
Firewalld is a firewall management tool pre-installed in most RHEL-based distributions. In this article, we’ll look at configuring a firewall with firewalld on a server running CentOS using the firewall-cmd utility.
In this tutorial we are going to learn how to install ssh server CentOS 7 Linux.
To install ssh server on CentOS 7, We need to install the openssh-server package. Then we need to Configure Firewall to all access to the ssh port 22.
- Install Openssh Server on CentOS 7
- Start SSH Service on CentOS 7
- Configure CentOS 7 Firewall to Allow SSH Connection
- View SSH Server status
- Summary – Install CentOS Openssh Server
- Install Fail2ban
- Local settings
- Available options
- Standard settings
- Individual parameters
- Monitor Fail2ban logs and firewall settings
- Conclusion
- Requirements
- Connection timeout
- Connection refused
- Tips for fixing connection errors
- Checking the status of the SSH service
- SSH port check
- Basics of work
- ICMP, protocols and targets
- Basic firewall concepts
- Save the rules
- Enabling the firewalld firewall
- Default firewall rules
- Other firewall zones
- Setting interface zones
- Changing interface area for one session
- Changing the interface area permanently
- Default zone setting
- Creating application rules
- What should I do if the required service is not available?
- Port setting
- Service definition
- Creating zones
- Automatic launch of the firewall
- Firewall assignment
- Firewall in Linux
Install Openssh Server on CentOS 7
The SSH Server for CentOS 7 provides by the openssh-server package which we can install using yum command.
Open the Linux terminal and execute,
yum install openssh-server
This will install the centos ssh server.

Start SSH Service on CentOS 7
After the Installation is Finished, Start the centos sshd service using systemctl command.
systemctl start sshd.service
systemctl enable sshd.service
Configure CentOS 7 Firewall to Allow SSH Connection
firewall-cmd –permanent –add-service=ssh
And that is all we have to do. Now you should be able to access your CentOS Server using an SSH Client.
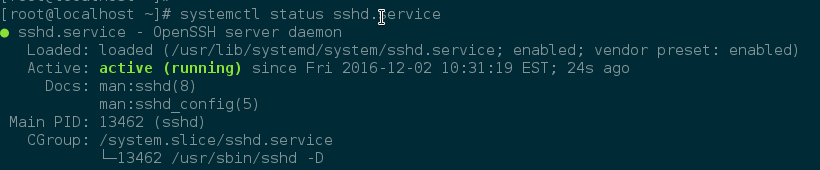
View SSH Server status
Using systemctl status command you can view the status of the CentOS sshd Service.
systemctl status sshd.service
You should get the status of the sshd service as active (running).
We can also use netstat command to make sure that our CentOS system is listening on Port 22 which is used by the ssh protocol.

Summary – Install CentOS Openssh Server
In this tutorial we learned how to install and configure SSH Server on CentOS 7.
March 1, 2016 11:48 am
Connections to the server via SSH are generally secure; however, the SSH daemon must be available on the Internet at all times in order to function correctly. This inevitably entails the risk of being hacked, since the SSH service is a convenient attack vector for potential attackers.
Of course, any service available on the Internet is a potential target. To verify this, carefully review the logs of these services; you can find systematically repeated login attempts in them — these are brute force attacks (attacks by guessing a password).
The Fail2ban service can mitigate this threat with rules that automatically change the iptables firewall settings; these rules are triggered when a certain number of failed login attempts are received. This tool allows you to protect the server from unauthorized access without the intervention of a system administrator.
This guide will help you install and configure Fail2ban on a CentOS 7 server.
Install Fail2ban
The Fail2ban tool is not available in the official CentOS repository, but it can be obtained from EPEL. The package of the EPEL (Extra Packages for Enterprise Linux) repository itself can be added from the official CentOS repository.
sudo yum install epel-release
Press y and Enter to continue. The following output will appear on the screen:
Now you can install the fail2ban package:
sudo yum install fail2ban
Once installation is complete, use the systemctl tool to enable fail2ban:
sudo systemctl enable fail2ban
Local settings
The Fail2ban service stores settings in the /etc/fail2ban directory. In it you can find the jail.conf file containing the standard settings.
This file is overwritten when the Fail2ban package is updated, so it cannot be edited. Instead, you need to create a new file called jail.local. The values in the jail.local file will override jail.conf.
First, write a simple version of jail.local. open the file in a text editor:
sudo nano /etc/fail2ban/jail.local
Paste the following code into the file:
This file overrides three settings: sets a new value for bantime, configures iptables support, and enables sshd.
Save and close the file. Restart fail2ban with systemctl:
sudo systemctl restart fail2ban
The systemctl command will not return any output; to make sure the service is running, use fail2ban-client:
For more verbose output, type:
sudo fail2ban-client status sshd
Available options
A basic version of jail.local has just been created, which can be extended with other settings. Open jail.conf and examine its parameters. To change the value of any of the standard settings, copy it to jail.local and set the new value.
sudo nano /etc/fail2ban/jail.conf
Standard settings
ignoreip = 127.0.0.1/8
bantime = 600
The bantime parameter sets the time interval during which the client will be blocked if it fails to authenticate. The parameter value is measured in seconds; the default is 600 seconds, or 10 minutes.
findtime = 600
maxretry = 3
To configure email notifications, you need to override destemail, sendername and mta parameters. The destemail parameter sets the email address to which messages should be sent. sendername sets the name of the sender of the message. The mta parameter specifies the mail service.
action = $(action_)s
This setting specifies the action Fail2ban will take if the user is banned. The default value of the parameter will simply reject traffic coming from the malicious host for the time interval set in the bantime parameter.
If you want to customize email notifications, you need to override action_ with action_mw. In order for the notification to contain the corresponding lines of the log file, set the value of action_mwl.
Note: Don’t forget to set up your mail.
Individual parameters
In this case, ssh is a predefined variable for the standard SSH port, and %(sshd_log)s uses the value defined in the default Fail2ban settings (thus jail.conf remains portable between different operating systems).
The next parameter — filter — indicates whether the line in the log is an unsuccessful authentication attempt.
The filter value is a link to a file located in the /etc/fail2ban/filter.d directory. The regular expressions of this file allow you to determine whether a line in the log is malicious.
Note: Unfortunately, this guide does not cover the in-depth analysis of this file, because it is quite complex and requires a separate article.
Available filters can be viewed in the catalog:
Find a file that looks like it’s related to the required service and open it with a text editor.
Most of the files are quite well commented, so you can independently determine what behavior this script protects against. Most of these filters have corresponding sections in jail.conf (they are disabled by default) that can be moved to jail.local.
As an example, let’s say you’re running a site using Nginx; at some point, you find that the password-protected pages of the site are constantly receiving unsuccessful authentication requests. In such a case, Fail2ban can use the nginx-http-auth.conf file to check the status of /var/log/nginx/error.log.
Restart the fail2ban service:
Monitor Fail2ban logs and firewall settings
The work of the Fail2ban service is very important to monitor. To check the status of a service, use systemctl.
sudo systemctl status fail2ban
If something is not working at this stage, you can fix the problem by checking the fail2ban log entries (before the last reboot):
sudo journalctl -b -u fail2ban
After that, use fail2ban-client to query the general state of fail2ban-server or any individual service:
sudo fail2ban-client status
sudo fail2ban-client status jail_name
The latest Fail2ban activity can be viewed in the following log:
sudo tail -F /var/log/fail2ban.log
To view current iptables rules:
sudo iptables -L
To display Iptables rules along with the commands needed to run the rule:
sudo iptables -S
Conclusion
You now have basic Fail2ban skills. The Fail2ban tool is very easy to set up and allows you to secure any authentication service.
More guides on working with Fail2ban can be found in a special section of our Informatorium.
May 25, 2017 11:40 am
In the first article of this series, you learned how and in what situations you can try to fix SSH errors. The rest of the articles will tell you how to identify and fix errors:
A basic network connection must be established for the SSH client to communicate with the SSH server. This guide will help you identify some common connection errors, fix them, and prevent them from occurring in the future.
Requirements
Most connection errors occur when the SSH host reference cannot be mapped to a network address. This is almost always DNS related, but the root cause is often unrelated to DNS.
On the OpenSSH client, this command:
may give an error:
ssh: Could not resolve hostname example.com: Name or service not known
PuTTY may get this error:
Unable to open connection to example.com Host does not exist
To resolve this error, you can try the following:
Connection timeout
This error means that the client tried to connect to the SSH server, but the server failed to respond within the specified timeout period.
On the OpenSSH client, the following command:
will give the following error:
In PuTTY, the error looks like this:
To correct a mistake:
Connection refused
This error means that the request is being sent to the SSH host, but the host cannot successfully accept the request.
On an OpenSSH client, the following command will give an error:
In PuTTY, an error will appear in a dialog box:
Network error: Connection refused
This error has common causes with the Connection Timeout error. To fix it, you can do the following:
Tips for fixing connection errors
Sometimes connection problems occur due to the firewall. It can block individual ports or services.
Different distributions use different firewalls. You must learn how to change the rules and policies of your firewall. Ubuntu usually uses UFW, CentOS uses FirewallD. The iptables firewall is used independently of the system.
To configure the firewall, you need to know the port of the SSH service. The default is port 22.
To request a list of iptables rules, type:
This output says that there are no rules blocking SSH:
Chain INPUT (policy ACCEPT)
target prot opt source destination
Chain FORWARD (policy ACCEPT)
target prot opt source destination
Chain OUTPUT (policy ACCEPT)
target prot opt source destination
If you see a REJECT or DROP default rule or policy in the output, make sure the INPUT chain allows access to the SSH port.
To request a list of FirewallD rules, enter:
The list that appears on the screen contains all the services that are supported by the firewall. The list should contain a rule:
dhcpv6-client http ssh
If you configured a custom SSH port, use the —list-ports option. If you have created a custom service definition, add the —list-services option to find SSH.
To check the status of UFW, enter:
The command will return available ports:
Status: active
To Action From
—
22 LIMIT Anywhere
443 ALLOW Anywhere
80 ALLOW Anywhere
Anywhere ALLOW 192.168.0.0
22 (v6) LIMIT Anywhere (v6)
443 (v6) ALLOW Anywhere (v6)
80 (v6) ALLOW Anywhere (v6)
The list should include the SSH port.
Checking the status of the SSH service
If you are unable to connect to the server via SSH, make sure the SSH service is running. The way to do this depends on the operating system of the server. Older distributions (Ubuntu 14.04, CentOS 6, Debian 8) use the service command. Modern Systemd based distributions use the systemctl command.
The method of checking the status of a service may vary from system to system. Older versions (Ubuntu 14 and below, CentOS 6, Debian 6) use the service command supported by the Upstart init system, while more modern distributions use the systemctl command to control the service.
Note: The service is called sshd on Red Hat distributions (CentOS and Fedora) and ssh on Debian and Ubuntu.
For older versions, use the command:
service ssh status
If the process is working properly, you will see an output that contains the PID:
ssh start/running, process 1262
If the service is down, you will see:
On SystemD based systems, use:
The output should contain the line active:
If the service is down, you will see inactive in the output:
sshd.service — OpenSSH server daemon
Loaded: loaded (/usr/lib/systemd/system/sshd.service; enabled)
Active: inactive (dead) since Fri 2017-04-21 08:36:13 EDT; 2s ago
Process: 906 ExecStart=/usr/sbin/sshd -D $OPTIONS (code=exited, status=0/SUCCESS)
Process: 899 ExecStartPre=/usr/sbin/sshd-keygen (code=exited, status=0/SUCCESS)
Main PID: 906 (code=exited, status=0/SUCCESS)
To restart the service, enter accordingly:
service ssh start
systemctl start sshd
SSH port check
There are two main ways to check the SSH port: check the SSH config file or view the running process.
Typically, the SSH configuration file is stored in /etc/ssh/sshd_config. The default port 22 can be overridden by any line in this file that defines the Port directive.
Run a file search using the command:
grep Port /etc/ssh/sshd_config
If you have already verified that the service is running, now you can find out if it is running on the required port. To do this, use the ss command. The netstat -plnt command will produce a similar result, but the ss command is recommended to query socket information from the kernel.
The output should show the name of the program and the port it is listening on. For example, the following output says that the SSH service is listening on all interfaces and on port 22.
If you are unable to set up an SSH connection yourself, you can contact your hosting provider’s support team for help.
Basics of work
There are two programs for managing firewalld: firewall-cmd for working in the terminal and graphical firewall-config. In this article, we will work with firewalld on CentOS and use firewall-cmd.
You can rent your own server for testing and experiments
Check service status:
sudo systemctl status firewalld
● firewalld.service — firewalld — dynamic firewall daemon Loaded: loaded (/usr/lib/systemd/system/firewalld.service; enabled; vendor preset: enabled) Active: active (running) since Thu 2022-04- 28 11:11:29 MSK; 2min 24s ago Docs: man:firewalld
Main PID: 484 (firewalld) CGroup: /system.slice/firewalld.service └─484 /usr/bin/python2 -Es /usr/sbin/firewalld —nofork — nopid
sudo apt install firewalldsudo systemctl enable firewalld —now
Just don’t forget to disable ufw — using two frontends for iptables/nftables at the same time is not recommended.
Find out the active rules (what is allowed and prohibited, what permissions apply to, etc.):
sudo firewall-cmd —list-all
In the output of the command, we see many different parameters. Let’s take them in order.
The ports field in the output of the previous command shows the ports on which connections are allowed. Let’s demonstrate the configuration using an example: change the listening port of the OpenSSH daemon from 22 to 3333 (/etc/ssh/sshd_config file):
Port 3333#AddressFamily any#ListenAddress 0.0.0.0#ListenAddress ::
sudo systemctl restart sshd
Print the ports sshd is listening on:
We see that port 3333 is now listening. The current session has not been interrupted, but if we try to reconnect using the standard or new port, nothing will work:
ssh: connect to host 37.46.131.83 port 22: Connection refused
ssh: connect to host 37.46.131.83 port 3333: No route to host
You need to add an allow rule in firewalld that allows you to connect via 3333/tcp:
sudo firewall-cmd —add-port=3333/tcp
sudo firewall-cmd —add-port=3333/tcp —permanentsudo firewall-cmd —reload
In the first case, the changes are active only in the current runtime, and when the machine or service is restarted, everything is reset. In the second case, the change is made permanent. The —permanent switch indicates that the settings are being changed, not the runtime, so you need to restart the firewall (option —reload).
Check which ports are now allowed:
sudo firewall-cmd —list-ports
Everything works now:
An attentive reader will wonder how we could connect via SSH before, because at first the ports field in the policy output was empty. The matter is that settings have been set by means of the description of services.
Services in firewalld are service descriptions that make configuration more convenient and centralized. Let’s see the current services and information about them:
sudo firewall-cmd —list-services
sudo firewall-cmd —info-service=ssh
ssh ports: 22/tcp protocols: source-ports: modules: destination:
Note that in SSH everything is also port 22. The fact is that the daemons’ own parameters are in no way related to their descriptions in firewalld. Let’s try to remove the standard port and add the 3333rd one to the ssh service description (don’t forget to remove the 3333/tcp port from the policies):
sudo firewall-cmd —service=ssh —remove-port=22/tcp —permanentsudo firewall-cmd —remove-port=3333/tcp —permanentsudo firewall-cmd —service=ssh — add-port=3333/tcp —permanentsudo firewall-cmd —reloadsudo firewall-cmd —info-service=ssh
ssh ports: 3333/tcp protocols: source-ports: modules: destination:
Let’s try to remove and add some service:
sudo firewall-cmd —remove-service=dhcpv6-clientsudo firewall-cmd —add-service=mysqlsudo firewall-cmd —runtime-to-permanentsudo firewall-cmd —list-services
The —runtime-to-permanent option makes the runtime permanent — you can not specify —permanent after each command, but execute a set of commands and only after that make the settings permanent (does not always work, since some commands require the switch — permanent).
Files with predefined services are located in /lib/firewalld/services. Let’s list them:
sudo firewall-cmd —get-services
You can create your own services. To do this, create an xml file in the /etc/firewalld/services directory. For convenience, you can copy some config from /etc/firewalld/services and make the appropriate changes. Then restart the firewall with the —reload key.
ICMP, protocols and targets
The —list-all output has the following curious fields:
In firewalld, you can configure not only services and ports, but also protocols. Let’s say we’re setting up a firewall on a router. Then it makes sense to specify the list of allowed protocols. To illustrate, let’s enable the dynamic routing protocol OSPF:
sudo firewall-cmd —add-protocol=ospfsudo firewall-cmd —list-protocols
Now let’s try to ping the server:
ping -c 3 37.46.131.83
PING 37.46.131.83 (37.46.131.83) 56(84) bytes of data. From 37.46.131.83 icmp_seq=1 Destination Host ProhibitedFrom 37.46.131.83 icmp_seq=2 Destination Host ProhibitedFrom 37.46.131.83 icmp_seq=3 Destination Host Prohibited— 37.46.131.83 ping statistics —3 packets transmitted, 0 received, +3 errors , 100% packet loss, time 2004ms
The machine does not respond. This method is often used by providers to hide the addresses of routers. However, it is clear from the errors that on the target devices, the packets are filtered by the firewall. To hide the computer, you need to use targets.
Target is an action that must be done with the package if any of the rules has worked. Most used: DROP, ACCEPT, REJECT. In the example above, REJECT was the target, i.e. returned the reason for the error. To drop a packet without sending anything, use DROP:
sudo firewall-cmd —set-target=DROP —permanentsudo firewall-cmd —reload
Ping the server again:
PING 37.46.131.83 (37.46.131.83) 56(84) bytes of data.^C— 37.46.131.83 ping statistics —3 packets transmitted, 0 received, 100% packet loss, time 2050ms
When working with firewalld, zones are often used. A machine may have multiple interfaces. Let’s say one of them «looks» on the Internet, the other — on the LAN, the third — in dmz. Different networks have different levels of trust, so the traffic coming from them must be controlled by different firewall rules. To do this, firewalld uses zones — sets of rules that apply to various fragments of the network.
We applied all the actions above for the public zone (by default):
sudo firewall-cmd —get-default-zone
Firewalld has several zones initially. However, you can create your own zones. Let’s display the list of available zones:
sudo firewall-cmd —get-zones
The —zone option allows you to set and view rules for a specific zone (without it, everything applies to the default zone). Let’s see the policies for the drop zone:
sudo firewall-cmd —list-all —zone=drop
In our case, the only interface eth0, through which Internet access is provided, looks into the public zone. This means that for incoming traffic, the policies of the public zone are applied. To add an interface to another zone, use the —change-interface switch. Let’s move our eth0 to the home zone:
sudo firewall-cmd —change-interface=eth0 —zone=homesudo firewall-cmd —list-interfaces —zone=home
A task may arise when it is necessary to configure rules not for all traffic entering the interface, but for a specific address. It is done like this:
sudo firewall-cmd —zone=drop —add-source=192.168.3.1
sudo firewall-cmd —zone=drop —list-all
Now, even if packets from the address 192.168.3.1 arrive at the eth0 interface, the rules will be applied not for the zone in which the interface is located, but for the zone we manually set (drop).
Suppose there is a task to set up a firewall on the router. Allow source nat:
sudo firewall-cmd —add-masqueradesudo firewall-cmd —list-all
Port forwarding on the machine:
sudo firewall-cmd —add-forward-port=port=3333:proto=tcp:toport=22sudo firewall-cmd —list-all
You may also notice the source-ports option. It is possible to allow certain outgoing ports in firewalld, but this is rarely used, as usually dynamic 5-digit ports act as source ports.
We have seen how to use different rules in firewalld for different areas of the network (interfaces, IP addresses). But sometimes the task arises of creating point rules: to allow connection from a specific address to a specific port, using such and such protocols, etc. Of course, you can create your own zone, but it’s better to use rich-rules.
Rich-rules in firewall centos have a separate syntax, details can be found in the mana:
There are also many examples:
Add manually written rule:
sudo firewall-cmd —add-rich-rule=’rule’
March 30, 2017 11:46 am
Firewalld is a complete firewall available by default in CentOS 7. This guide will help you set up a firewall on your server and will also introduce you to the firewall-cmd tool.
Basic firewall concepts
The firewalld daemon manages groups of rules using so-called zones.
Zones are, in fact, sets of rules that control traffic based on the level of trust in a particular network. Zones are assigned to network interfaces and control firewall behavior.
Computers that frequently connect to different networks (such as laptops) can use zones to change rule sets depending on the environment. For example, when connecting to a public WiFi network, the firewall can apply stricter rules, while relaxing restrictions on a home network.
The following zones exist in firewalld:
Save the rules
firewalld rules are either permanent or temporary. If any rule appears or changes in the set, the current firewall behavior changes immediately. However, after a reboot, all changes will be lost if they are not saved.
Most firewall-cmd commands can use the —permanent flag, which will save the rule, after which it will be used permanently.
Enabling the firewalld firewall
First you need to enable the demon. The systemd unit file is called firewalld.service. To start the daemon, type.
sudo systemctl start firewalld.service
Make sure the service is running:
The firewall is now up and running according to the default configuration.
At the moment the service is enabled, but will not start automatically with the server. To avoid accidentally blocking yourself on your own server, first create a set of rules, and then set up autostart.
Default firewall rules
To find out which zone is the default, enter:
At the moment, firewalld has not received any instructions regarding other zones, in addition, no interface is bound to other zones, so now the public zone is the default zone, and also the only active zone.
To get a list of active zones, enter:
firewall-cmd —get-active-zones
public
interfaces: eth0 eth1
Two network interfaces are bound to the public zone: eth0 and eth1. Interfaces bound to a zone operate according to the rules of that zone.
To find out which rules the zone uses by default, enter:
So now you know that:
Other firewall zones
Now you should familiarize yourself with other zones.
To get a list of all available zones, enter:
To get the parameters of a particular zone, add the —zone= flag to the command.
To list the definitions of all available zones, add the —list-all-zones option. For more convenient viewing, the output can be transferred to a pager:
Setting interface zones
Initially, all network interfaces are bound to the default zone.
Changing interface area for one session
To change an interface to another zone for one session, use the –zone= and –change-interface= options.
For example, to move eth0 to the home zone, enter:
sudo firewall-cmd —zone=home —change-interface=eth0
success
Note: When transferring an interface to another zone, be aware that this may affect the operation of some services. For example, the home zone supports SSH, so connections to this service will not be dropped. But some zones drop all connections, including SSH, and then you can accidentally block yourself from accessing your own server.
To make sure the interface is bound to the new zone, enter:
firewall-cmd —get-active-zones
home
interfaces: eth0
public
interfaces: eth1
After restarting the firewall, the interface will be bound to the default zone again.
sudo systemctl restart firewalld.service
firewall-cmd —get-active-zones
public
interfaces: eth0 eth1
Changing the interface area permanently
If no other zone is specified in the interface settings, after restarting the firewall, the interface will be bound to the default zone again. On CentOS, such configurations are stored in the /etc/sysconfig/network-scripts directory, in files of the ifcfg-interface format.
To define an interface zone, open the interface’s configuration file, for example:
sudo nano /etc/sysconfig/network-scripts/ifcfg-eth0
Add the ZONE= variable to the end of the file and specify another zone as the value, for example, home:
. . .
DNS1=2001:4860:4860::8844
DNS2=2001:4860:4860::8888
DNS3=8.8.8.8
ZONE=home
To update the settings, restart the network service and firewall:
sudo systemctl restart network.service
sudo systemctl restart firewalld.service
After the restart, the eth0 interface will be bound to the home zone.
Default zone setting
You can also select another default zone.
The —set-default-zone= parameter is used for this. After that, all interfaces will be assigned to another zone:
sudo firewall-cmd —set-default-zone=home
home
interfaces: eth0 eth1
Creating application rules
The easiest way is to add a service or port to the zone that the firewall uses. View available services:
firewall-cmd —get-services
RH-Satellite-6 amanda-client bacula bacula-client dhcp dhcpv6 dhcpv6-client dns ftp high-availability http https imaps ipp ipp-client ipsec kerberos kpasswd ldap ldaps libvirt libvirt-tls mdns mountd ms-wbt mysql nfs ntp openvpn pmcd pmproxy pmwebapi pmwebapis pop3s postgresql proxy-dhcp radius rpc-bind samba samba-client smtp ssh telnet tftp tftp-client transmission-client vnc-server wbem-https
Note: More information about each specific service can be found in the .xml files in the /usr/lib/firewalld/services directory. For example, information about the SSH service is stored in /usr/lib/firewalld/services/ssh.xml and looks like this:
To enable support for a service in a given zone, use the —add-service= option. You can specify the target zone with the —zone= option. By default, these changes will work for one session. To save changes and use them permanently, add the —permanent flag.
For example, to run a web server to serve HTTP traffic, first you need to enable support for this traffic in the public zone for one session:
sudo firewall-cmd —zone=public —add-service=http
If the service needs to be added to the default zone, the —zone= flag can be omitted.
Check that the operation was successful:
firewall-cmd —zone=public —list-services
dhcpv6-client http ssh
Test the service and firewall. If everything works correctly, you can change the permanent rule set and add a rule to it to support this service.
sudo firewall-cmd —zone=public —permanent —add-service=http
To view the list of permanent rules, enter:
sudo firewall-cmd —zone=public —permanent —list-services
dhcpv6-client http ssh
The public zone now supports HTTP and port 80 permanently. If the web server can serve SSL/TLS traffic, you can also add the https service (for a single session or in a set of permanent rules):
sudo firewall-cmd —zone=public —add-service=https
sudo firewall-cmd —zone=public —permanent —add-service=https
What should I do if the required service is not available?
The firewalld firewall includes many of the most common services by default. However, some applications require services that are not supported by firewalld. In this case, you can do it in two ways.
Port setting
The easiest way in this situation is to open the application port in the required firewall zone. You just need to specify the port or range of ports and the protocol.
For example, an application that uses port 5000 and the TCP protocol should be added to the public zone. To enable per-session application support, use the —add-port= option and specify the tcp or udp protocol.
sudo firewall-cmd —zone=public —add-port=5000/tcp
Make sure the operation was successful:
You can also specify a sequential range of ports by separating the first and last port of the range with a dash. For example, if the application uses UDP ports 4990-4999, to add them to the public zone, you would type:
sudo firewall-cmd —zone=public —add-port=4990-4999/udp
After testing, you can add these rules to the permanent firewall settings.
sudo firewall-cmd —zone=public —permanent —add-port=5000/tcp
sudo firewall-cmd —zone=public —permanent —add-port=4990-4999/udp
sudo firewall-cmd —zone=public —permanent —list-ports
success
success
4990-4999/udp 5000/tcp
Service definition
It’s easy to add ports to zones, but if you have a lot of such applications, it will be difficult to keep track of what a particular port is for as a result. To avoid this situation, you can define services instead of ports.
Services are simply collections of ports with a specific name and description. Services are easier to manage settings, but they are more complex than ports themselves.
First you need to copy the existing script from the /usr/lib/firewalld/services directory to the /etc/firewalld/services directory (this is where the firewall looks for non-standard settings).
For example, you can copy the definition of the SSH service and use it to define the conditional service example. The script name must match the service name and have the .xml extension.
sudo cp /usr/lib/firewalld/services/service.xml /etc/firewalld/services/example.xml
Correct the copied file.
sudo nano /etc/firewalld/services/example.xml
The file contains the definition of SSH:
Let’s return to the example service; let’s say it requires TCP port 7777 and UDP port 8888 to be opened. The definition would look like this:
Now the service will appear in the list of available services:
firewall-cmd —get-services
RH-Satellite-6 amanda-client bacula bacula-client dhcp dhcpv6 dhcpv6-client dns example ftp high-availability http https imaps ipp ipp-client ipsec kerberos kpasswd ldap ldaps libvirt libvirt-tls mdns mountd ms-wbt mysql nfs ntp openvpn pmcd pmproxy pmwebapi pmwebapis pop3s postgresql proxy-dhcp radius rpc-bind samba samba-client smtp ssh telnet tftp tftp-client transmission-client vnc-server wbem-https
Creating zones
The firewall provides many predefined zones, which in most cases are enough to work. But in some situations, it becomes necessary to create a custom zone.
For example, you can create a publicweb zone for a web server and a privateDNS zone for a DNS service.
When creating a zone, you need to add it to the permanent firewall settings.
Try creating publicweb and privateDNS zones:
sudo firewall-cmd —permanent —new-zone=publicweb
sudo firewall-cmd —permanent —new-zone=privateDNS
Make sure the zones exist:
No new zones will be available in the current session:
To access new zones, you need to restart the firewall:
Now you can assign required services and ports to new zones. For example, you can add SSH, HTTP, and HTTPS to the publicweb zone.
DNS can be added to the privateDNS zone:
You can then bind network interfaces to new zones:
sudo firewall-cmd —zone=publicweb —change-interface=eth0
sudo firewall-cmd —zone=privateDNS —change-interface=eth1
Now you can test the setting. If everything works correctly, you can add these rules to the permanent settings.
sudo firewall-cmd —zone=publicweb —permanent —add-service=ssh
sudo firewall-cmd —zone=publicweb —permanent —add-service=http
sudo firewall-cmd —zone=publicweb —permanent —add-service=https
sudo firewall-cmd —zone=privateDNS —permanent —add-service=dns
After that, you can configure the network interfaces to automatically connect to the correct zone.
For example, eth0 will be bound to publicweb:
sudo nano /etc/sysconfig/network-scripts/ifcfg-eth0
. . .
IPV6_AUTOCONF=no
DNS1=2001:4860:4860::8844
DNS2=2001:4860:4860::8888
DNS3=8.8.8.8
ZONE=publicweb
And the eth1 interface will be bound to privateDNS:
sudo nano /etc/sysconfig/network-scripts/ifcfg-eth1
. . .
NETMASK=255.255.0.0
DEFROUTE=’no’
NM_CONTROLLED=’yes’
ZONE=privateDNS
Restart network services and firewall:
sudo systemctl restart network
sudo systemctl restart firewalld
firewall-cmd —get-active-zones
privateDNS
interfaces: eth1
public web
interfaces: eth0
Make sure that the required services are running in the zones:
firewall-cmd —zone=publicweb —list-services
http http ssh
firewall-cmd —zone=privateDNS —list-services
dns
User zones are fully operational. You can make any of them the default zone. For example:
sudo firewall-cmd —set-default-zone=publicweb
Automatic launch of the firewall
Now that you have checked all the settings and made sure that all the rules are working properly, you can set the firewall to autostart.
To do this, enter:
Now the firewall will be launched together with the server.
The firewalld firewall is a very flexible tool. Zones allow you to quickly change firewall policy.
Now you know how firewalld works, you are familiar with the basic concepts of a firewall, you can create user zones and add services.
Firewall assignment
Firewall (firewall/firewall) is a program for providing access control at the network level. Based on the prescribed rules, the firewall determines which devices have access to sections of the network. In other words, allow some traffic, block the rest. On Linux, these functions are performed by the netfilter program built into the kernel.
Firewall in Linux
As we have already understood, netfilter works at the kernel level. To set up a firewall, you need tools in user space. As frameworks for managing netfilter, ip_tables / nf_tables are used, implemented as kernel modules. And on top of them, at the user level, either iptables (the command line utility of the same name), or nft, respectively, work.
Experienced administrators know that manually writing rules for iptables or nft is not so easy. Especially when you need to set up a large network or transfer rules to another system. Therefore, more friendly and multifunctional add-ons were invented. For example, in Ubuntu, such an add-on is a tool with a telling name ufw (Uncomplicated Firewall). And in the RedHat family of distributions (CentOS, Alma, Fedora, RHEL, OpenSUSE, SUSE Linux Enterprise) — firewalld.
A working firewall greatly improves network security. In this article, we have covered the basics of working in firewalld, which are necessary for competent configuration. Firewalld allows you to easily divide the network into sections and set your own security policies for each section, depending on the level of trust. This flexibility makes it easier to configure the firewall and saves the sysadmin time by allowing him to focus on other tasks.
