

Elasticsearch — это популярное решение для организации полнотекстового поиска с открытым исходным кодом, на основе библиотеки Apache Lucene. Программа поддерживает продвинутую фильтрацию, различные типы поисковых запросов, морфологический анализ текстов и многое другое.
На сайте уже есть статьи о том как пользоваться фильтрами Elastic, а также как работает поиск. В этой статье мы рассмотрим как выполняется установка Elasticsearch в Ubuntu 22.04, а также как настроить авторизацию в Elasticsearch и как установить графический интерфейс Kibana для управления индексами.
- 1. Установка Elasticsearch
- 2. Запуск Elasticsearch
- 3. Настройка Elasticsearch
- 4. Защита Elasticsearch
- 5. Установка Kibana
- 6. Настройка Kibana
- Выводы
- Step 1 — Download Java using the ‘apt’ command.
- Step 2 — Download the ElasticSearch
- Step 3 — Install and Run the ElasticSearch
- What is Elastic Stack ?
- What is Elasticsearch ?
- What is Logstash ?
- What is Kibana ?
- Prerequisites
- Install JDK on Ubuntu
- Install and Configure ElasticSearch on Ubuntu
- Install and Configure Kibana on Ubuntu
- Install and Configure Logstash on Ubuntu
- Install and Configure Filebeat on Ubuntu
- Access Kibana Web Interface
- Install Java
- Elasticsearch 6
1. Установка Elasticsearch
Способ установки последний версии Elasticsearch в Ubuntu только один. Надо добавить репозиторий разработчиков в систему и установить программу оттуда. Установите необходимые пакеты:
sudo apt install curl
Сначала добавьте GPG ключ репозитория:
curl -fsSL https://artifacts.elastic.co/GPG-KEY-elasticsearch |sudo gpg --dearmor -o /usr/share/keyrings/elasticsearch-keyring.gpg
Затем добавьте сам репозиторий. Для установки Elasticsearch 8.x добавьте такой репозиторий:
echo "deb [signed-by=/usr/share/keyrings/elasticsearch-keyring.gpg] https://artifacts.elastic.co/packages/8.x/apt stable main" | sudo tee /etc/apt/sources.list.d/elastic-8.x.list
Затем обновите список доступных пакетов в репозиториях:
sudo apt update
И установите программу:
sudo apt install elasticsearch
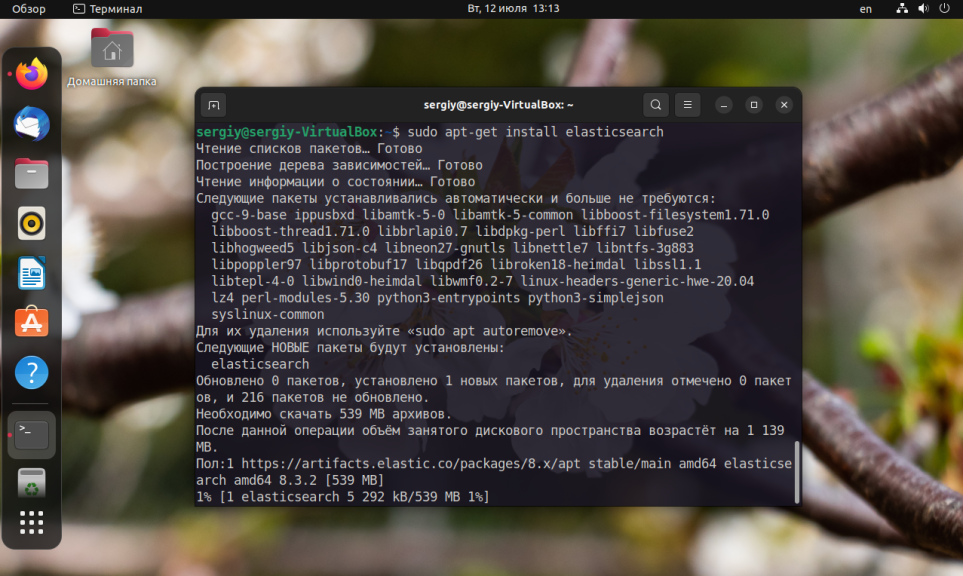
Если вы устанавливаете Elasticsearch 8 и выше, то авторизация будет включена по умолчанию, тогда в выводе установки будут выведены сгенерированные пароли для пользователя elastic, запишите его где нибудь чтобы использовать в будущем.
2. Запуск Elasticsearch
После завершения установки вы можете запустить Elasticsearch с помощью systemd:
sudo systemctl start elasticsearch
Также можно добавить программу в автозагрузку и сразу же запустить:
sudo systemctl start --now elasticsearch
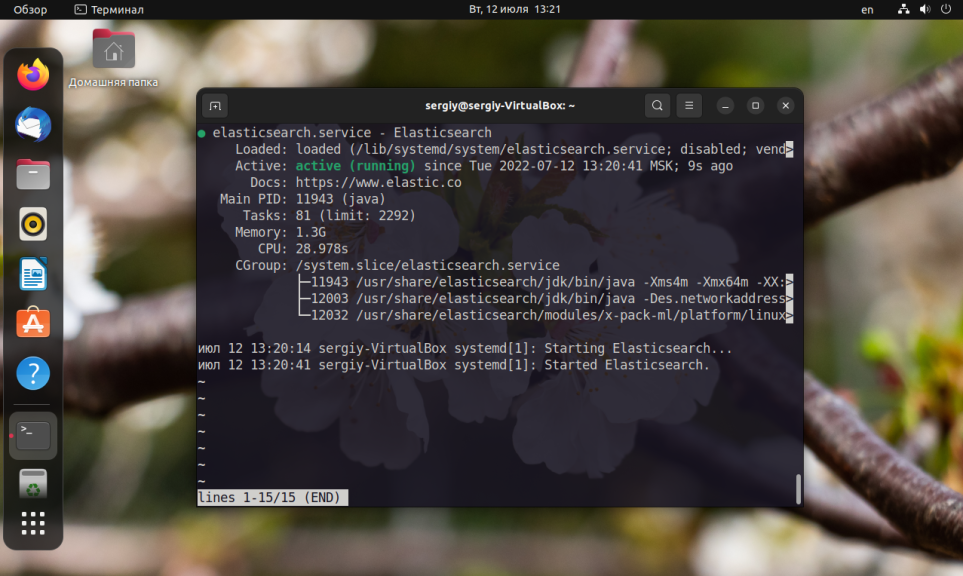
Для того чтобы убедится что запуск прошёл успешно выполните такую команду:
sudo systemctl status elasticsearch
Для того чтобы убедится что Elasticsearch работает, вы можете выполнить такой запрос с помощью curl:
curl -XGET https://127.0.0.1:9200 --insecure -u "elastic:пароль"
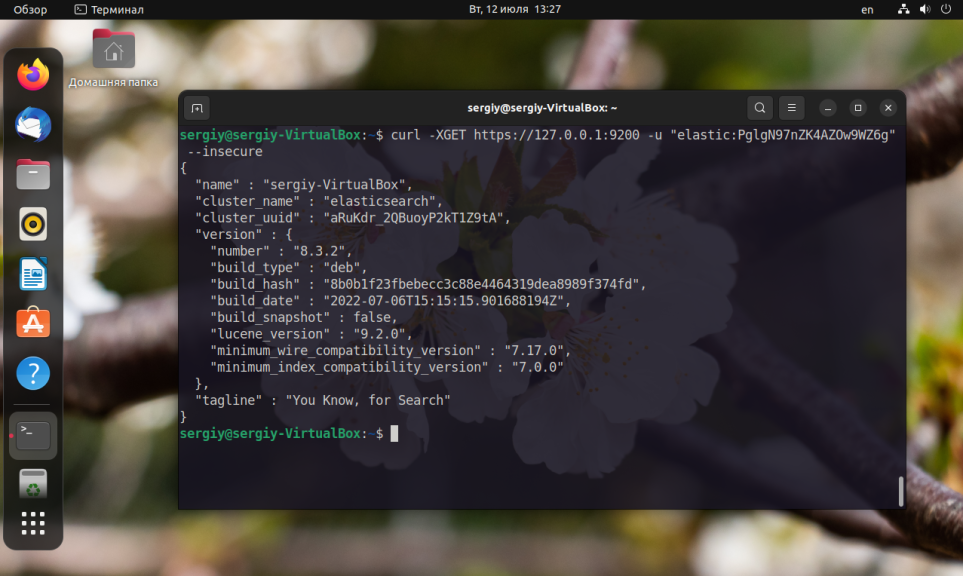
В качестве пароля надо передать пароль от пользователя elastic, который был сгенерирован при установке.
3. Настройка Elasticsearch
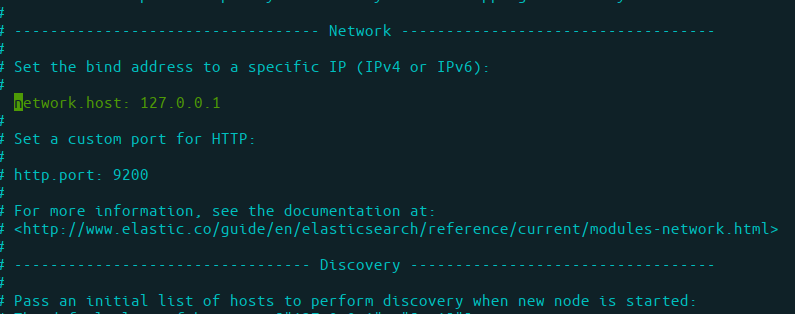
В конфигурационном файле /etc/elasticsearch/elasticsearch.yml можно настроить адрес и порт, на котором будет ожидать соединений Elasticsearch. За адрес отвечает http.host, а за порт http.port. По умолчанию используется IP адрес 0.0.0.0, а значит к Elasticsearch смогут подключится все участники сети. Вы можете установить 127.0.0.1 для того чтобы подключится можно было только локально:
sudo vi /etc/elasticsearch/elasticsearch.yml
http.host: 127.0.0.1

Если на вашем сервере мало оперативной памяти, вы можете ограничить количество памяти, потребляемой Elasticsearch. Для этого откройте файл /etc/elasticsearch/jvm.options и добавьте такие строчки:
sudo vi /etc/elasticsearch/jvm.options
-Xms4g
 -Xmx4g
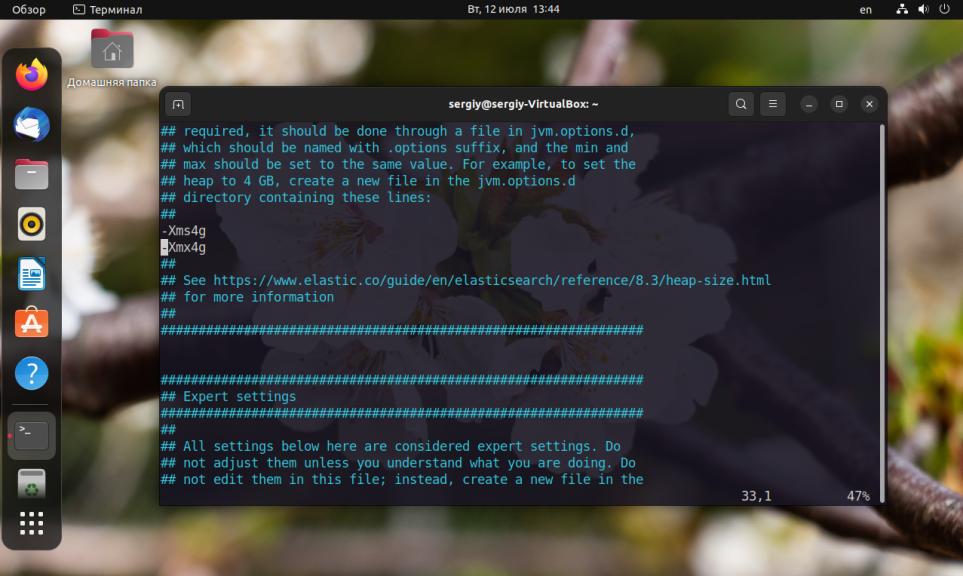
Здесь 4g — количество памяти, которую можно использовать в гигабайтах. В данном случае 4 гигабайта. Можно выбрать 512m для того чтобы ограничить размер памяти 512-ю мегабайтами.
4. Защита Elasticsearch
По умолчанию Elasticsearch слушает все подключения к порту 9200. Поэтому к нему могут получить доступ посторонние. В последних версиях Elasticsearch появилась возможность включить авторизацию по логину и паролю. Программа уже имеет предустановленных пользователей. Это суперпользователь elastic и ещё несколько пользователей для работы стека ELK: kibana_system, logstash_system, beats_system, apm_system, apm_system, remote_monitoring_user.
В Elasticsearch 8 пароли генерируются при установке. Если вы хотите сбросить пароль, например, для пользователя elastic, используйте следующую команду:
/usr/share/elasticsearch/bin/elasticsearch-reset-password -u elastic
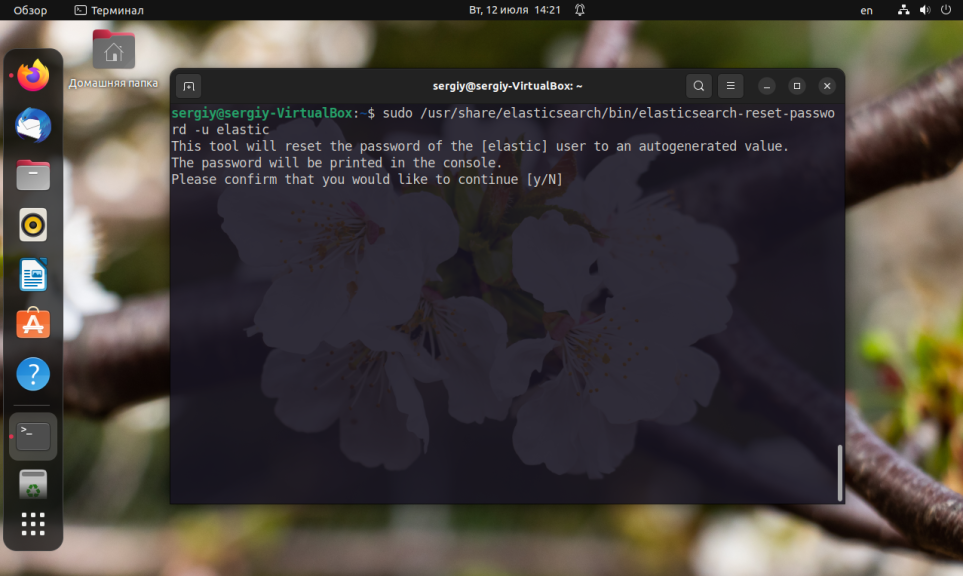
Эта команда устанавливает автоматически сгенерированный пароль и выводит его в консоль. Если вы хотите сами ввести пароль используйте опцию -i:
/usr/share/elasticsearch/bin/elasticsearch-reset-password -i -u elastic
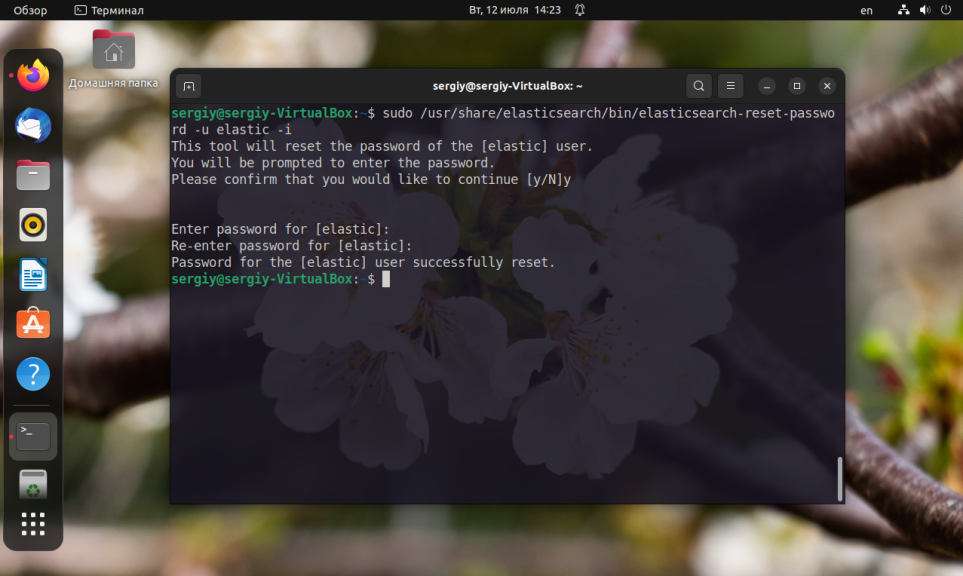
После запуска утилиты, она предложит подтвердить сброс пароля, а затем попросит два раза ввести новый пароль.
5. Установка Kibana
Для взаимодействиями с индексами Elasticsearch удобно использовать Kibana. Вы можете установить её из того же репозитория с помощью команды:
sudo apt install kibana
Дальше можно запустить или перезапустить сервис kibana:
sudo systemctl start kibana
6. Настройка Kibana
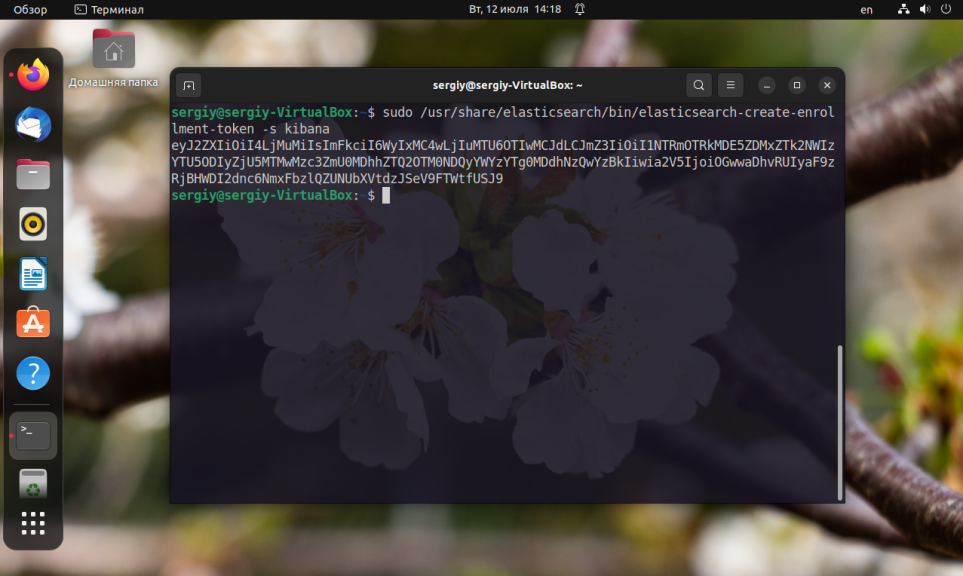
Для Kibana надо сгенерировать токен доступа. Для этого выполните команду:
/usr/share/elasticsearch/bin/elasticsearch/create-enrollment-token -s kibana
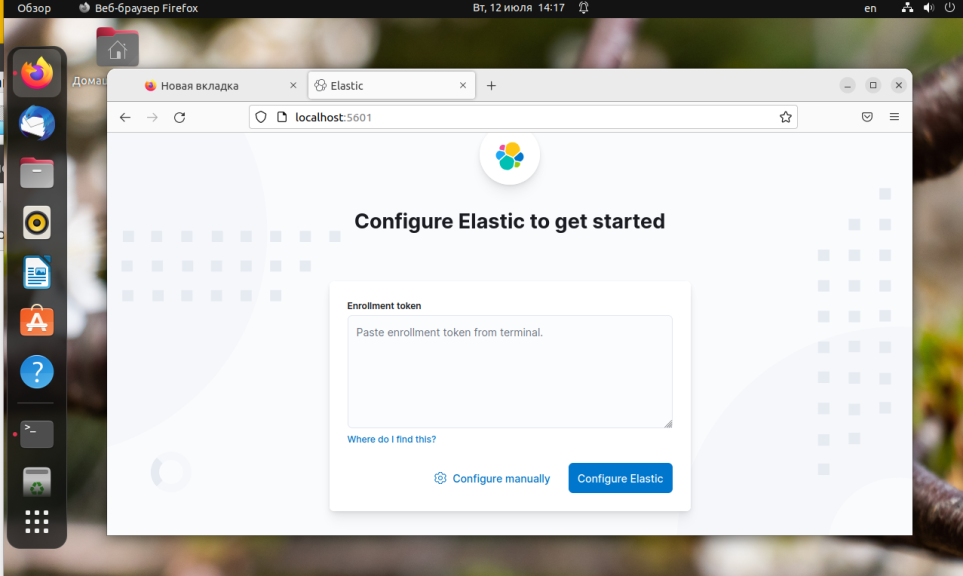
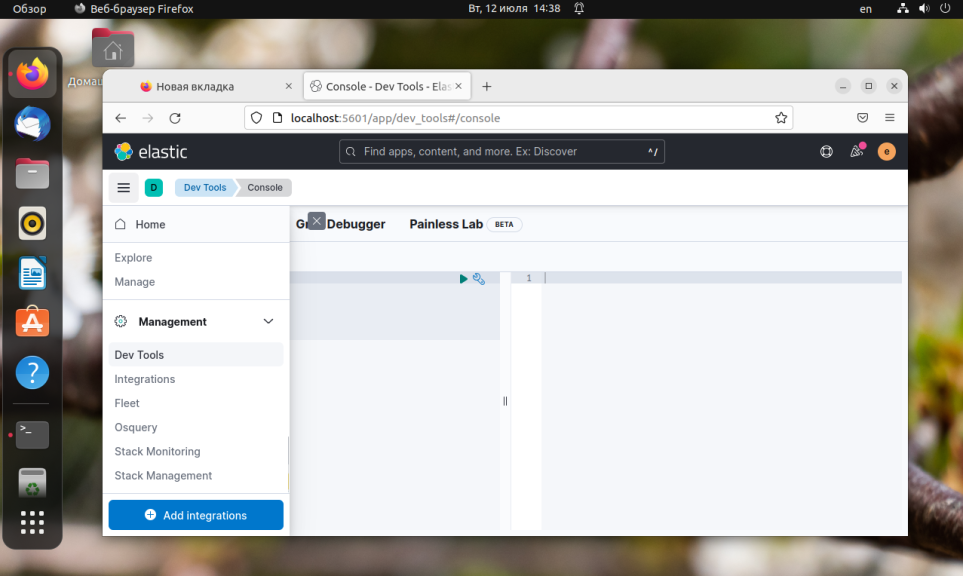
Затем откройте веб-интерфейс Kibana в браузере по адресу localhost:5601. При первом запуске необходимо указать токен доступа для настройки Elasticsearch, который был сгенерирован ранее:
Далее Kibana попросит код верификации:
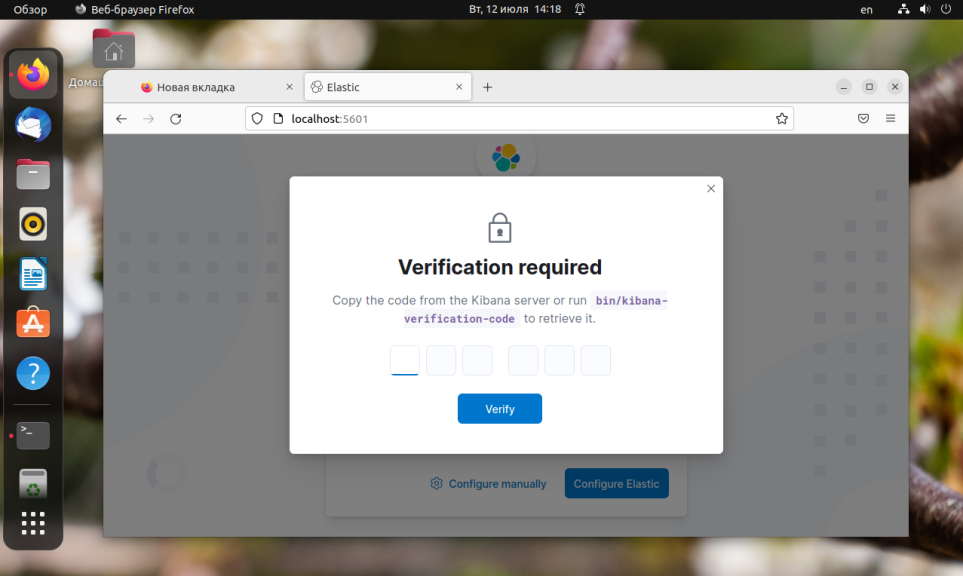
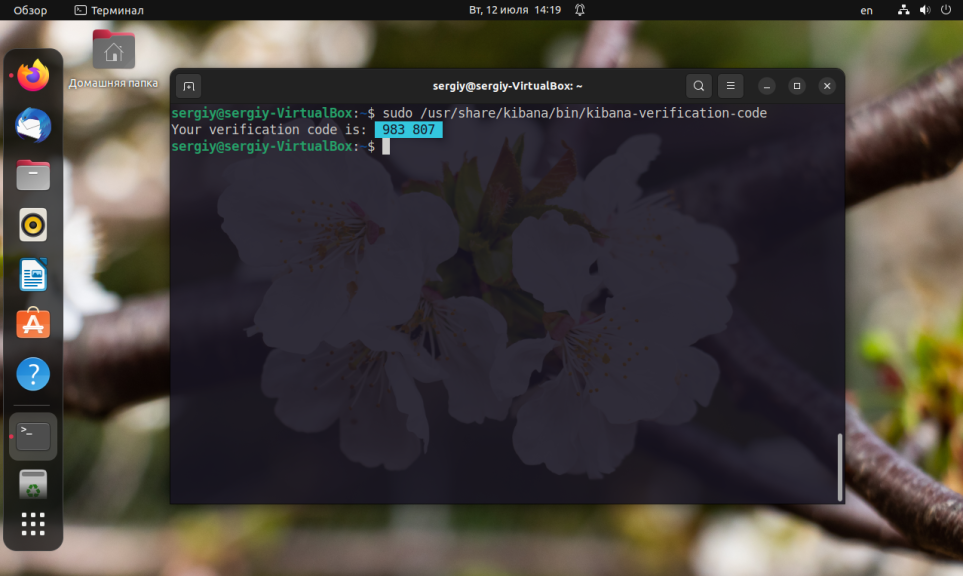
Этот код можно сгенерировать в терминале используя команду:
sudo /usr/share/kibana/bin/kibana-verification-code
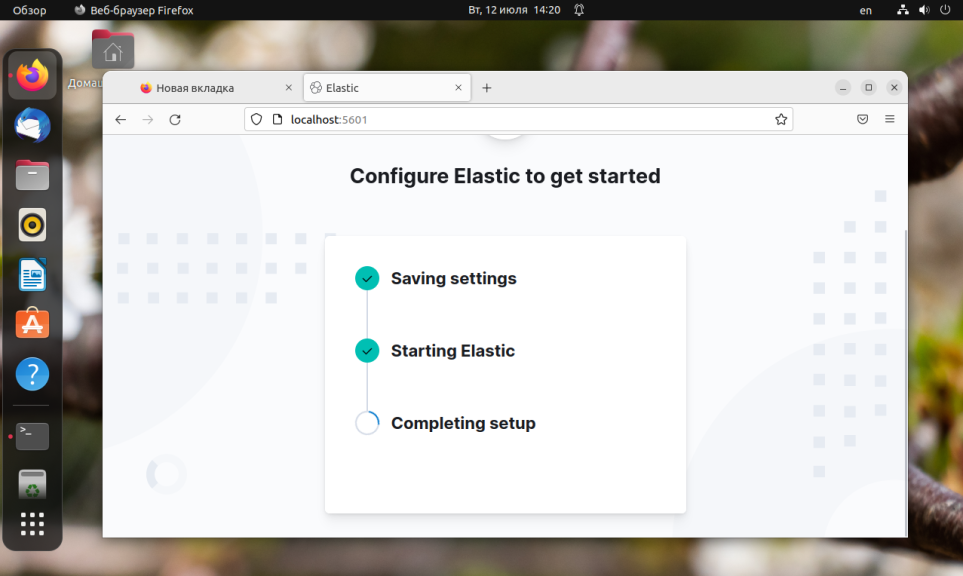
Далее откроется окно настройки Kibana. Это может занять некоторое время:
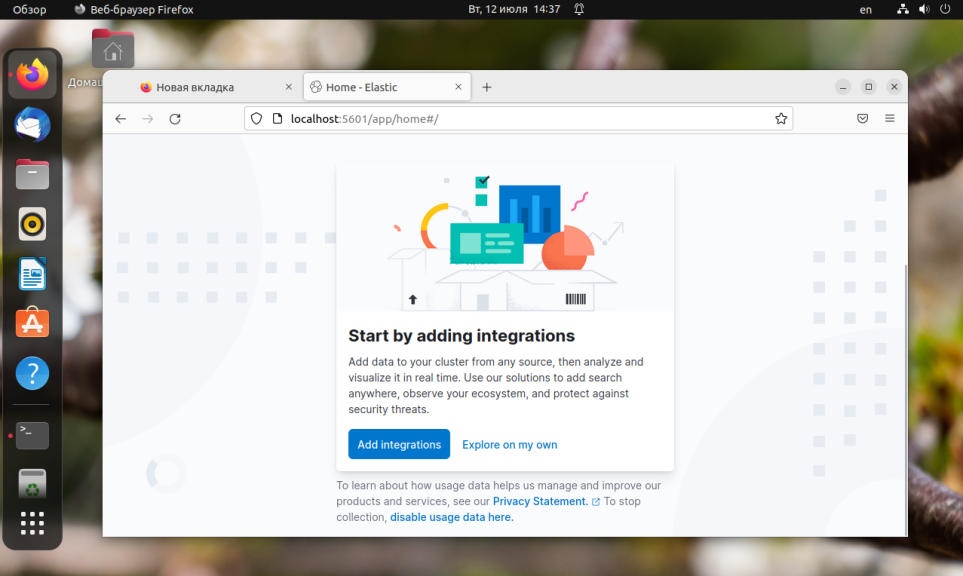
Дальше Kibana предложит ввести логин и пароль. Можете использовать логин elastic и пароль, который задали для этого пользователя ранее. При первом входе Kibana предложит выполнить кое-какие настройки и добавить данные, можно нажать кнопку Explore on my own, для того чтобы пропустить.
Для того чтобы начать выполнять запросы к Elasticsearch откройте раздел DevTools в боковом меню:
Вместо всего этого, вы можете установить пароль доступа для Elasticsearch в конфигурационном файле /etc/kibana/kibana.yml:
sudo vi /etc/kibana/kibana.yml
elasticsearch.username: "kibana_system"
 elasticsearch.password: "пароль"
Выводы
В этой небольшой статье мы рассмотрели как установить Elasticsearch в Ubuntu 22.04, а также как настроить авторизацию и Kibana для управления индексами. Как видите, всё довольно просто. Вы можете прочитать более подробно о том как использовать Elasticsearch в этой статье. А здесь можно прочитать про функциональность поиска в Elasticsearch.
Обнаружили ошибку в тексте? Сообщите мне об этом. Выделите текст с ошибкой и нажмите Ctrl+Enter.

Статья распространяется под лицензией Creative Commons ShareAlike 4.0 при копировании материала ссылка на источник обязательна .
Elasticsearch is a Cross-platform search engine based on Apache’s Lucene library. It provides a distributed, multitenant-capable full-text search engine with an HTTP web interface and schema-free JSON documents. It is written in Java.
Prerequisites: Java Installation on Ubuntu
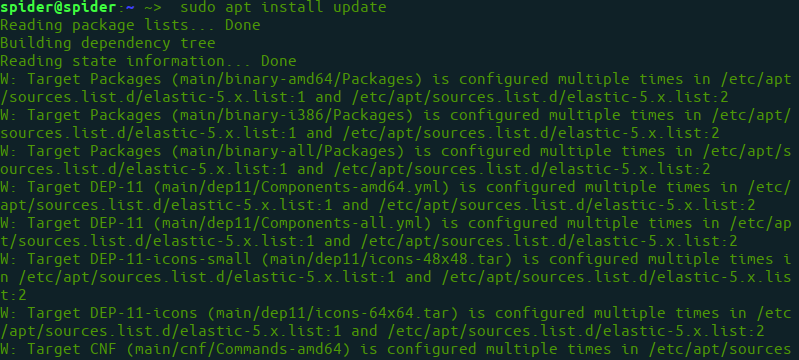
Step 1: First, update your system by using the following command:
$sudo apt install update
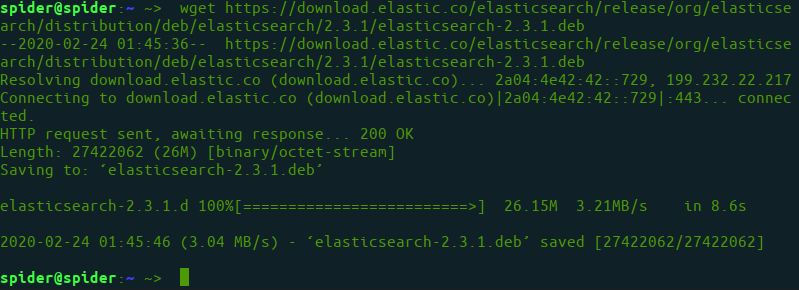
Step 2: Download .deb file for elasticsearch.
$wget https://download.elastic.co/elasticsearch/release/org/elasticsearch/distribution/deb/elasticsearch/2.3.1/elasticsearch-2.3.1.deb
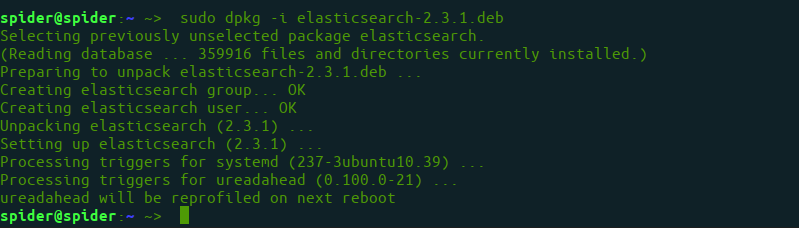
Step 3: Use dpkg commond to install the .deb file.
$sudo dpkg -i elasticsearch-2.3.1.deb
Step 4: Enable elasticsearch service
$sudo systemctl enable elasticsearch.service

Step 5: Setup network configuration for elasticsearch. Open file
$sudo nano /etc/elasticsearch/elasticsearch.yml
and set IP as localhost
...
network.host: 127.0.0.1
...
Step 6: Now, restart service.
$sudo systemctl restart elasticsearch
Step 7: Using and Testing Elasticsearch
$curl -X GET 'http://localhost:9200'
Output of curl
{ "name" : "Node-1", "cluster_name" : "mycluster1", "version" : { "number" : "2.3.1", "build_hash" : "bd980929010aef404e7cb0843e61d0665269fc39", "build_timestamp" : "2016-04-04T12:25:05Z", "build_snapshot" : false, "lucene_version" : "5.5.0" }
}
Last Updated :
30 Sep, 2022
Like Article
Save Article

Note: Updated for the latest version 8.4.2 and tested on Ubuntu 22.04.
ElasticSearch is a search engine built on Apache Lucene and developed in Java. It is basically a database but heavily focused on indexing and searching. ElasticSearch, indexes the database regularly to make searching extremely fast and easy. You can search within these indexes using it’s official application called Kibana or the APIs provided. But first you need an ElasticSearch server
Here in this tutorial I will explain how you can download, install and configure ElasticSearch to help you get started with it.
Note: A lot of big companies and start-up businesses started to implement ElasticSearch in their services one way or another. Learning it will be very helpful for both your career and your personal experience.
Step 1 — Download Java using the ‘apt’ command.
ElasticSearch is developed in Java. For this reason you need either the OpenJDK or the Oracle’s official JDK. I will be using the OpenJDK.
To install Java Runtime:
sudo apt upgradesudo apt install default-jre
After the install, check if Java is installed:
java -versionOutput:
openjdk version "11.0.16" 2022-07-19
You also need the Java Compiler. To install it:
sudo apt install default-jdkAfter the install, check if Java Compiler is installed:
javac -versionOutput:
javac 11.0.16
If everything went well congratulations! Your Java is now ready.
Step 2 — Download the ElasticSearch
Unlike Java, you cannot install ElasticSearch on Ubuntu with the ‘apt’ command. For this reason we will use the official archive to download and install ElasticSearch. You need to specify which version and architecture you want to use. There are two architectures x86_64 and aarch64.
You can get the version and other information you need from the official ElasticSearch:
https://www.elastic.co/downloads/past-releases/If your CPU is Intel or AMD: use x86_64
If your CPU is Apple M1/M2: use aarch64
You can specify the version and architecture like this:
elasticsearch-8.4.2-linux-aarch64.tar.gzDownload the official ElasticSearch archive:
wget https://artifacts.elastic.co/downloads/elasticsearch/elasticsearch-8.4.2-linux-aarch64.tar.gzDownload the SHA512 checksum for error checking:
wget https://artifacts.elastic.co/downloads/elasticsearch/elasticsearch-8.4.2-linux-aarch64.tar.gz.sha512Check if the download archive is valid and complete:
shasum -a 512 -c elasticsearch-8.4.2-linux-aarch64.tar.gz.sha512Output:
elasticsearch-8.4.2-linux-aarch64.tar.gz.sha512: OK
Step 3 — Install and Run the ElasticSearch
We are now ready to install ElasticSearch. Since it uses Java we will not need to use cmake or any other tools like that.
Extract the downloaded archive (this will be your ElasticSearch Home):
tar -xzf elasticsearch-8.4.2-linux-aarch64.tar.gzChange directory into the extracted folder:
cd elasticsearch-8.4.2/To start the ElasticSearch server:
./bin/elasticsearchThe first start-up process might take sometime just wait a little bit. You need to see something like this to make sure the ElasticSearch server is up and running:
✅ Elasticsearch security features have been automatically configured!✅ Authentication is enabled and cluster connections are encrypted.ℹ️ Password for the elastic user (reset with `bin/elasticsearch-reset-password -u elastic`):wTdmHPQwWxXMGm*riZVF
Important thing to note here is that ElasticSearch server automatically creates passwords and such. They are marked as bold characters. Make sure to save them somewhere safe as you cannot get them again.
Both the ElasticSearch server user&password and the Kibana token should be displayed on the terminal outputs. SAVE THEM!
You can test if the server is up and running by going to this address using any type of web browser.
https://localhost:9200Do not worry if your browser says ‘Unsecure Website’ or something like that. It gives that security warning because the certificate is self-signed and cannot be verified online. You can ignore this warning and proceed.
When asked for username and password, enter the information that you saved previously from the terminal outputs.
If it returns a JSON file saying “You Know, for Search” then congratulations my friend you now have ElasticSearch installed!
Thank you for following my guide. Right now you can not see what is going on inside your ElasticSearch server but we can do that using the Kibana. Soon, I will have another guide about it ❤.
How to Install Elastic Stack on Ubuntu 20.04 LTS or any Cloud Instance like Amazon EC2, Azure VM, Google Compute Engine, etc.
Install Configure ElasticSearch on Ubuntu, Install and Configure Kibana on Ubuntu, Install and Configure Logstash on Ubuntu, Install and Configure Filebeat on Ubuntu and Access Kibana Web Interface.
What is Elastic Stack ?
Elastic Stack formerly ELK is a collection of below open source tools.
- Elasticsearch
- Logstash
- Kibana
- Filebeat
Elastic Stack provides Log monitoring for our server and applications at one location.
A proper Log management is done by using ELK stack which includes collection of logs, its processing and visualization. Elastic Stack allows to fetch data from any source and in any format.
For data collection Filebeat is needed which renamed the ELK to Elastic Stack.
What is Elasticsearch ?
Elastic search is a open source tool which is used to store logs, Elasticsearch is a NoSQL database based on Lucene search engine, After storing logs we can also search it and indexed it.
In Elasticsearch we can store and analyze large volume data, Management becomes more easier by using Elasticsearch because it offers simple deployment.
What is Logstash ?
Logstash is used for collection of data and logs, After collected logs it gets transformed and feeds logs forward to Elasticsearch.
Logstash consists of three components –
- Input
- Filtering
- Output
Logstash can analyze structured as well as unstructured data.
Logstash provides plugins to get connected with different types of input sources to Logstash.
What is Kibana ?
Kibana is a visualization tool without which Elastic Stack is incomplete, Kibana provides a web interface on which we can search queries from Elasticsearch DB and then we can visualize it from the results obtained.
Kibana provides various types of dashboards which includes varieties of data diagrams, charts and graphs to visualize data, We can perform real-time search of indexed information.
We can save the dashboards and can share the snapshots of the logs been visualized.
Prerequisites
- Ubuntu Server with 20.04 LTS
- JDK
- 2 CPU and 4 GB RAM
- Open Ports 9200, 5601, 5044
Update the system packages:
sudo apt-get updateInstall JDK on Ubuntu
Install openjdk and other dependencies before installing elastic stack
sudo apt-get install openjdk-11-jdk wget apt-transport-https curl gnupg2 -yTo check java version
java -versionOutput:
openjdk version "11.0.10" 2021-01-19
OpenJDK Runtime Environment (build 11.0.10+9-Ubuntu-0ubuntu1.20.04)
OpenJDK 64-Bit Server VM (build 11.0.10+9-Ubuntu-0ubuntu1.20.04, mixed mode, sharing)
Install and Configure ElasticSearch on Ubuntu
First we will have to add a signing key and will have to add repositories to our system because Elasticsearch is not pre-installed in Ubuntu, we will have to do it manually.
Follow the below command to add elasticsearch signing key
wget -qO - https://artifacts.elastic.co/GPG-KEY-elasticsearch --no-check-certificate | sudo apt-key add -Next add the repository in /etc/apt/sources.list.d/elastic-7.x.list using below command.
echo "deb https://artifacts.elastic.co/packages/7.x/apt stable main" | sudo tee -a /etc/apt/sources.list.d/elastic-7.x.listupdate the system packages
sudo apt-get updateInstall elasticsearch on Ubuntu using below command
sudo apt-get install elasticsearch -yLet’s make changes in below elesticsearch configuration file
sudo nano /etc/elasticsearch/elasticsearch.ymlGo to Network section and uncommnet network.host and replace your system IP or localhost
network.host: localhostAdd the below line in Discovery section also.
discovery.type: single-nodeyou can change http port if you don’t want to use default port at (http.port:9200).
If you have installing Elastic Stack on Single system, Open Elasticsearch configuration , navigate to Discovery section and change below as shown below
/etc/elasticsearch/elasticsearch.yml
# ---------------------------------- Network -----------------------------------
#
# By default Elasticsearch is only accessible on localhost. Set a different
# address here to expose this node on the network:
#
network.host: localhost
#
# By default Elasticsearch listens for HTTP traffic on the first free port it
# finds starting at 9200. Set a specific HTTP port here:
#
#http.port: 9200
#
# For more information, consult the network module documentation.
#
# --------------------------------- Discovery ----------------------------------
#
# Pass an initial list of hosts to perform discovery when this node is started:
# The default list of hosts is ["127.0.0.1", "[::1]"]
#
#discovery.seed_hosts: ["host1", "host2"]
#
# Bootstrap the cluster using an initial set of master-eligible nodes:
#
#cluster.initial_master_nodes: ["node-1", "node-2"]
discovery.type: single-node
#
# For more information, consult the discovery and cluster formation module documentation.
#
start the elacticsearch service
sudo systemctl start elasticsearchTo enable elacticsearch at system startup
sudo systemctl enable elasticsearchTo check the status of elasticsearch
sudo systemctl status elasticsearchTo stop elasticsearch service
sudo systemctl stop elasticsearchTo check elasticsearch service pid using command line
sudo ss -antpl | sudo grep 9200Output:
sudo ss -antpl | sudo grep 9200
LISTEN 0 4096 *:9200 *:* users:(("java",pid=17313,fd=283))
Enter below command to check elasticsearch is running by sending HTTP request.
curl -X GET "localhost:9200"Output:
curl -X GET "localhost:9200"
{
 "name" : "ip-172-31-0-235",
 "cluster_name" : "elasticsearch",
 "cluster_uuid" : "_na_",
 "version" : {
 "number" : "7.12.0",
 "build_flavor" : "default",
 "build_type" : "deb",
 "build_hash" : "78722783c38caa25a70982b5b042074cde5d3b3a",
 "build_date" : "2021-03-18T06:17:15.410153305Z",
 "build_snapshot" : false,
 "lucene_version" : "8.8.0",
 "minimum_wire_compatibility_version" : "6.8.0",
 "minimum_index_compatibility_version" : "6.0.0-beta1"
 },
 "tagline" : "You Know, for Search"
}
Install and Configure Kibana on Ubuntu
To visualize data which is stored in Elasticsearch DB we will have to install Kibana, Kibana is a web interface visualization tool.
use below command to install kibana on Ubuntu
sudo apt-get install kibanaKibana runs on localhost so will have to change in kibana configuration file.
sudo nano /etc/kibana/kibana.ymlUncomment the below lines
server.port: 5601
server.host: "0.0.0.0"
elasticsearch.hosts: ["http://localhost:9200"]
/etc/kibana/kibana.yml
# Kibana is served by a back end server. This setting specifies the port to use.
server.port: 5601# Specifies the address to which the Kibana server will bind. IP addresses and host names are both valid values.
# The default is 'localhost', which usually means remote machines will not be able to connect.
# To allow connections from remote users, set this parameter to a non-loopback address.
server.host: "0.0.0.0"# Enables you to specify a path to mount Kibana at if you are running behind a proxy.
# Use the `server.rewriteBasePath` setting to tell Kibana if it should remove the basePath
# from requests it receives, and to prevent a deprecation warning at startup.
# This setting cannot end in a slash.
#server.basePath: ""# Specifies whether Kibana should rewrite requests that are prefixed with
# `server.basePath` or require that they are rewritten by your reverse proxy.
# This setting was effectively always `false` before Kibana 6.3 and will
# default to `true` starting in Kibana 7.0.
#server.rewriteBasePath: false# Specifies the public URL at which Kibana is available for end users. If
# `server.basePath` is configured this URL should end with the same basePath.
#server.publicBaseUrl: ""# The maximum payload size in bytes for incoming server requests.
#server.maxPayloadBytes: 1048576# The Kibana server's name. This is used for display purposes.
#server.name: "your-hostname"# The URLs of the Elasticsearch instances to use for all your queries.
elasticsearch.hosts: ["http://localhost:9200"]
After changing these two lines save it by Ctrl+O and exit by Ctrl+X.
To start kibana service
sudo systemctl start kibanaTo enable kibana at system startup
sudo systemctl enable kibanaTo check the status of kibana service
sudo systemctl status kibanaTo stop kibana service
sudo systemctl stop kibanaInstall and Configure Logstash on Ubuntu
To collect logs and parse them we will need to install Logstash, Collected and filtered logs will be stored in Elasticsearch DB.
use below command to install logstash on ubuntu
sudo apt-get install logstashTo load logstash beat create the below config file and insert below lines.
sudo nano /etc/logstash/conf.d/02-beats-input.confinput { beats { port => 5044 }}
save and close the file.
Create the logstash configuration file to send the logs, filter and showing in kibana and insert below lines
sudo nano /etc/logstash/conf.d/30-elasticsearch-output.confoutput { elasticsearch { hosts => ["localhost:9200"] manage_template => false index => "%{[@metadata][beat]}-%{[@metadata][version]}-%{+YYYY.MM.dd}" }}
Save the file by Ctrl+O and exit by Ctrl+X.
To start logstash service
sudo systemctl start logstashTo enable logstash at system startup
sudo systemctl enable logstashTo stop logstash service
sudo systemctl stop logstashTo check status of logstash
sudo systemctl status logstashInstall and Configure Filebeat on Ubuntu
Filebeat is an input to the logstash which gives logs collected from different sources. Follow the below command to install Filebeat so it can send logs to Logstash.
sudo apt-get install filebeatNow lets make changes in filebeat configuration file
sudo nano /etc/filebeat/filebeat.ymlComment the below lines
#output.elasticsearch:
#Array of hosts to connect to.
#hosts: ["localhost:9200"]
Uncomment the below lines
output.logstash:
hosts: ["localhost:5044"]
/etc/filebeat/filebeat.yml
# ---------------------------- Elasticsearch Output ----------------------------
#output.elasticsearch:
 # Array of hosts to connect to.
# hosts: ["localhost:9200"] # Protocol - either `http` (default) or `https`.
 #protocol: "https" # Authentication credentials - either API key or username/password.
 #api_key: "id:api_key"
 #username: "elastic"
 #password: "changeme"# ------------------------------ Logstash Output -------------------------------
output.logstash:
 # The Logstash hosts
 hosts: ["localhost:5044"] # Optional SSL. By default is off.
 # List of root certificates for HTTPS server verifications
 #ssl.certificate_authorities: ["/etc/pki/root/ca.pem"] # Certificate for SSL client authentication
 #ssl.certificate: "/etc/pki/client/cert.pem" # Client Certificate Key
 #ssl.key: "/etc/pki/client/cert.key"
To start filebeat service
sudo systemctl start filebeatTo enable filebeat at system startup
sudo systemctl enable filebeatTo check status of filebeat service
sudo systemctl status filebeatEnable filebeat system module
sudo filebeat modules enable systemLoad the index template
filebeat setup --index-management -E output.logstash.enabled=false -E 'output.elasticsearch.hosts=["localhost:9200"]'Now lets check that ElasticSearch is receiving datalog from filebeat using below command
curl -XGET http://localhost:9200/_cat/indices?vOutput:
curl -XGET http://localhost:9200/_cat/indices?v
health status index uuid pri rep docs.count docs.deleted store.size pri.store.size
green open .kibana_task_manager_7.12.0_001 6vZtJ4jqRyaBorqojMRVMA 1 0 9 149 203.3kb 203.3kb
green open .apm-custom-link RYBbJ3C5SlaqIHH2h7ke7w 1 0 0 0 208b 208b
green open .apm-agent-configuration ABJ5fag4QPuekS9kiStfoQ 1 0 0 0 208b 208b
yellow open filebeat-7.12.0-2021.04.27-000001 hCQ8p2iHQla_EzfsNSD4Aw 1 1 2777 0 841.3kb 841.3kb
green open .kibana-event-log-7.12.0-000001 gE8SlJosQlqdhZh5OBFR8A 1 0 3 0 16.4kb 16.4kb
green open .kibana_7.12.0_001 3KFkqOLnSNeCpA64JJ-pdg 1 0 11 3 2.1mb 2.1mb
green open .tasks
We have covered install elastic stack on Ubuntu 20.04 LTS.
Access Kibana Web Interface
Access Kibana Web Interface by using the URL
Enter you server IP address in the place of “your-server-ip”.
Click on Explore on my own, you will see elastic stack dashboard.
To check system logs in Kibana, click on Logs as shown below.
In Stream section, you can see logs of your system.
We have installed ELK Stack on Ubuntu 20.04 LTS, Configure ElasticSearch on Ubuntu, Install and Configure Kibana on Ubuntu, Install and Configure Logstash on Ubuntu, Install and Configure Filebeat on Ubuntu and Access Kibana Web Interface.
Install Java
sudo apt-get install default-jdkElasticsearch 6
sudo apt-get install apt-transport-httpssudo apt-get update && sudo apt-get install elasticsearch
edit the elasticsearch.yml file:
sudo vi /etc/elasticsearch/elasticsearch.ymlChange network.host to 0.0.0.0
Launch this commads for start elasticsearch service:
sudo /bin/systemctl daemon-reload
sudo /bin/systemctl enable elasticsearch.service
sudo /bin/systemctl start elasticsearch.service
so, now Elasticsearch should be running!
Check if it running at this address: http://127.0.0.1:9200/
At this address you should see something as this:
