

Apache is a popular Linux-based web server application. It is part of the LAMP stack (Linux, Apache, MySQL, PHP) that powers much of the internet.
This guide will show you how to install Apache on CentOS 8.
The LAMP stack is a set of open-source software used for web application development. It consists of a Linux operating system, an Apache HTTP server, the MySQL database management system, and PHP programming language.
In this tutorial, learn how to install the LAMP stack on CentOS 8.
В данном руководстве мы рассмотрим как установить стек LAMP (Linux, Apache, MySQL, PHP) на CentOS Stream, что так же справедливо будет и для CentOS 8 и RHEL 8. Чтобы не было путаницы, стоит прояснить момент, что Apache – организация открытого программного обеспечения, которая организовалась вокруг Apache HTTP Server – и в зависимости от контекста может подразумеваться и первое и второе. В нашем же руководстве мы под Apache будем подразумевать Apache HTTP Server.
В данном руководстве пойдёт речь о том, как установить LAMP на операционную систему CentOS Stream.
Аббревиатурой LAMP называют набор опенсорсного программного обеспечения, который необходимо развернуть на сервере, предназначенном для функционирования веб-приложений. Аббревиатура расшифровывается следующим образом:
В настоящей инструкции установка и настройка ПО будет производится на сервере, работающем под управлением ОС CentOS Stream release 8.
The LAMP server comes with 4 core components: the Apache web server, MySQL or MariaDB database and PHP which is a popular scripting language that is used for creating dynamic web pages.
Related Article: How to Install LEMP Server on CentOS 8
- Update CentOS 8 Software Packages
- Install Apache Web Server on CentOS 8
- Install MariaDB on CentOS 8
- Install PHP 7 on CentOS 8
- Testing PHP Information
- Update System Software Packages
- Шаг 3. Установка сервера MySQL 8 на CentOS Stream
- Шаг 1. Updating and configuring a CentOS Stream system
- System requirements
- PHP setup
- Apache Files and Directories
- Step 5. Check PHP is working
- Configure MySQL Security
- Test PHP with Apache
- Step 2. Installing Apache on CentOS Stream
- Installing Apache Web Server on CentOS 8
- Start and Manage Apache Web Server
- Test Apache Web Server
- Check the Default Apache Test Page
- Create an HTML File to Test
- Adjust Firewall for Apache
- Настройка MySQL
- Adjust the Firewall
- Настройка Apache
- Step 4 Installing PHP on CentOS Stream
- Install MySQL
- Install PHP and Supporting Modules
- Conclusions
- Conclusion
Update CentOS 8 Software Packages
As is always recommended, it’s a good idea to update software packages before embarking on any installation. So log in to your server and run the command below.
$ sudo dnf update
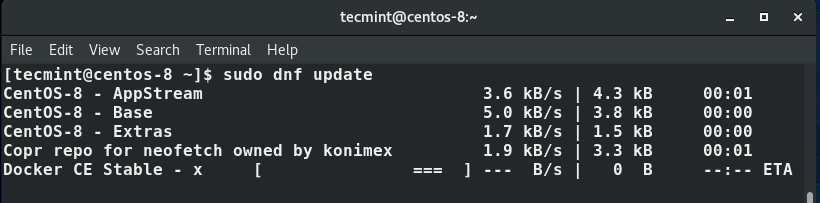
Update CentOS 8 Packages
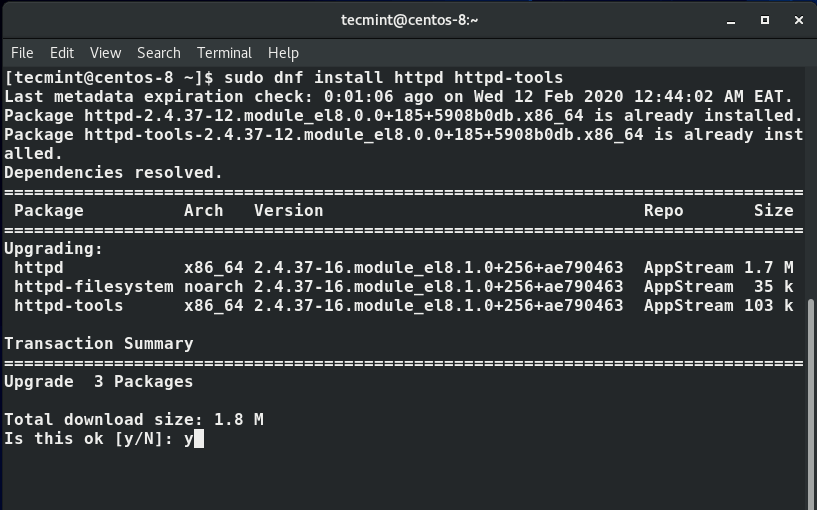
Install Apache Web Server on CentOS 8
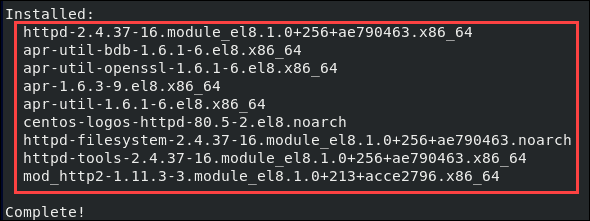
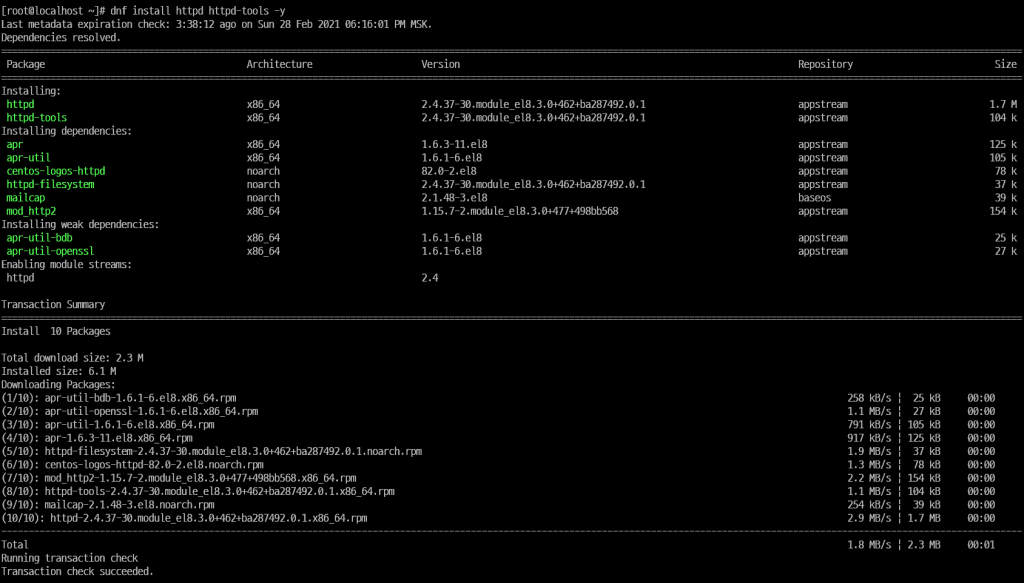
With the system packages up to date, the next step is installing the Apache Web Server and some crucial tools and utilities run the command.
$ sudo dnf install httpd httpd-tools
Once the installation is complete, enable Apache to auto-start at system boot time using the command below.
$ sudo systemctl enable httpd
Next, start the Apache service by running the command.
$ sudo systemctl start httpd
To confirm is Apache web service is running, run the command.
$ sudo systemctl status httpd
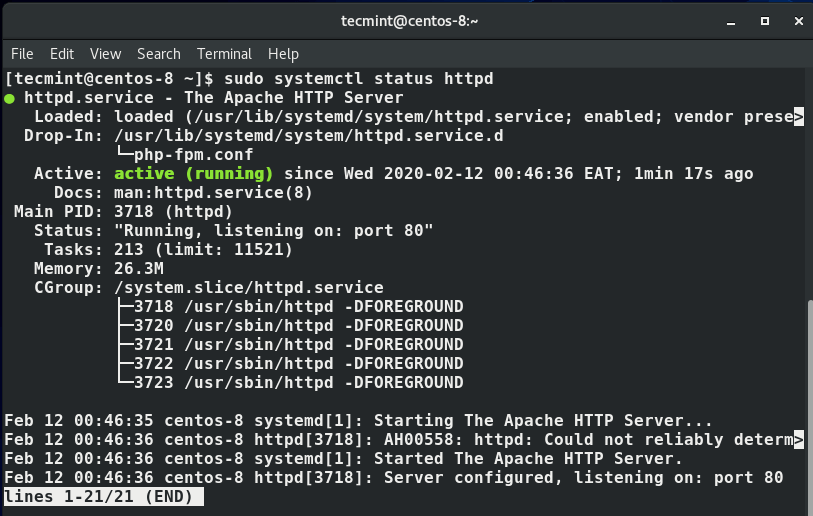
Verify Apache Service Status
After installing apache, update the firewall rules to allow requests to web server.
$ sudo firewall-cmd —permanent —zone=public —add-service=http
$ sudo firewall-cmd —permanent —zone=public —add-service=https
$ sudo firewall-cmd —reload
If you are a little curious, you can get the version of apache among other details related to Apache by running the rpm command.
$ sudo rpm -qi
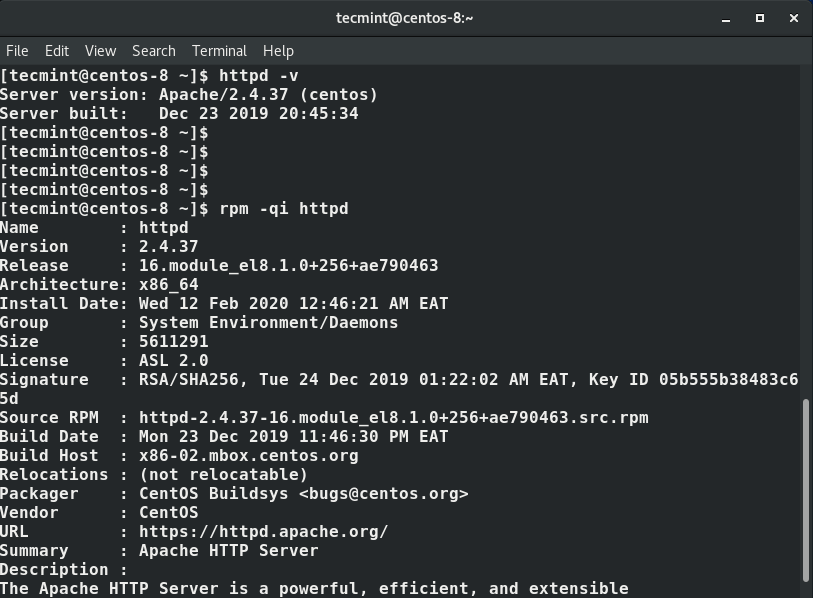
Check Apache Version
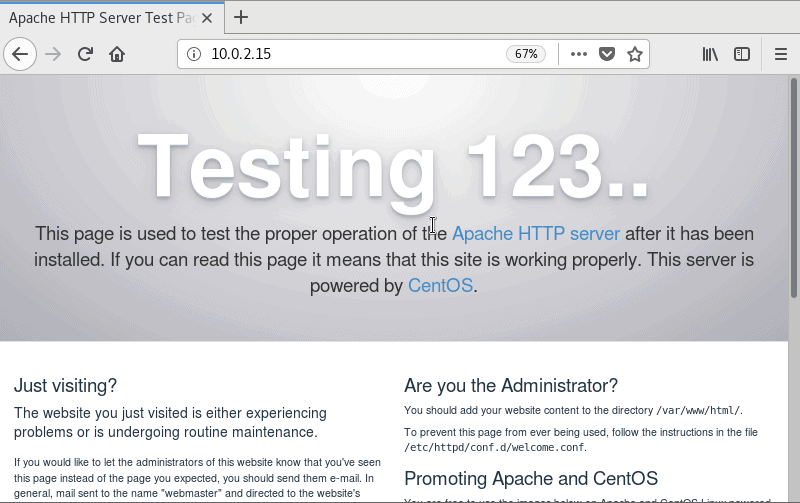
Additionally, you can open your web browser and visit your server’s IP a shown.
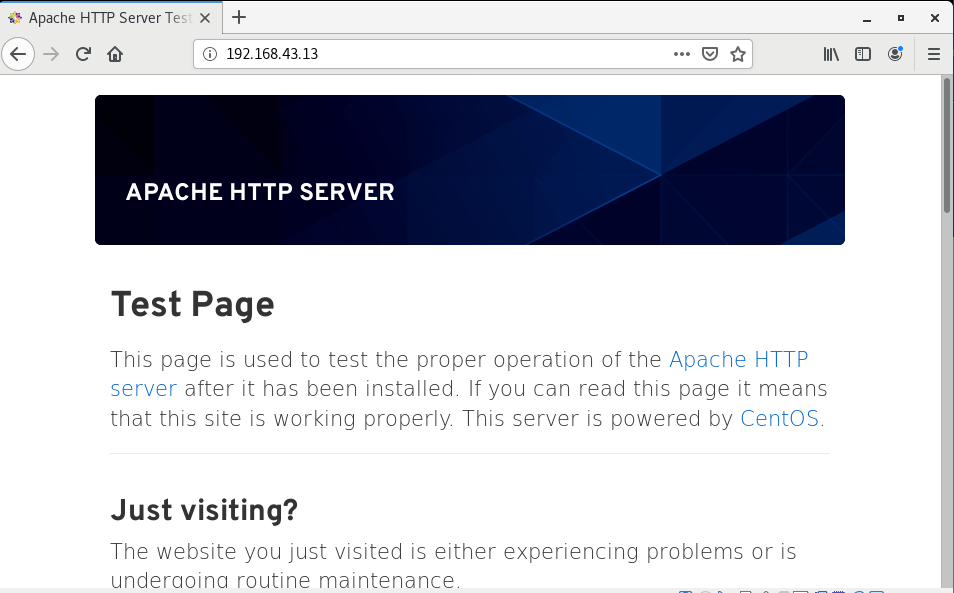
Verify Apache Web Page
Install MariaDB on CentOS 8
MariaDB is a fork of MySQL database . It was developed by a former team of MySQL who had concerns that Oracle may turn MySQL to a closed-source project. It ships with innovative and better features than MySQL that make it a better option than MySQL.
To install MariaDB, run the command.
$ dnf install mariadb-server mariadb -y
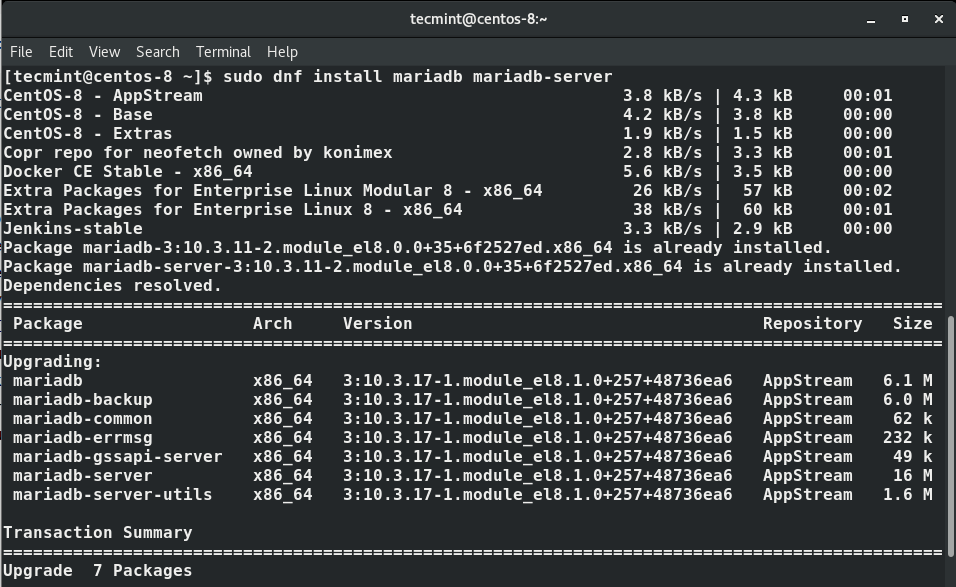
Install MariaDB in CentOS 8
Next, start and enable MariaDB on startup, run the command.
$ systemctl start mariadb
$ systemctl enable mariadb
You can verify the status of MariaDB by running the command.
$ systemctl status mariadb
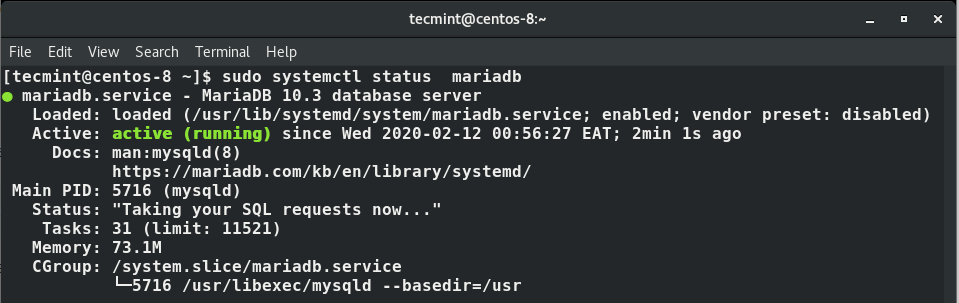
Verify MariaDB Service Status
Lastly, we need to secure our MariaDB database engine by running.
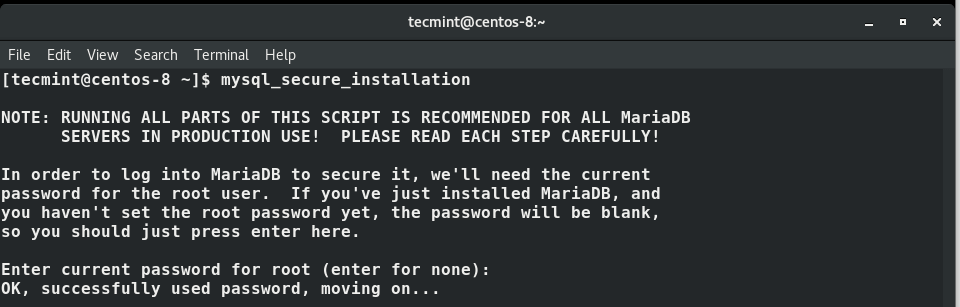
Secure MariaDB Installation on CentOS 8
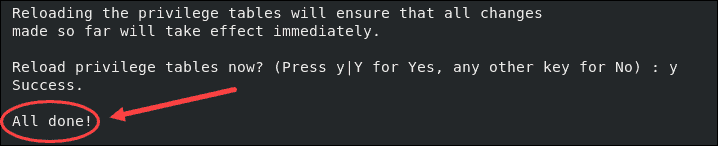
You will be prompted to enter the root password ( if you already have a root password in place) or set it up. Thereafter, answer Y for every subsequent prompt.
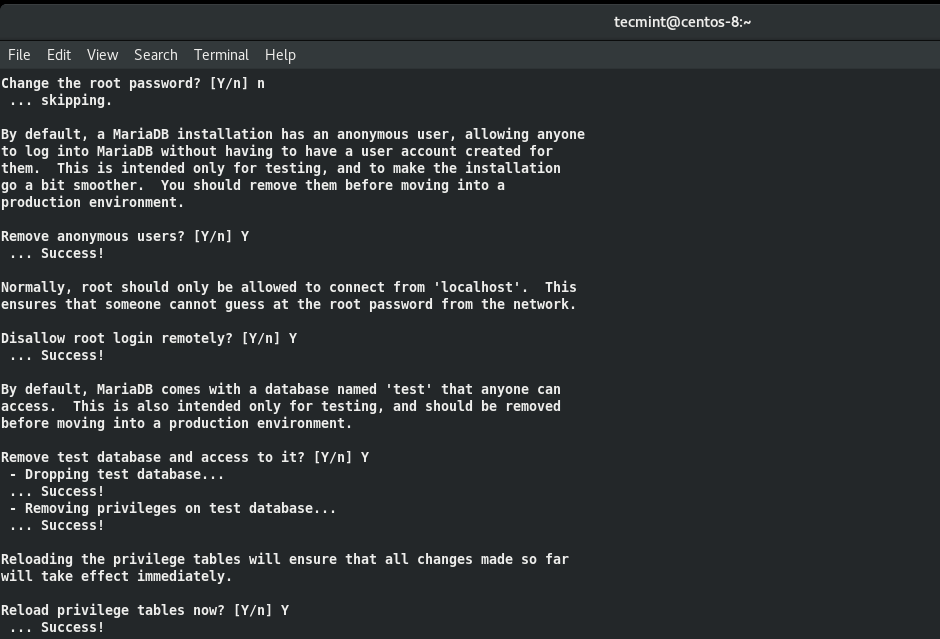
Secure MariaDB Installation Summary
Install PHP 7 on CentOS 8
The last component in the LAMP stack we need to install is PHP, and as mentioned earlier, PHP is a scripting web programming language used for developing dynamic web pages.
We are going to install the latest version of PHP ( PHP 7.4 by the time of penning down this guide) using the Remi repository.
First, install the EPEL repository.
$ sudo dnf install https://dl.fedoraproject.org/pub/epel/epel-release-latest-8.noarch.rpm
Next, install yum utils and enable remi-repository using the command below.
$ sudo dnf install dnf-utils http://rpms.remirepo.net/enterprise/remi-release-8.rpm
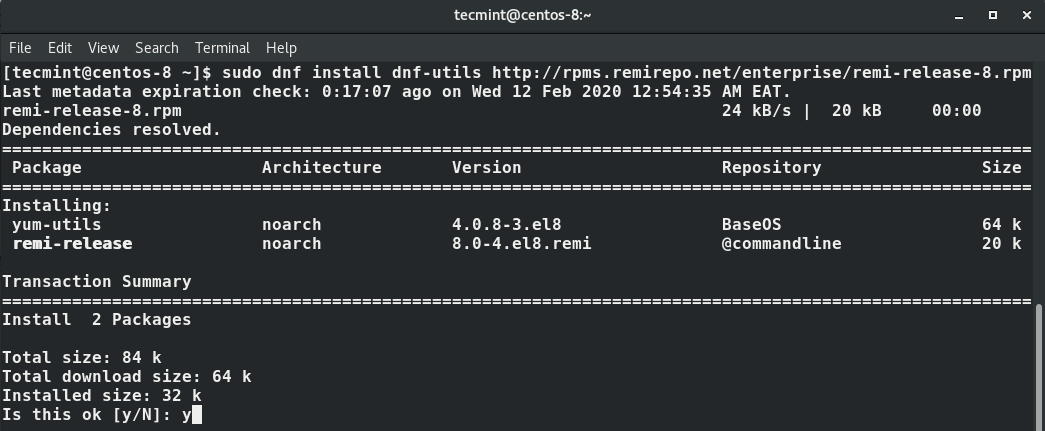
Install Remi Repository on CentOS 8
After the successful installation of yum-utils and Remi-packages, search for the PHP modules which are available for download by running the command.
$ sudo dnf module list php
The output will include the available PHP modules, stream and installation profiles as shown below.
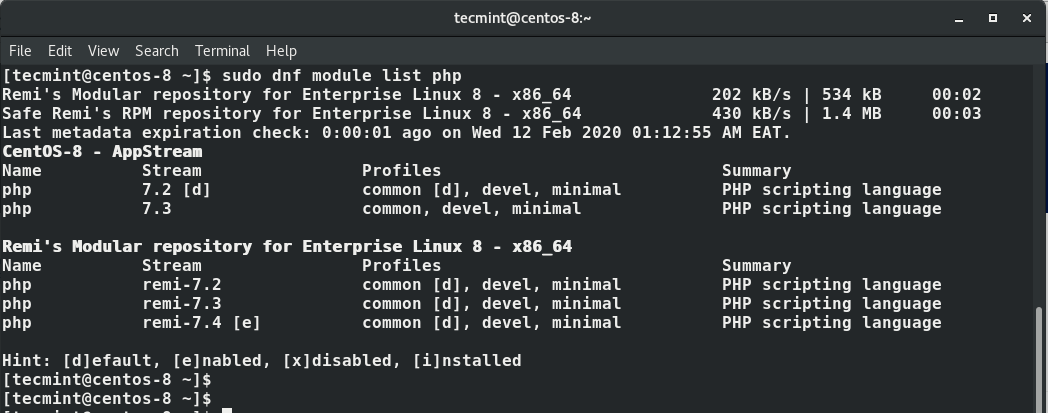
List PHP Module in CentOS 8
The output indicates that the currently installed version of PHP is PHP 7.2. To install the newer release, PHP 7.4, reset the PHP modules.
$ sudo dnf module reset php
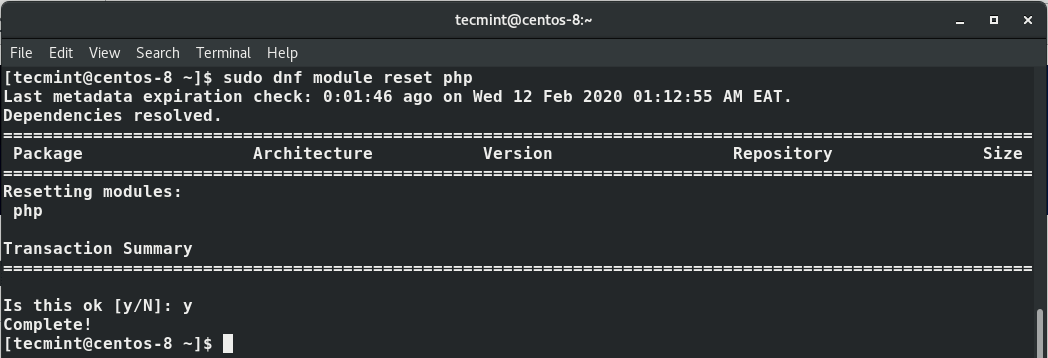
Reset PHP Module in CentOS 8
Having reset the PHP modules, enable the PHP 7.4 module by running.
$ sudo dnf module enable php:remi-7.4

Enable PHP Module in CentOS 8
Finally, install PHP, PHP-FPM (FastCGI Process Manager) and associated PHP modules using the command.
$ sudo dnf install php php-opcache php-gd php-curl php-mysqlnd

Install PHP Modules in CentOS 8
To verify the version installed to run.
$ php -v
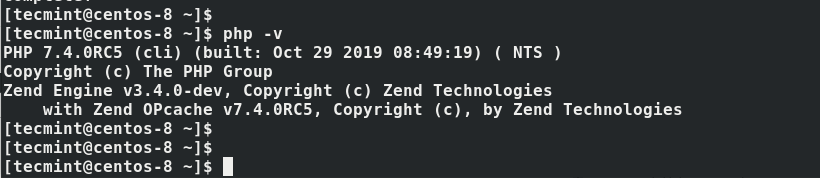
Check PHP Version in CentOS 8
Perfect! We now have PHP 7.4 installed. Equally important, we need to start and enable PHP-FPM on boot-up.
$ sudo systemctl start php-fpm
$ sudo systemctl enable php-fpm
To check its status execute the command.
$ sudo systemctl status php-fpm
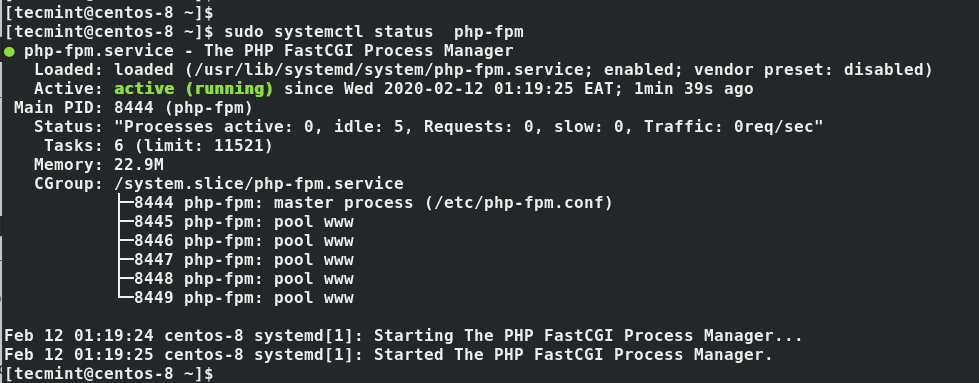
Check PHP-FPM Status
To instruct SELinux to allow Apache to execute the PHP code via PHP-FPM run.
$ setsebool -P httpd_execmem 1
Finally, restart Apache web server for PHP to work with Apache web server.
$ sudo systemctl restart httpd
Testing PHP Information
To test PHP with the web server, you’ll have to create an info.php file to the document root directory.
$ vi /var/www/html/info.php
Insert the PHP code below and save the file.
Then head out to your browser, and type the URL below. Remember to replace the server IP address with your server’s actual IP address.

Check PHP Info in CentOS 8
You should now be able to see information about PHP on your web browser.
Great! You have now installed Apache, PHP, and MariaDB on your CentOS 8 system. As good practice, ensure you delete the info.php file as it can pose a security risk if hackers are able to identify the PHP version you are running.
Update System Software Packages
Open a terminal window and update the package repository before installing new software:
sudo yum update
Шаг 3. Установка сервера MySQL 8 на CentOS Stream
Установим сервер MySQL с помощью команды:
dnf install mysql-server -y
Запустим и добавим старт сервиса при зарузке сервера:
systemctl start mysqld
systemctl enable mysqld
Обезопасим установку сервера MySQL выполнив скрипт:
Потребуется ответить на вопросы, приведены рекомендуемые ответы:
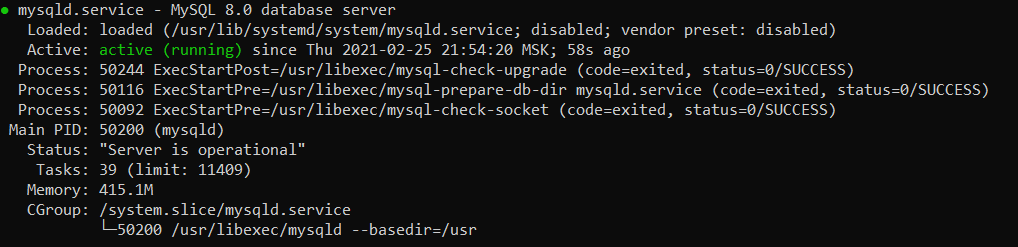
Проверим статус сервиса:
systemctl status mysqld
Теперь можно подключиться к mysql используя консольный клиент:
mysql -u root -p
Чтобы выйти из консоли, наберите “q” или “exit;”
Шаг 1. Updating and configuring a CentOS Stream system
Before proceeding with the installation, it is good to update the repositories and installed packages:
dnf update -y
Disable SELinux so as not to delve into fine-tuning the system:
System requirements
If you don’t have your own virtual server, you can start the server with Centos Stream from the RUVDS console here.
This tutorial uses a privileged root account, to switch to it, type the following command and enter the root password:
PHP setup
dnf install php php-cli php-mysqlnd php-json php-gd php-ldap php-odbc php-pdo php-opcache php-pear php-xml php-xmlrpc php-mbstring php-snmp php-soap php -zip
You can check the installed software version by typing:

Restart Apache:
And in your site’s directory, create an index.php file:
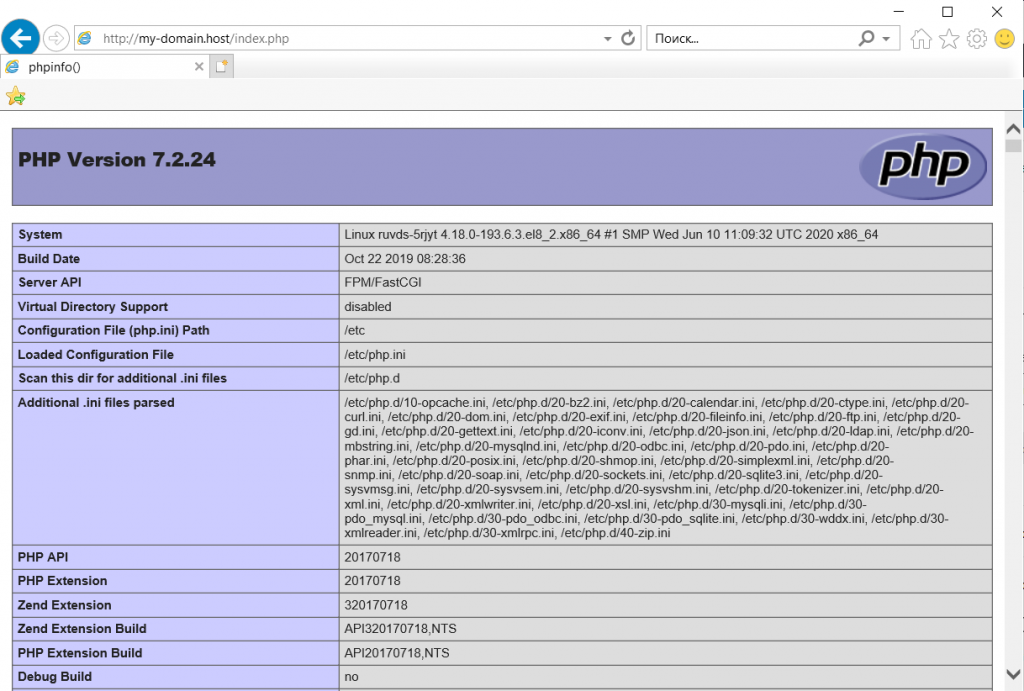
Type http://my-domain.host/index.php in your browser, replacing my-domain.host with your site name, and you will see the PHP configuration page:
Apache Files and Directories
Apache is controlled by applying directives in configuration files:
Note: When making changes to configuration files, remember to always restart the Apache service to apply the new configuration.
Diligently check Apache log files to monitor your web server:
Designate a directory to store the files for your website. Use the configuration files to point to the directory you choose. Some typical locations include:
You should now have a working Apache web server on your CentOS system. Next, you may be interested in installing a full LAMP stack.
Step 5. Check PHP is working
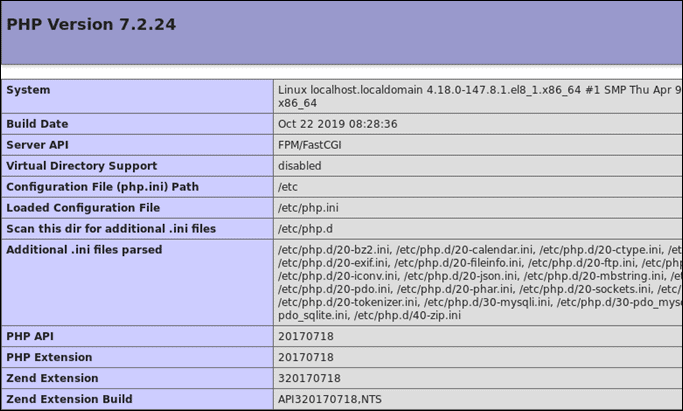
Let’s create a php file that displays information about installed PHP:
Now if we go to the address http://ip_address of our server/info.php or localhost/info.php in the browser, if we have installed LAMP on the local machine, we will see a page with information about the installed PHP:

Now that we have verified that everything is working as expected, we can delete the info.php file:
Configure MySQL Security
The next step is to configure the basic MySQL security settings.
1. Start by displaying the temporary MySQL root password:
The system displays the temporary MySQL password.

2. Next, run the command:
Provide the MySQL root password received in the previous step.
3. Then, enter and re-enter a new password, making sure it meets the standards for password strength.
4. After updating the password, you are prompted again to change the root password. To do so, type y and hit Enter.
5. The output displays the estimated strength of the password. Press y to continue with the password provided.
Answer the rest of the questions with y and Enter:
With this, MySQL is secured.
Test PHP with Apache
Apache creates a web root file in the default website directory /var/www/html/. To check whether PHP is set up properly by running a test from this directory.
1. Create a info.php file inside the directory:
sudo vim /var/www/html/info.php
3. Save and exit the file.
4. Now, verify if PHP is working correctly. Open a web browser and navigate to the URL (replacing ip_address with the public IP of the server):
The browser should display the content, as in the image below.
You should now have a working installation of LAMP Stack on your CentOS 8 system.
Next, explore other stack alternatives such as the XAMPP stack or the MEAN stack.
1. Install Apache Web Services with the command:
sudo yum -y install httpd
2. Then, start the Apache service by running:
sudo systemctl start httpd.service
3. To verify Apache is running, open a web browser and navigate to the server’s public IP address. It should display the Apache Test Page, as in the image below.
Step 2. Installing Apache on CentOS Stream
dnf install httpd httpd-tools -y
After the installation is complete, we can start Apache using the command:
And allow Apache autostart on system boot:
Now let’s check the service status:
httpd.service — The Apache HTTP Server
Loaded: loaded (/usr/lib/systemd/system/httpd.service; enabled; vendor preset: disabled)
Active: active (running) since Sun 2021-02-28 22:01:30 MSK; 11s ago
Docs: man:httpd.service
Main PID: 1662 (httpd)
Status: «Running, listening on: port 80»
Tasks: 213 (limit: 24739)
Memory: 42.9M
CGroup: /system.slice/httpd.service
├─1662 /usr/sbin/httpd -DFOREGROUND
├─1663 /usr/sbin/httpd -DFOREGROUND
├─1664 /usr/sbin/httpd -DFOREGROUND
├─1665 /usr/sbin/httpd -DFOREGROUND
└─1666 /usr/sbin/httpd -DFOREGROUND
“Enabled” in the output of the command means that the service will be started when the server starts, and “active (running)” indicates that the service is currently running. To exit the status view, press “q”.
To view the installed version of Apache, type the following command:
Server version: Apache/2.4.37 (centos)
Server built: Jul 31 2020 20:44:41
To check if the server is working correctly, first of all, you need to open port 80 (http) in the Centos firewall (enabled by default), for this, add the port by service name to the allowed ones, with the command:
firewall-cmd —permanent —add-service=http
The —permanent option means that this firewall rule will be saved even after a server restart. Next, apply the new firewall rules for the changes to take effect:
systemctl reload firewalld
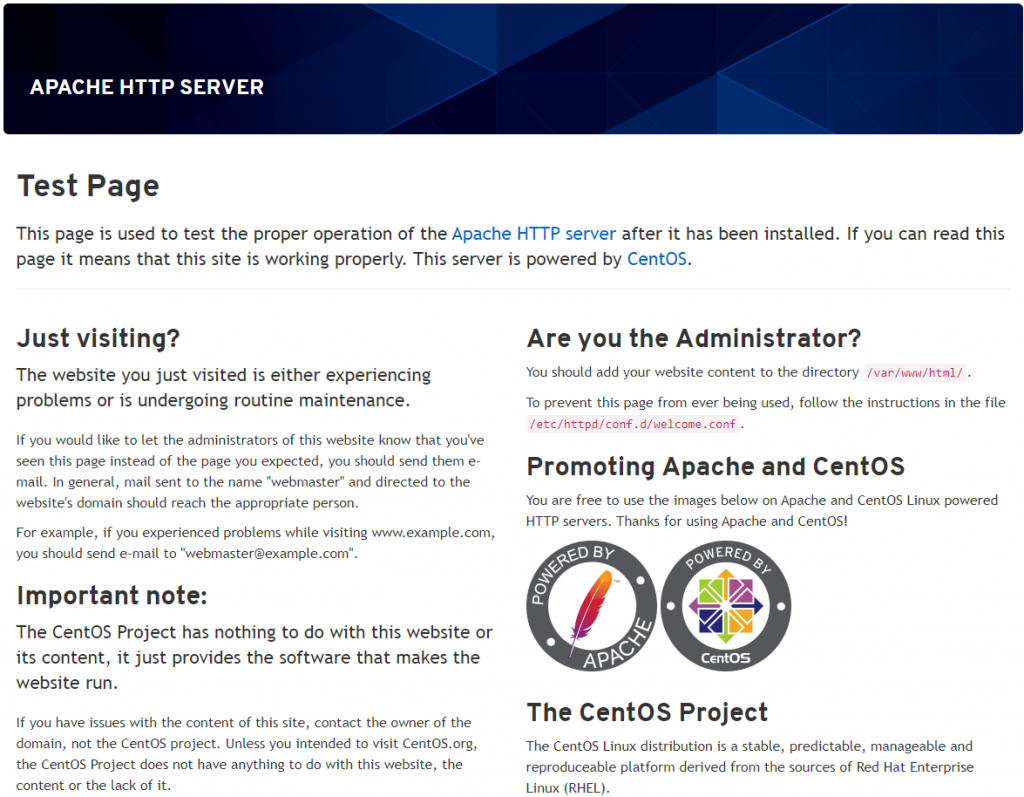
Now, if your server is available on the Internet, your page is also available to the public.
To disable the default page, you need to remove its configuration from the Apache configuration list:
Let’s create our own start page to make sure everything works correctly:
Prepare the /var/www/html directory for our files by setting the owner to the apache user that was created when Apache was installed:
chown -R apache:apache /var/www/html
By default, Apache uses the system name as its global “ServerName”. If this name is not resolved correctly by the DNS server, when you run “apachectl configtest”, you will see an error message:
AH00558: httpd: Could not reliably determine the server’s fully qualified domain name, using localhost.localdomain. Set the ‘ServerName’ directive globally to suppress this message
To determine the ServerName uniquely, you will need to edit the configuration file of our server. To do this, install the nano text editor and create a new configuration file (which will complement the global configuration file):
Add localhost to the beginning of the ServerName file if our server does not have DNS records, or specify the fully qualified DNS name (FQDN) if it exists:
Installing Apache Web Server on CentOS 8
Now you can install Apache with the command:
sudo yum –y install httpd
Note: “httpd” is the name for the Apache service in CentOS. The –y option automatically answers yes to the confirmation prompt.
Start and Manage Apache Web Server
Apache is a service that runs in the background.

The system doesn’t return an output if the command is run properly.
To configure Apache to run on startup:

To check the status of the Apache service:

To reload Apache (reloads configuration files to apply changes):
sudo systemctl reload httpd
To restart the entire Apache service:
To stop Apache:
sudo systemctl stop httpd
To disable Apache at system startup:
sudo systemctl disable httpd
Test Apache Web Server
Your Apache software’s job is to serve web pages over a network. Your new Apache installation has a default test page, but you can also create a custom test page.
Check the Default Apache Test Page

If you’re familiar with the ip addr show or ifconfig commands, you can use those instead.
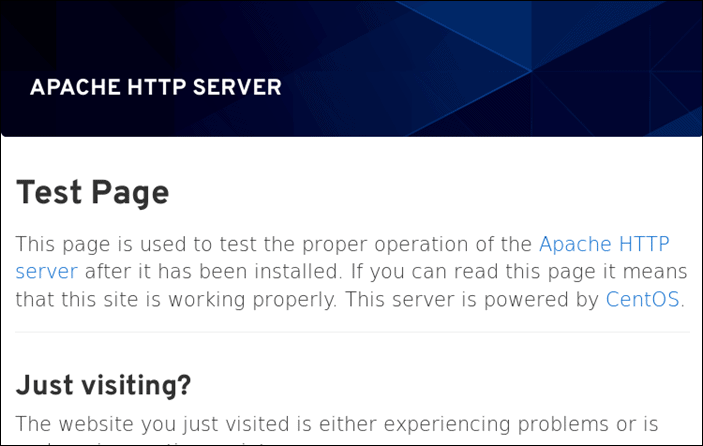
Open a web browser and type in the IP address displayed in the output. The system should show the Apache HTTP Server Test Page, as seen in the image below:
If your system doesn’t have a graphical interface, use the curl command:
Create an HTML File to Test
In a terminal window, create a new HTML index file:
Edit the file to your liking and save it.
Your Apache server is working correctly if it displays the specified custom page.
Adjust Firewall for Apache

Double-check to make sure your firewall is correctly configured:
You should see http and https in the list of allowed services.

Apache also offers ModSecurity, a plug-in module that works as a firewall. You can install and configure ModSecurity as an additional safety layer, which helps you monitor traffic and respond to any irregularities.
Настройка MySQL
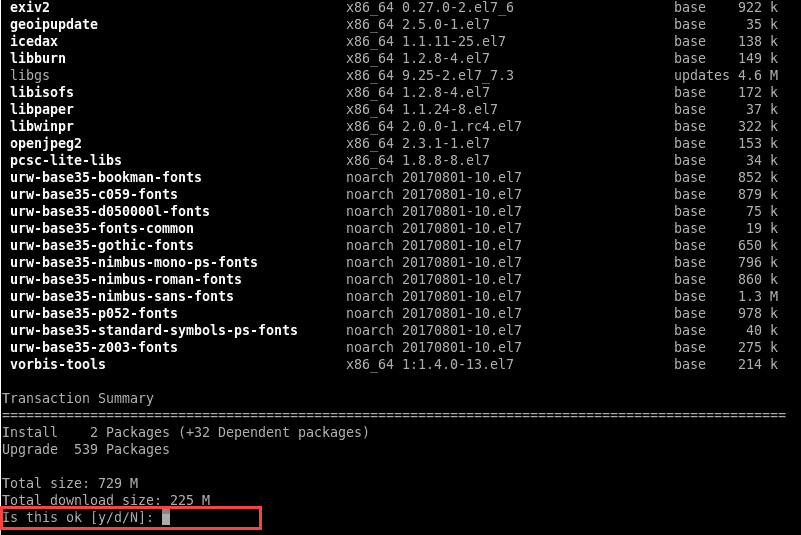
На следующем этапе настройки вашего VPS необходимо произвести установку и настройку СУБД MySQL. Для запуска инсталляции пакета из стандартного репозитория запустите:
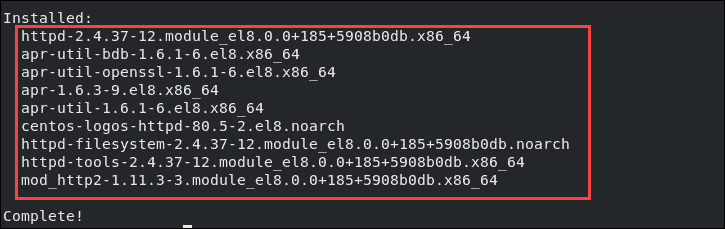
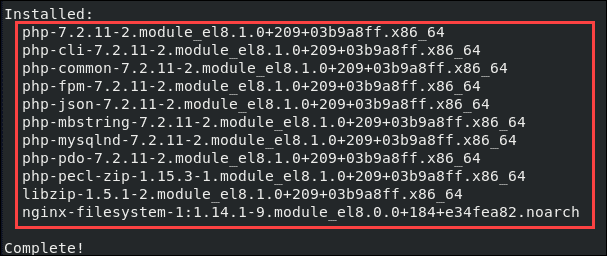
Как всегда, по окончании установки, система покажет вам список проинсталлированных приложений:

Далее, произведите запуск службы MySQL:
systemctl start mysqld.service
Также, проверьте её состояние:
Теперь вы можете настроить автозапуск сервиса MySQL на вашем VPS:
Для отключения автозапуска используйте инструкцию:
systemctl disable mysqld
В качестве следующего шага при настройке MySQL, запустите скрипт безопасности, который подкорректирует некоторые параметры СУБД для повышения уровня её безопасности:
В ходе своего исполнения скрипт попросит вас установить пароль учётной записи root для подключения к MySQL, а также, попросит вашего согласия на изменение некоторых дефолтных настроек СУБД.
Вывод команды выглядит так:
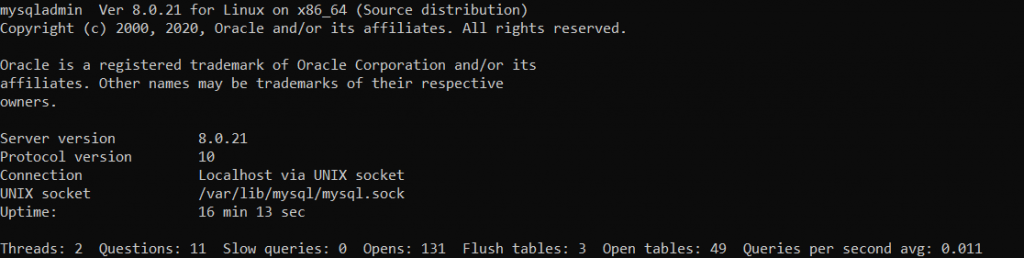
Подключение к СУБД осуществляется следующей инструкцией:
Adjust the Firewall
If you have firewalld set up on CentOS, you need to adjust the configuration to allow Apache connections.
1. Open the firewall for HTTP traffic with the command:
2. Next, adjust it to allow HTTPS traffic as well:
3. Restart the firewall for the changes to take place:
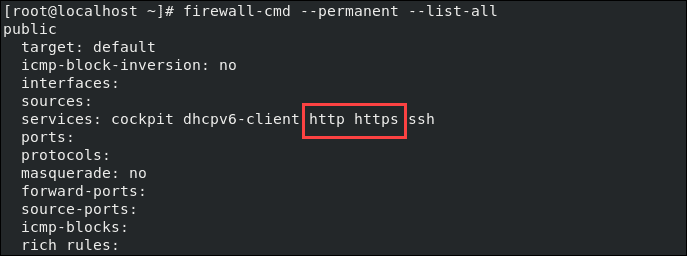
4. Check to verify HTTP and HTTPS routes are now permanently open by running:
sudo firewall-cmd —permanent —list-all
The output should display http and https in the list of services.
Настройка Apache
Первым этапом установки LAMP будет установка и настройка веб-сервера для ваших будующих веб-приложений Apache. В CentOS Stream установка Apache производится при помощи следующей инструкции:

Далее, необходимо добавить Apache в автозагрузку и запустить службу:
systemctl enable httpd
systemctl start httpd
Проверить запуск сервера можно командой:

firewall-cmd —permanent —zone=public —add-service=http
firewall-cmd —permanent —zone=public —add-service=https
firewall-cmd —reload
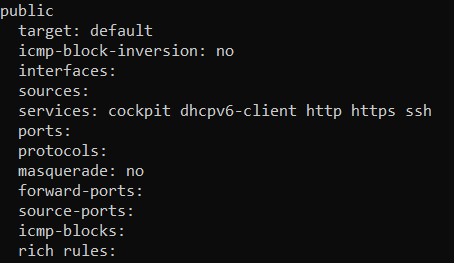
Теперь, проверьте, открылись ли порты:
Обратите внимание на то, что в списке разрешённых служб должны присутствовать http и https:
Теперь можно создать простенькую страничку для вашего сайта:

Сначала перейдите в директорию /etc/httpd/conf/ и откройте файл httpd.conf:
cd /etc/httpd/conf
vi httpd.conf
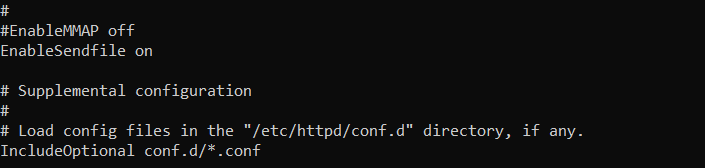
В этом файле должна быть раскомментирована строка IncludeOptional:
Теперь, необходимо создать каталоги для вашего сайта (значение my-domain.host замените на имя своего домена):
Далее, перейдите в каталог /etc/httpd/conf.d/:
В каталоге необходимо создать файл my-domain.host.conf и наполнить его текстом, для чего используйте следующие команды (помните, здесь вместо my-domain.host вы должны будете вводить имя своего домена):
Таким образом, вы создадите конфигурационный файл вашего сайта (в данном мануале этот сайт называется my-domain.host).
Now, check your Apache configuration for syntax errors:
The output should look like this:

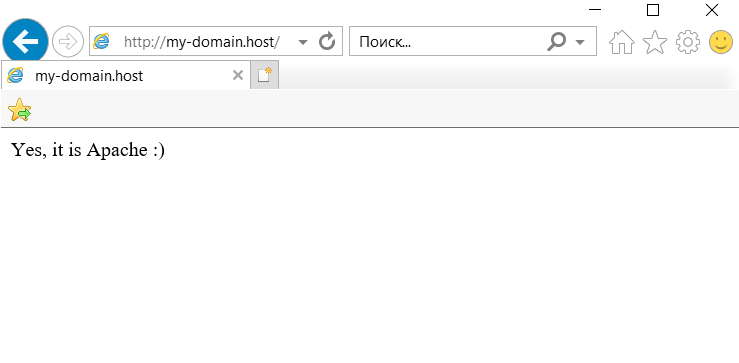
Go to the /web/sites/my-domain.host/www/ directory and create a virtual host file for your domain there (replacing my-domain.host with your own):
And now, when you type the name of your site in the browser, the server will return you a similar page:
Step 4 Installing PHP on CentOS Stream
Install PHP with the most commonly used modules, on CentOS Stream the Apache web server by default uses PHP-FPM instead of mod_php to execute PHP code, so in the command below we will also install php-fpm:
dnf install php php-fpm php-mysqlnd php-opcache php-gd php-xml php-mbstring -y
After installation, we need to run and add php-fpm to autorun:
systemctl start php-fpm
systemctl enable php-fpm
PHP-FPM also sets Apache’s php.conf configuration to the /etc/httpd/conf.d/ server directory, so you need to restart Apache to be able to execute PHP code.
Install MySQL
The third layer of the LAMP stack is MySQL or MariaDB. Both are open-source database management systems used for storing and managing data on your website.
In this example, the tutorial includes a MySQL installation. Alternatively, you can install MariaDB.
1. Start by adding the MySQL repository:
rpm -ivh https://dev.mysql.com/get/mysql80-community-release-el8-1.noarch.rpm
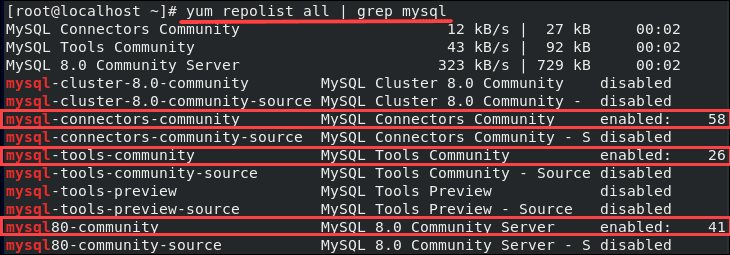
2. Check the repository by typing:
The output should display a list of the different MySQL options available.
3. Now, install MySQL:
sudo yum —disablerepo=AppStream install -y mysql-community-server
4. Then, enable the MySQL service and set it to start on boot:
sudo systemctl start mysqld
sudo systemctl enable mysqld
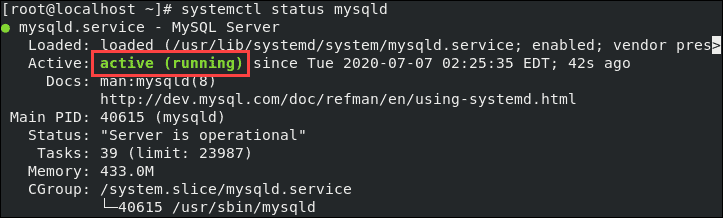
5. Check whether the service is running properly with the command:
sudo systemctl status mysql
The output should display the service is active (running).
Install PHP and Supporting Modules
sudo yum -y install php php-pdo php-pecl-zip php-json php-common php-fpm php-mbstring php-cli php-mysqlnd wget upzip
Then, enable the PHP module to work with Apache by restarting the webserver:
sudo systemctl restart httpd.service
Conclusions
In this tutorial, we have seen how to install the popular LAMP stack on CentOS Stream, which is suitable for developing and testing PHP applications. For productive environments, nginx is usually added, because. nginx and apache have a key difference in how they process requests. Where there are at least such requests (server for development), one Apache is enough, where the number of connections will be significant (server on the Internet) — it is advisable to additionally install nginx as a reverse proxy.
Conclusion
Having completed the above steps, you have deployed a universal and affordable tool for hosting and developing web resources on your VPS. Now that you know how to install the LAMP software suite on CentOS Stream, you can proceed directly to setting up your site.
