

As previously mentioned, example.com, example.net and example.org were officially reserved by the IETF for documentation purposes. Additionally, ICANN has also reserved example.edu.
Some ccTLDs and newer gTLDs have equivalent example domains reserved. Most probably, all gTLDs managed by ICANN have the same restrictions regarding reserved names. Further below, I’ve listed a few that I’ve been able to confirm as reserved.
On some occasions, I need an example domain name longer than 8 characters (excluding the TLD itself) and it doesn’t matter that it isn’t valid — I just want it to not resolve. Therefore using an underscore in the domain name is an acceptable solution in those cases (e.g. example_domain.com or your_domain.com).
Another alternative TLD, although not officially reserved, would be .tld (!). I’ve looked at ICANN’s new gTLD current application status list and .tld doesn’t show up. So any domain could be used under this TLD (e.g. example.tld or yourdomain.tld). I would however recommend using it with caution, as the fact that it’s not currently assigned doesn’t mean no one will ever apply for it. As a side note, be aware that both Amazon EU and Charleston Road Registry have applied for .dev.
Reserved generic example TLDs (not including the latest expansion):
Reserved country code example TLDs (not a complete list):
- RFC 2606
- RFC 608
Время на прочтение

Казалось бы, что развёртывание приложений на Next.js не влечёт за собой трудностей — установил зависимости, сделал «npm run build && npm run start» и проксируешь запросы на 3000-ый порт, но для оптимальной работы предстоит сделать кое-что ещё.
В данной статье мы рассмотрим как правильно сконфигурировать веб-сервер для Next.js приложения на примере Nginx.
Минимальная конфигурация выглядит так (для упрощения обойдёмся без https):
С этим конфигом вы действительно сможете увидеть на «example.com» свой сайт на Next.js, но есть загвоздка. Next позволяет нам генерировать статичные файлы — css, js, html и даже медиа файлы. В примере выше Node.js будет обрабатывать всю эту статику самостоятельно, но зачем нам это, когда у нас есть Nginx, которому нет равных в обработке статики? Нужно отдать эту задачу ему.
После «npm run build» наш фреймворк сгенерирует директорию «.next», в которой помимо всего прочего будут нужные нам статичные файлы.
- Страницы
- CSS, JS и медиа
- Public
- Сравнение
- Заключение
- Настраиваем домашний почтовый сервер и уходим с «бесплатной» почты
- Home server
- Communication, electricity, backups
- Symbols
- Rent a VPS, set up a VPN server
- Domain registration, DNS setup
- Create a virtual machine
- System installation and initial configuration
- VPN connection setup
- Mail server setup
- Generate certificates, complete setup
- Install Rainloop webmail
- PhpPgAdmin
- A-record
- MX records.
- PTR record.
- TXT record and SPF.
Страницы
Начнём со статичных страниц. Они будут расположены в «.next/server/pages». Пути к ним будут такими же как и в файловой структуре вашего проекта.
CSS, JS и медиа
С html страницами мы разобрались, теперь пришло время стилей, JavaScript и медиа. Всё это находится в «.next/static» и нам нужно будет просто искать файлы, запрашиваемые в «example.com/_next/static», в этой директории.
Теперь наш веб-сервер обрабатывает все файлы, которые размещены в «.next/static», и они даже кэшируются браузером клиента на 1 год.
Для удобства в отдельную переменную был выделен путь к root директории, она нам понадобится и дальше, ведь это ещё не всё.
Public
Большая часть работы сделана — страницы, css, JavaScript и меди файлы обрабатываются Nginx’ом, но у нас скорее всего остались файлы в «./public», которые Next.js не сгенерировал, например, «favicon», «manifest» и т.д. Исправим это.
Сравнение
Изначально наш конфиг был таким:
И в итоге превратился в такой:
Заключение
Настройка Nginx для Next.js приложения оказалась не такой уж и сложной. Мы отделили обработку динамических данных от статичных, облегчив работу Ноде, и даже смогли уменьшить количество запросов к серверу за счёт кэширования в браузере.
При небольших нагрузках вряд ли это даст ощутимый прирост в производительности, но с ростом числа пользователей эффект будет всё более заметным.
Настраиваем домашний почтовый сервер и уходим с «бесплатной» почты
Мы уже привыкли, что наша активность в интернете анализируется для подсовывания релевантной рекламы. Но там нет персональных данных в чистом виде: есть пользователь-1 с такими-то привычками, есть пользователь-2 с другими привычками, пользователь-3, 4, 5 и т.д.
Совсем другое дело почта. Обработка почты ‒ это зачастую обработка персональных данных. Все что вы покупаете ‒ квитанции приходят к вам на почту, какими сервисами вы пользуетесь ‒ регистрационные данные и отчеты приходят к вам на почту, купили билеты в отпуск ‒ все данные о вашей поездке у вас в почте. Where is your mail?
But it’s not so easy to refuse:
Home server
Obviously, for the mail server we need a computer or its equivalent, which will be available from the outside 24/7. One could look in the direction of something compact and low-power like the Raspberry Pi, but since. I need a backlog for the future for other home systems, then I preferred a full-fledged computer. The VMWare ESXi hypervisor is installed on the computer, and virtual machines with the necessary functions, including the mail server, already live on it. This approach provides additional flexibility when conducting experiments and allocating resources, and in which case virtual machines can be easily transferred to other hardware. If there are no special requirements for the speed of work, then for a computer you can take a regular HDD, because. from virtual machine swap partitions, a used SSD can quickly degrade. Or make virtual machines without swap. Or install two disks: the main disk of the virtual machine lives on the SSD, and the swap partition on the HDD. The computer I chose was an HP ProDesk 600 G2 SFF with an i5-6500 processor: a compact case, fairly low power consumption, and ESXi is installed on it as native. All this economy in idle mode consumes 25 watts, under load 40-45 watts. In private ads, such a computer is quite realistic to find for sane money.
ESXi is installed with all default settings, then a static IP is assigned to the network interface. For more details and pictures see here.
Communication, electricity, backups
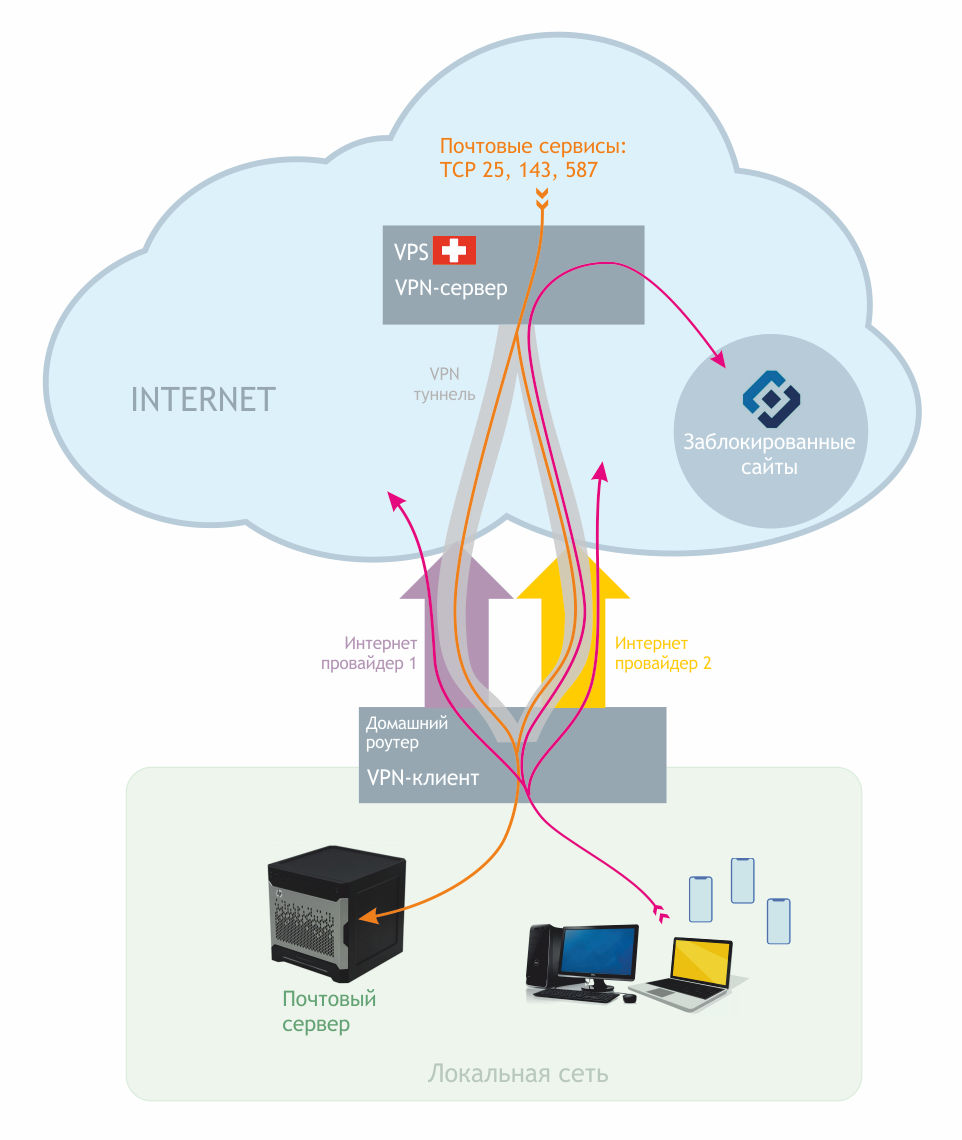
At home, unlike the data center, power outages are possible, so you need a UPS with a battery for several hours of server and router operation. The operation of the home provider’s equipment depends on the same electricity, so a UPS for a home server does not solve the problem of turning off provider equipment and the Internet along with electricity. It turns out that two providers should be connected to the home router: the main one (for example, via twisted pair or optics) and the backup one (via an LTE modem). In different routers, the setup process looks different, but the essence does not change. For a backup Internet channel, I took a Huawei E3372-320 LTE modem. The whistle is good because it is freely available in an unlocked form and it is equipped with connectors for external antennas, which in some situations can greatly improve the quality of communication.
However, with two providers you will have two different gray IP addresses, and the mail server needs a normal domain name and a good white IP. My way out of the situation is this: a virtual server (VPS) is rented abroad, a VPN server is configured on it, and a tunnel to the VPS is configured on the mail server. In addition, the tunnel can be lifted directly from the home router (if it can) and thus two birds with one stone are eliminated at once: we get a static white IP that does not depend on local providers, and after tuning the routing on the router, a centralized bypass of Roskompozor blocking for all devices on the home network . The scheme turns out something like this:
It won’t be much fun if the home server’s hard drive suddenly crashes along with all the mail. Therefore, the need for server backups is not even discussed. We’ll talk about setting up backups at the end of the article.
Symbols
The article will contain configuration examples in which you will need to replace some values with your own:
Rent a VPS, set up a VPN server
There are a lot of different VPS providers, I chose vps2day.com because they do not ask for personal data when registering, you can pay with crypto, you can choose the country where the server is located. For VPN purposes, a VPS in the basic configuration will suffice, which will cost 5 € / month. First, I registered a mailbox on protonmail, and then I created an account on vps2day on it, threw in the crypt and rented a VPS. I chose Debian 10 as the OS, a few minutes after the lease is issued, a chipper arrives in the mail with the server IP address and credentials for the SSH connection.
apt update && apt upgrade
I chose Wireguard as my VPN solution, but to install on Debian 10 you need to add its repository to apt:
Create a directory for configuration files (if it suddenly doesn’t exist), assign access rights there, go to it and generate private and public keys:
At the output we get two files: privatekey with a private key and publickey with a public key. Create a configuration file /etc/wireguard/wg0.conf like:
A little later we will add to this file, but for now let’s move on.
Domain registration, DNS setup
In the DNS zone editor, you need to add an «A» record with the name mail and indicating the external IP of our mail server, which will be the rented VPS:

«MX» record with priority 10 pointing to mail.example.com:

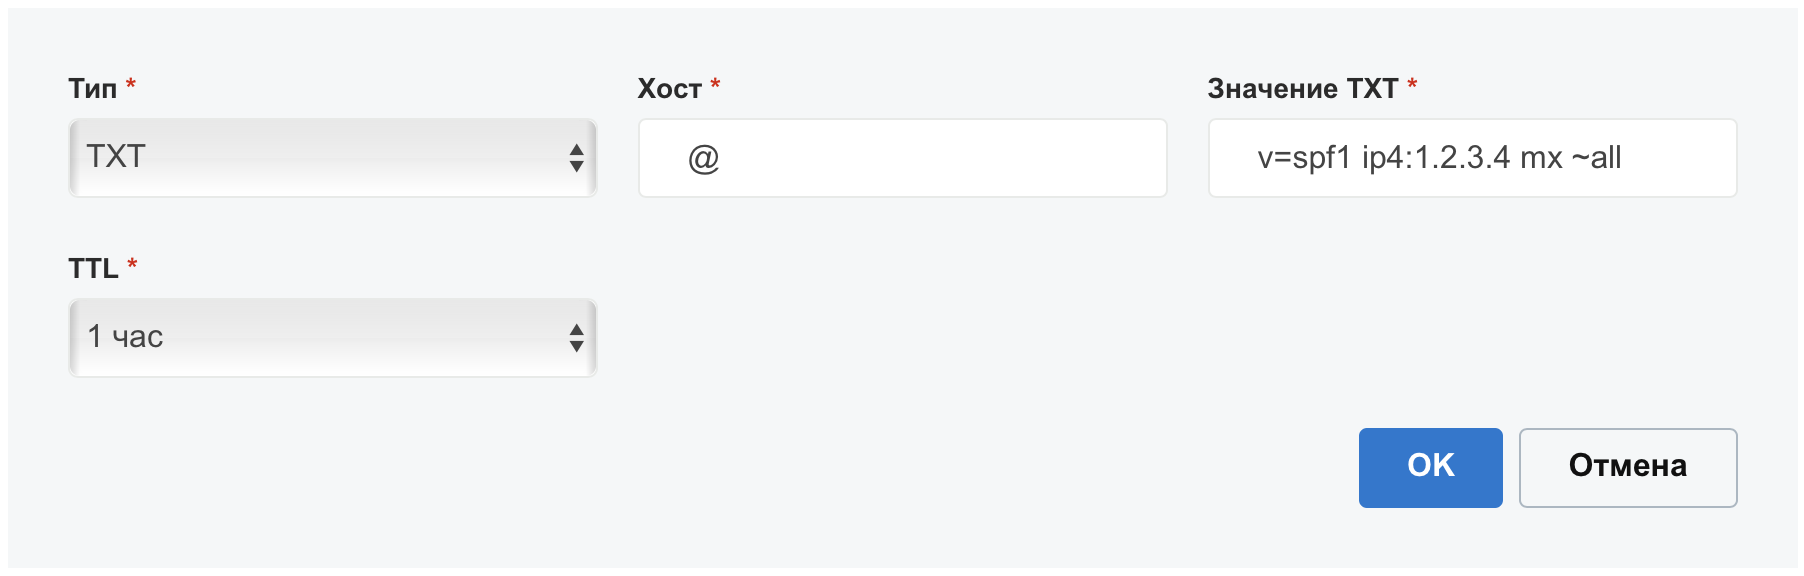
Write «TXT» with SPF v=spf1 ip4:1.2.3.4 mx ~all :
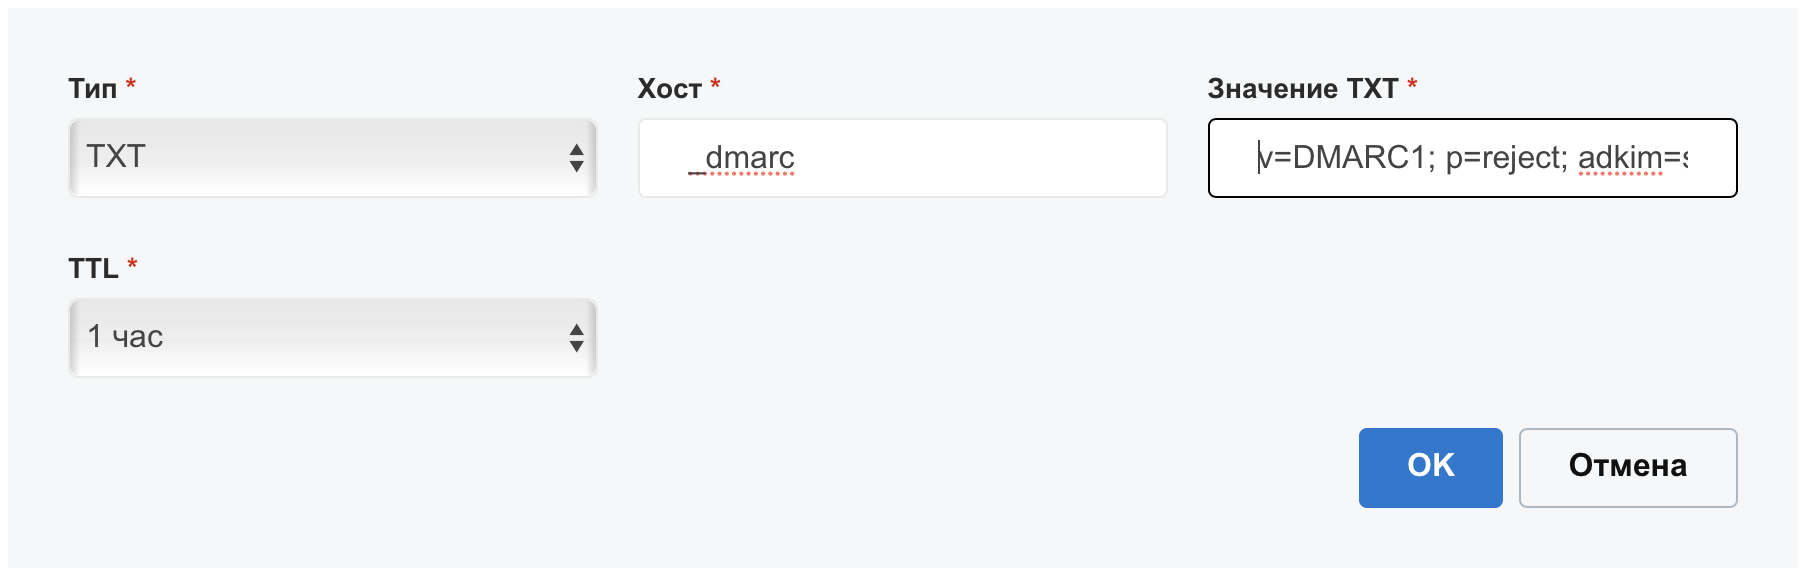
Write «TXT» DMARC v=DMARC1; p=reject; adkim=s; aspf=s; pct=100; :
Create a virtual machine
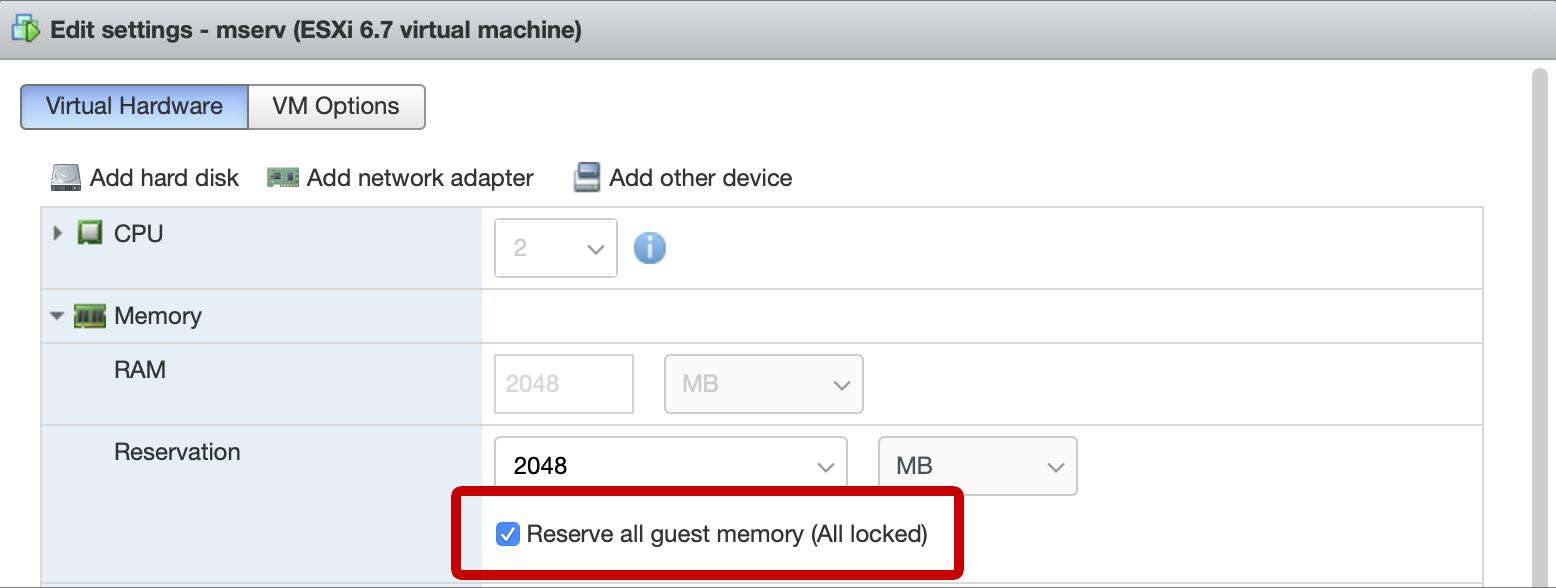
Create a virtual machine (VM) on ESXi. We will encrypt the mail server disk, so you need to take into account one nuance. By default, the hypervisor creates a swap file equal to the size of the virtual machine’s RAM in the VM directory. Thus, there is a possibility that the disk encryption key stored in the VM memory during operation will end up in the swap file on the hypervisor, which is not great at all. To prevent this from happening, in the settings of the virtual machine, you need to reserve all the RAM allocated for the VM, then the swap file will be of zero length.
System installation and initial configuration
In the guest OS, it is quite possible to abandon the swap partition, especially if you assign a sufficient amount of RAM to the VM, and the hypervisor’s datastore is on the SSD. I took Debian 10, the installation process is completely standard except for disk partitioning. The server name is set to mail, the domain is example.com. The system is installed in the minimum configuration. In the disk layout, I made the first partition under /boot and the second partition with encryption:

I set a static address if it was not done during installation. To do this, edit the file /etc/network/interfaces. Please note that your server’s network adapter may be called differently, in my example ens192. The section of the file with the network adapter settings should look like this:
allow-hotplug ens192
iface ens192 inet static
address 192.168.1.3/24
gateway 192.168.1.1
To apply the changes, execute the command (do not forget to replace the name of the network interface with your own):
ifdown ens192 && ifup ens192
In order not to delve into setting up home routers, we will make a VPN tunnel immediately from the mail server to the VPS and wrap all traffic there. Therefore, it makes sense to change the DNS servers to public ones. To do this, edit the file /etc/resolv.conf, the final form of which will look like:
nameserver 1.1.1.1
nameserver 1.0.0.1
I also disable IPv6, for this I add the line to the end of the /etc/sysctl.conf file:
net.ipv6.conf.all.disable_ipv6 = 1
To apply the parameter, execute the command:
Checking if IPv6 has gone down is pretty easy. To do this, you need to view the output of the following command for the presence of ipv6 addresses:
Install ssh and wget:
apt install ssh wget
service ssh restart
Connect to the server via ssh and move on.
VPN connection setup
Install wireguard on the mail server in the same way as we did on the VPS a few steps above:
Create a configuration file /etc/wireguard/wg0.conf with the following content:
Now we go via SSH to the VPS server and add to the configuration file /etc/wireguard/wg0.conf:
On the VPS server, add the line net.ipv4.ip_forward = 1 to the /etc/sysctl.conf file to enable traffic forwarding, and to apply this setting without rebooting, issue the command sysctl -w net.ipv4.ip_forward = 1
Create a small firewall script on the VPS that will run every time the network adapter is turned on. We create the file /etc/network/if-up.d/firewall, the contents of the file are hidden under the spoiler.
Don’t forget to make the file executable with chmod +x /etc/network/if-up.d/firewall
Run wireguard on the VPS server:
Return to the mail server and run wireguard there:
The connection status can be viewed using the wg show command. If at least some data went in both directions, then everything is OK and you can move on:

Mail server setup
In order not to smoke configs, and the result was predictable — I made a script that automates 90% of the entire process from the above guide with some differences:
The script installs the necessary packages, configures apache, database, configures mail services, and the output is a mail server almost ready for use. At the same time, I have not yet begun to include the generation of SSL and DKIM in the script, we will do it with our hands a little lower.
The script has not yet been tested for correct operation when run multiple times. If your mail server is deployed as a virtual machine, then it is better to take a snapshot of the VM before execution.
Download and unpack the script:
wget https://github.com/alexmdv/mailserver-autosetup/archive/main.zip
unzip main.zip
chmod +x -R ./mailserver-autosetup-main
cd ./mailserver-autosetup-main
There are 3 files in the catalog:
Generate certificates, complete setup
Generate an SSL certificate with the command. Don’t forget to replace example.com with your domain:
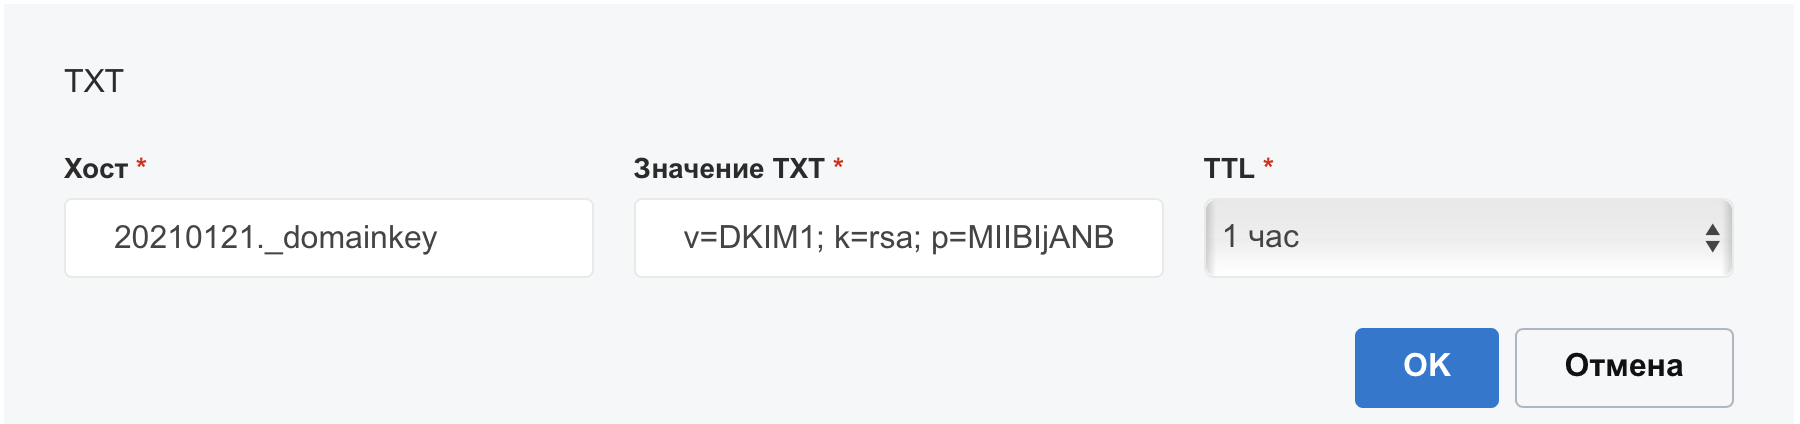
Generate DKIM. In the command below, example.com is your domain, and instead of 20210121, you can take the current date (yyyymmdd):
The result of the command execution will be the following text:
20210121._domainkey IN TXT ( «v=DKIM1; k=rsa; »
«p=MIIBIjANBgkqhkiG9w0BAQEFAAOCAQ8AMIIBCgKCAQEAumOhUcY3anZV4tGF1+VsYDD9bTZ0rqiFCm8FPdDHVB0U+ZPfZ2Cxf+x+jIFYXfO/jWEoAw2uYFz3Mt1ImvRQzU9oMx0t/0HtMKS4m 3AhOBM5SkkhvoAaJkoIt3gTQ4KQyiBsZemihAw6V/gsex8K6M76m4WkbT92+tg192EGXBUDo0k7kk1rDOld0G9X2P0IxkVfqKqfwg+fI+0Im»
«AOFC1gBCIm18XPEGZA2oOoNbkWO95bD8Rj20yv8639bMA27+B08v4/aPXQb9HZLEwpsz8Qa/WgEZFGJzd6kUaYWHTfMmbgBXnET5N+tjXGvkjtnLbx25ru/PZTeckGjE/komQIDAQAB »
) ;
There is a nuance here. By default, the length of a TXT record can be up to 255 characters. Since we generated a 2048 bit DKIM key, its length is beyond this limit, and if you look closely at the key generation result, the p parameter is split into two, each of which is in its own double quotes. If the registrar supports TXT records of greater length, then the two parts can simply be collapsed by removing the quotes. GoDaddy, for example, has a maximum TXT record length of 1024 characters. And if the registrar does not support more than 255 characters, then the key is written in two TXT records. Or you can generate a shorter key of 1024 bits.
The last thing to do is fix the /etc/postfix/master.cf file. You need to uncomment the line:
#submission inet n — — — — smtpd
And 4 nested parameters starting with «-o». The double space before them must be kept. The last parameter may just need to be added. Just in case, a ready-to-use master.cf file is attached in the archive with the script. It should look like this:
submission inet n — — — — smtpd
-o syslog_name=postfix/submission
-o smtpd_tls_security_level=encrypt
-o smtpd_client_restrictions=permit_sasl_authenticated,reject
-o cleanup_service_name=header_cleanup
To check the correctness of DKIM and SPF settings, you can use the resource https://dkimvalidator.com by sending a test email there and looking at the report. All checks must be in the pass status.
Install Rainloop webmail
All necessary php modules for Rainloop have already been installed by the script. Download the current version of the project, unpack it, set permissions, enable vhost on the web server:
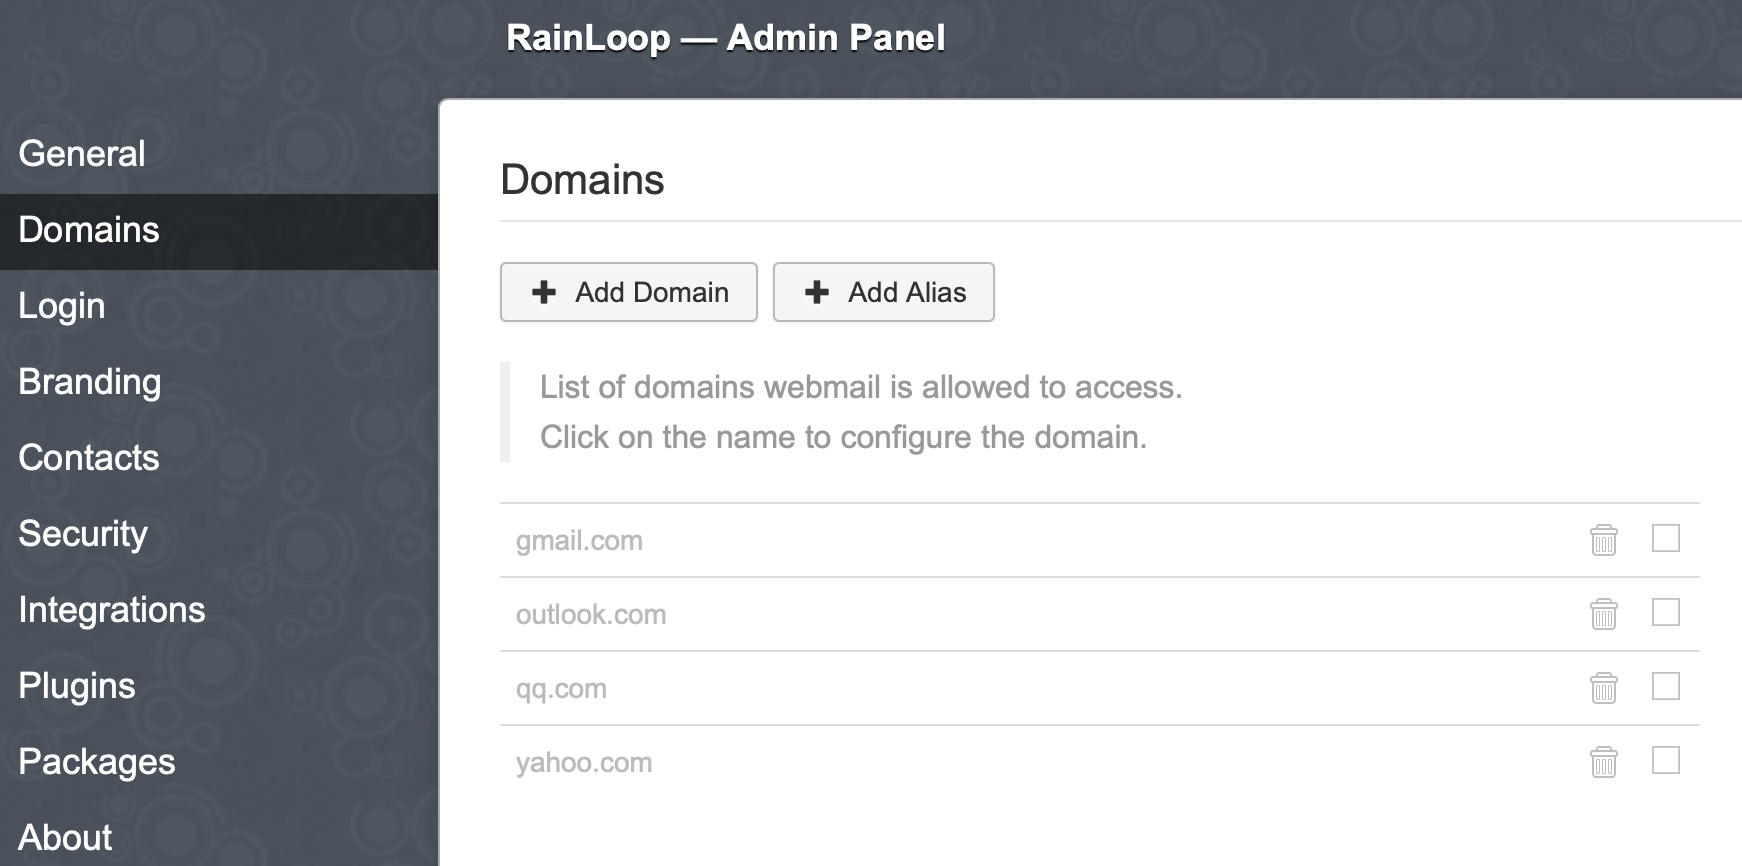
Next, add our mail server. Go to the Domains section, disable all other mail servers and click on the Add Domain button:
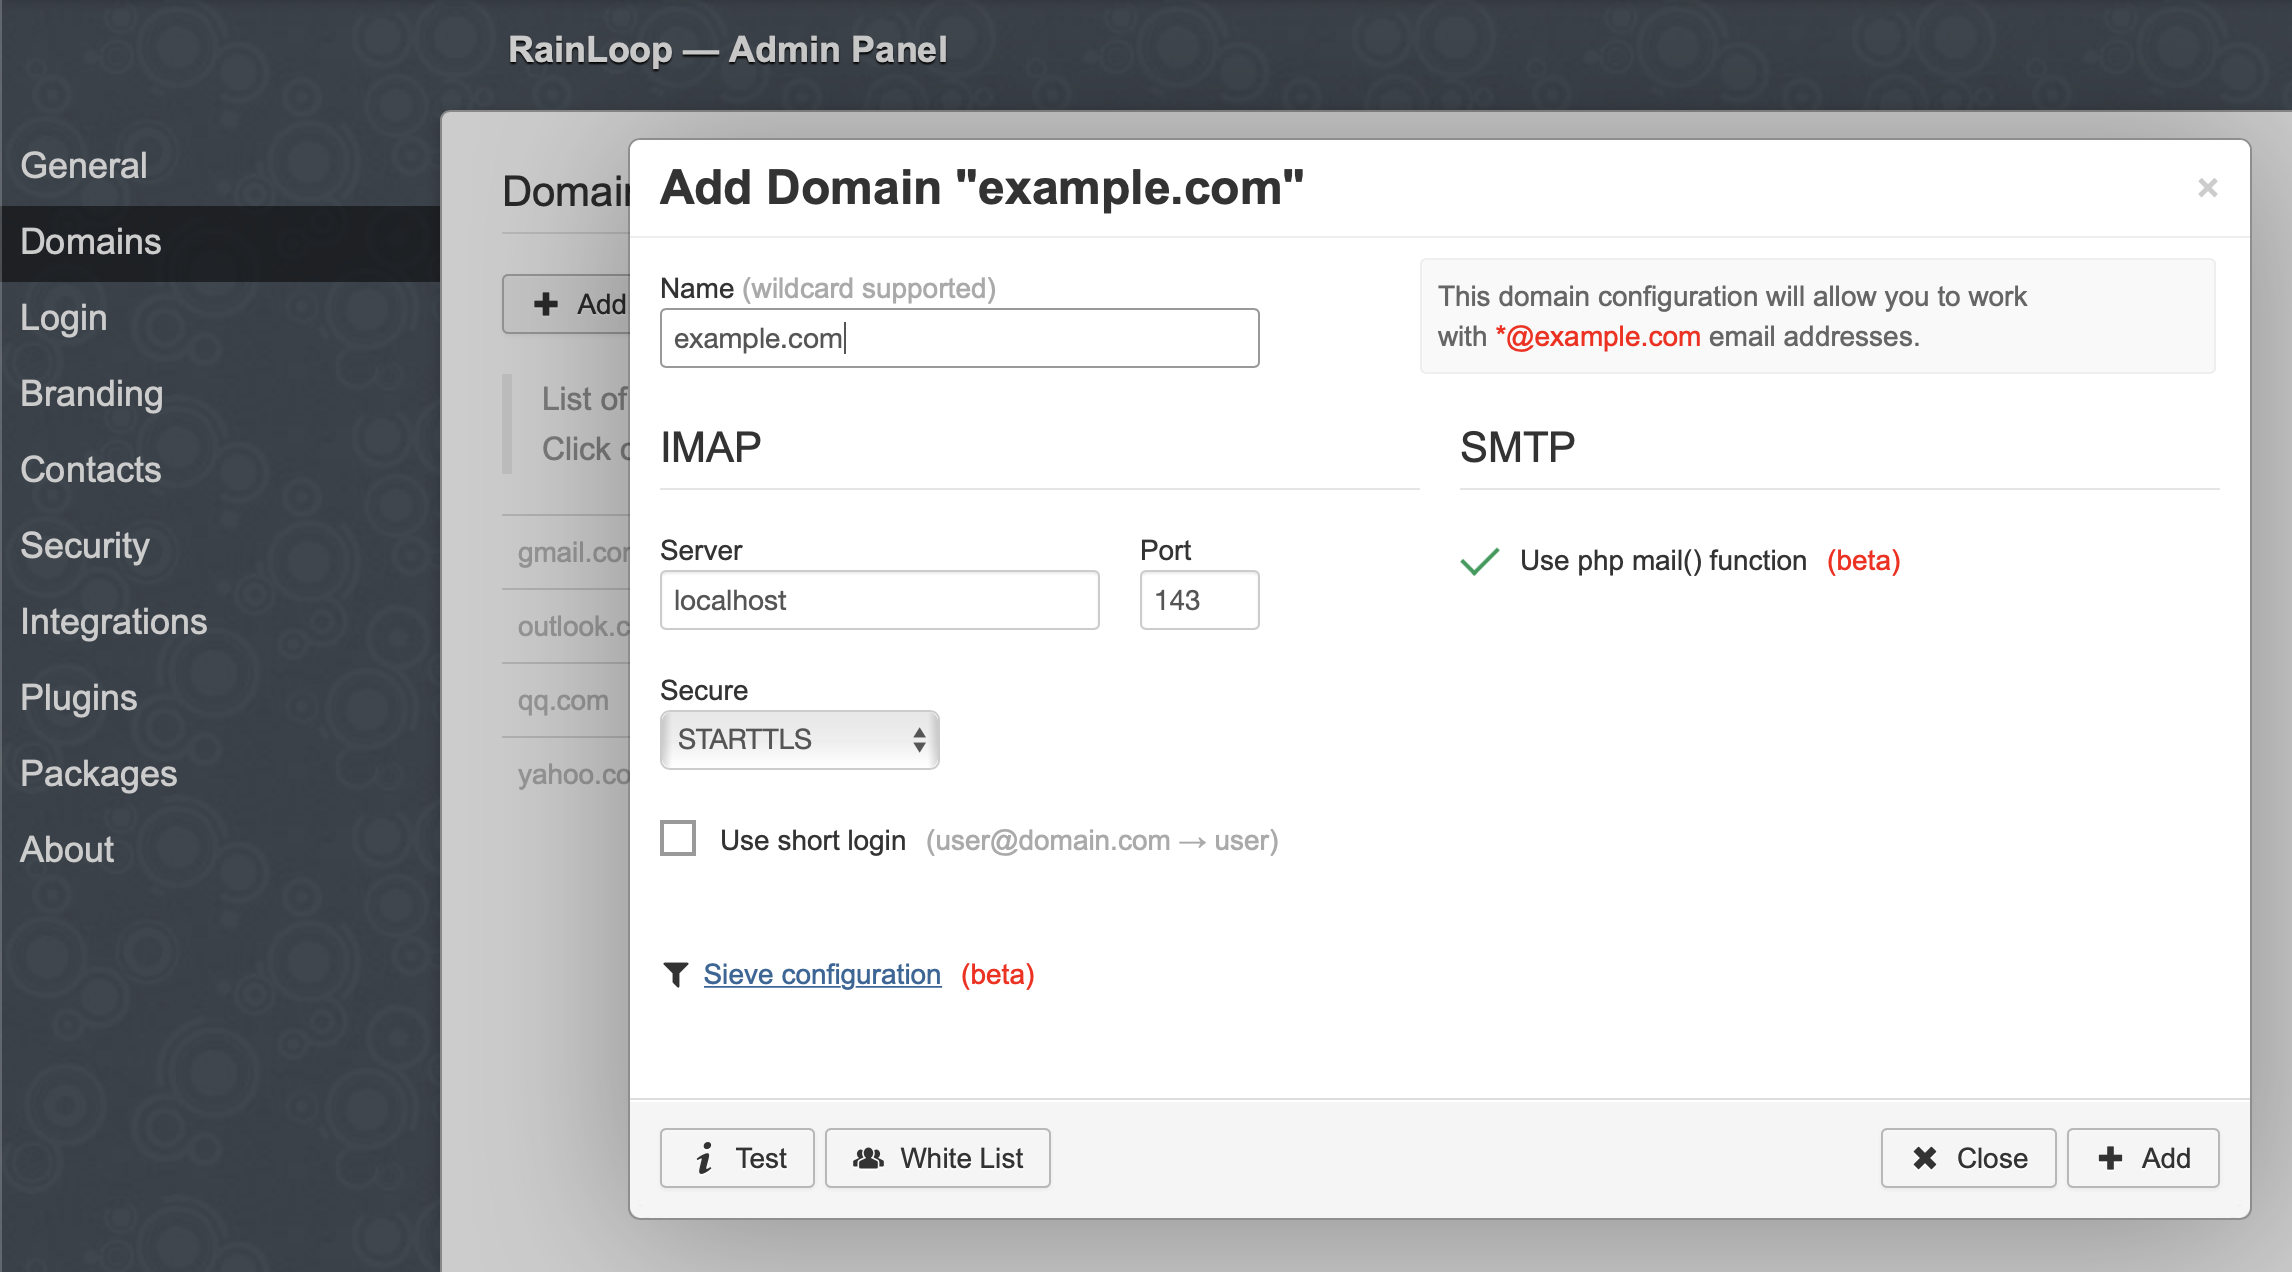
Enter the parameters of our domain and click Add:
Additionally, you can also specify a domain in the Login tab:
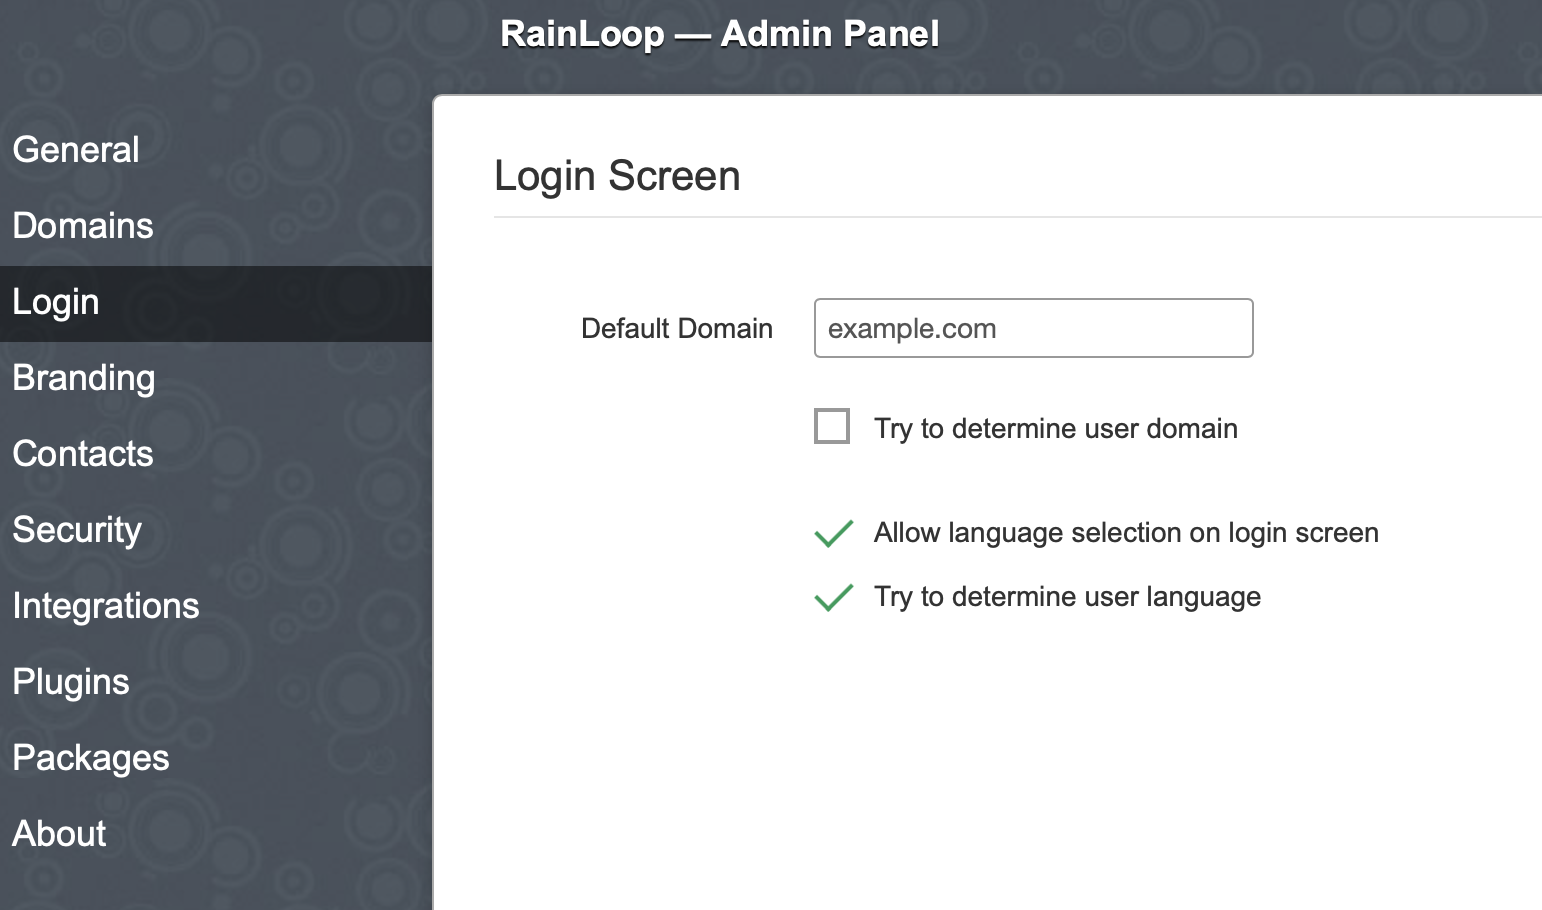
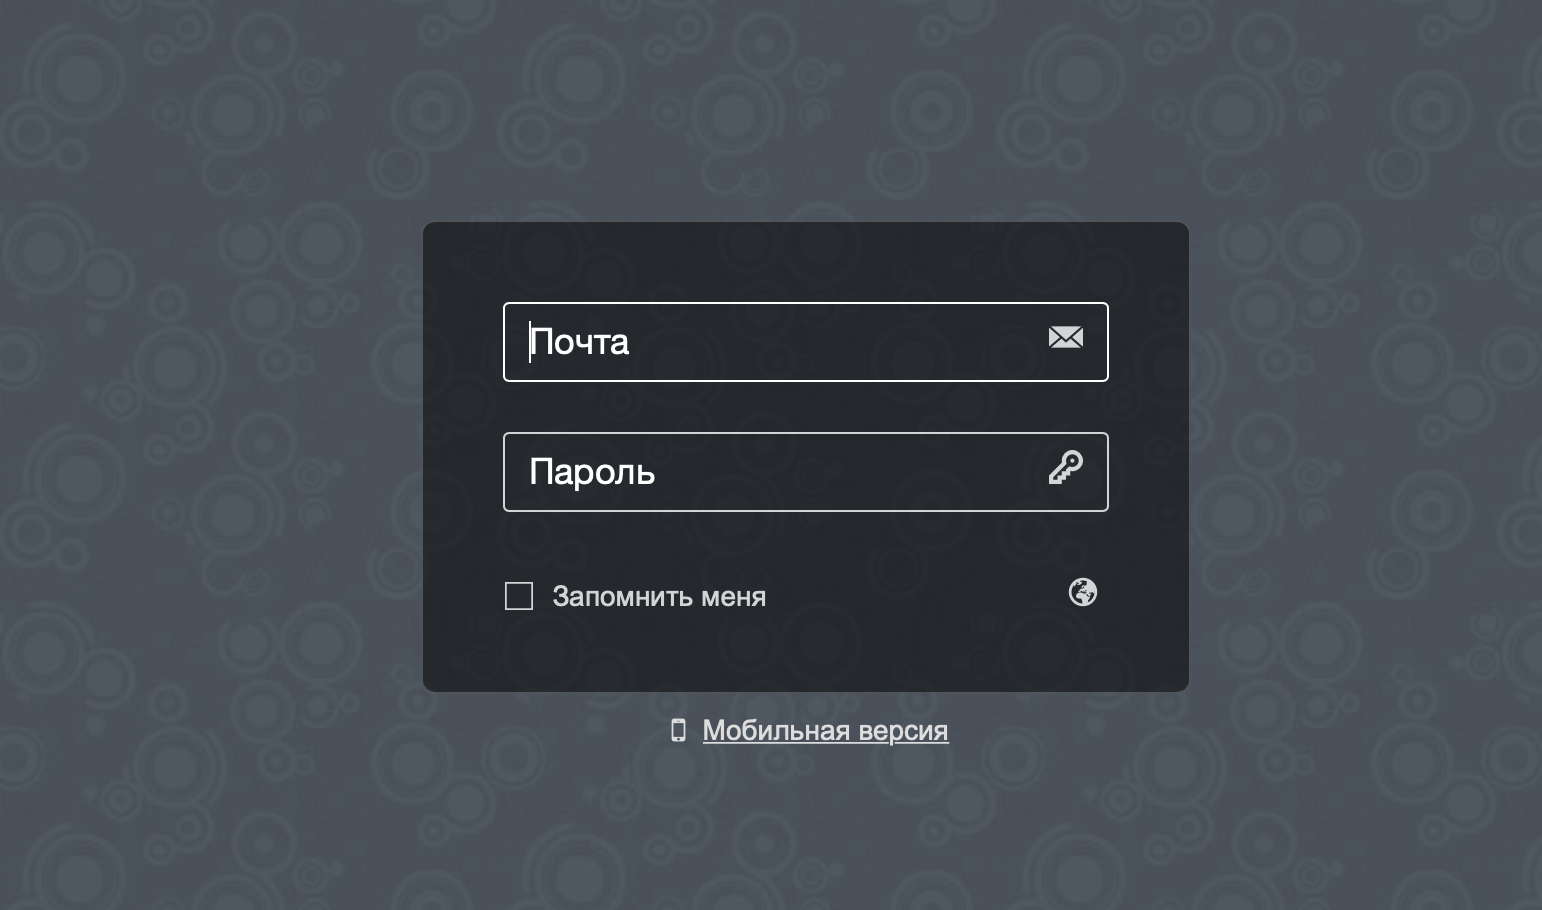
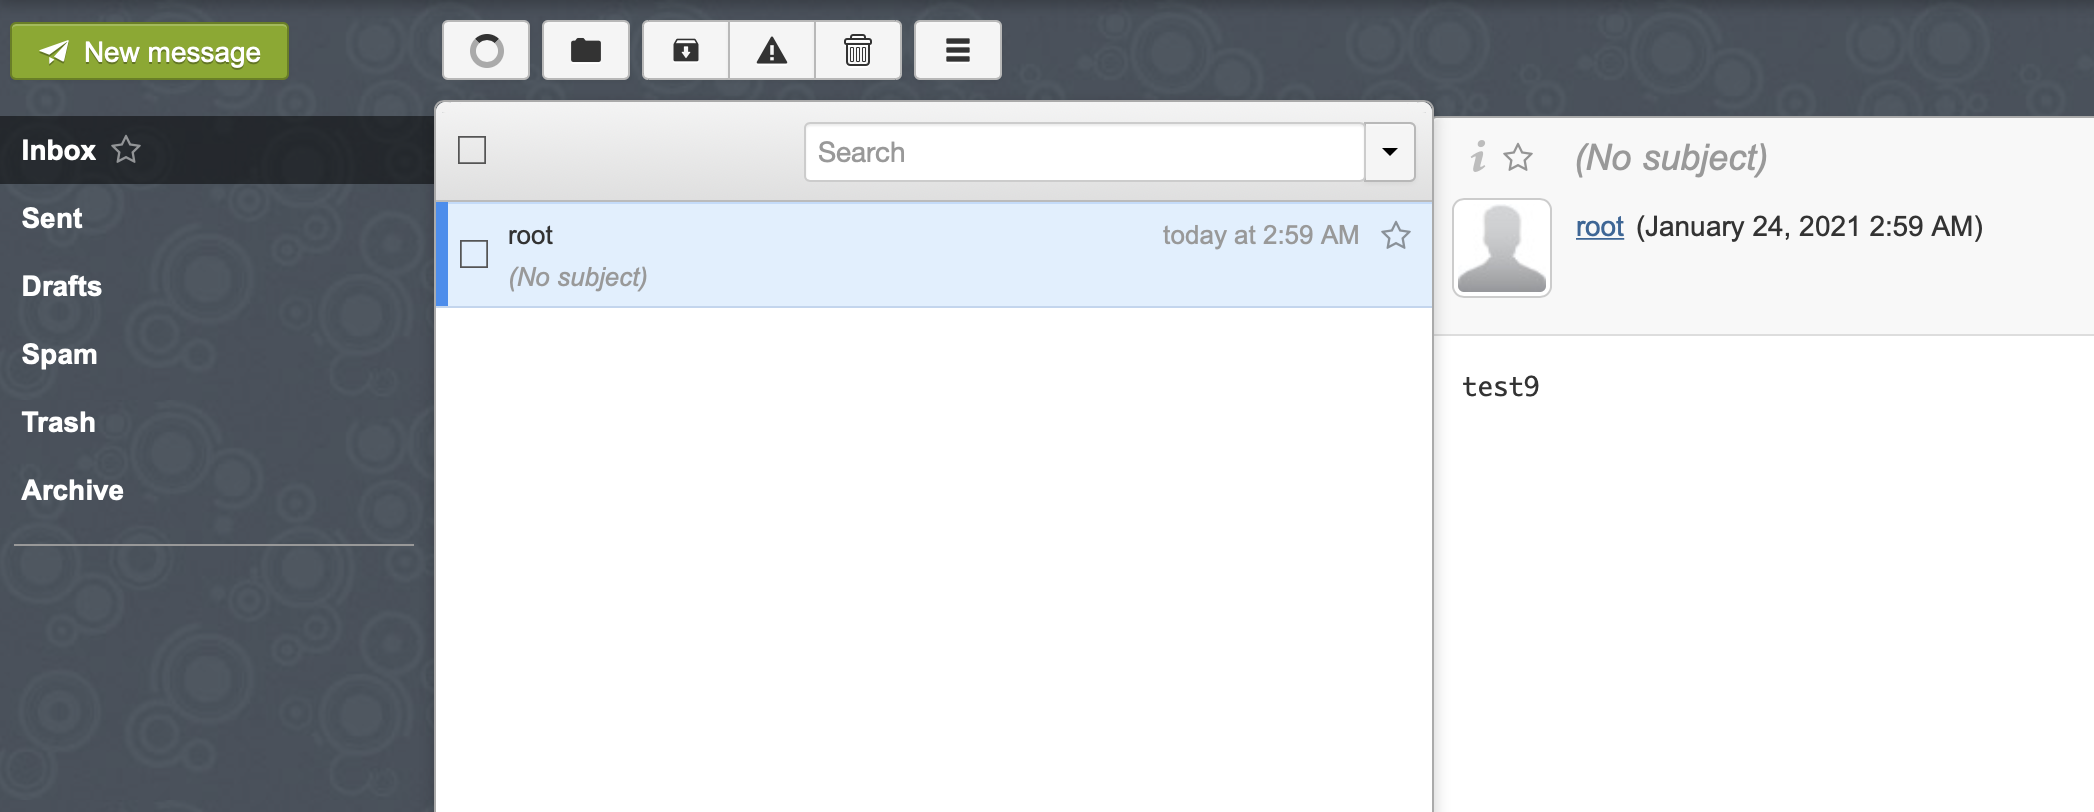
The interface looks concise, works quickly, it is possible to customize the appearance for yourself.
As a small Apache security tweak, let’s add a couple of lines to the /etc/apache2/apache2.conf file. This will hide the webserver version data:
ServerSignature Off
ServerTokens Prod
To apply the changes, reload Apache with the service apache2 reload command.
PhpPgAdmin
a2dissite lanhost
service apache2 reload
Since I made the mail server for myself and a very limited circle of people, the server does not need much space, the capacity of the entire disk is 20 GB. The backup scheme is as follows: the entire mail server virtual machine is backed up once, so that in case something happens, the server is not reconfigured. And outside, a backup of the mail directory is made. Naturally, we encrypt all backups. For catalog copies, a VPS is perfect, which has as much as 25 GB of space, I will backup using restic. But first you need to configure an ssh connection to the VPS using a certificate.
Generate an RSA key on the mail server, just press Enter to answer all the wizard’s questions:
ssh-keygen -t rsa -b 4096
Copy the public key to the VPS:
apt install restic
Create a repository (copies will be stored on the VPS in the /mnt/mserv-bkp directory):
restic -r sftp:192.168.77.1:/mnt/mserv-bkp init
The command may take several minutes to complete, at the end you will be asked to come up with a password to encrypt the repository. To automate the process of creating backups, let’s create a file with variables /root/.restic with the following content:
export RESTIC_REPOSITORY=»sftp:192.168.77.1:/mnt/mserv-bkp»
export RESTIC_PASSWORD=»Password created in last step»
Let’s try to back up the mail directory:
restic backup /var/vmail
Check that something has appeared in the repository:
If we have our newly created snapshot, then we move on. Create file /etc/root/restic with content:
#!/bin/bash
source /root/.restic
restic backup /var/vmail
Making it executable:
chmod +x /root/restic
And add to /etc/crontab to run once a day:
0 1 * * * root /root/restic
As you can see, owning your own mail server costs some money. The price consists of paying for domain registration, renting a VPS, paying for a second home provider, and eventually electricity. In my case, it turns out around 950 ₽ per month for everything. On the other hand, a backup Internet channel and VPN will be useful for the entire home network, but we will talk about this next time.
Original article in my blog.
I think it will be interesting for many to finally find out how mail works. In several articles, I will try to describe in the simplest possible language all the main issues related to the operation of e-mail in general and the necessary settings in particular.
For simplicity and to reduce the number of letters, we will consider the simplest (and most common) situation:
Regarding mail, we are interested in four types of records in DNS.
A-record
mail IN A 127.127.127.127
— record type.
— IP of our mail server.
MX records.
MX (Mail eXchange) is the main DNS record for email. It specifies which servers handle mail for our domain.
We have one email domain — example.com. And one mail server — mail.example.com. Accordingly, the record will look like this:
example.com. I N MX 10 mail.example.com
— domain for which mail is processed.
— recording priority (More details below).
— A-name of the mail server.
The MX-record must point exactly to the A-record of the mail server. Putting MX as a pointer to IP or CNAME is not correct.
MX record priority is needed when there is more than one mail server for one domain (for example, Google Mail has six of them). It indicates which server is being contacted first, second, and so on (if the first (second, tenth) server is unavailable or overloaded, or cannot accept the letter for other reasons). The logic is simple — the one whose number is smaller is given priority. The order of numbers is not limited, at least 10-20-30, at least 1000-2000-3000.
If the domain does not have any MX records, or none of the MX servers is available, the sender’s server will try to deliver mail to the IP specified in the domain’s A record. This is called A-delivery, but in principle it is not kosher and is not used by many servers — you need to specify MX, even if there is only one.
PTR record.
Our reverse IP will look like this: 127.127.127.127.in-addr.arpa. In this example, it is poorly visible, but the address is inverted in the reverse zone. Those. I P 192.168.0.1 will look like 1.0.168.192.in-addr.arpa.
PTR record in our case, respectively:
127.127.127.127.in-addr.arpa IN PTR mail.example.com.
TXT record and SPF.
TXT (TeXT) — DNS text record. We are interested in it only because it can (and in the modern world should) contain SPF.
SPF (Sender Policy Framework) — a record that allows you to specify which servers have the right to send mail on behalf of your domain (posing as your server or with a return address in your domain).
If this record does not exist, and someone tries to send an email (usually spam) with a return address in your domain, it will be rejected by most servers. Or not, and you will get big problems with your data center or provider and a reputation as a spammer 🙂
The SPF record looks like this:
v=spf1 ip4:1.1.1.1 +a +mx -all (example).
— protocol version.
— permission or prohibition of sending mail from the IP corresponding to the A-record of the domain.
— allow or prohibit sending mail from the IP corresponding to the MX-record of the domain.
— an explicit indication of the IP from which mail can be received on behalf of the domain.
— Reject or accept mail from IPs not listed and not explicitly specified.
In our case, the TXT SPF record will be:
example.com. I N TXT «v=spf1 +mx +a -all»
Thus, we allowed receiving mail on behalf of a domain with IPs corresponding to A or MX records and prohibited receiving from other addresses — no one can spam pretending to be us or deceive our users by sending a phishing link on behalf of those. support.
I will be glad to comments, ready to answer questions.
In future articles I will write about SMTP, Greylisting and RBL.
You can also join a blog and also talk about something.
There is no law against (ab)using someone elses domain or IP address in examples, but it is a very bad idea. As some uses will use your example values verbatim.
For example, the IP address 1.2.3.4 have been used in examples. But that is live real IPv4 addresses that are used in 1/8 as valid global IPv4-prefix. There are already some concerns about this use of that address in examples.
RFC5737 is about IPv4 addresses used for examples, which are any address in networks 192.0.2.0/24 (TEST-NET-1), 198.51.100.0/24 (TEST-NET-2) and 203.0.113.0/24 (TEST-NET-3), like 192.0.2.10, 198.51.100.3 or 203.0.113.254. These don’t exist on the Internet.
RFC3849 is about IPv6 addresses used for examples, which are any address in 2001:db8::/32. These are also not used on the Internet.
The document describes the use of the IPv6
address prefix 2001:DB8::/32 as a reserved prefix for use in
documentation.
RFC2606 is about reserved TLD:s for different use. Those are «.test», «.example», «.invalid» and «localhost». Any domain under those can be used, like «a-host.example»
«test» is used for testing, «example» for documentation, «invalid» in configuration files that needs to be tweeked and «localhost» for 127/8 (mostly 127.0.0.1). There are also three reserved second level domains to be used for example domains (example.com, example.net and example.org).
To reduce the likelihood of conflict and confusion, a few top levels
domain names are reserved for use in private testing, as examples in
documentation, and the like. In addition, a few second level domains
names reserved for use as examples are documented.
This document describes address allocation for private internets. The
allocation permits full network layer connectivity among all hosts
inside an enterprise as well as among all public hosts of different
enterprises.
RFC3330 should be of interest as an overview of all special IPv4 networks.
