
В этом руководстве мы рассмотрим процедуру установки и настройки работы двух web-серверов с целью использования преимуществ каждого из них, руководство подразумевает как отдельное настраивание, так и взаимное.
В этой статье будет идти речь о настройке сервера с использованием: Apache2, Nginx, ngx_pagespeed, PHP, PHP-FPM, MariaDB и MemCached.
- Apache Reverse Proxy allows you to run one or more back-end servers behind a proxy server. Here’s how to configure Apache Reverse Proxy on Ubuntu/Debian system.
- Overview
- Step 1: Install Apache2
- Step 2: Configure Apache2 as Reverse Proxy
- Step 3: Enable Apache2 Proxy
- Step 4: Enable the SSL
- Step 5: Restart Apache2
- Conclusion:
- Explore
- Memcached
- Установка
- Настройка
- БалансерФлаги статуса члена
- PHP
- Workers
- Настройка сайта
- Создаем каталог для сайта
- Настройка сайта
- Nginx http
- apache2
- Проверяем
- https (Существующий Сертификат)
- Apache2
- Проверяем
- ngx_pagespeed on
- Загрузка динамического модуля PageSpeed
- Apache2 Real IP
- Установка
- Настройка
- Динамические проверки здоровья
- Failover
- Mysql (Mariadb)
- Установка
- Настройка
- Простое обратное проксирование
- Balancer Manager
- Ngx_pagespeed
- Установка
- Настройка
- Конфигурация Balancer и BalancerMember
- Nginx
- Установка
- Настройка
- Обратный прокси-гид
- Настройка пользователя
- Форвардные прокси и обратные прокси/шлюзы
- PHP-FPM
- Установка
- Настройка
- Basic Examples
- Кластеры и балансиры
- Доступ через обработчик
- Обратные прокси PHP-скрипты
- Apache2
- Установка
- Настройка
<span data-i18n="380d4e0124af27b5351df26ad38a8fb1d44798dd/8d" data-source="Do not enable proxying with ProxyRequests until you have secured your server. Open proxy servers are dangerous both to your network and to the Internet at large.» onmousemove=»i18n(this)»>Не включайте проксирование с помощью ProxyRequests , пока не защитите свой сервер . Открытые прокси-серверы опасны как для вашей сети, так и для Интернета в целом.
<span data-i18n="dc2201c11537c4a14a5b1c805d3a787e410389b3/91" data-source="mod_proxy and related modules implement a proxy/gateway for Apache HTTP Server, supporting a number of popular protocols as well as several different load balancing algorithms. Third-party modules can add support for additional protocols and load balancing algorithms.» onmousemove=»i18n(this)»>mod_proxy и связанные модули реализуют прокси / шлюз для Apache HTTP Server, поддерживая ряд популярных протоколов, а также несколько различных алгоритмов балансировки нагрузки. Сторонние модули могут добавлять поддержку дополнительных протоколов и алгоритмов распределения нагрузки.
<span data-i18n="03beaff21d09d9de6649c4840aa34bc04a8b4f2c/57" data-source="A set of modules must be loaded into the server to provide the necessary features. These modules can be included statically at build time or dynamically via the LoadModule directive). The set must include:» onmousemove=»i18n(this)»>Набор модулей должен быть загружен на сервер для обеспечения необходимых функций. Эти модули могут быть включены статически во время сборки или динамически через директиву LoadModule ). Набор должен включать в себя:
- <span data-i18n="0591f865c23aab93e0741cda5ae5d04b13353c62/93" data-source="
mod_proxy, which provides basic proxy capabilities» onmousemove=»i18n(this)»>mod_proxy, который предоставляет основные возможности прокси - <span data-i18n="edac92bf1705f1278ff8ce0371a053f1633e2977/83" data-source="
mod_proxy_balancerand one or more balancer modules if load balancing is required. (Seemod_proxy_balancerfor more information.)» onmousemove=»i18n(this)»>mod_proxy_balancerи один или несколько модулей балансировки, если требуется балансировка нагрузки. (См.mod_proxy_balancerдля получения дополнительной информации.) - одна или несколько прокси-схем,или протоколов,модулей:
<span data-i18n="8c075fe98352235e9375f7d35f3a63f68a62a042/39" data-source="In addition, extended features are provided by other modules. Caching is provided by mod_cache and related modules. The ability to contact remote servers using the SSL/TLS protocol is provided by the SSLProxy* directives of mod_ssl. These additional modules will need to be loaded and configured to take advantage of these features.» onmousemove=»i18n(this)»>Кроме того, расширенные функции предоставляются другими модулями. Кэширование обеспечивается mod_cache и связанными модулями. Возможность связываться с удаленными серверами с использованием протокола SSL / TLS обеспечивается директивами SSLProxy* mod_ssl . Эти дополнительные модули необходимо будет загрузить и настроить для использования этих функций.
Apache Reverse Proxy allows you to run one or more back-end servers behind a proxy server. Here’s how to configure Apache Reverse Proxy on Ubuntu/Debian system.
Overview
Apache Reverse Proxy allows all traffic and forwards it to run one or more backend servers or containers behind a proxy server, without exposing them publicly. The back-end web server can be either another Apache2 or open source HTTP server like Nginx. Apache2 HTTP server is one of the most popular open source web server that is being used today.
There are many reasons to install and configure a proxy server. For Example, reverse proxy can help you to add security, for load balancing, restrict access to certain locations in order to prevent attacks and many more. This article explains how to install and configure apache reverse proxy configuration step by step for HTTPS Server on Ubuntu/Debian:
- Installing Apache2
- Configure Apache2
- Enable its proxy modules
- Enable the SSL
- Restart Apache2
- Conclusion
Step 1: Install Apache2
Installing Apache2 is very simple and easy to run. To do Installations, run the below commands simply:
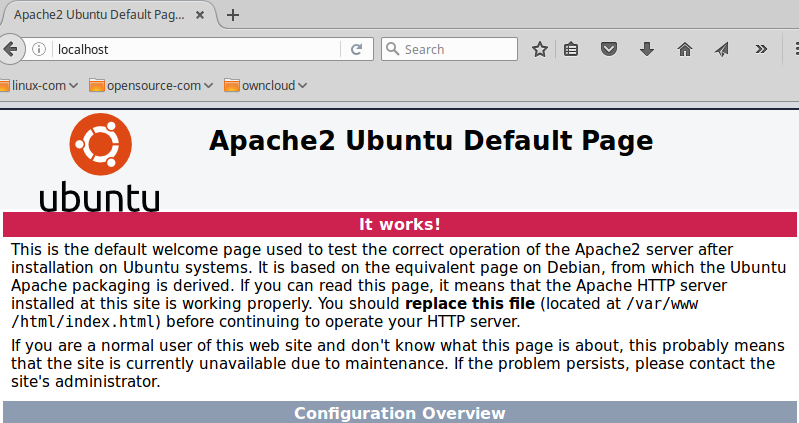
To check Apache2 setup, open your browser and browse to the server hostname or your system IP address and you should see Apache2 default test page as shown below. When you see that, then Apache2 is working as expected. http://localhost
Step 2: Configure Apache2 as Reverse Proxy
Apache2 is successfully installed and ready to use. You can now configure Apache2 to work as a apache2 reverse proxy ubuntu. Apache2 proxy module’s ProxyPass and ProxyPassReverse function provide a reverse proxy. To use ProxyPass and ProxyPassReverse, you must first know that where you want to direct site traffic.
The apache2 reverse proxy server will listen for all traffic on the default HTTP port, which is port 80 in a simple setup. The back-end server which host the website content will listen on a custom port and it is most likely port 8080.
In this blog article, we are going set up Apache2 to listen on port 80 and then direct traffic to the back-end server which listens on port 8080. Run below command to create a proxy VirtualHost file called Apache2Proxy.conf.
Apache2Proxy.conf file contains your server name as well as the proxy_pass where traffic will be directed when received by the http proxy server.
Step 3: Enable Apache2 Proxy
Apache2 web server is now installed and setup successfully. Apache has many available bundled modules bundled with in it. These modules are not enabled in fresh apache2 installation. First we’ll need to enable the modules we need to enable required apache mod_proxy module and several of its add-on modules to support different network protocols. Run the below listed commands to enable its http proxy modules.
Now enable the VirtualHost site and restart Apache2 to enable reload the Apache2 modules configuration.
Launch a web browser of your choice and navigate to your server hostname like example.com. You will now be proxied to your Apache2 server on default port i.e 8080.
Step 4: Enable the SSL
If you want to enable the apache reverse proxy ssl module then run the below command to enable apache reverse proxy https proxy pass:
This will provide secure apache reverse proxy http to https support to backend servers.
Step 5: Restart Apache2
To make these changes into effect, restart Apache by running the below command:
Congratulations! You have successfully installed and configured Apache2 reverse proxy on your Linux system.
Conclusion:
In this tutorial, we explored and discussed what is a Proxy Server and apache reverse proxy example configuration step by step. We also learned how to set up and configure apache2 as a reverse proxy on a linux system. In our upcoming tutorials, we’ll discuss more interesting topics about apache and other web server solution stacks.
Explore
You may also like the below more related articles:
- How to Install and Secure phpMyAdmin with Nginx on Ubuntu
- How to Setup Nginx With Passenger on AWS Production Server
- Configure HTTP/2 Support in Nginx On Ubuntu/Debian
- Secure and Encrypt Nginx with Let’s Encrypt on Ubuntu 20.04
- How to Install and Configure ownCloud with Apache on Ubuntu
These is where ProxyPass can offer a cleaner alternative. ProxyPass allows you to take a request for a specific URL, and forward it to another server, which would be known as your backend server, or your master web server.
This guide will assume that you are performing this on all web servers in the solution, unless otherwise specified. The specific examples are for a WordPress based solution, but it can be easily adapted for other CMS’s.
To get started, first ensure that mod_proxy is installed:
# CentOS 6
[[email protected] ~]# yum install mod_proxy_html
[[email protected] ~]# service httpd restart
[[email protected] ~]# httpd -M |grep proxy proxy_module (shared) proxy_balancer_module (shared) proxy_ftp_module (shared) proxy_http_module (shared) proxy_connect_module (shared) proxy_ajp_module (shared)
# Ubuntu 12.04 and 14.04
[[email protected] ~]# apt-get update
[[email protected] ~]# apt-get install libapache2-mod-proxy-html
[[email protected] ~]# a2enmod proxy proxy_http
There are several ways you can proceed from here. I’ll post them out as ‘options’ below. Each one basically accomplishes the same thing, but one may work better for your environment than another.
So no matter which of the 3 options you go with, always be sure to rigorously test it before implementing it in production!
Option 1: Easy – Define master server based off the URI in each Apache Vhost
# CentOS 6
[[email protected] ~]# vim /etc/httpd/vhost.d/example.com.conf
# Ubuntu 12.04 and 14.04
[[email protected] ~]# vim /etc/apache2/sites-enabled/example.com.conf
...
ProxyPreserveHost On ProxyRequests Off ProxyPassMatch ".*/wp-admin.*" "http://192.168.2.1" ProxyPassMatch ".*/wp-login.php" "http://192.168.2.1"
...
# CentOS 6
[[email protected] ~]# vim /etc/httpd/vhost.d/example.com.conf
# Ubuntu 12.04 and 14.04
[[email protected] ~]# vim /etc/apache2/sites-enabled/example.com.conf
...
ProxyRequests Off ProxyPreserveHost Off ProxyVia Off <Location "/wp-login.php"> Header set "Host" "www.example.com" ProxyPass http://192.168.2.1/wp-login.php ProxyPassReverse http://192.168.2.1/wp-login.php </Location> <Location "/wp-admin"> Header set "Host" "www.example.com" ProxyPass http://192.168.2.1/wp-admin ProxyPassReverse http://192.168.2.1/wp-admin </Location>
Setup proxypass so it knows which server is the master web server. Be sure to update the IP so its the IP address of your master web server:
# CentOS 6
[[email protected] ~]# vim /etc/sysconfig/httpd
...
OPTIONS="-DSLAVE"
export MASTER_SERVER="192.168.2.1"
...
# Ubuntu 12.04 and 14.04
[[email protected] ~]# /etc/apache2/envvars
...
export APACHE_ARGUMENTS="-DSLAVE"
export MASTER_SERVER="192.168.2.1"
...
# CentOS 6
[[email protected] ~]# vim /etc/httpd/vhost.d/example.com.conf
# Ubuntu 12.04 and 14.04
[[email protected] ~]# vim /etc/apache2/sites-enabled/example.com.conf
...
<IfDefine SLAVE>
RewriteEngine On
ProxyPreserveHost On
ProxyPass /wp-admin/ http://${MASTER_SERVER}/wp-admin/ ProxyPassReverse /wp-admin/ http://${MASTER_SERVER}/wp-admin/
RewriteCond %{REQUEST_METHOD} =POST RewriteRule . http://${MASTER_SERVER}%{REQUEST_URI} [P]
</IfDefine>
...
# CentOS 6
[[email protected] ~]# service httpd restart
# Ubuntu 12.04 and 14.04
[[email protected] ~]# service apache2 restart
Так как зачастую, сайтов в организации много, а IP адресов мало, нужно иметь решение с Reverse Proxy. Для моих целей раньше всегда выступал Microsoft TMG, но у него есть свои недостатки, как и плюсы. Один из основных минусов, это то что на TMG нужно подгружать сертификаты публикуемого ресурса, что с Let’s Encrypt довольно неудобно, ввиду обновления сертификатов каждые 90 дней.
Решение было найдено: поднять Reverse Proxy на Apache и сделать так, чтобы работала автовыдача сертификатов Let’s Encrypt. А после чего спокойно публиковать его на Firewall, при этом порты буду перенаправляться с http на https.
За основу берем что у нас стоит чистый Debian GNU/Linux 8 (jessie). Подробнее под катом.
Ну что-ж, поехали.
aptitude install -y build-essential
aptitude install -y libapache2-mod-proxy-html libxml2-dev
aptitude install -y apache2
После чего активируем следующие модули:
a2enmod proxy
a2enmod proxy_http
a2enmod proxy_ajp
a2enmod rewrite
a2enmod deflate
a2enmod headers
a2enmod proxy_balancer
a2enmod proxy_html
a2enmod proxy_ftp
a2enmod proxy_connect
a2enmod ssl
и рестартуем Apache:
service apache2 restartТут нас поджидает первая неудача, Apach’у для правильной работы не хватает модуля mod_xml2enc, НО! в Jessie этот модуль не работает, нам последовательно нужно внести следующие команды:
aptitude install apache2-prefork-dev libxml2 libxml2-dev apache2-dev
mkdir ~/modbuild/ && cd ~/modbuild/
wget http://apache.webthing.com/svn/apache/filters/mod_xml2enc.c
wget http://apache.webthing.com/svn/apache/filters/mod_xml2enc.h
apxs2 -aic -I/usr/include/libxml2 ./mod_xml2enc.c
cd ~
rm -rfd ~/modbuild/
service apache2 restart
После чего, все у нас хорошо, модуль стоит. Едем дальше )
Так как мы хотим опубликовать HTTPS сайт, до того момента пока мы не установим Let’s Encrypt, нам нужно сделать самоподписанный сертификат для нашего сайта, вводим комманду:
mkdir /etc/apache2/ssl
cd /etc/apache2/ssl
openssl req -x509 -nodes -days 365 -newkey rsa:2048 -keyout server.key -out server.crt
Нам нужно создать файл конфигурации и назвать его понятным именем:
touch /etc/apache2/sites-available/sambi4.conf<VirtualHost *:80>
ServerName sambi4.ru
Redirect permanent / https://sambi4.ru/ #отвечает за перенаправление на https
</VirtualHost>
<VirtualHost *:443>
SSLEngine On
SSLProxyEngine On
ProxyRequests Off
ProxyPreserveHost On
ProxyVia full
SSLCertificateFile /etc/apache2/ssl/server.crt #указываем путь к нашему самоподписанному сертификату
SSLCertificateKeyFile /etc/apache2/ssl/server.key #указываем путь к нашему самоподписанному ключу сертификата
ProxyHTMLInterp On
ProxyHTMLExtended On
<proxy *>
Order deny,allow
Allow from all
</proxy>
ProxyPass / https://192.168.199.78/ #IP адрес публикуемого ресурса.
ProxyPassReverse / https://192.168.199.78/ #IP адрес публикуемого ресурса.
ServerName sambi4.ru
ServerAdmin sambi4@sambi4.ru #считается хорошим тоном указывать email админа
DocumentRoot "/var/www/html" #эта строка нужна для того чтобы апач запустился, без нее он не сможет опубликовать ваш ресурс.
</VirtualHost>a2ensite /etc/apache2/sites-available/sambi4.confservice apache2 restartПосле всех проделанных процедур, мы имеем настроеный Reverse Proxy на Apache2, теперь можно приступить к настройке Let’s Encrypt:
Из всех бесплатных сертификатов, жив остался только Let’s Encrypt, но его особенность в том, что сертификат выдается сроком на 3 месяца.
Нам нужно поставить сертификат, и сделать автоматическую выдачу при завершении срока сертификации.
echo 'deb http://ftp.debian.org/debian jessie-backports main' | tee /etc/apt/sources.list.d/backports.listaptitude updateну а теперь ставим сам Let’s Encrypt:
aptitude install -y python-certbot-apache -t jessie-backportsДожидаемся процесса установки, и пробуем выпустить сертификат:
certbot --apacheИ вот тут нас поджидает неудача:
ERROR:letsencrypt_apache.configurator:No vhost exists with servername or alias of: sambi4.ru. No vhost was selected. Please specify servernames in the Apache config
Связано это с тем, что в репозитариях до сих пор старая версия (на момент написания 0.10.2), в которой наблюдаются ошибки. А именно ошибки в python-скриптах. Решение как обычно просто:
Качаем свежую версию certbot:
git clone https://github.com/certbot/certbot.gitПосле чего, идем по пути:
cd /usr/lib/python2.7/dist-packagesУдаляем папки (а лучше делаем бэкап):
acme
certbot
certbot_apache
И копируем файлы из нового релиза:
cp /root/certbot/certbot /usr/lib/python2.7/dist-packages/
cp /root/certbot/acme/acme/ /usr/lib/python2.7/dist-packages/
cp /root/certbot/certbot-apache/certbot_apache/ /usr/lib/python2.7/dist-packages/
Теперь можно со спокойной душой запускать процесс выпуска сертификата:
certbot --apacheОтвечаем на вопросы и все!
Поздравляю, сертификат мы выпустили, теперь нужно добавить скрипт автопродления сертификата, т.к. Let’s Encrypt выдает сертификаты сроком только на 90 дней (мы об этом помним).
Все просто. Нам в cron нужно добавить строчку:
30 2 * * 1 /usr/bin/certbot renew >> /var/log/le-renew.logcrontab -eИ добавляем нашу строку (обязательно перейти на следующую срочку, иначе не сохранится)
И все, повторить бесконечное множество раз с Вашими другими ресурсами.
Memcached
Memcached — Программное обеспечение, реализующее сервис кэширования данных в оперативной памяти на основе хеш-таблицы.
Установка
Для начала, выполняем установку пакетов:
apt-get install memcached php-memcachedНастройка
После разрешаем автозапуск и запускаем сервис кэширования:
systemctl enable memcached && systemctl start memcachedsystemctl restart apache2Для проверки, что модуль memcached появился в PHP, открываем наш сайт в браузере — в phpinfo должна появиться новая секция Memcached.
Доступы и настройка находится в файле memcached.conf:
vi /etc/memcached.confnetstat -tap | grep memcachedБалансерФлаги статуса члена
<span data-i18n="c2947fce709df5603a75706378c2d960b5f04f0e/e1" data-source="In the balancer-manager the current state, or status, of a worker is displayed and can be set/reset. The meanings of these statuses are as follows:» onmousemove=»i18n(this)»>В балансировщике-менеджере отображается текущее состояние или статус работника, который можно установить / сбросить. Значения этих статусов следующие:
Apache HTTP Server
PHP
Устанавливаем необходимые библиотеки для PHP и PHP-FPM:
apt install php-xml php-intl php-gd php-curl php-zip php-mbstring php-bcmath php-bz2 php-cgi php-cli php-common php-dba php-dev php-enchant php-gmp php-imap php-interbase php-json php-ldap php-odbc php-opcache php-phpdbg php-pspell php-readline php-recode php-sybase php-tidy php-xmlrpc php-xslWorkers
Прокси управляет конфигурацией исходных серверов и их коммуникационными параметрами в объектах с именами, Есть два встроенных рабочих: рабочий перенаправителя по умолчанию и обратный прокси по умолчанию. Дополнительные работники могут быть настроены явно.
Два рабочих по умолчанию имеют фиксированную конфигурацию и будут использоваться,если ни один другой рабочий не будет соответствовать запросу.Они не используют HTTP Keep-Alive или повторное использование соединения.Вместо этого TCP-соединения с исходным сервером будут открываться и закрываться для каждого запроса.
<span data-i18n="936f3e501ce395ea41d432ed9c0ba1b266da0dac/f0" data-source="Explicitly configured workers are identified by their URL. They are usually created and configured using ProxyPass or ProxyPassMatch when used for a reverse proxy:» onmousemove=»i18n(this)»>Явно настроенные рабочие процессы идентифицируются по их URL. Обычно они создаются и настраиваются с помощью ProxyPass или ProxyPassMatch при использовании обратного прокси:
ProxyPass connectiontimeout=5 =30
<span data-i18n="e06a22d71bc3b17ba20076b7531ccf81a62d5bc9/e8" data-source="This will create a worker associated with the origin server URL http://backend.example.com that will use the given timeout values. When used in a forward proxy, workers are usually defined via the ProxySet directive:» onmousemove=»i18n(this)»>Это создаст рабочий процесс, связанный с URL-адресом исходного сервера http://backend.example.com , который будет использовать заданные значения времени ожидания. При использовании в прямом прокси рабочие процессы обычно определяются с помощью директивы ProxySet :
ProxySet connectiontimeout=5 =30
<span data-i18n="83e4214df04d4e37464a174a27292ef0e4ffb0ff/74" data-source="or alternatively using Proxy and ProxySet:» onmousemove=»i18n(this)»>или, альтернативно, используя Proxy и ProxySet :
< > connectiontimeout= timeout=
</>
<span data-i18n="72645dc3577a13c766afbcf596fa12150d4ff2c3/df" data-source="Using explicitly configured workers in the forward mode is not very common, because forward proxies usually communicate with many different origin servers. Creating explicit workers for some of the origin servers can still be useful if they are used very often. Explicitly configured workers have no concept of forward or reverse proxying by themselves. They encapsulate a common concept of communication with origin servers. A worker created by ProxyPass for use in a reverse proxy will also be used for forward proxy requests whenever the URL to the origin server matches the worker URL, and vice versa.» onmousemove=»i18n(this)»>Использование явно настроенных воркеров в режиме переадресации не очень распространено, поскольку прокси-серверы пересылки обычно взаимодействуют со многими разными исходными серверами. Создание явных рабочих процессов для некоторых исходных серверов может быть полезным, если они используются очень часто. Явно настроенные рабочие процессы сами по себе не имеют понятия прямого или обратного проксирования. Они инкапсулируют общую концепцию связи с исходными серверами. Рабочий процесс, созданный ProxyPass для использования в обратном прокси-сервере, также будет использоваться для запросов прямого прокси-сервера, когда URL-адрес исходного сервера совпадает с URL-адресом рабочего, и наоборот.
URL-адрес,идентифицирующий прямого работника,является URL-адресом его исходного сервера,включая любые заданные компоненты пути:
ProxyPass
ProxyPass
Этот пример определяет двух разных рабочих,каждый из которых использует отдельный пул соединений и конфигурацию.
Разделение рабочего происходит,если URL рабочего перекрываются,что происходит,когда URL одного рабочего является ведущей подстрокой URL другого рабочего,определенного позже в конфигурационном файле.В следующем примере
ProxyPass =60
ProxyPass =10
<span data-i18n="bc6332f050dd04476f7a161d1afb7a3e26b788ab/b4" data-source="the second worker isn't actually created. Instead the first worker is used. The benefit is, that there is only one connection pool, so connections are more often reused. Note that all configuration attributes given explicitly for the later worker will be ignored. This will be logged as a warning. In the above example, the resulting timeout value for the URL /examples will be 60 instead of 10!» onmousemove=»i18n(this)»>второй работник на самом деле не создан. Вместо этого используется первый работник. Преимущество состоит в том, что существует только один пул соединений, поэтому соединения чаще используются повторно. Обратите внимание, что все атрибуты конфигурации, указанные явно для более позднего работника, будут игнорироваться. Это будет зарегистрировано как предупреждение. В приведенном выше примере результирующее значение времени ожидания для URL /examples будет 60 вместо 10 !
<span data-i18n="305c6f7c46db9266cffdfeff3b79b664f768f519/24" data-source="If you want to avoid worker sharing, sort your worker definitions by URL length, starting with the longest worker URLs. If you want to maximize worker sharing, use the reverse sort order. See also the related warning about ordering ProxyPass directives.» onmousemove=»i18n(this)»>Если вы хотите избежать совместного использования рабочих процессов, отсортируйте определения рабочих операций по длине URL-адресов, начиная с самых длинных URL-адресов рабочих операций. Если вы хотите максимизировать совместное использование работников, используйте обратный порядок сортировки. См. также соответствующее предупреждение об упорядочивании директив ProxyPass .
Явно сконфигурированные рабочие приходят с двумя вкусами:<span data-i18n="c5010622f0267c067b8b5a4445e3d08be2524468/65" data-source=". They support many important configuration attributes which are described below in the ProxyPass directive. The same attributes can also be set using ProxySet.» onmousemove=»i18n(this)»>. Они поддерживают множество важных атрибутов конфигурации, которые описаны ниже в директиве ProxyPass . Те же атрибуты можно также установить с помощью ProxySet .
<span data-i18n="49c6f858798234ff3a9e5f2e87305b0b007c249b/79" data-source="The set of options available for a direct worker depends on the protocol which is specified in the origin server URL. Available protocols include ajp, fcgi, ftp, http and scgi.» onmousemove=»i18n(this)»>Набор параметров, доступных для прямого работника, зависит от протокола, указанного в URL-адресе исходного сервера. Доступные протоколы включают в себя ajp , fcgi , ftp , http и scgi .
Работники балансировщиков-это виртуальные работники,которые используют непосредственных работников,известных как их члены,для фактической обработки запросов.Каждый балансировщик может иметь несколько членов.Когда он обрабатывает запрос,он выбирает члена на основе настроенного алгоритма балансировки нагрузки.
<span data-i18n="aa981713af7810d7ed0d99216c3cadd9e205b495/bd" data-source="A balancer worker is created if its worker URL uses balancer as the protocol scheme. The balancer URL uniquely identifies the balancer worker. Members are added to a balancer using BalancerMember.» onmousemove=»i18n(this)»>Рабочий балансировщик создается, если его рабочий URL использует balancer в качестве схемы протокола. URL-адрес балансировщика однозначно идентифицирует работника балансировщика. Участники добавляются в балансировщик с помощью BalancerMember .
<span data-i18n="9d8b2ea29297dcb6d65195446de6f60badadfb39/a6" data-source="DNS resolution for origin domains» onmousemove=»i18n(this)»>Разрешение DNS для исходных доменов
<span data-i18n="180d64caba1cfea0a9057ee4e11bfc6230d2bbfd/b8" data-source="DNS resolution happens when the socket to the origin domain is created for the first time. When connection reuse is enabled, each backend domain is resolved only once per child process, and cached for all further connections until the child is recycled. This information should to be considered while planning DNS maintenance tasks involving backend domains. Please also check ProxyPass parameters for more details about connection reuse.» onmousemove=»i18n(this)»>Разрешение DNS происходит, когда сокет для исходного домена создается в первый раз. Когда повторное использование соединения включено, каждый серверный домен разрешается только один раз для дочернего процесса и кэшируется для всех дальнейших подключений до тех пор, пока дочерний процесс не будет перезапущен. Эту информацию следует учитывать при планировании задач обслуживания DNS, связанных с внутренними доменами. Пожалуйста, также проверьте параметры ProxyPass для получения более подробной информации о повторном использовании соединения.
© 2018 The Apache Software Foundation
Licensed under the Apache License, Version 2.0.
https://httpd.apache.org/docs/2.4/en/mod/mod_proxy.html
Apache HTTP Server
Настройка сайта
Создаем каталог для сайта
mkdir -p /var/www/example.com/{www,tmp}
mkdir -p /var/www/example.com/log/{nginx,apache}
Задаем права на папки:
chown -R www-data:www-data /var/www/example.com/www
chmod -R 775 /var/www/example.com/www
Создаем индексный файл:
vi /var/www/example.com/www/index.php<?php phpinfo(); ?>Настройка сайта
Nginx http
server { listen 80; server_name example.com; set $root_path /var/www/example.com/www; access_log /var/www/example.com/log/nginx/access_log; error_log /var/www/example.com/log/nginx/error_log; root $root_path; gzip on; gzip_disable "msie6"; gzip_min_length 1000; gzip_vary on; gzip_proxied expired no-cache no-store private auth; gzip_types text/plain text/css application/json application/x-javascript text/xml application/xml application/xml+rss; location / { location ~ [^/]\.ph(p\d*|tml)$ { try_files /does_not_exists @fallback; } location ~* ^.+\.(jpg|jpeg|gif|png|css|zip|tgz|gz|rar|bz2|doc|docx|xls|xlsx|exe|pdf|ppt|tar|wav|bmp|rtf|js)$ { try_files $uri $uri/ @fallback; } location ~* \.(?:css(\.map)?|js(\.map)?|jpe?g|png|gif|ico|cur|heic|webp|tiff?|mp3|m4a|aac|ogg|midi?|wav|mp4|mov|webm|mpe?g|avi|ogv|flv|wmv)$ { expires 7d; access_log off; } location ~* \.(?:svgz?|ttf|ttc|otf|eot|woff2?)$ { add_header Access-Control-Allow-Origin "*"; expires 7d; access_log off; } location = /favicon.ico { log_not_found off; access_log off; } location = /robots.txt { log_not_found off; access_log off; } location / { try_files /does_not_exists @fallback; } } # Если используется PHP location @fallback { proxy_pass http://127.0.0.1:8080; proxy_redirect http://127.0.0.1:8080 /; proxy_set_header Host $host; proxy_set_header X-Forwarded-For $proxy_add_x_forwarded_for; proxy_set_header X-Forwarded-Proto $scheme; access_log off; } # Если используется PHP-FPM location @fallback { index index.php index.html index.htm; fastcgi_pass unix:/var/run/php/php7.3-fpm.sock; fastcgi_index index.php; fastcgi_param SCRIPT_FILENAME $root_path$fastcgi_script_name; include fastcgi_params; fastcgi_param DOCUMENT_ROOT $root_path; }
}
ln -s /etc/nginx/sites-available/example.com.conf /etc/nginx/sites-enabled/example.comВсе запросы будут переводится на локальный сервер по порту 8080, на котором работает apache, кроме обращений к статическим файлам (jpg, png, css и так далее).
apache2
vi /etc/apache2/sites-available/example.com.conf<VirtualHost 127.0.0.1:8080> Define root_domain example.com Define root_path /var/www/example.com ServerName ${root_domain} ServerAlias www.${root_domain} DocumentRoot ${root_path}/www ErrorLog ${root_path}/log/apache/error_log TransferLog ${root_path}/log/apache/access_log <IfModule mod_dir.c> DirectoryIndex index.php index.html index.htm </IfModule> <Directory /var/www/example.com/www> AllowOverride All Options Indexes ExecCGI FollowSymLinks Require all granted </Directory> <IfModule setenvif_module> SetEnvIf X-Forwarded-Proto https HTTPS=on </IfModule> <IfModule php7_module> php_admin_value upload_tmp_dir ${root_path}/tmp php_admin_value doc_root ${root_path} php_value open_basedir ${root_path}:/usr/local/share/smarty:/usr/local/share/pear php_value post_max_size 512M php_value upload_max_filesize 512M php_flag short_open_tag On </IfModule>
</VirtualHost>ln -s /etc/apache2/sites-available/example.com.conf /etc/apache2/sites-enabled/example.com.confПроверяем
Проверяем корректность настроек конфигурационных файлов:
nginx -t
apachectl configtest
systemctl reload nginx
systemctl reload apache2https (Существующий Сертификат)
vi /etc/nginx/conf.d/example.com.conf# Устанавливается только на главный домен, чтобы шел редирект с ip на главный домен.
server { listen 80; server_name Ваш_ip; return 301 https://example.com$request_uri;
}
server { listen 443 ssl; ssl on; ssl_certificate /etc/nginx/ssl/cert.pem; ssl_certificate_key /etc/nginx/ssl/cert.key; server_name example.com; set $root_path /var/www/example.com/www; access_log /var/www/example.com/log/nginx/access_log; error_log /var/www/example.com/log/nginx/error_log; gzip on; gzip_disable "msie6"; gzip_min_length 1000; gzip_vary on; gzip_proxied expired no-cache no-store private auth; gzip_types text/plain text/css application/json application/x-javascript text/xml application/xml application/xml+rss root $root_path; location / { location ~ [^/]\.ph(p\d*|tml)$ { try_files /does_not_exists @fallback; } location ~* ^.+\.(jpg|jpeg|gif|png|css|zip|tgz|gz|rar|bz2|doc|docx|xls|xlsx|exe|pdf|ppt|tar|wav|bmp|rtf|js)$ { try_files $uri $uri/ @fallback; } location ~* \.(?:css(\.map)?|js(\.map)?|jpe?g|png|gif|ico|cur|heic|webp|tiff?|mp3|m4a|aac|ogg|midi?|wav|mp4|mov|webm|mpe?g|avi|ogv|flv|wmv)$ { expires 7d; access_log off; } location ~* \.(?:svgz?|ttf|ttc|otf|eot|woff2?)$ { add_header Access-Control-Allow-Origin "*"; expires 7d; access_log off; } location = /favicon.ico { log_not_found off; access_log off; } location = /robots.txt { log_not_found off; access_log off; } location / { try_files /does_not_exists @fallback; } } # Если используется PHP location @fallback { proxy_pass http://127.0.0.1:8080; proxy_redirect http://127.0.0.1:8080 /; proxy_set_header Host $host; proxy_set_header X-Forwarded-For $proxy_add_x_forwarded_for; proxy_set_header X-Forwarded-Proto $scheme; access_log off; } # Если используется PHP-FPM location @fallback { index index.php index.html index.htm; fastcgi_pass unix:/var/run/php/php7.3-fpm.sock; fastcgi_index index.php; fastcgi_param SCRIPT_FILENAME $root_path$fastcgi_script_name; include fastcgi_params; fastcgi_param DOCUMENT_ROOT $root_path; }
}Все запросы будут переводится на локальный сервер по порту 8080, на котором работает apache, кроме обращений к статическим файлам (jpg, png, css и так далее).
Apache2
vi /etc/apache2/sites-available/example.com.conf<VirtualHost 127.0.0.1:8080> Define root_domain example.com Define root_path /var/www/example.com ServerName ${root_domain} ServerAlias www.${root_domain} DocumentRoot ${root_path}/www ErrorLog ${root_path}/log/apache/error_log TransferLog ${root_path}/log/apache/access_log <IfModule mod_dir.c> DirectoryIndex index.php index.html index.htm </IfModule> <Directory /var/www/example.com/www> AllowOverride All Options Indexes ExecCGI FollowSymLinks Require all granted </Directory> <IfModule setenvif_module> SetEnvIf X-Forwarded-Proto https HTTPS=on </IfModule> <IfModule php7_module> php_admin_value upload_tmp_dir ${root_path}/tmp php_admin_value doc_root ${root_path} php_value open_basedir ${root_path}:/usr/local/share/smarty:/usr/local/share/pear php_value post_max_size 512M php_value upload_max_filesize 512M php_flag short_open_tag On </IfModule>
</VirtualHost>ln -s /etc/apache2/sites-available/example.com.conf /etc/apache2/sites-enabled/example.com.confПроверяем
Проверяем корректность настроек конфигурационных файлов:
nginx -t
apachectl configtest
systemctl reload nginx
systemctl reload apache2ngx_pagespeed on
Загрузка динамического модуля PageSpeed
Откройте файл nginx.conf:
vi /etc/nginx/nginx.confДобавляем в начало:
load_module modules/ngx_pagespeed.so;Настраивается PageSpeed в http контексте, поэтому поместите эти директивы в новый файл конфигурации под названием example.com.conf в файле /etc/nginx/conf.d каталог.
# Максимальный размер кэша
pagespeed MessageBufferSize 10240;
# Путь к каталогу кэша
pagespeed FileCachePath /var/cache/nginx_pagespeed;
server { listen 80; server_name example.com; set $root_path /var/www/example.com/www; # запуск pagespeed pagespeed on; root $root_path; # Адрес и директория сайта pagespeed LoadFromFile "http://www.example.com" "/var/www/example.com/www"; access_log /var/www/example.com/log/nginx/access_log; error_log /var/www/example.com/log/nginx/error_log; # Настройки фильтров pagespeed RewriteLevel CoreFilters; pagespeed EnableFilters collapse_whitespace,remove_comments; pagespeed DisableFilters rewrite_images; gzip on; gzip_disable "msie6"; gzip_min_length 1000; gzip_vary on; gzip_proxied expired no-cache no-store private auth; gzip_types text/plain text/css application/json application/x-javascript text/xml application/xml application/xml+rss; location / { location ~ [^/]\.ph(p\d*|tml)$ { try_files /does_not_exists @fallback; } location ~* ^.+\.(jpg|jpeg|gif|png|css|zip|tgz|gz|rar|bz2|doc|docx|xls|xlsx|exe|pdf|ppt|tar|wav|bmp|rtf|js)$ { try_files $uri $uri/ @fallback; } location ~* \.(?:css(\.map)?|js(\.map)?|jpe?g|png|gif|ico|cur|heic|webp|tiff?|mp3|m4a|aac|ogg|midi?|wav|mp4|mov|webm|mpe?g|avi|ogv|flv|wmv)$ { expires 7d; access_log off; } location ~* \.(?:svgz?|ttf|ttc|otf|eot|woff2?)$ { add_header Access-Control-Allow-Origin "*"; expires 7d; access_log off; } location = /favicon.ico { log_not_found off; access_log off; } location = /robots.txt { log_not_found off; access_log off; } location / { try_files /does_not_exists @fallback; } # правила обработки адресов location ~ "\.pagespeed\.([a-z]\.)?[a-z]{2}\.[^.]{10}\.[^.]+" { add_header "" ""; } location ~ "^/pagespeed_static/" { } location ~ "^/ngx_pagespeed_beacon$" { } } # Если используется PHP location @fallback { proxy_pass http://127.0.0.1:8080; proxy_redirect http://127.0.0.1:8080 /; proxy_set_header Host $host; proxy_set_header X-Forwarded-For $proxy_add_x_forwarded_for; proxy_set_header X-Forwarded-Proto $scheme; access_log off; } # Если используется PHP-FPM location @fallback { index index.php index.html index.htm; fastcgi_pass unix:/var/run/php/php7.3-fpm.sock; fastcgi_index index.php; fastcgi_param SCRIPT_FILENAME $root_path$fastcgi_script_name; include fastcgi_params; fastcgi_param DOCUMENT_ROOT $root_path; }
}
Создаем папку для хранения кэша:
mkdir /var/cache/nginx_pagespeed/
chown www-data:www-data /var/cache/nginx_pagespeed/
Проверяем конфигурацию Nginx и применяем настройки:
nginx -t
nginx -s reload
Apache2 Real IP
Установка
Создаем конфигурационный файл со следующим содержимым:
vi /etc/apache2/mods-available/remoteip.confНастройка
<IfModule remoteip_module> RemoteIPHeader X-Forwarded-For RemoteIPTrustedProxy 127.0.0.1/8
</IfModule>
a2enmod remoteipsystemctl restart apache2В разделе Apache Environment мы должны увидеть внешний адрес компьютера, с которого обращаемся к серверу в опции REMOTE_ADDR.
Динамические проверки здоровья
<span data-i18n="f23b4eff9b43dfc58d8526d8c22f9e1680b7e14f/5e" data-source="Before httpd proxies a request to a worker, it can "test" if that worker is available via setting the ping parameter for that worker using ProxyPass. Oftentimes it is more useful to check the health of the workers out of band, in a dynamic fashion. This is achieved in Apache httpd by the mod_proxy_hcheck module.» onmousemove=»i18n(this)»>Прежде чем httpd проксирует запрос рабочему процессу, он может «проверить» , доступен ли этот рабочий процесс, установив параметр ping для этого рабочего процесса с помощью ProxyPass . Часто полезнее проверять здоровье рабочих вне очереди , в динамическом режиме. Это достигается в Apache httpd с помощью модуля mod_proxy_hcheck .
Failover
Вы также можете точно настроить различные сценарии обхода отказа,уточнив,к каким работникам и даже к каким балансировщикам следует обращаться в таких случаях.Например,нижеприведенная установка реализует три сценария обхода отказа:
- <span data-i18n="46f002a49d856f18f752e1372db9b0d3a56b1c76/f0" data-source="
http://spare1.example.com:8080andhttp://spare2.example.com:8080are only sent traffic if one or both ofhttp://www2.example.com:8080orhttp://www3.example.com:8080is unavailable. (One spare will be used to replace one unusable member of the same balancer set.)» onmousemove=»i18n(this)»>http://spare1.example.com:8080иhttp://spare2.example.com:8080отправляют трафик только в том случае, если один или оба изhttp://www2.example.com:8080илиhttp://www3.example.com:8080недоступен. (Один запасной будет использоваться для замены одного непригодного элемента из того же набора балансировщиков.) - <span data-i18n="b6f4602486f0cd8f5420eb3b30d0f1b8196ccee0/d8" data-source="
http://hstandby.example.com:8080is only sent traffic if all other workers in balancer set0are not available.» onmousemove=»i18n(this)»>http://hstandby.example.com:8080отправляет трафик только в том случае, если все остальные работники в наборе балансировщиков0не доступны. - <span data-i18n="518b0f7253629879fa550c74e30b4b574a8108ed/0f" data-source="If all load balancer set
0workers, spares, and the standby are unavailable, only then will thehttp://bkup1.example.com:8080andhttp://bkup2.example.com:8080workers from balancer set1be brought into rotation.» onmousemove=»i18n(this)»>Если все балансировщики нагрузки с набором0рабочих, запасные части и резерв недоступны, только тогда будут доставлены рабочиеhttp://bkup1.example.com:8080иhttp://bkup2.example.com:8080из балансировочного набора1в ротацию.
Таким образом,для каждого комплекта балансировщиков нагрузки можно иметь одну или несколько горячих запчастей и горячих подставок.
< : : : : : : : : lbmethod=byrequests
</>
В случае выхода из строя горячие запчасти используются в качестве замены непригодных рабочих в одном и том же комплекте балансировщиков нагрузки.Работник считается непригодным к эксплуатации,если он сливается,останавливается или находится в неисправном/неисправном состоянии.Горячие резервуары используются,если все рабочие и запасные части в комплекте балансировщика нагрузки недоступны.Комплекты балансировщиков нагрузки (с соответствующими горячими запчастями и стойками)всегда пробуются по порядку от самого низкого до самого высокого.
Mysql (Mariadb)
Установка
apt-get install mariadb-server php-mysql php-mysqliНастройка
Разрешаем автозапуск и запускаем СУБД:
systemctl enable mariadb
systemctl start mariadb
Зададим пароль для пользователя root:
mysqladmin -u root passwordsystemctl restart apache2Создаем и настраиваем пользователя:
mysql -uroot -p
mysql> GRANT ALL PRIVILEGES ON *.* TO 'dbuser'@'localhost' IDENTIFIED BY 'password' WITH GRANT OPTION;
# ALL PRIVILEGES: предоставляет полные права на использование данных.
# *.* : права предоставляются на все базы и все таблицы.
# dbuser - имя учетной записи.
# localhost - доступ для учетной записи будет предоставлен только с локального компьютера.
# password - пароль, который будет задан пользователю.
# WITH GRANT OPTION - позволяет пользователю назначать права другим пользователям.
> update user set plugin='' where User='root';
> flush privileges;
> exitsudo systemctl restart mariadb.serviceПростое обратное проксирование
<span data-i18n="a157099713b409fd9aa5f3c919211896caa14491/36" data-source="The ProxyPass directive specifies the mapping of incoming requests to the backend server (or a cluster of servers known as a Balancer group). The simplest example proxies all requests ("/") to a single backend:» onmousemove=»i18n(this)»>Директива ProxyPass указывает сопоставление входящих запросов с внутренним сервером (или кластером серверов, известным как группа Balancer ). Самый простой пример проксирует все запросы ( "/" ) на один сервер:
ProxyPass
<span data-i18n="a71b9b01c6f4585997cb05ab8a4fc3f413cfd065/bf" data-source="To ensure that and Location: headers generated from the backend are modified to point to the reverse proxy, instead of back to itself, the ProxyPassReverse directive is most often required:» onmousemove=»i18n(this)»>Чтобы гарантировать, что и Location: заголовки, сгенерированные из бэкэнда, изменены так, чтобы они указывали на обратный прокси-сервер, а не обратно на себя, чаще всего требуется директива ProxyPassReverse :
ProxyPass
ProxyPassReverse
Проксирование возможно только определенных URI,как показано в этом примере:
ProxyPass
ProxyPassReverse
<span data-i18n="dcb3d90dcf1d7734dd7d60c09fda6140e73000ab/4a" data-source="In the above, any requests which start with the /images path with be proxied to the specified backend, otherwise it will be handled locally.» onmousemove=»i18n(this)»>Как указано выше, любые запросы, начинающиеся с пути /images , будут проксированы к указанному бэкэнду, в противном случае он будет обрабатываться локально.
Balancer Manager
<span data-i18n="f39477a2d1a794169d365750d075988e74581d63/8a" data-source="One of the most unique and useful features of Apache httpd's reverse proxy is the embedded balancer-manager application. Similar to mod_status, balancer-manager displays the current working configuration and status of the enabled balancers and workers currently in use. However, not only does it display these parameters, it also allows for dynamic, runtime, on-the-fly reconfiguration of almost all of them, including adding new BalancerMembers (workers) to an existing balancer. To enable these capability, the following needs to be added to your configuration:» onmousemove=»i18n(this)»>Одной из самых уникальных и полезных функций обратного прокси-сервера Apache httpd является встроенное приложение балансировщика-менеджера . Как и в mod_status , Balancer-Manager отображает текущую рабочую конфигурацию и состояние включенных балансировщиков и рабочих, которые используются в настоящее время. Тем не менее, он не только отображает эти параметры, но также позволяет динамически изменять конфигурацию на лету практически всех из них, включая добавление новых BalancerMembers (рабочих) к существующему балансировщику. Чтобы включить эти возможности, в вашу конфигурацию необходимо добавить следующее:
SetHandler balancer-manager Require host localhost
<span data-i18n="a6bb65c612b8a693f00002f2f4f10a2d51eb2bdc/07" data-source="Do not enable the balancer-manager until you have secured your server. In particular, ensure that access to the URL is tightly restricted.» onmousemove=»i18n(this)»>Не включайте менеджер балансировки, пока не защитите свой сервер . В частности, убедитесь, что доступ к URL-адресу строго ограничен.
<span data-i18n="f9105e1266f2943b951ddd5da39e2c604591ca64/79" data-source="When the reverse proxy server is accessed at that url (eg: http://rproxy.example.com/balancer-manager/, you will see a page similar to the below:» onmousemove=»i18n(this)»>Когда обратный прокси-сервер будет доступен по этому URL-адресу (например, http://rproxy.example.com/balancer-manager/ , вы увидите страницу, аналогичную приведенной ниже:
Эта форма позволяет администратору devops настраивать различные параметры,выводить сотрудников в автономный режим,изменять методы балансировки нагрузки и добавлять новые работы.Например,нажав на сам балансировщик,вы получите следующую страницу:
В то время как щелчок по рабочему,отображает эту страницу:
<span data-i18n="6cb3c266171ca4acbe564a24411eb02ff05b42fe/9e" data-source="To have these changes persist restarts of the reverse proxy, ensure that BalancerPersist is enabled.» onmousemove=»i18n(this)»>Чтобы эти изменения сохранялись при перезапусках обратного прокси-сервера, убедитесь, что BalancerPersist включен.
Ngx_pagespeed
ngx_pagespeed (или просто pagespeed) – это модуль Nginx, предназначенный для автоматической оптимизации работы сайта путём сокращения времени загрузки сайта в браузере. Дополнительную информацию о модуле можно найти на официальном сайте.
Установка
Устанавливаем необходимые пакеты:
sudo apt-get install unzip gcc make g++ libpcre3-dev zlib1g-dev build-essential libpcre3 uuid-devНастройка
Создаем и переходим в папку, в которой будем собирать ngx_pagespeed:
mkdir /etc/nginx/build
cd /etc/nginx/build
Узнаем текущую версию nginx:
nginx -vСкачиваем необходимую версию:
wget -qO - http://nginx.org/download/nginx-1.18.0.tar.gz | tar zxfv -В нашем случае это nginx 1.18
Скачиваем репозиторий с ngx_pagespeed:
git clone https://github.com/pagespeed/ngx_pagespeed.git
cd ngx_pagespeed/
git checkout tags/latest-stable
cat PSOL_BINARY_URL
Скачиваем папку psol:
psol_url=https://dl.google.com/dl/page-speed/psol/${NPS_VERSION}.tar.gz [ -e scripts/format_binary_url.sh ] && psol_url=$(scripts/format_binary_url.sh PSOL_BINARY_URL)
wget ${psol_url}
tar zxf 1.13.35.2-x64.tar.gz
Собираем файл ngx_pagespeed.so:
cd ../nginx-1.18.0/
./configure --add-dynamic-module=../ngx_pagespeed --with-compat
make
ls objs/*so
Копируем файл ngx_pagespeed.so:
cd objs
cp ngx_pagespeed.so /etc/nginx/modules
Конфигурация Balancer и BalancerMember
<span data-i18n="fa672759b6e908ab22c27c22931579b0f2029d6b/e2" data-source="You can adjust numerous configuration details of the balancers and the workers via the various parameters defined in ProxyPass. For example, assuming we would want http://www3.example.com:8080 to handle 3x the traffic with a timeout of 1 second, we would adjust the configuration as follows:» onmousemove=»i18n(this)»>Вы можете настроить многочисленные детали конфигурации балансировщиков и рабочих с помощью различных параметров, определенных в ProxyPass . Например, предположив, что мы хотим, чтобы http://www3.example.com:8080 обрабатывал в 3 раза больше трафика с тайм-аутом в 1 секунду, мы должны изменить конфигурацию следующим образом:
< : : : lbmethod=bytraffic
</>
Nginx
HTTP-сервер и обратный прокси-сервер, почтовый прокси-сервер, а также TCP/UDP прокси-сервер общего назначения.
Установка
Установите пакеты, необходимые для подключения apt-репозитория:
sudo apt install curl gnupg2 ca-certificates lsb-releaseДля подключения apt-репозитория для стабильной версии nginx, выполните следующую команду:
echo "deb http://nginx.org/packages/debian `lsb_release -cs` nginx" \ | sudo tee /etc/apt/sources.list.d/nginx.listТеперь нужно импортировать официальный ключ, используемый apt для проверки подлинности пакетов:
curl -fsSL https://nginx.org/keys/nginx_signing.key | sudo apt-key add -Проверьте, верный ли ключ был импортирован:
sudo apt-key fingerprint ABF5BD827BD9BF62Вывод команды должен содержать полный отпечаток ключа 573B FD6B 3D8F BC64 1079 A6AB ABF5 BD82 7BD9 BF62:
pub rsa2048 2011-08-19 [SC] [expires: 2024-06-14] 573B FD6B 3D8F BC64 1079 A6AB ABF5 BD82 7BD9 BF62
uid [ unknown] nginx signing key
Чтобы установить nginx, выполните следующие команды:
sudo apt update && sudo apt install nginxНастройка
systemctl enable nginx && systemctl start nginxvi /etc/nginx/nginx.confВ итоге мы должны увидеть заголовок «Welcome to nginx!».
Обратный прокси-гид
Помимо того,что Apache является «базовым» веб-сервером и предоставляет конечным пользователям статический и динамический контент,Apache httpd (а также большинство других веб-серверов)может также действовать в качестве обратного прокси-сервера,так называемого «шлюзового» сервера.
<span data-i18n="a7f1a3e792d05cdf14f75d1a886444546b6cae90/27" data-source="In such scenarios, httpd itself does not generate or host the data, but rather the content is obtained by one or several backend servers, which normally have no direct connection to the external network. As httpd receives a request from a client, the request itself is proxied to one of these backend servers, which then handles the request, generates the content and then sends this content back to httpd, which then generates the actual HTTP response back to the client.» onmousemove=»i18n(this)»>В таких сценариях сам httpd не генерирует и не размещает данные, а скорее получает контент одним или несколькими внутренними серверами, которые обычно не имеют прямого подключения к внешней сети. Когда httpd получает запрос от клиента, сам запрос передается на один из этих внутренних серверов, который затем обрабатывает запрос, генерирует контент и затем отправляет этот контент обратно на httpd, который затем генерирует фактический HTTP-ответ обратно клиенту ,
<span data-i18n="239824a709a8b8dafc5081e1421031280b1f6af2/8f" data-source="There are numerous reasons for such an implementation, but generally the typical rationales are due to security, high-availability, load-balancing and centralized authentication/authorization. It is critical in these implementations that the layout, design and architecture of the backend infrastructure (those servers which actually handle the requests) are insulated and protected from the outside; as far as the client is concerned, the reverse proxy server is the sole source of all content.» onmousemove=»i18n(this)»>Существует множество причин для такой реализации, но обычно типичные обоснования связаны с безопасностью, высокой доступностью, балансировкой нагрузки и централизованной аутентификацией / авторизацией. В этих реализациях очень важно, чтобы компоновка, дизайн и архитектура серверной инфраструктуры (те серверы, которые фактически обрабатывают запросы) были изолированы и защищены извне; Что касается клиента, обратный прокси-сервер является единственным источником всего контента.
Ниже приведена типичная реализация:
Настройка пользователя
adduser devДобавляем пользователя в группу www-data:
adduser dev www-dataДаем права sudo пользователю:
usermod -aG sudo devФорвардные прокси и обратные прокси/шлюзы
HTTP-сервер Apache может быть настроен в обоих направлениях.прокси-сервер (также известный как
<span data-i18n="eff742a5947b2352df0139f120f3cbd8c13b23f4/6a" data-source="is an intermediate server that sits between the client and the origin server. In order to get content from the origin server, the client sends a request to the proxy naming the origin server as the target. The proxy then requests the content from the origin server and returns it to the client. The client must be specially configured to use the forward proxy to access other sites.» onmousemove=»i18n(this)»>промежуточный сервер, который находится между клиентом и исходным сервером . Чтобы получить контент с исходного сервера, клиент отправляет запрос прокси-серверу с указанием исходного сервера в качестве цели. Затем прокси-сервер запрашивает контент с исходного сервера и возвращает его клиенту. Клиент должен быть специально настроен для использования прямого прокси для доступа к другим сайтам.
<span data-i18n="c2c48394147237e1716c88d0a6e39f82fb7ee562/4f" data-source="A typical usage of a forward proxy is to provide Internet access to internal clients that are otherwise restricted by a firewall. The forward proxy can also use caching (as provided by mod_cache) to reduce network usage.» onmousemove=»i18n(this)»>Типичным использованием прямого прокси-сервера является предоставление доступа в Интернет внутренним клиентам, которые в противном случае ограничены брандмауэром. mod_cache прокси-сервер также может использовать кэширование (как предусмотрено mod_cache ) для уменьшения использования сети.
<span data-i18n="ec4f96c2a43fe0c7f8c601ff7b99e8c63e4efd9f/cd" data-source="The forward proxy is activated using the ProxyRequests directive. Because forward proxies allow clients to access arbitrary sites through your server and to hide their true origin, it is essential that you secure your server so that only authorized clients can access the proxy before activating a forward proxy.» onmousemove=»i18n(this)»>Прямой прокси активируется с помощью директивы ProxyRequests . Поскольку прямые прокси-серверы позволяют клиентам получать доступ к произвольным сайтам через ваш сервер и скрывать свое истинное происхождение, очень важно защитить ваш сервер , чтобы только авторизованные клиенты могли получить доступ к прокси-серверу перед активацией прямого прокси-сервера.
), напротив, выглядит для клиента, как обычный веб-сервер. Никаких специальных настроек на клиенте не требуется. Клиент делает обычные запросы на контент в пространстве имен обратного прокси. Затем обратный прокси-сервер решает, куда отправлять эти запросы, и возвращает контент, как если бы он сам был источником.
Типичным использованием обратного прокси является обеспечение доступа пользователей Интернета к серверу,находящемуся за брандмауэром.Обратный прокси также может использоваться для балансировки нагрузки между несколькими внутренними серверами или для обеспечения кэширования для более медленного внутреннего сервера.Кроме того,обратный прокси можно использовать просто для того,чтобы привести несколько серверов в одно и то же URL пространство.
PHP-FPM
FastCGI — протоколу взаимодействия веб-сервера с программами. FPM расшифровывается как Fastcgi Process Manager.
Установка
apt-get install php-fpmНастройка
Разрешаем автозапуск php-fpm и запускаем его:
systemctl enable php7.3-fpm && systemctl start php7.3-fpmОбратите внимание, что мы запустили php-fpm версии 7.2. Но установлена может быть и другая версия — ее можно узнать по версии php командой php -v.
Basic Examples
Приведенные ниже примеры являются лишь базовой идеей,которая поможет вам начать работу.Пожалуйста,ознакомьтесь с документацией по отдельным директивам.
<span data-i18n="45c8a39e70e73eda11cd84da5179abeb87ebc2c8/a7" data-source="In addition, if you wish to have caching enabled, consult the documentation from mod_cache.» onmousemove=»i18n(this)»>Кроме того, если вы хотите включить кэширование, обратитесь к документации по mod_cache .
ProxyPass
ProxyPassReverse
< > host internal..
</>
Кластеры и балансиры
<span data-i18n="bf8012468c47180495ab60efb2e2872de0c8ab01/4e" data-source="As useful as the above is, it still has the deficiencies that should the (single) backend node go down, or become heavily loaded, that proxying those requests provides no real advantage. What is needed is the ability to define a set or group of backend servers which can handle such requests and for the reverse proxy to load balance and failover among them. This group is sometimes called a cluster but Apache httpd’s term is a balancer. One defines a balancer by leveraging the <Proxy> and BalancerMember directives as shown:» onmousemove=»i18n(this)»>Каким бы полезным ни было вышеизложенное, у него все еще есть недостатки, связанные с тем, что если (один) внутренний узел выйдет из строя или станет сильно загруженным, проксирование этих запросов не даст реального преимущества. Что необходимо, так это возможность определить набор или группу внутренних серверов, которые могут обрабатывать такие запросы, и для обратного прокси-сервера для балансировки нагрузки и аварийного переключения между ними. Эту группу иногда называют кластером, но термин Apache httpd — балансировщик . Один определяет балансировщик, используя директивы <Proxy> и BalancerMember , как показано ниже:
< : : : lbmethod=bytraffic
</>
<span data-i18n="e2029f524eb5a4ab229c75b46cf8631c7a928eda/79" data-source="The balancer:// scheme is what tells httpd that we are creating a balancer set, with the name myset. It includes 2 backend servers, which httpd calls BalancerMembers. In this case, any requests for /images will be proxied to one of the 2 backends. The ProxySet directive specifies that the myset Balancer use a load balancing algorithm that balances based on I/O bytes.» onmousemove=»i18n(this)»>Схема balancer:// сообщает httpd, что мы создаем набор балансировщиков с именем myset . Он включает в себя 2 внутренних сервера, которые httpd вызывает BalancerMembers . В этом случае любые запросы на /images будут проксироваться на один из двух бэкендов. Директива ProxySet указывает, что балансировщик myset использует алгоритм балансировки нагрузки, который балансирует на основе байтов ввода-вывода.
<span data-i18n="fecdca9bc4871135389c80a4c164e9163b0a4e80/47" data-source="BalancerMembers are also sometimes referred to as workers.» onmousemove=»i18n(this)»>BalancerMembers также иногда называют рабочими .
Доступ через обработчик
Вы также можете заставить запрос обрабатываться как обратный прокси-запрос,создав подходящий проход обработчика.В примере конфигурации,приведенном ниже,все запросы PHP-скриптов будут передаваться указанному FastCGI серверу с использованием обратного прокси:
Обратные прокси PHP-скрипты
<FilesMatch > SetHandler
</FilesMatch>
Эта функция доступна в HTTP-сервере Apache 2.4.10 и более поздних версиях.
Apache2
Для поддержки файла .htaccess, который используется многими сайтами, необходимо установить и настроить веб-сервер Apache.
Установка
Устанавливаем apache и модуль для php:
apt-get install apache2 libapache2-mod-phpНастройка
Заходим в настройки портов:
vi /etc/apache2/ports.confИ редактируем следующее:
Listen 127.0.0.1:8080
# <IfModule ssl_module>
# Listen 443
# </IfModule>
# <IfModule mod_gnutls.c>
# Listen 443
# </IfModule>
мы настроили прослушивание на порту 8080, так как на 80 уже работает NGINX. Также мы закомментировали прослушивание по 443, так как и он будет слушаться NGINX.
a2dismod mpm_eventпо умолчанию, apache2 может быть установлен с модулем мультипроцессовой обработки mpm_event. Данный модуль не поддерживает php 7 и выше.
Разрешаем модуль мультипроцессовой обработки mpm_prefork:
a2enmod mpm_preforkРазрешаем модуль php:
a2enmod php7.3Разрешаем модуль rewrite:
a2enmod rewriteРазрешаем модуль setenvif:
a2enmod setenvifРазрешаем автозапуск и запускаем службу:
systemctl enable apache2 && systemctl start apache2в разделе Server API мы должны увидеть Apache.
