
- Step 6 — Start and Test Replication
- Step 1 — Adjusting Your Source Server’s Firewall
- Step 4 — Retrieving Binary Log Coordinates from the Source
- If Your Source Doesn’t Have Any Existing Data to Migrate
- If Your Source Has Existing Data to Migrate
- Step 2 — Configuring the Source Database
- Understanding Replication in MySQL
- What Is MySQL?
- Purpose of Master Slave Replication
- Why do you need MySQL Master Master Replication?
- Step 1: Installation and Configuration of MySQL on Server 1
- Step 2: Installation and Configuration of MySQL on Server 2
- Step 3: Completing MySQL Master Master Replication on Server 1
- Step 4: Testing MySQL Master Master Replication
- Шаг 4 — Получение координат двоичного журнала из базы-источника
- If your source has data to transfer
- Prerequisites
- Step 3 — Creating a Replication User
- Step 3 — Create a user account for replication
- MySQL Master Master Replication Alternatives
- MySQL MGR replication
- MySQL BinLog Replication
- What is MySQL?
- Key Features of MySQL
- Step 5 — Configuring the Replica Database
- Prerequisites
- Steps to Achieve MySQL Master Slave Replication
- 1. Setting Up The Master
- 2. Create A New User For Slave
- 3. Move Data From Master To Slave
- 4. Configure Slave Server
- 5. Import Data Dump
- 6. Start Slave Server
- 7. Test MySQL Master Slave Replication
- Шаг 5 — Настройка реплики
- Prerequisites
- Using Hevo’s No-code Data Pipeline for Seamless MySQL Replication
- Если в вашем источнике нет данных для переноса
- Шаг 2 — Настройка исходной базы данных для MySQL-репликации
- Table of Contents
- Conclusion
- Conclusion
- MySQL Master Master Replication Pros & Cons
- Pros
- Cons
Step 6 — Start and Test Replication
At this point, both of your MySQL instances are fully configured to start master-slave replication. To run it, open the MySQL shell on the replica server:
sudo mysql You can type this command in a text editor before running it on the server, so it will be easier for you to replace all the information you need:
 CHANGE REPLICATION SOURCE TO
SOURCE_HOST='source_server_ip',
SOURCE_USER='replica_user',
SOURCE_PASSWORD='password',
SOURCE_LOG_FILE='mysql-bin.000001',
SOURCE_LOG_POS=899;
Now activate the replica server:
START REPLICA; If you entered all the data correctly, this instance will start replicating all changes made to the database
db
All details about the current state of the replica can be obtained with the following command. Modifier
\G
here rearranges the text to make it more readable:
SHOW REPLICA STATUS\G; This command prints out a lot of useful information that you can use during debugging and troubleshooting.
Note:
If the replica has connectivity issues or replication stops unexpectedly, it’s possible that some event in the source’s binary log is preventing replication. In such cases, try running the command
SET GLOBAL SQL_SLAVE_SKIP_COUNTER
,
to skip a number of events following the binary log position defined in the previous command. For example, only the first event is skipped here:
SET GLOBAL SQL_SLAVE_SKIP_COUNTER = 1; After that, you will need to restart the replica:
START REPLICA; If you ever need to stop replication, run this command on the replica server:
STOP REPLICA; Your replica is now copying data from the source. All changes made to the original database will be reflected in the replica of the MySQL instance. For the test, let’s create a test table and check if the replication was successful.
Open the MySQL shell on the origin server:
sudo mysql Select a database to replicate:
USE db; Create a table in it. In this example we have a table called
example_table
with one column
example_column
CREATE TABLE example_table (
example_column varchar
);
If you wish, you can add data there:
INSERT INTO example_table VALUES
('First line'),
('Second line'),
('Third line');
After that, return to the MySQL shell of your replica server and select the database to copy:
USE db; Then run the statement
to list all tables in the selected database:
SHOW TABLES; If MySQL replication is working correctly, you will see the newly created table in the list.
In addition, if you added data to the table in the source, you can check them by running a similar query:
SELECT * FROM example_table; In SQL, the asterisk (
*
) means «all columns». Basically, this query tells MySQL to output each column from
example_table
. If MySQL replication is working properly, this operation will show this data.
If none of these operations output the table or data from the source, you may have a bug somewhere in the configuration. To find the problem, you can try running the operation
SHOW REPLICA STATUS\G
. Кроме того, вы можете обратиться к
по устранению неполадок репликации.
Step 1 — Adjusting Your Source Server’s Firewall
This particular command allows any connections that originate from the replica server’s IP address — represented by replica_server_ip
— to MySQL’s default port number, 3306
:
- ufw allow from replica_server_ip to any port
Rule added Step 4 — Retrieving Binary Log Coordinates from the Source
Recall from the Understanding Replication in MySQL
section that MySQL implements replication by copying database events from the source’s binary log file line by line and implementing each event on the replica. When using MySQL’s binary log file position-based replication, you must provide the replica with a set of coordinates that detail the name of the source’s binary log file and a specific position within that file. The replica then uses these coordinates to determine the point in the log file from which it should begin copying database events and track which events it has already processed.
- ">FLUSH TABLES WITH READ LOCK
- ">SHOW MASTER STATUS
You will see a table similar to this example in your output:
 +------------------+----------+--------------+------------------+-------------------+
| File | Position | Binlog_Do_DB | Binlog_Ignore_DB | Executed_Gtid_Set |
+------------------+----------+--------------+------------------+-------------------+
| mysql-bin.000001 | 899 | db | | |
+------------------+----------+--------------+------------------+-------------------+
1 row in set (0.00 sec)
This is the position from which the replica will start copying database events. Record the File
name and the Position
value, as you will need these later when you initiate replication.
If Your Source Doesn’t Have Any Existing Data to Migrate
If your source MySQL instance is a new installation or doesn’t have any existing data you want to migrate to your replicas, you can at this point unlock the tables:
- ">UNLOCK TABLES
- ">CREATE DATABASE db
Query OK, 1 row affected (0.01 sec) After that, close the MySQL shell:
- ">
If Your Source Has Existing Data to Migrate
If you have data on your source MySQL instance that you want to migrate to your replicas, you can do so by creating a snapshot of the database with the mysqldump
utility. However, your database should still be currently locked. If you make any new changes in the same window, the database will automatically unlock. Likewise, the tables will automatically unlock if you exit the client.
Unlocking the tables could lead to problems since it would mean that clients could again change the data in the database. This could potentially lead to a mismatch between your data snapshot and the binary log coordinates you just retrieved.
For this reason, you must open a new terminal window or tab on your local machine
so you can create the database snapshot without unlocking MySQL.
From the new terminal window or tab
, open up another SSH session to the server hosting your source MySQL instance
:
- sammy@source_server_ip
- mysqldump root db db
.sql
- UNLOCK TABLES
Then you can exit the MySQL shell:
-
You can now send your snapshot file to your replica server. Assuming you’ve configured SSH keys
on your source server and have added the source’s public key to your replica’s authorized_keys
file, you can do this securely with an scp
command like this:
- db.sql sammy
@ replica_server_ip
:/tmp/
After sending the snapshot to the replica server, SSH into it:
- sammy
@ replica_server_ip
Then open up the MySQL shell:
- mysql
From the prompt, create the new database that you will be replicating from the source:
- ">CREATE DATABASE db
You don’t need to create any tables or load this database with any sample data. That will all be taken care of when you import the database using the snapshot you just created. Instead, exit the MySQL shell:
- ">
Then import the database snapshot:
- mysql db /tmp/ db.sql
Your replica now has all the existing data from the source database. You can complete the final step of this guide to configure your replica server to begin replicating new changes made on the source database.
Step 2 — Configuring the Source Database
In order for your source MySQL database to begin replicating data, you need to make a few changes to its configuration.
On Ubuntu 20.04, the default MySQL server configuration file is named mysqld.cnf
and can be found in the /etc/mysql/mysql.conf.d/
directory. Open this file on the source server
with your preferred text editor. Here, we’ll use nano
:
- /etc/mysql/mysql.conf.d/mysqld.cnf
Within the file, find the bind-address
directive. It will look like this by default:
 . . .
bind-address = 127.0.0.1
. . .
127.0.0.1
is an IPv4 loopback address that represents localhost
, and setting this as the value for the bind-address
directive instructs MySQL to only listen for connections on the localhost
address. In other words, this MySQL instance will only be able to accept connections that originate from the server where it’s installed.
Remember that you’re turning your other MySQL instance into a replica of this one, so the replica must be able to read whatever new data gets written to the source installation. To allow this, you must configure your source MySQL instance to listen for connections on an IP address which the replica will be able to reach, such as the source server’s public IP address.
Replace 127.0.0.1
with the source server’s
IP address. After doing so, the bind-address
directive will look like this, with your own server’s IP address in place of source_server_ip :
. . .
bind-address =  source_server_ip
. . .
Next, find the server-id
directive, which defines an identifier that MySQL uses internally to distinguish servers in a replication setup. Every server in a replication environment, including the source and all its replicas, must have their own unique server-id
value. This directive will be commented out by default and will look like this:
 . . .
# server-id = 1
. . .
. . .
server-id = 1
. . . Below the server-id
line, find the log_bin
directive. This defines the base name and location of MySQL’s binary log file.
When commented out, as this directive is by default, binary logging is disabled. Your replica server must read the source’s binary log file so it knows when and how to replicate the source’s data, so uncomment this line to enable binary logging on the source. After doing so, it will look like this:
 . . .
log_bin = /var/log/mysql/mysql-bin.log
. . .
Lastly, scroll down to the bottom of the file to find the commented-out binlog_do_db
directive:
 . . .
# binlog_do_db = include_database_name
Remove the pound sign to uncomment this line and replace include_database_name
with the name of the database you want to replicate. This example shows the binlog_do_db
directive pointing to a database named db , but if you have an existing database on your source that you want to replicate, use its name in place of
db :
. . .
binlog_do_db =  db
Note
: If you want to replicate more than one database, you can add another binlog_do_db
directive for every database you want to add. This tutorial will continue on with replicating only a single database, but if you wanted to replicate more it might look like this:
. . .
binlog_do_db =  db
binlog_do_db =  db_1
binlog_do_db =  db_2
Alternatively, you can specify which databases MySQL should not replicate by adding a binlog_ignore_db
directive for each one:
 . . .
binlog_ignore_db = db_to_ignore
After making these changes, save and close the file. If you used nano
to edit the file, do so by pressing CTRL + X
, Y
, and then ENTER
.
- systemctl restart mysql
Understanding Replication in MySQL
In MySQL, replication involves the source database writing down every change made to the data held within one or more databases in a special file known as the binary log
. Once the replica instance has been initialized, it creates two threaded processes. The first, called the IO thread
, connects to the source MySQL instance and reads the binary log events line by line, and then copies them over to a local file on the replica’s server called the relay log
. The second thread, called the SQL thread
, reads events from the relay log and then applies them to the replica instance as fast as possible.
Recent versions of MySQL support two methods for replicating data. The difference between these replication methods has to do with how replicas track which database events from the source they’ve already processed.
MySQL refers to its traditional replication method as binary log file position-based replication
. When you turn a MySQL instance into a replica using this method, you must provide it with a set of binary log coordinates. These consist of the name of the binary log file on the source which the replica must read and a specific position within that file which represents the first database event the replica should copy to its own MySQL instance.
These coordinates are important since replicas receive a copy of their source’s entire binary log and, without the right coordinates, they will begin replicating every database event recorded within it. This can lead to problems if you only want to replicate data after a certain point in time or only want to replicate a subset of the source’s data.
Binary log file position-based replication is viable for many use cases, but this method can become clunky in more complex setups. This led to the development of MySQL’s newer native replication method, which is sometimes referred to as transaction-based replication
. This method involves creating a global transaction identifier (GTID) for each transaction — or, an isolated piece of work performed by a database — that the source MySQL instance executes.
The mechanics of transaction-based replication are similar to binary log file-based replication: whenever a database transaction occurs on the source, MySQL assigns and records a GTID for the transaction in the binary log file along with the transaction itself. The GTID and the transaction are then transmitted to the source’s replicas for them to process.
MySQL’s transaction-based replication has a number of benefits over its traditional replication method. For example, because both a source and its replicas preserve GTIDs, if either the source or a replica encounter a transaction with a GTID that they have processed before they will skip that transaction. This helps to ensure consistency between the source and its replicas. Additionally, with transaction-based replication replicas don’t need to know the binary log coordinates of the next database event to process. This means that starting new replicas or changing the order of replicas in a replication chain is far less complicated.
Keep in mind that this is only a general explanation of how MySQL handles replication; MySQL provides many options which you can tweak to optimize your own replication setup. This guide outlines how to set up binary log file position-based replication. If you’re interested in configuring a different type of replication environment, though, we encourage you to check out MySQL’s official documentation
.
What Is MySQL?
MySQL
is one of the most popular and widely used open-source RDBMS (Relational Database Management System). MySQL is available for free under the GNU public license and is also available as a premium proprietary version. MySQL was originally developed by Michael Widenius at MySQL AB, a Swedish-based company. In 2012, Sun Microsystems acquired MySQL AB, and later Oracle acquired Sun Microsystems.
To gain a deeper understanding of MySQL’s high availability, we recommend consulting our comprehensive guide, MySQL High Availability, and Replication
. Additionally, for insights into the simplified MySQL data load process, we have a helpful guide dedicated to explaining and streamlining the MySQL load data procedure
.
This is one of the main advantages of using MySQL master slave replication. It provides better scalability and availability for your application. By using MySQL master slave multiple servers, you can distribute the read load across multiple servers, improving the overall performance of your application. Additionally, if the master server goes down, you can quickly promote one of the slave servers to become the new master, ensuring that your application continues to function without any downtime.
In this replication, there are various types of replication processes. You can have a single master and multiple slaves or multiple masters and multiple slaves, etc.
In this process, it is always a single or one-way transmission of data. The data is stored in the master first and then copied on to the slaves. Hence, the write operation is performed only on the master database. The read operation is done in both the master and the slave. The slaves can also be used for data accessibility to reduce the load on the master database.
Purpose of Master Slave Replication
One of the main purposes of going for a master-slave replication system is to have a standby system with a live backup that can be promoted as the master when the original master server crashes. Apart from this, there are several benefits as outlined below:
- Scalability
: All query requests to the database can be routed to multiple database servers to reduce the load on the server and allow faster accessibility. Most of the web applications and sites that you encounter nowadays come loaded with more read operations than write operations to the database. Hence, website administrators need to provide the perfect setup for the quick loading of details on the website. - Performance
: All database write operations are done on the master database. Once these changes are made to the master database, they get updated from the master to the slave. But the read requests from websites can be shared across multiple slaves to increase the performance of the website. - Backup
: You can just replicate the latest snapshot of the database to another database and create a backup in just a couple of minutes. Data corruption is largely reduced as the master server runs without any issues and provides 99.9% Uptime. This allows applications to process large amounts of reading or write operations without any hassle. - Analytics and Benchmarking
: This process allows database analysts to run all kinds of data analysis tests and experiments on the slaves without disturbing the master.
Why do you need MySQL Master Master Replication?
MySQL Master Master replication is a development of master-slave replication that addresses its major flaws. This method of replication requires two or more master nodes that can handle both read and write requests. Additionally, each of your masters can have several slave nodes. Asynchronous replication occurs between master nodes.
Hevo
can be your go-to tool if you’re looking for Data Replication and a monopoly over all peripheral interactions of data transfer. It offers compatibility of integrations from 100+ Data Sources
(internal link to integration page)(including 40+ Free Data Sources) like MySQL into Redshift, Snowflake, Databricks, and many other databases and warehouses systems. Hevo also supports native connectors for various variants of MySQL
like Cloud, on-premise, etc. Hence, Hevo is an all-in-one solution.
Try Hevo if you’re looking for an all-in-one package. Hevo supports MySQL as a destination as well. To further streamline and prepare your data for analysis, you can process and enrich Raw Granular Data using Hevo’s robust & built-in Transformation Layer without writing a single line of code!
With Hevo in place, you can reduce your Data Extraction, Cleaning, Preparation, and Enrichment time & effort by many folds! In addition, Hevo’s native integration with BI & Analytics Tools will empower you to mine your replicated data to get actionable insights.
Sign up here for a 14-Day Free Trial!

Step 1: Installation and Configuration of MySQL on Server 1
sudo apt-get install mysql-server mysql-client #server-id = 1
#log_bin = /var/log/mysql/mysql-bin.log
#binlog_do_db = include_database_name
bind-address = 127.0.0.1 The server-id lets you identify your particular server uniquely, in the replication configuration. The first thing you need to do is uncomment the first line, by deleting the “#” symbol at the beginning. The second line specifies the file which will store the logs for all the changes made to any MySQL database or table.
The third line specifies all the databases that you want to replicate between your servers. You may add multiple databases to this line. In the given example, we will be using a single database named “demo”. Finally, the last line instructs the server to accept connections from the internet (by not listening on 127.0.0.1).
 server-id = 1
log_bin = /var/log/mysql/mysql-bin.log
binlog_do_db = demo
# bind-address = 127.0.0.1
sudo service mysql restart mysql -u root -p Once you have successfully logged in, you must run certain commands.
create user 'demouser'@'%' identified by 'password'; grant replication slave on *.* to 'demouser'@'%';
Finally, to finish the initial configuration of Server 1, we must extract some information about the current MySQL instance which will later be provided to Server 2.
show master status; 
Make sure to note the file and position which you will use in the next step.
Step 2: Installation and Configuration of MySQL on Server 2
You need to set up Server 2 similar to Server 1 by repeating the same steps as above. First, you need to install it, after successful installation edit the my.cnf file in much the same way. The server-id for this server will, however, be set to 2.
 server-id = 2
log_bin = /var/log/mysql/mysql-bin.log
binlog_do_db = demo
# bind-address = 127.0.0.1
The next step is to save the file and then restart the MySQL service:
sudo service mysql restart After the configuration is complete, you must go into the MySQL shell and set some more configuration options.
mysql -u root -p create user 'demouser'@'%' identified by 'password'; grant replication slave on *.* to ‘demouser’@'%'; Now, it is time to create the database you want to replicate.
create database demo; slave stop;
CHANGE MASTER TO MASTER_HOST = '3.3.3.3', MASTER_USER = 'demouser', MASTER_PASSWORD = 'password', MASTER_LOG_FILE = 'mysql-bin.000001', MASTER_LOG_POS = 107;
slave start; Your values for MASTER_LOG_FILE and MASTER_LOG_POS may be different from what is shown above. You should use the values that “SHOW MASTER STATUS” returns on Server 1.
To enable MySQL master master replication in the other direction (from Server 2 to Server 1), you must make note of the master log file and position.
SHOW MASTER STATUS; - Exceptional Security:
A Fault-tolerant Architecture that ensures Zero Data Loss. - Built to Scale:
Exceptional Horizontal Scalability with Minimal Latency for Modern-data Needs. - Built-in Connectors:
Support for 100+ Data Sources
, including MySQL
, Databases, SaaS Platforms, Files & More. Native Webhooks & REST API Connector available for Custom Sources. - Data Transformations:
Best-in-class & Native Support for Complex Data Transformation at fingertips. Code & No-code Flexibility ~ designed for everyone. - Smooth Schema Mapping:
Fully-managed Automated Schema Management for incoming data with the desired destination. - Blazing-fast Setup:
Straightforward interface for new customers to work on, with minimal setup time.
Get Started with Hevo for Free
Step 3: Completing MySQL Master Master Replication on Server 1
 slave stop;
CHANGE MASTER TO MASTER_HOST = '4.4.4.4', MASTER_USER = 'replicator', MASTER_PASSWORD = 'password', MASTER_LOG_FILE = 'mysql-bin.000004', MASTER_LOG_POS = 107;
slave start;
The last thing you need to do is just test whether MySQL Master Master replication is working on both servers.
Step 4: Testing MySQL Master Master Replication
Now that you have your configuration in place, all you have to do is test it. For this, you will create a table in your ‘demo’ database on Server 1 and see if it shows up on Server 2. To check its bidirectional functionality, you will then delete this database from Server 2 and ensure that it’s no longer showing up on Server 1.
 use database demo;
create table dummy (`id` varchar
);
Now, check Server 2 to see if this table shows up.
show tables in demo; +-------------------+
| Tables_in_demo |
+-------------------+
| dummy |
+-------------------+
1 row in set (0.00 sec) On Server 2:
DROP TABLE dummy; On Server 1:
Empty set (0.00 sec)
If you get the above output, then your MySQL Master Master replication is working just fine! Here you have it. Congratulations!
Шаг 4 — Получение координат двоичного журнала из базы-источника
Как вы помните из раздела «Как работает репликация в MySQL», MySQL выполняет репликацию, построчно копируя события базы данных из двоичного журнала источника и исполняя каждое событие в реплике. При использовании репликации двоичного файла журнала на основе позиции вы должны сообщить реплике набор координат, в которых подробно указывается имя исходного двоичного журнала и конкретная позиция в этом файле. Затем реплика использует эти координаты для определения точки в файле журнала, с которой она должна начать копирование событий базы данных, и отслеживать, какие события она уже обработала.
На этом шаге мы рассмотрим, как получить текущие координаты двоичного журнала исходной базы, чтобы запустить копирование данных на репликах с последней строчки в журнале. To avoid the problems of other users changing the data while getting the coordinates, you will need to lock the database so that no one can read or write the information. This won’t take long, but it will pause your database.
From the command line of the open MySQL source shell, run the following command. It will close all open tables in each database in the original instance and lock them:
FLUSH TABLES WITH READ LOCK; Then perform the following operation, which will display information about the current state of the source (master) binary log:
SHOW MASTER STATUS; From this position, the replica will start copying database events. Fix (remember or write down) the name
; you will need them later when you start replication.
Your next steps depend on whether there is any data in the source database that you want to transfer to your replicas. Go to the section that suits you.
If your source has data to transfer
Already existing data from the source database can be transferred to the slave by creating a snapshot (copy) of the database using the utility
However, your database is still locked. If you make any new changes in the same window or close it, it will automatically unlock, which can lead to problems. Unlocking tables means that the data in the database can be changed. This could potentially lead to a mismatch between your snapshot copy and the binary log coordinates you just received.
Therefore, you must open a new terminal window or tab on your local computer. This way you can create a database snapshot without unlocking MySQL.
In a new window or tab open another SSH session on the server hosting
original MySQL instance
ssh username@source_server_ip Then from a new tab or window, export your database with
mysqldump
. This example creates a dump file named
db.sql
from the base with the name
db
. Make sure you have the name of your own database. Also, don’t forget to run this command in a shell bash
, not in the MySQL shell:
sudo mysqldump -u root db > db.sql You can now close this window or tab and return to the initial window where the MySQL shell should be open. At the MySQL command line, unlock the databases to make them writable again:
UNLOCK TABLES; Exit MySQL shell:
exit Now you can send the snapshot to your replica server. Assuming you have already set up SSH keys on the source server and added the source public key to the file
authorized_keys
of your line, you can securely send a snapshot using the command
scp db.sql username@replica_server_ip:/tmp/ After sending the snapshot to the replica server, connect to it via SSH:
ssh username@replica_server_ip Open MySQL shell:
sudo mysql Create a database that you will copy from the source:
CREATE DATABASE db; You do not need to create tables or upload any sample data to this database. Everything will populate on its own when you import the database using the snapshot you just created. Instead, exit the MySQL shell:
exit sudo mysql db < /tmp/db.sql Now your replica master-slave
contains all existing data from the source database. Let’s move on to the last step to set up the replica server to start replication.
Prerequisites
- An active MySQL account.
- Working knowledge of MySQL and SQL Commands.
- Working knowledge of Databases.
- Clear idea regarding the type of data to be replicated.
Step 3 — Creating a Replication User
Start by opening up the MySQL shell:
- mysql
- mysql sammy
- ">CREATE @ IDENTIFIED WITH mysql_native_password BY
- ">GRANT REPLICATION SLAVE ON *.* TO @
- ">FLUSH PRIVILEGES
Step 3 — Create a user account for replication
Each replica in a MySQL environment connects to the source database with a username and password. Replicas can be connected using
any MySQL user
, which exists in the original database and has the appropriate rights, but in this tutorial we will create a special account for this purpose.
Start by opening the MySQL shell:
sudo mysql Note:
if you have configured an account with password authentication, you can connect to MySQL with the following command:
mysql -u username -p CREATE USER 'replica_user'@'replica_server_ip' IDENTIFIED WITH mysql_native_password BY 'password'; After creating a new user, grant him the appropriate rights. At a minimum, such a user must have permissions
GRANT REPLICATION SLAVE ON *.* TO 'replica_user'@'replica_server_ip'; FLUSH PRIVILEGES; This completes the setup of the replication user in the original MySQL.
But don’t rush out of the MySQL shell.
You will need it in the next step to get important information about the source database’s binary log, so leave it open for now.
MySQL Master Master Replication Alternatives
MySQL MGR replication
A MySQL Server plugin implements the MySQL Group Replication feature, which enables replication in a fundamentally new approach based on a distributed state machine architecture.
Group MySQL Replication enables the creation of fault-tolerant systems with redundancy, ensuring that the cluster will remain online even if some of the servers fail (as long as it is not a majority). M GR replication is distinguished by the fact that it has built-in automated recovery and dispute resolution.
MySQL BinLog Replication
Hevo supports MySQL BinLog Replication
as a viable alternative for MySQL Master Master Replication. Depending on the database updates being recorded, the information in the binary log is stored in different logging formats. The binary log from the source is read by replicas, and the events in the binary log are executed on the replica’s local database.
Each duplicate obtains a copy of the binary log’s entire contents. The replica is responsible for determining which statements in the binary log should be executed. Unless you specify differently, the replica executes all events in the source’s binary log. You can configure the replica to process only events that pertain to specific databases or tables if necessary.
Each replica keeps track of the binary log coordinates it reads and processes from the source: the file name and position within the file. This means that many replicas can be connected to the source and run various parts of the same binary log at the same time. Individual replicas can be attached and disconnected from the server without disrupting the source’s operation because the replicas control the process. Furthermore, because each replica keeps track of its present place in the binary log, replicas can be detached, rejoin, and restart processing.
You can refer to this
for detailed information on MySQL BinLog Replication.
What is MySQL?
MySQL was first created in 1994 by MySQL AB, a Swedish corporation. Sun Microsystems bought the company in 2008, and Sun Microsystems was eventually bought out by Oracle, a US IT giant. Oracle is now in charge of MySQL’s development and expansion. Despite the fact that MySQL is open-source and freely available to everybody, it contains some premium features that Oracle only makes available to customers who are willing to pay for them.
To know more about MySQL, visit this link
.


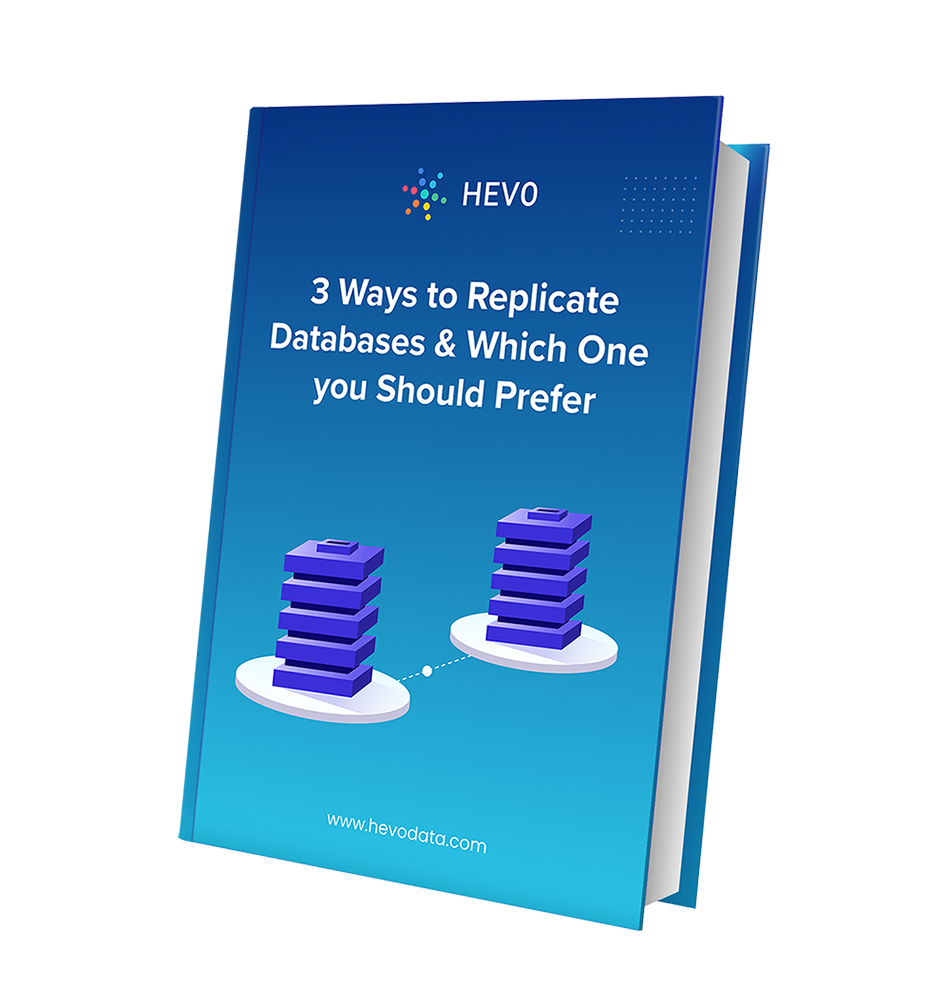
Download the Ultimate Guide on Database Replication
Learn the 3 ways to replicate databases & which one you should prefer.
Key Features of MySQL
- MySQL is a simple and easy-to-use database system.
- MySQL is an open-source relational database management system that is quick, flexible, and scalable.
- MySQL is a safe database management system since it uses an encrypted password-protected method to connect to the server.
- MySQL is a cross-platform database management system. It swiftly works with a variety of platforms, including Linux, Solaris, Windows, macOS, Ubuntu, and others.
- MySQL is a powerful database that makes use of stored procedures and triggers.
- Because MySQL operates in cluster mode, data backup is simple.
- MySQL is built on a client-server model. As a result, the client can query and alter data from anywhere using the internet to communicate with the server.
Step 5 — Configuring the Replica Database
All that’s left to do is to change the replica’s configuration similar to how you changed the source’s. Open up the MySQL configuration file, mysqld.cnf
, this time on your replica server
:
- /etc/mysql/mysql.conf.d/mysqld.cnf
As mentioned previously, each MySQL instance in a replication setup must have a unique server-id
value. Find the replica’s server-id
directive, uncomment it, and change its value to any positive integer, as long as it’s different from that of the source:
server-id = 2 . . .
log_bin = /var/log/mysql/mysql-bin.log
. . .
binlog_do_db = db
. . . . . .
relay-log = /var/log/mysql/mysql-relay-bin.log After making these changes, save and close the file. Then restart MySQL on the replica to implement the new configuration:
- systemctl restart mysql
After restarting the mysql
service, you’re finally ready to start replicating data from your source database.
Prerequisites
To complete this guide, you will need:
- Two servers running Ubuntu 20.04. Both should have a non-root administrative user with
sudo
privileges and a firewall configured with UFW. Follow our initial server setup guide for Ubuntu 20.04
to set up both servers. - MySQL installed on each server. This guide assumes that you’re using the latest version of MySQL available from the default Ubuntu repositories which, as of this writing, is version 8.0.25
. To install this on both servers, follow our guide on How To Install MySQL on Ubuntu 20.04
.
Be aware that the procedure outlined in this guide involves designating the MySQL installation on one server as the source database
, and then configuring the MySQL installation on the other server to be the source’s replica
. To keep things clear, any commands that must be run on the source database’s server will have a blue background, like this:
Likewise, any commands that must be run on the replica MySQL instance’s server will have a red background:
Lastly, this tutorial includes optional instructions on how to migrate data in an existing database from the source to the replica. This process involves creating a snapshot of the source’s database and copying the resulting file to the replica. To do this, we recommend that you set up SSH keys on the source server server
and then make sure that the source’s public key has been copied to the replica.
Steps to Achieve MySQL Master Slave Replication
Master server: 12.34.56.111
Slave server: 12.23.34.222
1. Setting Up The Master
root@repl-master:~# sudo apt-get update root@repl-master:~# sudo apt-get install mysql-server mysql-client -y root@repl-master:~# sudo mysql_secure_installation root@repl-master:~# sudo nano /etc/mysql/mysql.conf.d/mysqld.cnf Next, in the same file, find the line containing bind-address = 127.0.0.1 and replace that IP address with the IP address of your master replication server. So, the line will look like:
bind-address = 12.34.56.111
 server-id = 1
log_bin = /var/log/mysql/mysql-bin.log
You will see that the above lines have been commented, just uncomment these lines and exit the edit interface by clicking CTRL + X. Save the changes and restart the MySQL service for the changes to take effect.
root@repl-master:~# sudo service mysql restart
2. Create A New User For Slave
 root@repl-master:~# mysql -uroot -p;
mysql> CREATE USER ‘slave’@’12.34.56.789‘ IDENTIFIED BY ‘SLAVE_PASSWORD‘;
mysql> GRANT REPLICATION SLAVE ON . TO ‘slave’@’12.34.56.222 ‘;
mysql> FLUSH PRIVILEGES;
mysql> FLUSH TABLES WITH READ LOCK;
mysql> SHOW MASTER STATUS;
3. Move Data From Master To Slave
root@repl-master:~# mysqldump -u root -p –all-databases –master-data > data.sql scp data.sql root@12.34.56.222 mysql> UNLOCK TABLES;
4. Configure Slave Server
Now, all you need to do is configure the slave server and test if replication is working. Ensure MySQL is installed.
Open the configuration file in your slave server and update these lines:
root@repl-slave:~# sudo nano /etc/mysql/mysql.conf.d/mysqld.cnf root@repl-slave:~# sudo service mysql restart
5. Import Data Dump
root@repl-slave:~# mysql -uroot -p < data.sql root@repl-slave:~# mysql -uroot -p;
mysql> STOP SLAVE; You have finally imported the dump files and updated the master IP address, password, log file name, and position, to enable the master to communicate with the slave without any issues.
6. Start Slave Server
Next, use the “Start Slave” command to start operating the slave server.
START SLAVE;
7. Test MySQL Master Slave Replication
To test if your MySQL master slave replication works, just create a database in your master server and see if it is replicated in the slave server. If you can see the database in the slave, then it is working fine.
Create a test database in a master server called ‘sampledb’.
CREATE DATABASE sampledb; Now login to your slave server and list the databases, and if you see the “sampledb” there, then the master slave replication process is working fine.
show databases; Шаг 5 — Настройка реплики
Нам осталось только изменить конфигурацию реплики так же, как вы меняли исходную базу данных. Откройте файл конфигурации MySQL,
, теперь уже
на сервере-реплике
sudo nano /etc/mysql/mysql.conf.d/mysqld.cnf Как упоминалось ранее, каждый экземпляр MySQL в среде должен иметь уникальное значение
server-id
. Найдите в реплике директиву
server-id
,
раскомментируйте её и измените её значение на любое положительное целое число, отличающееся от значения исходной базы данных:
/etc/mysql/mysql.conf.d/mysqld.cnf

server-id           = 2
После этого обновите значения
log_bin
binlog_do_db
, чтобы они соответствовали значениям, которые вы установили в файле конфигурации исходного сервера:
/etc/mysql/mysql.conf.d/mysqld.cnf

.

log_bin             = /var/log/mysql/mysql-bin.log

.

binlog_do_db        = db

.
Наконец, добавьте директиву
relay-log
, определяющую расположение файла журнала ретрансляции реплики. Включите данную строку в конец файла конфигурации:
/etc/mysql/mysql.conf.d/mysqld.cnf

.

relay-log           = /var/log/mysql/mysql-relay-bin.log
Внеся изменения, сохраните и закройте файл. Затем перезапустите MySQL на реплике, чтобы запустить новые настройки:
sudo systemctl restart mysql После перезапуска службы
репликация будет готова к запуску.
Prerequisites
- 2 VM (Virtual Machine) or VPS (Virtual Private Server) with root access.
- Working Internet.
Download the Ultimate Guide on Database Replication
Learn the 3 ways to replicate databases & which one you should prefer.
Using Hevo’s No-code Data Pipeline for Seamless MySQL Replication
Hevodata, an automated no-code data pipeline
provides a hassle-free solution and helps you replicate your data from MySQL
to any database, data warehouse, or destination of your choice within minutes. Hevo is fully managed and completely automates the process of not only loading data from your desired source but also enriching the data and transforming it into an analysis-ready form without having to write a single line of code.
More reasons to love Hevo
:
- Secure
: Hevo has a fault-tolerant architecture that ensures that the data is handled in a secure, consistent manner with zero data loss.
- Auto Schema Mapping
: Hevo takes away the tedious task of schema management & automatically detects the schema of incoming data from MySQL files
and maps it to the destination schema. - Quick Setup
: Hevo with its automated features, can be set up in minimal time. Moreover, with its simple and interactive UI, it is extremely easy for new customers to work on and perform operations. - Pre and Post-load Transformations
: Using Transformations in Hevo, you can prepare the data in multiple ways before loading it to the Destination. Hevo offers numerous data transformations including Cleansing, Re-expression, Data Filtering, Normalization
, etc. - Hevo Is Built To Scale
: As the number of sources and the volume of your data grows, Hevo scales horizontally, handling millions of records per minute with very little latency. - Live Support
: The Hevo team is available round the clock to extend exceptional support to its customers through chat, email, and support calls.
With continuous real-time data movement, load your data from MySQL
to your destination warehouse with Hevo’s easy-to-setup and No-code interface. Try our 14-day
full-access free trial.
Get Started with Hevo for free
Если в вашем источнике нет данных для переноса
Если вы только установили данную MySQL или в ней нет существующих данных, которые вы хотите перенести в слейв, на этом этапе вы можете разблокировать таблицы:
UNLOCK TABLES; Вы можете создать базу данных для репликации master-slave, пока у вас еще открыта оболочка MySQL. Как в примере из шага 2, следующая команда создаст базу данных под именем
CREATE DATABASE db; После этого закройте оболочку MySQL:
exit Шаг 2 — Настройка исходной базы данных для MySQL-репликации
Чтобы ваша исходная база данных MySQL начала синхронизировать данные, вам необходимо внести несколько изменений в ее конфигурацию.
В Ubuntu 20.04 файл конфигурации сервера MySQL по умолчанию называется
mysqld.cnf
и находится в директории
Откройте этот файл
на исходном сервере
в любом текстовом редакторе. Здесь мы будем использовать
sudo nano /etc/mysql/mysql.conf.d/mysqld.cnf Найдите в файле директиву
bind-address
. По умолчанию она выглядит так:
127.0.0.1
— это адрес IPv4, представляющий
localhost
. Если указать это значение для директивы
, то MySQL будет слушать соединения только по адресу
localhost
. Другими словами, этот экземпляр MySQL сможет принимать только соединения, исходящие от сервера, на котором он установлен.
.

bind-address        = source_server_ip

.
Затем найдите директиву
server-id
, определяющую идентификатор, с помощью которого MySQL различает серверы внутри системы репликации. Каждый сервер в системе, включая источник и все его реплики (мастера и все слейвы), должен иметь собственное уникальное значение
server-id
. По умолчанию эта директива закомментирована и выглядит так:
/etc/mysql/mysql.conf.d/mysqld.cnf

.

# server-id         = 1

.
Раскомментируйте эту строку, удалив знак решетки (
). Вы можете выбрать любое число в качестве значения этой директивы, но помните, что номер должен быть уникальным и не может совпадать с другими
server-id
в вашей группе репликации. Для простоты в следующем примере это значение остаётся по умолчанию
/etc/mysql/mysql.conf.d/mysqld.cnf

.

server-id         = 1

.
. Она определяет имя и расположение двоичного журнала MySQL.
По умолчанию эта директива закомментирована, поэтому ведение двоичного журнала отключено. To know when and how to start replication, your replica server needs to read the source’s binary log, so uncomment this line to enable logging at the source. After that, it will look like this:
/etc/mysql/mysql.conf.d/mysqld.cnf
.
log_bin = /var/log/mysql/mysql-bin.log
.
Finally, scroll down to the bottom of the file to find the commented out directive
/etc/mysql/mysql.conf.d/mysqld.cnf
.
# binlog_do_db
= include_database_name
Remove the pound sign to uncomment this line and replace
the name of the database you want to duplicate. This example shows the directive
pointing to the database named
. If you already have an existing database in the source that you want to replicate, use its name instead of
/etc/mysql/mysql.conf.d/mysqld.cnf
.
binlog_do_db
Note:
if you are replicating more than one database, you can add another directive
binlog_do_db
for each base to be added to the group. In this tutorial, we will continue to replicate only one database, but if you have several, the result will be something like this:
/etc/mysql/mysql.conf.d/mysqld.cnf
.
binlog_do_db = db
binlog_do_db = db_1
binlog_do_db       = db_2
Or you can specify which MySQL databases
should not
duplicate by adding directive
for each of them:
/etc/mysql/mysql.conf.d/mysqld.cnf
.
binlog_ignore_db = db_to_ignore
.
After making changes, save and close the file. If you used
, do it by pressing
CTRL+X
Y
and then
ENTER
Restart MySQL by running the following command:
sudo systemctl restart mysql This MySQL instance is now ready to serve as the source database that your MySQL server will replicate. However, before setting up the replica, we need to do a few more manipulations with the source in order to ensure that replication works correctly. First you need to create a special MySQL user account that will perform all the actions related to replication.
Table of Contents
- Prerequisites
- What is MySQL?
- Why do you need MySQL Master Master Replication?
- Steps to Set Up MySQL Master Master Replication
- MySQL Master Master Replication Pros & Cons
- MySQL Master Master Replication Alternatives
- Conclusion
Conclusion
The above article has provided you with enough information about how to set up a MySQL master slave replication. The step-by-step guide is specially provided to help beginners understand the process and start testing the replication process in their environment. But this process requires extensive hard work as you have to manually configure many details. So, if you want to overlook this hardship and experience a hassle-free process, then give Hevo a try.
Hevo Data
provides an Automated No-code Data Pipeline
that empowers you to overcome the above-mentioned limitations. You can leverage Hevo to seamlessly replicate your MySQL
data in real time without writing a single line of code.
Hevo’s Data Pipeline enriches your data and manages the transfer process in a fully automated and secure manner. Hevo caters to 150+ data sources
(including 50+ free sources)
and can directly transfer data to Data Warehouses, Business Intelligence Tools
, or any other destination of your choice in a hassle-free manner. It will make your life easier and make data migration hassle-free.
https://youtube.com/watch?v=p0XGLDgvCo8%3Ffeature%3Doembed
You can post your experience and comments about the MySQL master slave replication process in the comment section below.
Conclusion
Visit our Website to Explore Hevo
Hevo
Data provides an Automated No-code Data Pipeline that empowers you to overcome the above-mentioned limitations. Hevo caters to 100+ data sources
(including 40+ free sources)
and can seamlessly perform MySQL Replication
in real-time. Furthermore, Hevo’s fault-tolerant architecture ensures a consistent and secure replication of your MySQL data. Using Hevo will make your life easier and make Data Replication hassle-free.
https://youtube.com/watch?v=p0XGLDgvCo8%3Ffeature%3Doembed
Want to take Hevo for a spin? Sign Up
for a 14-day free trial
and experience the feature-rich Hevo suite first hand. You can also have a look at the unbeatable pricing
that will help you choose the right plan for your business needs.
MySQL Master Master Replication Pros & Cons
Pros
- You can scale write requests by adding additional master nodes as well as expanding the computational capabilities of a single master node.
- Because you have many master nodes, failover is semi-automatic. The chances of all master nodes failing at the same time are extremely slim. There is at least one more master node that can handle the requests if one of the master nodes fails.
Cons
- If one of the master nodes fails, you may lose certain transactions due to asynchronous replication amongst all master nodes.
- You can’t be guaranteed that backups created on each master node have the same data because of asynchronous replication.
- In the event that you need to promote a Slave node to a Master node, failover is still not entirely automated.
