
- ZABBIX-Server starts failure processing
- Make a mistake
- Turn off Selinux
- Start Zabbix
- Intelligent Recommendation
- zabbix (a: zabbix server)
- [Zabbix] zabbix-server installation
- zabbix-server
- Notification starts broadcast failure
- Calico starts POD failure
- More Recommendation
- Vagrant starts failure resolution
- ZooKeeper starts failure
- Tomcat starts failure solution
- ADB starts failure resolution
- RocketMQ-EXPORTER starts failure
- Copyright DMCA © 2018-2023 — All Rights Reserved — www.programmersought.com User Notice
- Step 1 – SetUp Apache, MySQL and PHP
- Step 2 – Configure Yum Repository
- Step 3 – Install Zabbix Server with MySQL
- Step 4 – Setup Zabbix Apache Configuration
- Step 5 – Configure MySQL Database for Zabbix
- Step 6 – Start Zabbix Server
- Step 7 – Complete Zabbix Web Installer Wizzard
- Zabbix Setup Welcome Screen
- Check for pre-requisities
- Configure DB Connection
- Zabbix Server Details
- Pre-Installation Summary
- Install Zabbix
- Zabbix Login Screen
- About Zabbix
- Environment
- Step 1 – Install Zabbix Server with MySQL
- Step 2 – Edit PHP timezone
- Step 3 – Edit create and import initial zabbix database and user
- Step 4 – Set SELinux settings and adjust Firewall
- Step 5 – Configure Zabbix via Web console
- 2 ответа
- Ошибка при запуске службы.
- Введение
- Подготовка сервера CentOS к установке
- Centos 7
- Centos 8
- Установка сервера Zabbix 4. 0 в CentOS
- Настройка SELinux с zabbix
ZABBIX-Server starts failure processing
Make a mistake
[email protected] data# systemctl status zabbix-server ● zabbix-server.service - Zabbix Server Loaded: loaded /usr/lib/systemd/system/zabbix-server.service enabled vendor preset: disabled Active: activating auto-restart Result: exit-code since four -06-09 :18:54 CST 6s ago Process: /bin/kill -SIGTERM codeexited, /FAILURE Process: /usr/sbin/zabbix_server -c codeexited, /SUCCESS Main PID: codeexited, /SUCCESS
Month 09 :18:54 ncayu101 kill: -q, --queue sig use sigqueue rather than kill
Month 09 :18:54 ncayu101 kill: -p, --pid print pids without signaling them
Month 09 :18:54 ncayu101 kill: -l, --list signal list signal names, or convert one to a name
Month 09 :18:54 ncayu101 kill: -L, --table list signal names and numbers
Month 09 :18:54 ncayu101 kill: -h, --help display this and
Month 09 :18:54 ncayu101 kill: -V, --version output version information and
Month 09 :18:54 ncayu101 kill: For details see kill.
Month 09 :18:54 ncayu101 systemd: zabbix-server.service: control process exited, exited
Month 09 :18:54 ncayu101 systemd: Unit zabbix-server.service entered failed state.
Month 09 :18:54 ncayu101 systemd: zabbix-server.service failed.
Seeing the prompts mentioning Selinux, the inspection found that it did not turn off Selinux
[email protected] data
Enforcing[email protected] data
SELinux status: enabled
SELinuxfs mount: /sys/fs/selinux
SELinux root directory: /etc/selinux
Loaded policy name: targeted
Current mode: enforcing
Mode from config file: enforcing
Policy MLS status: enabled
Policy deny_unknown status: allowed
Max kernel policy version:
Turn off Selinux
Connect ECS instance remotely with root permissions. Please refer to the connection method overview.
Run the command GetenForce to verify the SELINUX state. If the return state is Enforcing, it indicates that Selinux has been opened.
Select temporarily closed or permanently closed Selinux. Execute the command setenforce Close Selinux temporarily. Close Selinux permanently.
[email protected] data
Enforcing# Temporary closed selinux[email protected] data# setenforce 0[email protected] data[email protected] data[email protected] data
Permissive- a. Run the following command and edit the config file of Selinux.
vim /etc/selinux/config - b. Find Selinux = Enforcing, enter the editing mode according to i, and modify the parameters to Selinux = Disabled.
# This file controls the state of SELinux on the system.# SELINUX= can take one of these three values:# enforcing - SELinux security policy is enforced.# permissive - SELinux prints warnings instead of enforcing.# disabled - No SELinux policy is loaded.enforcing# SELINUXTYPE= can take one of three values:# targeted - Targeted processes are protected,# minimum - Modification of targeted policy. Only selected processes are protected. # mls - Multi Level Security protection.targetedI have modified it

c. After the modification is completed, press the keyboard ESC key to execute the command: WQ, save and exit the file.
d. Restart ECS instance.
-r now- e. After restarting, run the command GetenForce, verify that the Selinux state is Disabled, indicating that Selinux is closed.
Start Zabbix
systemctl start zabbix-server zabbix-agent httpd rh-php72-php-fpm# Linux view http://192.168.70.133/zabbix/setup.php
View in the browser

Intelligent Recommendation
zabbix (a: zabbix server)

[Zabbix] zabbix-server installation

zabbix-server
Notification starts broadcast failure

Calico starts POD failure
More Recommendation

Vagrant starts failure resolution
ZooKeeper starts failure

Tomcat starts failure solution
ADB starts failure resolution
RocketMQ-EXPORTER starts failure
Copyright DMCA © 2018-2023 — All Rights Reserved — www.programmersought.com User Notice
Top
After checking for a long time, I can’t find out why. I saw that the database has 45G, clean it up, ok. The zabbix-server service is up.
17513:20191224:092628.167 7f76bd8cd000-7f76bd8ce000 rw-p 00000000 00:00 0 17513:20191224:092628.167 7ffef170c000-7ffef172d000 rw-p 00000000 00:00 0 [stack] 17513:20191224:092628.167 7ffef17dc000-7ffef17de000 r-xp 00000000 00:00 0 [vdso] 17513:20191224:092628.167 ffffffffff600000-ffffffffff601000 r-xp 00000000 00:00 0 [vsyscall] 17513:20191224:092628.167 ================================ 17513:20191224:092628.167 Please consider attaching a disassembly listing to your bug report. 17513:20191224:092628.167 This listing can be produced with, e.g., objdump -DSswx zabbix_server. 17513:20191224:092628.167 ================================ 17503:20191224:092628.168 One child process died (PID:17513,exitcode/signal:1). Exiting ... 17503:20191224:092630.172 syncing history data... 17503:20191224:092630.279 syncing history data done 17503:20191224:092630.279 syncing trend data... 17503:20191224:092630.303 syncing trend data done 17503:20191224:092630.303 Zabbix Server stopped. Zabbix 3.4.15 (revision 86739).After a while, zabbix-server restarts automatically. Later, I thought it might be that I enabled the mail function that comes with the system. I have said on the Internet that there is a bug.
So close this module and truncate the historical database, ok.
Observe the running status of zabbix-server
watch -n 1 -d "systemctl status zabbix-server"[[email protected] yum.repos.d]# systemctl status zabbix-server
● zabbix-server.service - Zabbix Server Loaded: loaded (/usr/lib/systemd/system/zabbix-server.service; enabled; vendor preset: disabled) Active: active (running) since Tue 2019-12-24 10:56:49 CST; 15min ago Process: 34639 ExecStop=/bin/kill -SIGTERM $MAINPID (code=exited, status=1/FAILURE) Process: 34842 ExecStart=/usr/sbin/zabbix_server -c $CONFFILE (code=exited, status=0/SUCCESS) Main PID: 34844 (zabbix_server) CGroup: /system.slice/zabbix-server.service ├─34844 /usr/sbin/zabbix_server -c /etc/zabbix/zabbix_server.conf ├─34878 /usr/sbin/zabbix_server: configuration syncer [synced configuration in 1.394036 sec, idle 60 sec] ├─34879 /usr/sbin/zabbix_server: alerter #1 [sent 0, failed 0 alerts, idle 667.706364 sec during 667.986064 sec] ├─34880 /usr/sbin/zabbix_server: alerter #2 [sent 0, failed 0 alerts, idle 677.474511 sec during 678.971590 sec] ├─34881 /usr/sbin/zabbix_server: alerter #3 [sent 0, failed 0 alerts, idle 672.695920 sec during 673.010181 sec] ├─34882 /usr/sbin/zabbix_server: housekeeper [startup idle for 30 minutes] ├─34883 /usr/sbin/zabbix_server: timer #1 [processed 106 triggers, 0 events in 0.002007 sec, 0 maintenances in 0.002024 sec, idle 30 sec] ├─34884 /usr/sbin/zabbix_server: http poller #1 [got 0 values in 0.000521 sec, idle 5 sec] ├─34885 /usr/sbin/zabbix_server: discoverer #1 [processed 0 rules in 0.000000 sec, performing discovery] ├─34886 /usr/sbin/zabbix_server: history syncer #1 [synced 0 items in 0.000048 sec, idle 1 sec] ├─34887 /usr/sbin/zabbix_server: history syncer #2 [synced 0 items in 0.000054 sec, idle 1 sec] ├─34888 /usr/sbin/zabbix_server: history syncer #3 [synced 0 items in 0.000065 sec, idle 1 sec] ├─34889 /usr/sbin/zabbix_server: history syncer #4 [synced 254 items in 0.015404 sec, idle 1 sec] ├─34890 /usr/sbin/zabbix_server: escalator #1 [processed 0 escalations in 0.000257 sec, idle 3 sec] ├─34891 /usr/sbin/zabbix_server: proxy poller #1 [exchanged data with 0 proxies in 0.000018 sec, idle 5 sec] ├─34892 /usr/sbin/zabbix_server: self-monitoring [processed data in 0.000016 sec, idle 1 sec] ├─34893 /usr/sbin/zabbix_server: task manager [processed 0 task(s) in 0.000110 sec, idle 5 sec] ├─34894 /usr/sbin/zabbix_server: poller #1 [got 167 values in 4.084475 sec, idle 1 sec] ├─34895 /usr/sbin/zabbix_server: poller #2 [got 59 values in 0.149098 sec, getting values] ├─34896 /usr/sbin/zabbix_server: poller #3 [got 0 values in 0.000028 sec, idle 1 sec] ├─34897 /usr/sbin/zabbix_server: poller #4 [got 45 values in 0.144095 sec, idle 1 sec] ├─34898 /usr/sbin/zabbix_server: poller #5 [got 42 values in 0.177383 sec, getting values] ├─34899 /usr/sbin/zabbix_server: unreachable poller #1 [got 2 values in 6.013010 sec, getting values] ├─34900 /usr/sbin/zabbix_server: trapper #1 [processed data in 0.000288 sec, waiting for connection] ├─34901 /usr/sbin/zabbix_server: trapper #2 [processed data in 0.000296 sec, waiting for connection] ├─34902 /usr/sbin/zabbix_server: trapper #3 [processed data in 0.000751 sec, waiting for connection] ├─34903 /usr/sbin/zabbix_server: trapper #4 [processed data in 0.000782 sec, waiting for connection] ├─34904 /usr/sbin/zabbix_server: trapper #5 [processed data in 0.001437 sec, waiting for connection] ├─34905 /usr/sbin/zabbix_server: icmp pinger #1 [pinging hosts] ├─34906 /usr/sbin/zabbix_server: alert manager #1 [sent 0, failed 0 alerts, idle 5.007279 sec during 5.007342 sec] ├─34907 /usr/sbin/zabbix_server: preprocessing manager #1 [queued 0, processed 967 values, idle 4.989516 sec during 5.000585 sec] ├─34908 /usr/sbin/zabbix_server: preprocessing worker #1 started ├─34909 /usr/sbin/zabbix_server: preprocessing worker #2 started ├─34910 /usr/sbin/zabbix_server: preprocessing worker #3 started ├─47412 sh -c /usr/sbin/fping -C3 2>&1 </tmp/zabbix_server_34885.pinger;/usr/sbin/fping6 -C3 2>&1 </tmp/zabbix_server_34885.pinger; ├─47413 /usr/sbin/fping -C3 ├─47415 sh -c /usr/sbin/fping -C3 2>&1 </tmp/zabbix_server_34905.pinger;/usr/sbin/fping6 -C3 2>&1 </tmp/zabbix_server_34905.pinger; └─47416 /usr/sbin/fping -C3
Dec 24 10:56:49 gt-zabbix.gtland.cn systemd[1]: Starting Zabbix Server...
Dec 24 10:56:49 gt-zabbix.gtland.cn systemd[1]: zabbix-server.service: Supervising process 34844 which is not our child. We'll most likely not notice when it exits.
Dec 24 10:56:49 gt-zabbix.gtland.cn systemd[1]: Started Zabbix Server.I just installed Zabbix 5.0 LTS (The Latest verion of Zabbix) on RHEL-8 OS. On logging in the Zabbix front end, I gett a message saying «Zabbix server is not working». & bar below says:»Zabbix server not working.Information delayed may not be current».Kindly provide help?
Edit:My server port is 10051.
On entering «service zabbix start», I get output:
Redirecting to /bin/systemctl start zabbix.service
Failed to start zabbix.service:Unit zabbix.service not found.
& on entering «systemctl restart zabbix-server zabbix-agent httpd php-fpm», I get:
Job for zabbix-server.service failed because the control process exited with error code.
See "systemctl status zabbix-server.service" and "journalctl -xe" for details.
Output of «journalctl -xe»:
RHEL8 platform-python[5746]: SELinux is preventing zabbix_server from using the dac_override capability.
*** Plugin dac_overrride (91.4 confidence) suggests ************************
If you want to help identify if domain needs this access or you have a file with the wrong permissions on your system
Then turn on full auditing to get path information about the offending file and generate the error again.
Do
Turn on full auditing
#auditctl -w /etc/shadow -p w
Try to recreate AVC.Then execute
#ausearch -m avc -ts recent
If you see PATH record check ownership/permissions on file, and fix it,
otherwise report as a bugzilla
*** Plugin catchall (9.59 confidence) suggests *************************
If you believe that zabbix_server should have the dac_override capability by default.
Then you should report this as a bug.
You can generate a local policy module to allow this access.
Do
allow this access for now by executing:
#ausearch -c 'zabbix_server' --raw | audit2allow -M my-zabbixserver
#semodule -X 300 -i my-zabbixserver.pp
RHEL8 dbus-daemon[779]: [system] Activating service name='org.fedoraproject.Setroubleshootd' requested by ':1.40' (uid=0 pid=748 comm="/usr/sbin/sedispatch " label="sytem_u:system_r:auditd_t:s0") (using servicehelper)
On entering «systemctl status zabbix-server.service», I get output:
zabbix-server.service-Zabbix server: Loaded:.... Active:.... Process: 4959 ExecStart=/usr/sbin/zabbix_server -c $CONFILE (code=exited,status=1/FAILURE)
RHEL8 systemd[1]:zabbix-server.service:Control process exited,code=exited status=1
RHEL8 systemd[1]:zabbix-server.service:Failed with result 'exit-code'.
RHEL8 systemd[1]:Failed to start Zabbix Server. What do I do now?
Using systemd I located this file on /lib/systemd/system :
I started the service,ut when I check the status:
sudo systemctl status CATALOG_REST-py.serviceI receive this error:
● CATALOG_REST-py.service — Test Service Loaded: loaded
(/lib/systemd/system/CATALOG_REST-py.service; enabled; vendor preset:
enabled) Active: failed (Result: exit-code) since Sun 2021-08-22
16:54:13 UTC; 1s ago Process: 23968 ExecStart=/usr/bin/python3
/home/GreenHouse/Catalog/Catalog_REST.py (code=exited,
status=1/FAILURE) Main PID: 23968 (code=exited, status=1/FAILURE)
I want to say that if I run in terminal python3 /home/GreenHouse/Catalog/Catalog_REST.py , it works.
Do you know some ways to obtain a better explanation of the error?
This article will help you to step by step install Zabbix 3.0 Server on CentOS/RHEL 7/6 systems. Before starting installation read below basic requirements to run Zabbix 3.4.
- Apache: 1.3.12 or later.
- PHP: 5.4.0 or later.
- MySQL: 5.0.3 or later.
- OpenIPMI: Required for IPMI support.
- libssh2: Required for SSH support. Version 1.0 or higher.
- fping: Required for ICMP ping items.
- libcurl: Required for web monitoring.
- libiksemel: Required for Jabber support.
- net-snmp: Required for SNMP support.
Step 1 – SetUp Apache, MySQL and PHP
In order to use Zabbix, we required a Web Server, database server, and PHP to work. In this steps we are going to set up these services, You may skip this step if you have already configured it.
Install All Services
yum install httpd httpd-devel
yum install mysql mysql-server
yum install php php-devel php-bcmath php-pear php-gd php-mbstring php-mysql php-xml
Start All Services
service httpd start
service mysqld start
MySQL Initial Setup
mysql_secure_installation
Step 2 – Configure Yum Repository
CentOS/RHEL 7:rpm -Uvh https://repo.zabbix.com/zabbix/4.0/rhel/7/x86_64/zabbix-release-4.0-2.el7.noarch.rpmCentOS/RHEL 6:rpm -Uvh https://repo.zabbix.com/zabbix/4.0/rhel/6/x86_64/zabbix-release-4.0-2.el6.noarch.rpm
Step 3 – Install Zabbix Server with MySQL
yum install zabbix-server-mysql zabbix-web-mysql zabbix-proxy-mysql
Step 4 – Setup Zabbix Apache Configuration
Zabbix creates its own apache configuration file /etc/httpd/conf.d/zabbix.conf. Edit this file and just update timezone. More timezone’s
php_value date.timezone Asia/Kolkata
After changing value restart Apache service.
service httpd restart
Step 5 – Configure MySQL Database for Zabbix
mysql -u root -p
mysql> CREATE DATABASE zabbixdb CHARACTER SET UTF8;
mysql> GRANT ALL PRIVILEGES on zabbixdb.* to [email protected] IDENTIFIED BY 'password';
mysql> FLUSH PRIVILEGES;
mysql> quit
zcat /usr/share/doc/zabbix-server-mysql*/create.sql.gz | mysql -uroot -p zabbixdb zcat /usr/share/doc/zabbix-proxy-mysql*/schema.sql.gz | mysql -uroot -p zabbixdb
DBHost=localhost DBName=zabbixdb DBUser=zabbix DBPassword=password
Step 6 – Start Zabbix Server
service zabbix-server start
After starting Zabbix service, let’s go to Zabbix web installer and finish the installation.
Step 7 – Complete Zabbix Web Installer Wizzard
http://host.tecadmin.net/zabbix/
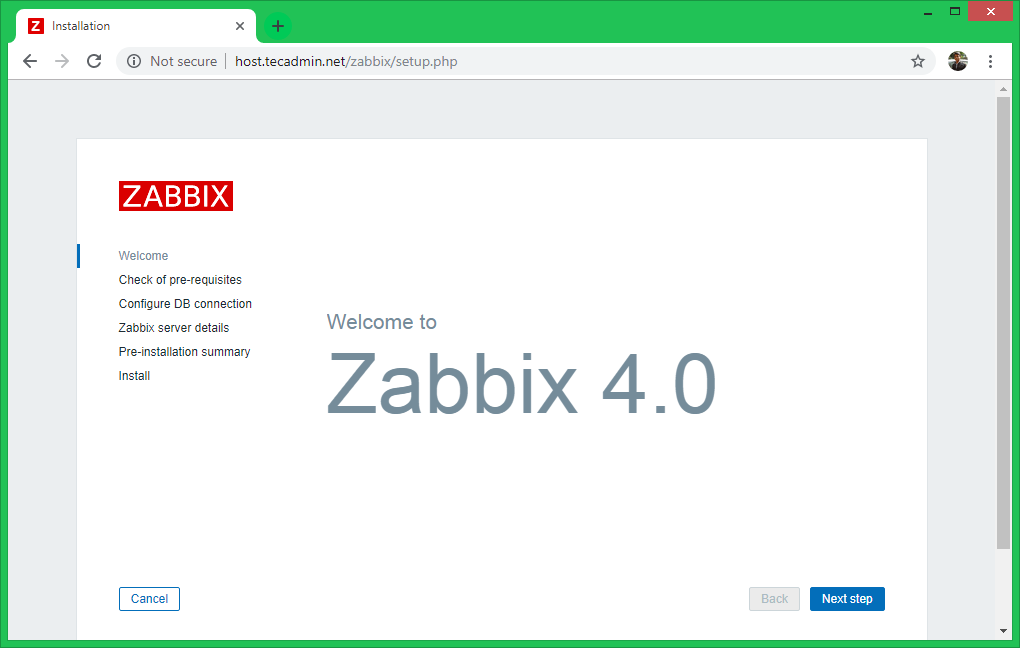
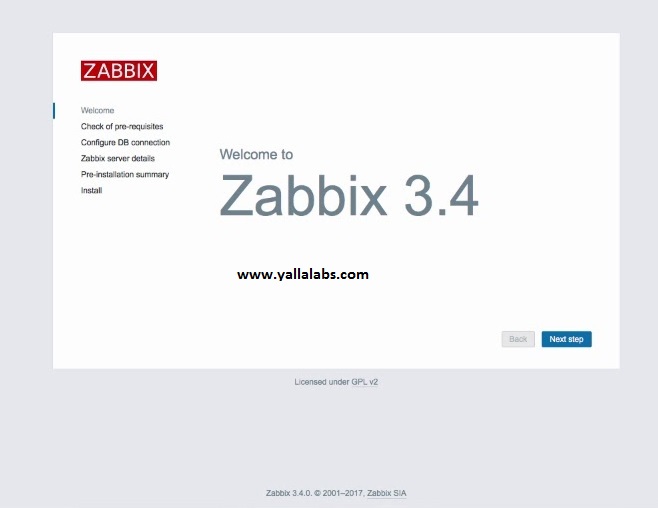
Zabbix Setup Welcome Screen
This is the welcome screen of Zabbix web installer. Go forward by click on next button.
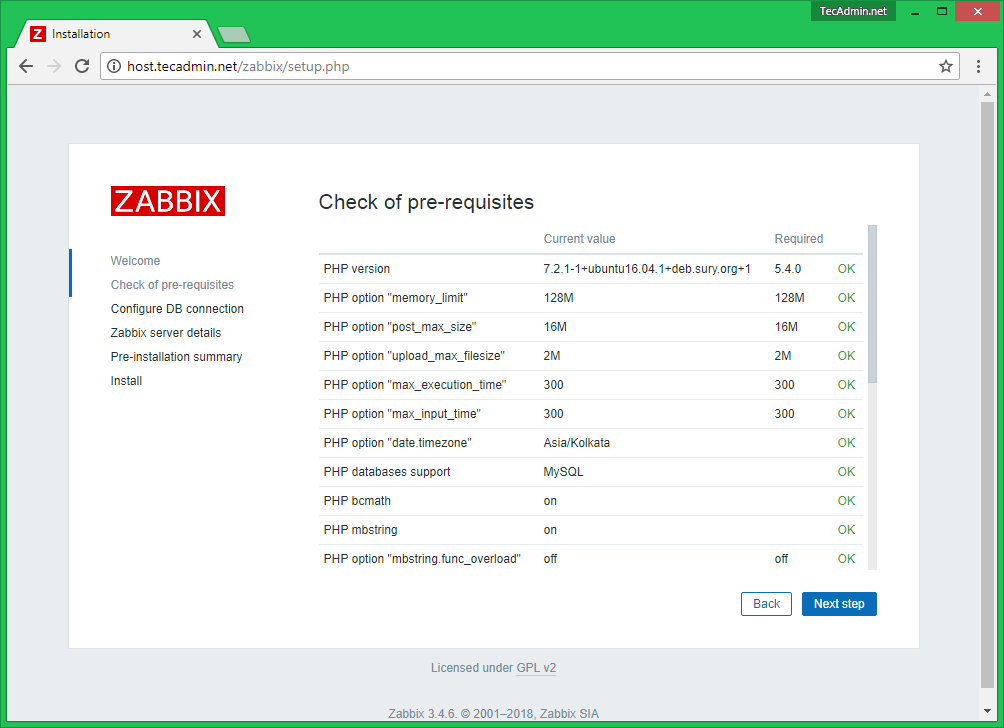
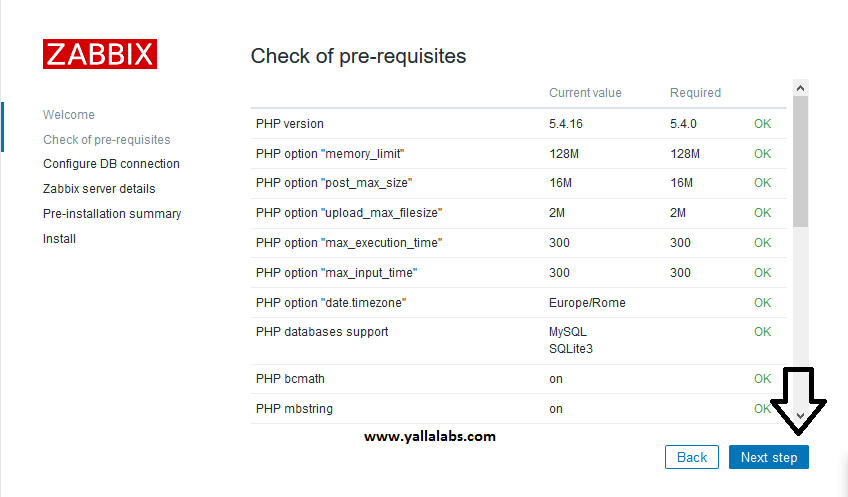
Check for pre-requisities
Check if your system has all required packages, if everything is ok click next.
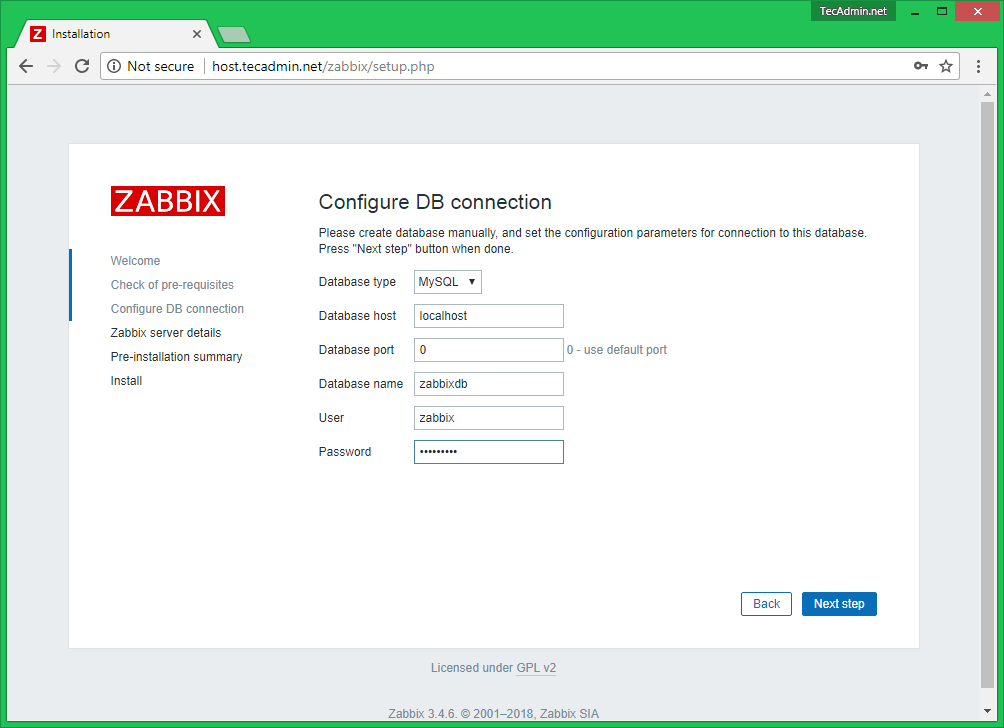
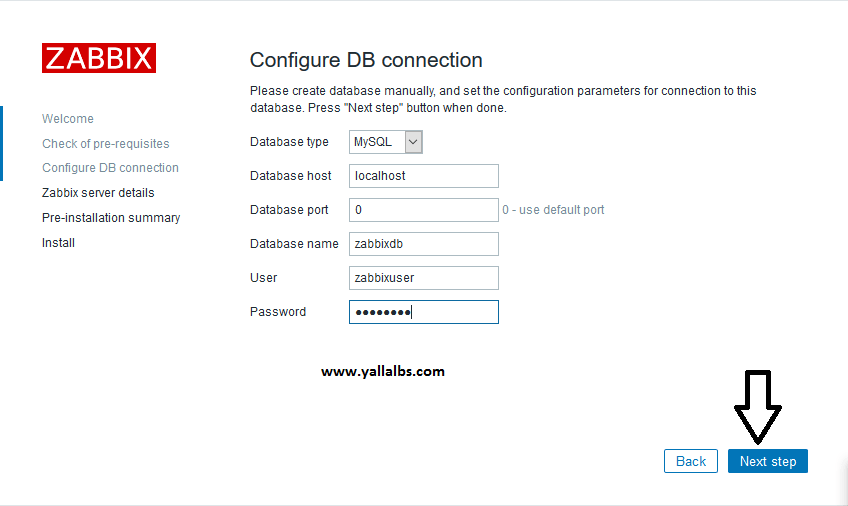
Configure DB Connection
Enter database details created in Step #4 and click next to continue.
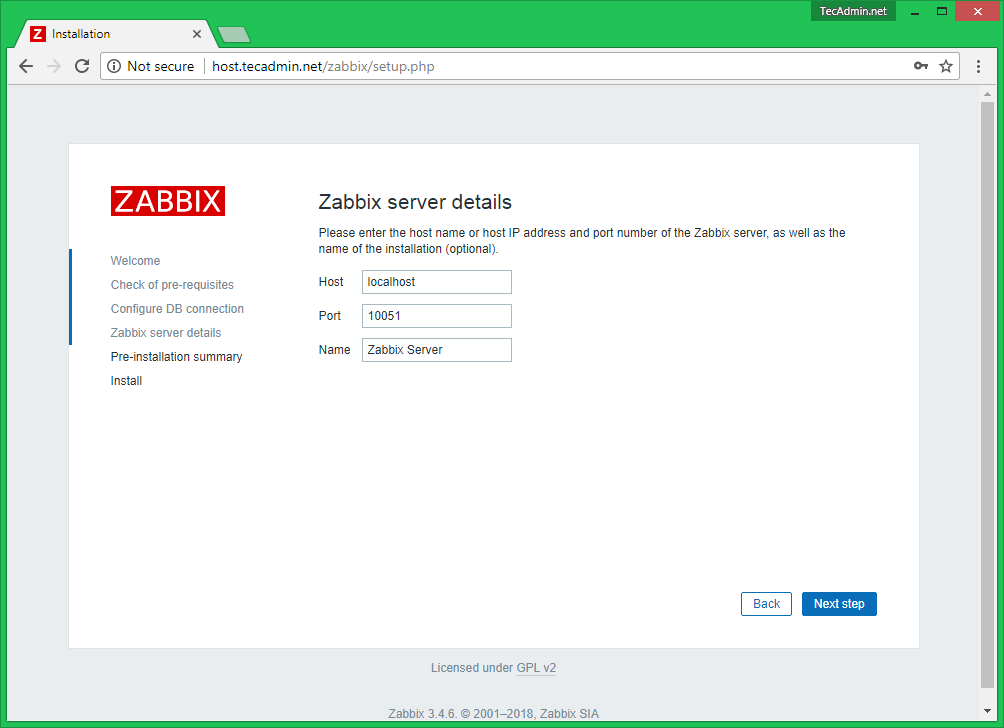
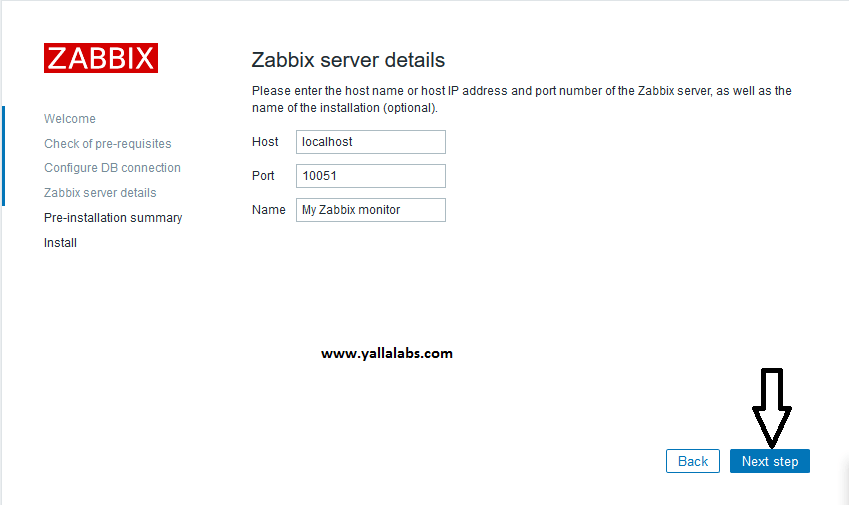
Zabbix Server Details
This is the host and port of running Zabbix server. As your Zabbix server is running on the same host, so keep the values unchanged. You can give a name for your instance.
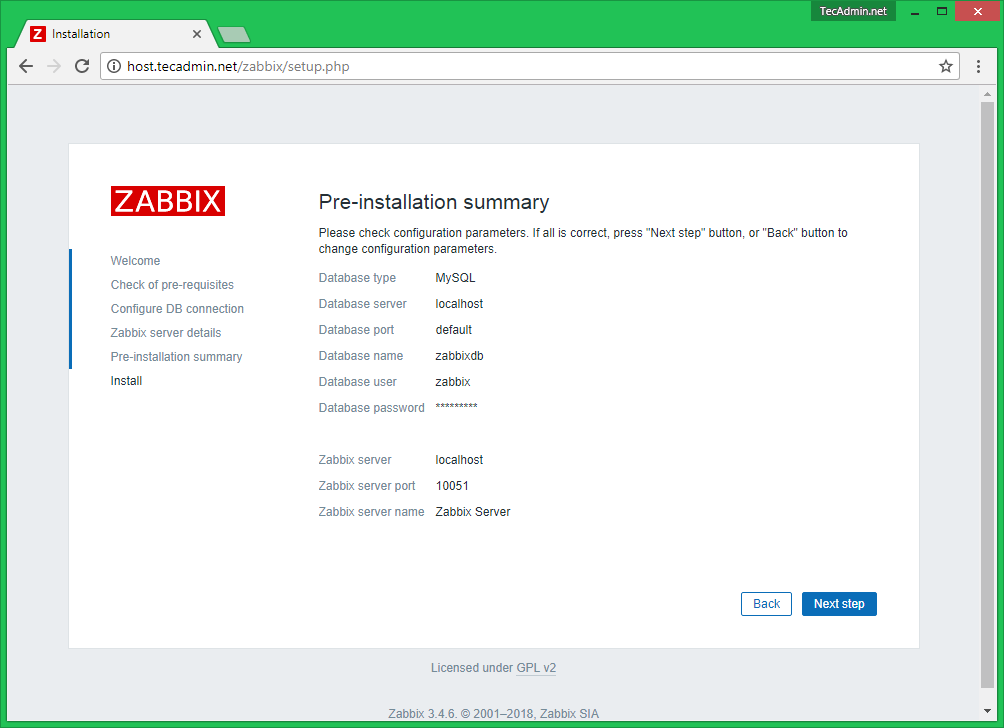
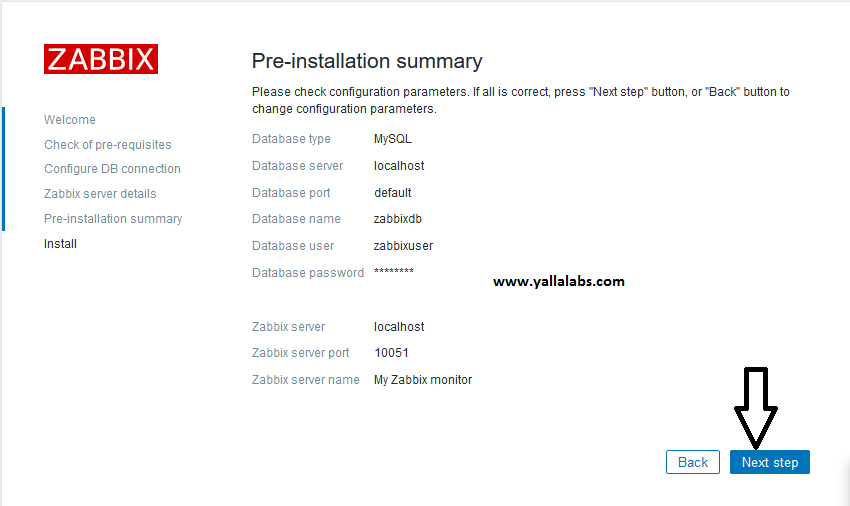
Pre-Installation Summary
In this step will show the summary you have entered previous steps, so simply click next.
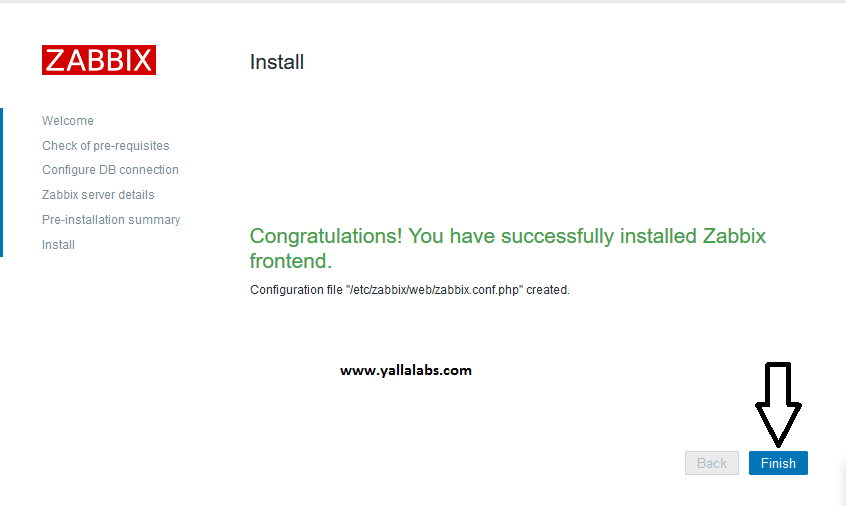
Install Zabbix
If everything goes correctly, you will see a successful installation message on this page. This will also show you a message for the created configuration file.

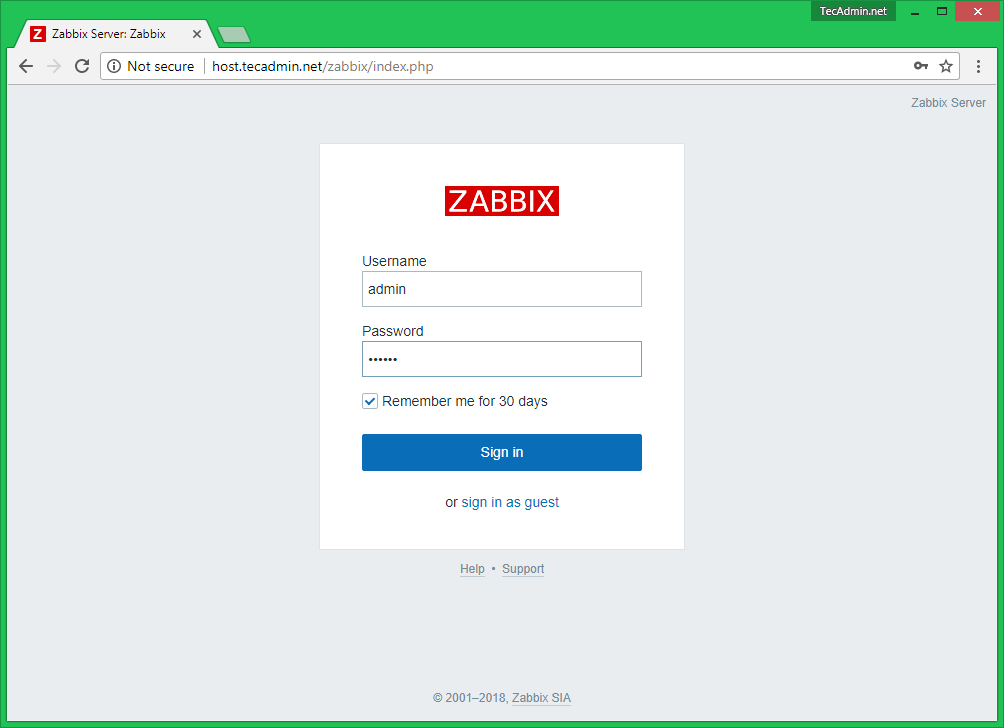
Zabbix Login Screen
Login to Zabbix using default credentials.
Username: admin Password: zabbix
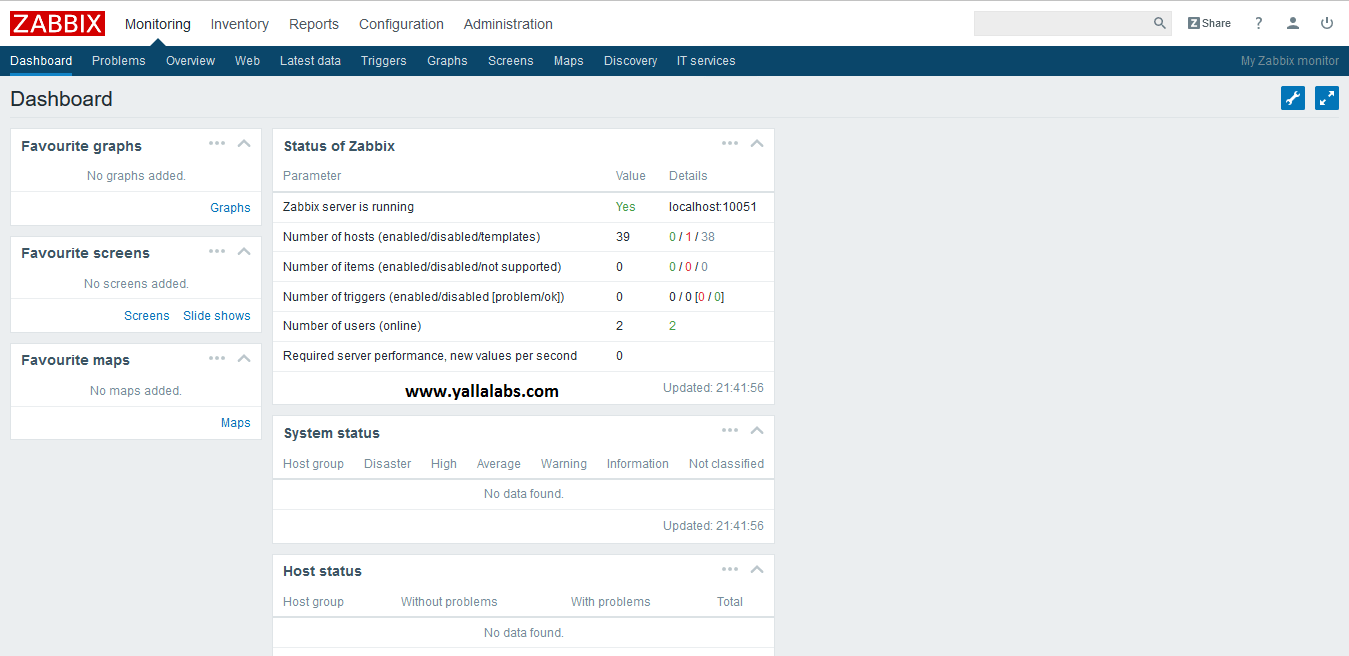
After successful login, You will get Zabbix dashboard like below.
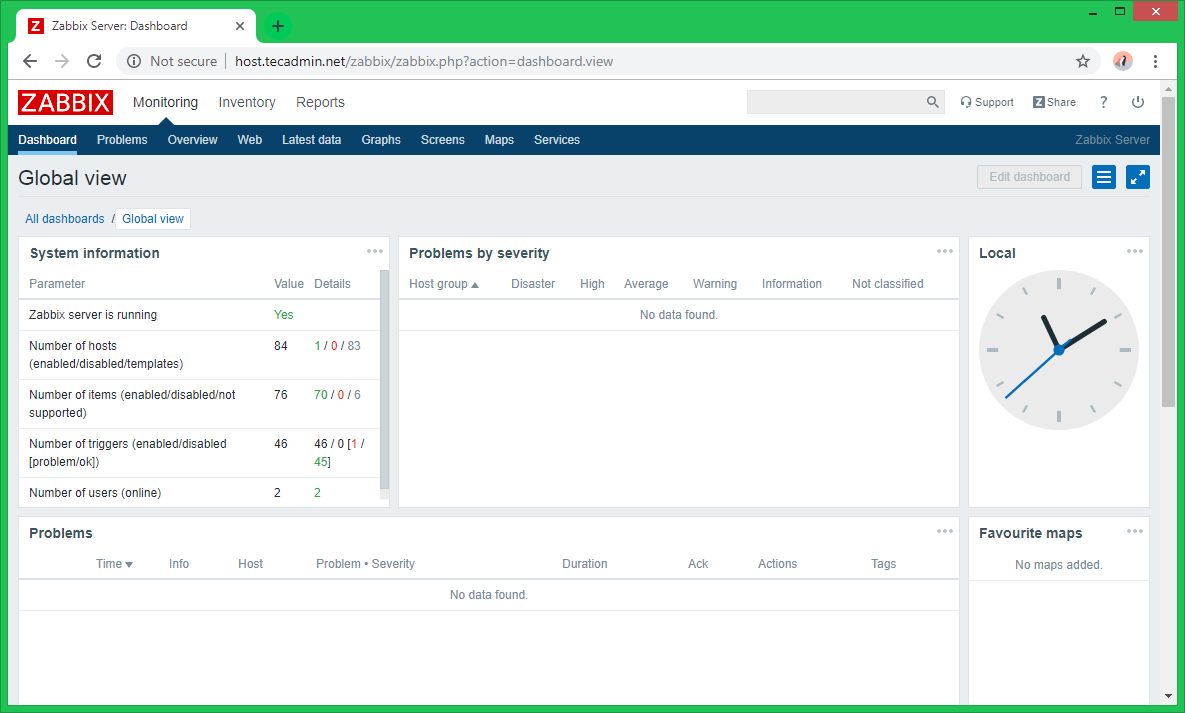
Congratulation! Your Zabbix setup has been completed. Read our next article to install zabbix agent and add host in zabbix server.
About Zabbix
Zabbix is a free and open source network monitoring Software tool which is used to monitor and track the availability and performance of your IT infrastracture: servers, network devices and other IT assets.
Environment
- Hostname = zabbix.yallalabs.com
- IP Address = 192.168.1.200
- OS = CentOS 7 / RHEL 7
Before we begin, note that I have installed lamp stack in my server:
[[email protected] ~]# yum update
[[email protected] ~]# yum install httpd -y
[[email protected] ~]# yum install php php-cli php-common php-devel php-pear php-gd php-mbstring php-mysql php-xml -y
[[email protected] ~]# yum install mariadb-server -y
[[email protected] ~]# systemctl enable httpd && systemctl start httpd
[[email protected] ~]# systemctl enable mariadb && systemctl start mariadb
– Don’t forget to set a password for the root using mysql_secure_installtion, take a look to this tutorial: Securing MySQL server / Mariadb with mysql_secure_installation
Step 1 – Install Zabbix Server with MySQL
Before starting the installation we need to enable the zabbix repository using this commands:
[[email protected] ~]# rpm --import http://repo.zabbix.com/RPM-GPG-KEY-ZABBIX
[[email protected] ~]# rpm -ivh http://repo.zabbix.com/zabbix/3.4/rhel/7/x86_64/zabbix-release-3.4-1.el7.centos.noarch.rpm
Now use the below command to install Zabbix and necessary packages
[[email protected] ~]# yum install zabbix-server-mysql zabbix-web-mysql zabbix-agent zabbix-get zabbix-sender zabbix-java-gateway -yStep 2 – Edit PHP timezone
Open the file /etc/httpd/conf.d/zabbix.conf created by Zabbix with your favourite editer
[[email protected] ~]# vi /etc/httpd/conf.d/zabbix.conf
It’s necessary to uncomment the “date.timezone” setting and set the right timezone for you.
php_value date.timezone
– Save the file and don’t forget to reload httpd service using the below command:
[[email protected] ~]# systemctl reload httpdStep 3 – Edit create and import initial zabbix database and user
[[email protected] ~]# mysql -u root -p
Enter password:
Welcome to the MariaDB monitor. Commands end with ; or \g.
Your MariaDB connection id is 10
Server version: 5.5.47-MariaDB MariaDB Server
Copyright (c) 2000, 2015, Oracle, MariaDB Corporation Ab and others.
Type 'help;' or '\h' for help. Type '\c' to clear the current input statement.
MariaDB [(none)]> CREATE DATABASE CHARACTER SET utf8 COLLATE utf8_bin;
Query OK, 1 row affected (0.00 sec)
MariaDB [(none)]> GRANT ALL PRIVILEGES ON .* TO IDENTIFIED BY "";
Query OK, 0 rows affected (0.00 sec)
MariaDB [(none)]> FLUSH PRIVILEGES;
Query OK, 0 rows affected (0.00 sec)
MariaDB [(none)]> exit
Bye
[[email protected] ~]#
[[email protected] ~]# zcat /usr/share/doc//create.sql.gz | mysql -u -p
– Now we need to edit database configuration in the zabbix server configuration file zabbix_server.conf
[[email protected] ~]# vi /etc/zabbix/zabbix_server.confDBHost= DBName= DBUser= DBPassword=
Step 4 – Set SELinux settings and adjust Firewall
[[email protected] ~]# setsebool -P httpd_can_network_connect=1
[[email protected] ~]# setsebool -P httpd_can_connect_zabbix=1
[[email protected] ~]# setsebool -P zabbix_can_network=1
– SELinux configuration is done, you need to restart Apache web server:
[[email protected] ~]# systemctl start httpd[[email protected] ~]# firewall-cmd --permanent --add-service=http success [[email protected] ~]# firewall-cmd --permanent --zone=public --add-port=10051/tcp success [root[email protected] ~]# firewall-cmd --permanent --zone=public --add-port=10050/tcp success [[email protected] ~]# firewall-cmd --reload success
– After adjusting the Selinux settings and the firewall we need to enable and start zabbix service on boot using the bellow commands
[[email protected] ~]# systemctl enable zabbix-server
[[email protected] ~]# systemctl start zabbix-server
[[email protected] ~]# systemctl enable zabbix-agent
[[email protected] ~]# systemctl start zabbix-agent
If you have issues starting the zabbix-server daemon and the zabbix-agent daemon and you got this error “Job for zabbix-server.service failed because a configured resource limit was exceeded. See “systemctl status zabbix-server.service” and “journalctl -xe” for details“, you need to set Selinux roles using the audit2allow command:
[[email protected] ~]# yum install policycoreutils-python -y
* SELINUX for Zabbix-agent:
[[email protected] ~]# cat /var/log/audit/audit.log | grep zabbix_agentd | grep denied | audit2allow -M zabbix_agent_setrlimit
[[email protected] ~]# semodule -i zabbix_agent_setrlimit.pp
* SELINUX for Zabbix-server:
[[email protected] ~]# cat /var/log/audit/audit.log | grep zabbix_server | grep denied | audit2allow -M zabbix_server_setrlimit
[[email protected] ~]# semodule -i zabbix_server_setrlimit.pp
[[email protected] ~]# systemctl start zabbix-server
[[email protected] ~]# systemctl start zabbix-agent
Step 5 – Configure Zabbix via Web console
– Navigate to http://ip_address/zabbix or http://host_name/zabbix
– Make sure that all software prerequisites are met.
– Enter details for connecting to the database. Zabbix database must already be created.
– Enter Zabbix server details.
– Review a summary of settings.
– Finish the installation.

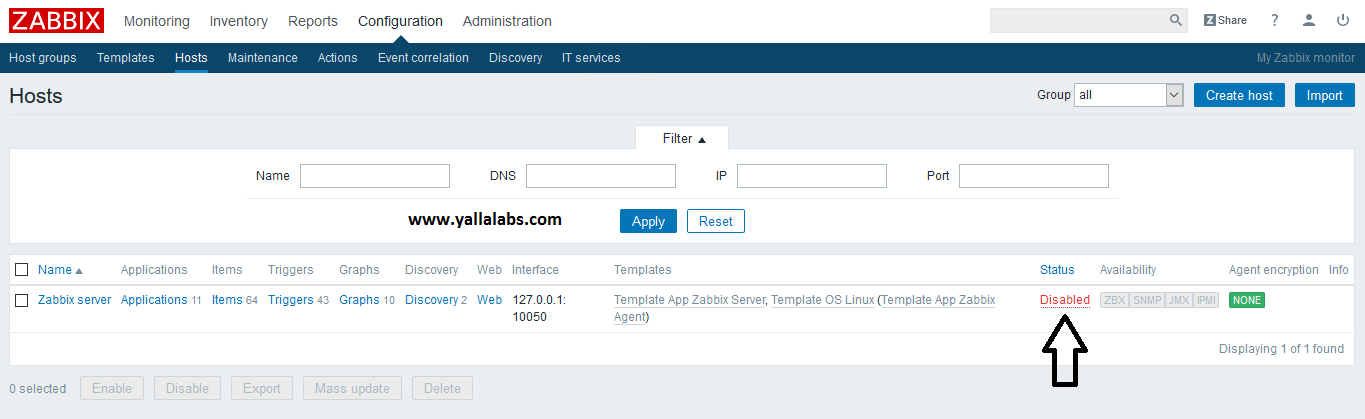
Last thing to do is to enable your server zabbix to be monitored: go to Configuration -> Hosts. Select the host (zabbix server) and click “Disabled”
We hope this tutorial was enough Helpful. If you need more information, or have any questions, just comment below and we will be glad to assist you!

Lotfi Waderni
Я только что установил Zabbix 5.0 LTS (Последняя версия Zabbix) на ОС RHEL-8. При входе в интерфейс Zabbix я получаю сообщение «Zabbix server не работает». Панель & внизу говорит: «Zabbix server не работает. Информация может быть устаревшей». Пожалуйста, окажите помощь?
Изменить: порт моего сервера — 10051.
При вводе «запуск службы zabbix» я получаю вывод:
Redirecting to /bin/systemctl start zabbix.service
Failed to start zabbix.service:Unit zabbix.service not found.
& при вводе «systemctl restart zabbix-server zabbix-agent httpd php-fpm» я получаю:
Job for zabbix-server.service failed because the control process exited with error code.
See "systemctl status zabbix-server.service" and "journalctl -xe" for details.
Вывод «journalctl -xe»:
RHEL8 platform-python[5746]: SELinux is preventing zabbix_server from using the dac_override capability.
*** Plugin dac_overrride (91.4 confidence) suggests ************************
If you want to help identify if domain needs this access or you have a file with the wrong permissions on your system
Then turn on full auditing to get path information about the offending file and generate the error again.
Do
Turn on full auditing
#auditctl -w /etc/shadow -p w
Try to recreate AVC.Then execute
#ausearch -m avc -ts recent
If you see PATH record check ownership/permissions on file, and fix it,
otherwise report as a bugzilla
*** Plugin catchall (9.59 confidence) suggests *************************
If you believe that zabbix_server should have the dac_override capability by default.
Then you should report this as a bug.
You can generate a local policy module to allow this access.
Do
allow this access for now by executing:
#ausearch -c 'zabbix_server' --raw | audit2allow -M my-zabbixserver
#semodule -X 300 -i my-zabbixserver.pp
RHEL8 dbus-daemon[779]: [system] Activating service name='org.fedoraproject.Setroubleshootd' requested by ':1.40' (uid=0 pid=748 comm="/usr/sbin/sedispatch " label="sytem_u:system_r:auditd_t:s0") (using servicehelper)
При вводе «systemctl status zabbix-server.service» я получаю вывод:
zabbix-server.service-Zabbix server: Loaded:.... Active:.... Process: 4959 ExecStart=/usr/sbin/zabbix_server -c $CONFILE (code=exited,status=1/FAILURE)
RHEL8 systemd[1]:zabbix-server.service:Control process exited,code=exited status=1
RHEL8 systemd[1]:zabbix-server.service:Failed with result 'exit-code'.
RHEL8 systemd[1]:Failed to start Zabbix Server. What do I do now?
2 ответа
Решено. Пришлось настроить SELinux. Просто зайдите в «vim / etc / selinux / config» и измените SELinux с «enforcing» на «permissive». После этого перезагрузите систему, и тогда Zabbix сервер начнет работать.
5 Июн 2020 в 02:39
Вы видели, что в этом файле / var / log / messages содержится информация о Zabbix. В этом файле вы видите текст, подобный приведенному ниже:
run sealert -l 84e0b04d-d0ad-4347-8317-22e74f6cd020Выполните эту команду:
#sealert -l 84e0b04d-d0ad-4347-8317-22e74f6cd020Затем вы увидите подробное описание этой проблемы, для решения которой вам необходимо разрешить Zabbix в среде. Это делает команда audit2allow. ссылка ниже:
8 Авг 2020 в 21:31

Присоединился: 3 месяца назад
На Debian 11 поднял mySQL , установил Zabbix-server-mysql, но при запуске возникает ошибка, не создаётся log файл. Один раз переустановил, но проблема не решилась. Помогите где еще поискать проблему.
# systemctl status zabbix-server
● zabbix-server.service — Zabbix Server (MySQL/MariaDB)
Loaded: loaded ( ; enabled; vendor preset: enabled)
Active: failed (Result: exit-code) since Wed 2023-01-18 17:54:56 MSK; 12s ago
Docs: man:zabbix_server
Process: 28573 ExecStart=/usr/sbin/zabbix_server —foreground (code=exited, status=1/FAILURE)
Main PID: 28573 (code=exited, status=1/FAILURE)
CPU: 14ms

Присоединился: 9 лет назад
unknown parameter "DBpassword"
Параметр называется DBPassword. Регистр букв в Linux имеет значение.
Присоединился: 3 месяца назад
# systemctl status zabbix-server
● zabbix-server.service — Zabbix Server (MySQL/MariaDB)
Loaded: loaded ( ; enabled; vendor preset: enabled)
Active: failed (Result: exit-code) since Thu 2023-01-19 00:07:58 MSK; 10min ago
Docs: man:zabbix_server
Process: 31071 ExecStart=/usr/sbin/zabbix_server —foreground (code=exited, status=1/FAILURE)
Main PID: 31071 (code=exited, status=1/FAILURE)
CPU: 13ms
Started Zabbix Server (MySQL/MariaDB).
Starting Zabbix Server. Zabbix 5.0.8 (revision d3c78f993a).
Press Ctrl+C to exit.
Main process exited, code=exited, status=1/FAILURE
Failed with result ‘exit-code’.
Присоединился: 9 лет назад
Присоединился: 3 месяца назад
Не могу понять, он должен создаваться при установке или его необходимо создать или перенести..
Присоединился: 9 лет назад
Присоединился: 3 месяца назад
Присоединился: 9 лет назад
Присоединился: 3 месяца назад
pcp-export-zabbix-agent/stable 5.2.6-1 amd64
Module for exporting PCP metrics to Zabbix agent
python3-protobix/stable 1.0.2-8 all
Implementation of Zabbix Sender protocol (Python 3)
python3-pyzabbix/stable 0.8.2-1 all
Zabbix API Python interface.
resource-agents/stable 1:4.7.0-1 amd64
Cluster Resource Agents
uwsgi-core/stable 2.0.19.1-7.1 amd64
fast, self-healing application container server (core)
zabbix-java-gateway/stable 1:5.0.8+dfsg-1 all
network monitoring solution — Java gateway
zabbix-proxy-mysql/stable 1:5.0.8+dfsg-1 amd64
network monitoring solution — proxy (using MySQL)
zabbix-proxy-pgsql/stable 1:5.0.8+dfsg-1 amd64
network monitoring solution — proxy (using PostgreSQL)
zabbix-proxy-sqlite3/stable 1:5.0.8+dfsg-1 amd64
network monitoring solution — proxy (using SQLite3)
zabbix-server-pgsql/stable 1:5.0.8+dfsg-1 amd64
network monitoring solution — server (using PostgreSQL)
Присоединился: 3 месяца назад
Присоединился: 3 месяца назад
Ошибка при запуске службы.
Присоединился: 5 лет назад
Добрый день. Установил Zabbix 3.4, всё запустилось без проблем и какое-то время работало с маленьким количеством прослушиваемых хостов.
После проверки работоспособности начал добавлять хосты и в какой-то момент словил ошибку:
ExecStop=/bin/kill -SIGTERM $MAINPID (code=exited, status=1/FAILURE) при запуске службы zabbix-server.
Может кто-то знает как решить данную проблему?
Присоединился: 9 лет назад
Присоединился: 5 лет назад
Другой. И ошибка в логе другая.
10947:20171102:115807.471 Starting Zabbix Server. Zabbix 3.4.3 (revision 73588).
 10947:20171102:115807.471 ***
 10947:20171102:115807.471 SNMP monitoring: YES
 10947:20171102:115807.471 IPMI monitoring: YES
 10947:20171102:115807.471 Web monitoring: YES
 10947:20171102:115807.471 VMware monitoring: YES
 10947:20171102:115807.471 SMTP authentication: YES
 10947:20171102:115807.471 Jabber notifications: YES
 10947:20171102:115807.471 Ez Texting notifications: YES
 10947:20171102:115807.471 ODBC: YES
 10947:20171102:115807.471 SSH2 support: YES
 10947:20171102:115807.471 IPv6 support: YES
 10947:20171102:115807.471 TLS support: YES
 10947:20171102:115807.472 ***************************
 10947:20171102:115807.472 using configuration file: /etc/zabbix/zabbix_server.conf
 10947:20171102:115807.482 current database version (mandatory/optional): 03040000/03040005
 10947:20171102:115807.482 required mandatory version: 03040000
 10947:20171102:115807.501 server #0 started [main process]
 10952:20171102:115807.502 server #1 started [configuration syncer #1]
 10953:20171102:115807.503 server #2 started [alerter #1]
 10954:20171102:115807.503 server #3 started [alerter #2]
 10955:20171102:115807.504 server #4 started [alerter #3]
 10956:20171102:115807.505 server #5 started [housekeeper #1]
 10957:20171102:115807.505 server #6 started [timer #1]
 10959:20171102:115807.506 server #7 started [http poller #1]
 10963:20171102:115807.509 server #10 started [history syncer #2]
 10964:20171102:115807.509 server #11 started [history syncer #3]
 10967:20171102:115807.511 server #12 started [history syncer #4]
 10968:20171102:115807.512 server #13 started [escalator #1]
 10970:20171102:115807.517 server #14 started [proxy poller #1]
 10960:20171102:115807.517 server #8 started [discoverer #1]
 10971:20171102:115807.522 server #15 started [self-monitoring #1]
 10974:20171102:115807.523 server #18 started [poller #2]
 10962:20171102:115807.528 server #9 started [history syncer #1]
 10976:20171102:115807.533 server #19 started [poller #3]
 10972:20171102:115807.539 server #16 started [task manager #1]
 10973:20171102:115807.540 server #17 started [poller #1]
 10981:20171102:115807.546 server #23 started [trapper #1]
 10978:20171102:115807.550 server #20 started [poller #4]
 10984:20171102:115807.551 server #25 started [trapper #3]
 10985:20171102:115807.556 server #26 started [trapper #4]
 10986:20171102:115807.561 server #27 started [trapper #5]
 10979:20171102:115807.572 server #21 started [poller #5]
 10980:20171102:115807.585 server #22 started [unreachable poller #1]
 10989:20171102:115807.587 server #30 started [preprocessing manager #1]
 10982:20171102:115807.595 server #24 started [trapper #2]
 10987:20171102:115807.600 server #28 started [icmp pinger #1]
 10988:20171102:115807.600 server #29 started [alert manager #1]
 10996:20171102:115807.611 server #32 started [preprocessing worker #2]
 10997:20171102:115807.624 server #33 started [preprocessing worker #3]
 10990:20171102:115807.656 server #31 started [preprocessing worker #1]
 10947:20171102:120234.081 Got signal [signal:15(SIGTERM),sender_pid:11109,sender_uid:0,reason:0]. Exiting ...
 10947:20171102:120236.083 [Z3001] connection to database 'zabbix' failed: [2002] Can't connect to local MySQL server through socket '/var/lib/mysql/mysql.sock' (2)
Причём с прошлой версией на ubuntu такая же проблема была. Сначала всё работает хорошо, как только массово добавляю хосты всё падает, но ошибка там другая была.
Присоединился: 9 лет назад
1-го октября 2018 года вышла новая версия бесплатной системы мониторинга, которую я постоянно использую. Я подробно расскажу об установке и начальной настройке Zabbix 4.0 на примере систем CentOS, Debian, Ubuntu со скриншотами и пояснениями. В этой версии много интересных и полезных нововведений, так что посмотреть на неё однозначно стоит.
Если у вас есть желание научиться строить и поддерживать высокодоступные и надежные системы, рекомендую познакомиться с онлайн-курсом «DevOps практики и инструменты» в OTUS. Курс не для новичков, для поступления нужно пройти вступительный тест.
Введение
На сегодняшний день, по моему мнению, из бесплатных систем мониторинга именно Zabbix самая популярная и функциональная. Упоминания о ней я постоянно встречаю в технических статьях специалистов различного масштаба и организаций. К примеру, СберТех использует Zabbix как единую платформу мониторинга. ИТ отдел сети магазинов Магнит так же использует zabbix как основную систему мониторинга. Пару лет назад я смотрел выступление представителя ИТ отдела Магнита, где он подробно описывал структуру системы. На тот момент это была самая крупная инсталляция заббикса с тысячами прокси серверов для сбора данных из магазинов по всей стране. Упоминания о мониторинге заббикс я встречал у специалистов компаний 1С, Крок, Яндекс.Деньги и других. Перечислил только то, что запомнилось.
Нужно понимать, что Zabbix — система мониторинга общего назначения. У нее нет специализации в микросервисы, сеть, железо и т.д. В связи с этим, всегда может найтись инструмент, который сможет выполнять ту или иную задачу удобнее и эффективнее, чем zabbix. Но это не умоляет остальных достоинств системы. Я их вижу в первую очередь в том, что в ней можно настроить мониторинг всего, что угодно. Главное научиться подавать значения в систему. А для этого есть масса инструментов — как самих агентов, так и скриптов, которые можно подключать к сбору данных.
Система мониторинга Zabbix позволяет так или иначе завести на нее все обслуживаемые сервисы. Где-то это может быть не очень просто, но в любом случае, один универсальный инструмент удобнее, чем несколько. Мне всегда удавалось настроить желаемый мониторинг с помощью заббикса. Если не было готовых шаблонов или подходящих агентов для сбора, писал скрипты и передавал ими данные агенту. С моими (и не только) решениями по мониторингу можете познакомиться в отдельном разделе zabbix.
Чем меня еще подкупает zabbix — хорошая документация и большое комьюнити. Много выступлений от различных специалистов с описанием внедрений. Все это облегчает работу с системой. Проще принять решение как поступить в той или иной ситуации. Сами разработчики постоянно проводят встречи, приглашают выступающих, потом выкладывают видео. В общем, система со всех сторон оставляет благоприятное впечатление.
Я буду устанавливать и настраивать работу сервера zabbix на nginx, что несколько отличается от дефолтной установки, которая включает в себя веб сервер apache. В связи с этим, нам необходимо будет подготовиться.
Подготовка сервера CentOS к установке
Centos 7
Первым делом вам необходимо установить и настроить сервер CentOS 7. Перед установкой сервера Zabbix нам также нужно подготовить Web сервер. У меня есть отдельная статья по настройке web сервера на centos. Там все подробно описано. Сейчас же я кратко и без лишних комментариев выполню минимум необходимых действий для работы заббикса. Так же я не буду останавливаться на настройке iptables. Эта отдельная тема и мне не хочется ее касаться в этой статье. Либо настройте сами по моим инструкциям, либо просто отключите firewall:
# systemctl stop firewalld
# systemctl disable firewalld
Подключаем репозиторий nginx и устанавливаем его:
# rpm -Uvh http://nginx.org/packages/centos/7/noarch/RPMS/nginx-release-centos-7-0.el7.ngx.noarch.rpm
# yum install nginx
Запускаем nginx и добавляем в автозагрузку.
# systemctl start nginx
# systemctl enable nginx
Проверяем, работает ли он. Для этого открываем в браузере ссылку http://192.168.13.117/, где 192.168.13.117 — ip адрес настраиваемого сервера.
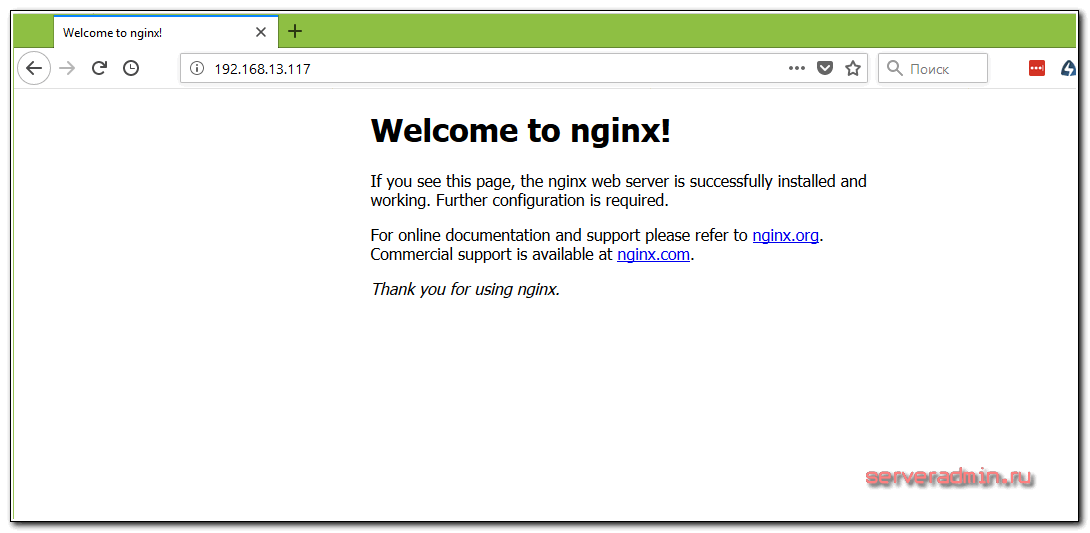
Если у вас не работает nginx, разберитесь с ним, прежде чем двигаться дальше. В первую очередь проверьте настройки фаервола. Более детально о настройке nginx у меня рассказано отдельно.
Дальше устанавливаем php-fpm. Для этого подключаем репозиторий remi и epel-release.
# yum install epel-release
# rpm -Uhv http://rpms.remirepo.net/enterprise/remi-release-7.rpm
Активируем репу remi-php71, для этого выполняем команды:
# yum install yum-utils
# yum-config-manager --enable remi-php71
Устанавливаем php 7.1 и модули к нему.
# yum install php71 php-fpm php-cli php-mysql php-gd php-ldap php-odbc php-pdo php-pecl-memcache php-pear php-xml php-xmlrpc php-mbstring php-snmp php-soap php-bcmath
Запускаем php-fpm и добавляем в автозагрузку.
# systemctl start php-fpm
# systemctl enable php-fpm
Проверяем, запустился ли он.
# netstat -tulpn | grep php-fpm
tcp 0 0 127.0.0.1:9000 0.0.0.0:* LISTEN 13261/php-fpm: mast
Все в порядке, запустился на порту 9000. Запустим его через unix сокет. Для этого открываем конфиг /etc/php-fpm.d/www.conf и комментируем строку:
# mcedit /etc/php-fpm.d/www.conf
;listen = 127.0.0.1:9000
Вместо нее добавляем несколько других:
listen = /var/run/php-fpm/php-fpm.sock
listen.mode = 0660
listen.owner = nginx
listen.group = nginx
Заодно измените пользователя, от которого будет работать php-fpm. Вместо apache укажите nginx, отредактировав соответствующие параметры.
user = nginx
group = nginx
# systemctl restart php-fpm
Проверяем, стартовал ли указанный сокет.
# ll /var/run/php-fpm/php-fpm.sock
srw-rw----. 1 nginx nginx 0 Oct 4 15:08 /var/run/php-fpm/php-fpm.sock
На текущий момент с настройкой php-fpm закончили. Продолжаем подготовку сервера к установке zabbix.
Устанавливаем свежую версию MariaDB. Подключаем репозиторий. Для этого создаем файл /etc/yum.repos.d/mariadb.repo следующего содержания.
# mcedit /etc/yum.repos.d/mariadb.repo
# MariaDB 10.3 CentOS repository list - created 2018-10-04 12:10 UTC
# http://downloads.mariadb.org/mariadb/repositories/
[mariadb]
name = MariaDB
baseurl = http://yum.mariadb.org/10.3/centos7-amd64
gpgkey=https://yum.mariadb.org/RPM-GPG-KEY-MariaDB
gpgcheck=1
Устанавливаем последнюю версию mariadb на centos.
# yum install MariaDB-server MariaDB-client
Запускаем mariadb и добавляем в автозагрузку.
# systemctl start mariadb
# systemctl enable mariadb
Запускаем скрипт начальной конфигурации mysql и задаем пароль для root. Все остальное можно оставить по-умолчанию.
# /usr/bin/mysql_secure_installation
Внесем некоторые изменения в стандартный конфиг mariadb, чтобы потом не заниматься очисткой и оптимизацией базы для zabbix. Для этого открываем конфиг mysql /etc/my.cnf.d/server.cnf и приводим его к следующему виду.
# mcedit /etc/my.cnf.d/server.cnf
[client]
port	= 3306
socket	= /var/lib/mysql/mysql.sock
default-character-set=utf8
[mysqld]
character_set_server=utf8
collation-server=utf8_bin
init_connect="SET NAMES utf8 collate utf8_bin"
port = 3306
socket = /var/lib/mysql/mysql.sock
innodb_file_per_table=1 innodb_buffer_pool_size = 768M # внимание на параметр! установить примерно в 2 раза меньше объема оперативной памяти сервера
innodb_buffer_pool_instances=1 # увеличивать на 1 каждый GB
innodb_buffer_pool_size
innodb_flush_log_at_trx_commit = 0
innodb_log_file_size = 512M
innodb_log_files_in_group = 3
innodb-strict-mode = OFF
[server]
[galera]
[embedded]
[mariadb]
[mariadb-10.3]
Я добавил минимум настроек, отличных от дефолта. В статье про оптимизацию mysql их приведено гораздо больше, но со временем я понял, что зря это сделал. Реально у меня нет большого опыта в тонкой настройке mysql. Никаких тестов и проверок я не делал, а данные брал на основе других статей в интернете. Не факт, что там не было ошибок. В итоге сейчас тут только заданы некоторые важные параметры по innodb, в частности указание хранить каждую таблицу в отдельном файле, задан размер и количество бинарных логов и еще пару настроек, которые явно будут к месту (innodb_buffer_pool_size, innodb_buffer_pool_instances и innodb_flush_log_at_trx_commit). При желании, вы можете сами заняться тюнингом mysql. В общем случае, достаточно будет текущих настроек.
Перезапустите mariadb и убедитесь, что она запустилась.
# systemctl restart mariadb
# systemctl status mariadb.service
Сервер баз данных mysql для нашего zabbix сервера готов. На этом предварительные настройки сервера закончены. Можно приступать к установке.
Centos 8
Как установить Centos 8 читайте в отдельной статье. Его подготовка к установке zabbix будет проще, так как в базовых репозиториях более свежий софт, который нам подходит. Вначале либо отключите firewalld, либо выполните его настройку. Я не буду на этом останавливаться, так как это тема отдельной статьи.
# systemctl stop firewalld
# systemctl disable firewalld
То же самое касается SELinux. В Centos 8 я еще не разбирался, как его корректно настроить для работы с zabbix-server. Пока отключите, либо сами поищите информацию по настройке. Когда найдете, буду рад, если поделитесь в комментариях.
# mcedit /etc/sysconfig/selinux
SELINUX=disabled
Дальше подключаем репозиторий epel.
# dnf install epel-release
Теперь подключим репозиторий nginx. Для этого создаем файл /etc/yum.repos.d/nginx.repo следующего содержания.
[nginx-stable]
name=nginx stable repo
baseurl=http://nginx.org/packages/centos/$releasever/$basearch/
gpgcheck=1
enabled=1
gpgkey=https://nginx.org/keys/nginx_signing.key
module_hotfixes=true
Устанавливаем nginx, запускаем и добавляем в автозагрузку.
# dnf install nginx
# systemctl start nginx
# systemctl enable nginx
Зайдите по адресу http://ip-сервера/ и убедитесь, что nginx запустился. Теперь отдельно установим php и модули к нему, которые понадобятся.
# dnf install php php-fpm php-cli php-mysqlnd php-gd php-ldap php-odbc php-pdo php-pear php-xml php-xmlrpc php-mbstring php-snmp php-soap php-bcmath
Запускаем php-fpm и добавляем в автозагрузку.
# systemctl start php-fpm
# systemctl enable php-fpm
Проверяем, стартовал ли указанный в конфиге сокет.
# ll /run/php-fpm/www.sock
srw-rw----+ 1 root root 0 Oct 4 13:14 /run/php-fpm/www.sock
На текущий момент с настройкой php-fpm закончили. Продолжаем подготовку сервера к установке zabbix.
Устанавливаем сервер баз данных Mariadb.
# dnf install mariadb-server mariadb
Запускаем mariadb и добавляем в автозагрузку.
# systemctl start mariadb
# systemctl enable mariadb
Запускаем скрипт начальной конфигурации mysql и задаем пароль для root. Все остальное можно оставить по-умолчанию.
# /usr/bin/mysql_secure_installation
Внесем некоторые изменения в стандартный конфиг mariadb, чтобы потом не заниматься очисткой и оптимизацией базы для zabbix. Для этого открываем конфиг mysql /etc/my.cnf.d/server.cnf и приводим его к следующему виду.
# mcedit /etc/my.cnf.d/mariadb-server.cnf
[client]
port	= 3306
socket	= /var/lib/mysql/mysql.sock
default-character-set=utf8
[mysqld]
character_set_server=utf8
collation-server=utf8_bin
init_connect="SET NAMES utf8 collate utf8_bin"
port = 3306 socket = /var/lib/mysql/mysql.sock
innodb_file_per_table=1
innodb_buffer_pool_size = 768M # внимание на параметр! установить примерно в 2 раза меньше объема оперативной памяти сервера
innodb_buffer_pool_instances=1 # увеличивать на 1 каждый GB
innodb_buffer_pool_size
innodb_flush_log_at_trx_commit = 0
innodb_log_file_size = 512M
innodb_log_files_in_group = 3
innodb-strict-mode = OFF
Тут заданы некоторые важные параметры по innodb, в частности указание хранить каждую таблицу в отдельном файле, задан размер и количество бинарных логов и еще пару настроек, которые явно будут к месту (innodb_buffer_pool_size, innodb_buffer_pool_instances и innodb_flush_log_at_trx_commit). При желании, вы можете сами заняться тюнингом mysql. В общем случае, достаточно будет текущих настроек.
Перезапустите mariadb и убедитесь, что она запустилась.
# systemctl restart mariadb
# systemctl status mariadb.service
Сервер баз данных mysql для нашего zabbix сервера готов. На этом предварительные настройки сервера закончены. Можно приступать к установке.
Установка сервера Zabbix 4. 0 в CentOS
Для того, чтобы установить Zabbix Server 4.0 на Centos 7 нужно подключить репозиторий актуальной версии.
# rpm -Uvh https://repo.zabbix.com/zabbix/4.0/rhel/7/x86_64/zabbix-release-4.0-1.el7.noarch.rpm
Retrieving https://repo.zabbix.com/zabbix/4.0/rhel/7/x86_64/zabbix-release-4.0-1.el7.noarch.rpm
warning: /var/tmp/rpm-tmp.fCWryx: Header V4 RSA/SHA512 Signature, key ID a14fe591: NOKEY
Preparing... ################################# [100%]
Updating / installing... 1:zabbix-release-4.0-1.el7 ################################# [100%]
То же самое делаем для Centos 8.
# rpm -Uvh https://repo.zabbix.com/zabbix/4.0/rhel/8/x86_64/zabbix-release-4.0-2.el8.noarch.rpm
Устанавливаем сам сервер заббикса.
# yum install zabbix-server-mysql zabbix-web-mysql
В зависимостях пакетов будет httpd, который нам не нужен, так как у нас будет nginx и php7.1, но я не разбирался, как поставить без него. После установки пакетов, создадим базу данных, пользователя zabbix и заполним базу.
# mysql -uroot -p
Enter password:
> create database zabbix character set utf8 collate utf8_bin;
> grant all privileges on zabbix.* to zabbix@localhost identified by 'zabpassword';
exit
# zcat /usr/share/doc/zabbix-server-mysql*/create.sql.gz | mysql -uzabbix -p zabbix
Теперь редактируем файл конфигурации сервера заббикс. Прописываем данные для подключения к БД, отключаем ipv6 и увеличиваем стандартный timeout.
# mcedit /etc/zabbix/zabbix_server.conf
Изменяем указанные строки, остальные не трогаем:
DBHost=localhost
DBName=zabbix
DBUser=zabbix
DBPassword=zabpassword
ListenIP=0.0.0.0
Timeout=10
Этих минимальных настроек достаточно, для работы сервера. Я рекомендую увеличивать параметр Timeout, так как он отвечает за время ожидания ответа от агента, snmp устройства или внешней проверки. Иногда стандартного значения в 4 секунды бывает недостаточно. В частности, когда используется какой-то скрипт, который долго выполняется для получения метрики. Поставьте секунд 10.
Запускаем zabbix и добавляем в автозагрузку.
# systemctl start zabbix-server
# systemctl enable zabbix-server
Проверяем лог файл на наличие ошибок.
# cat /var/log/zabbix/zabbix_server.log
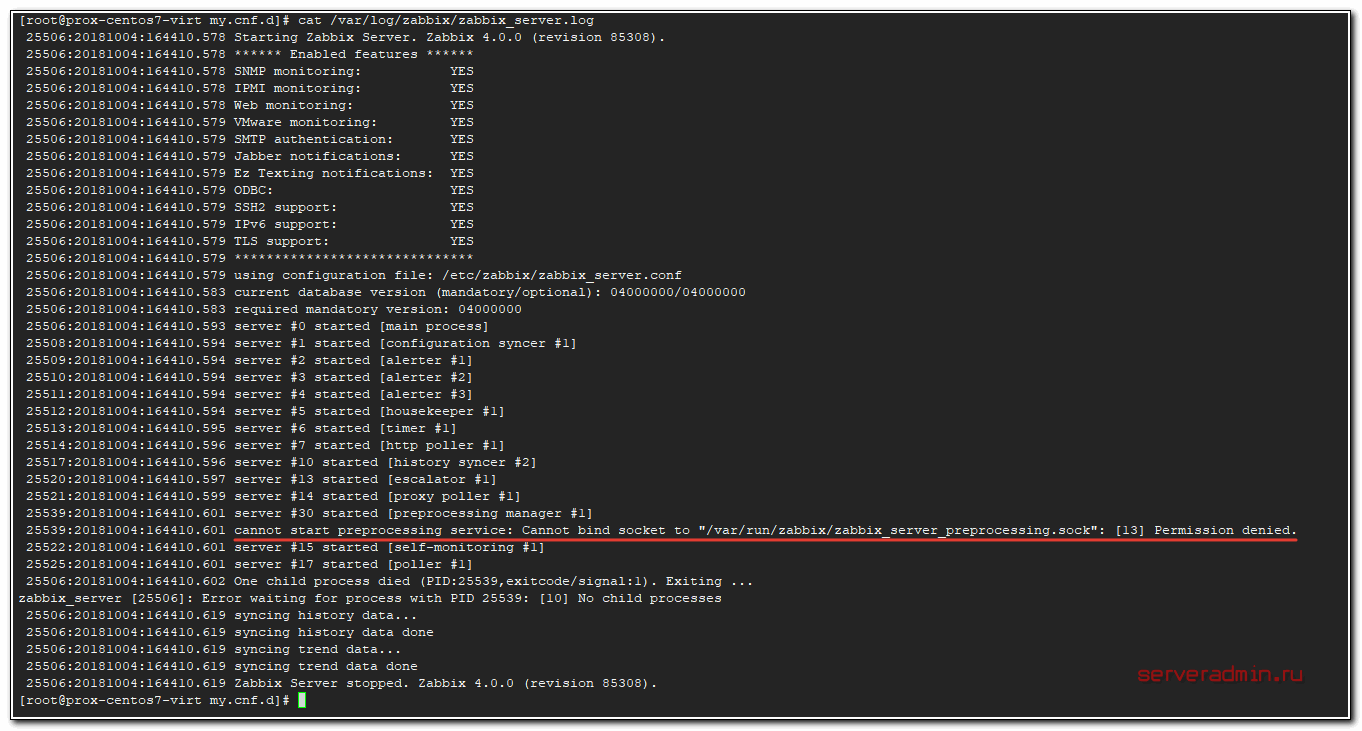
Настройка SELinux с zabbix
Если у вас включен SELinux, получите ошибку.
cannot start preprocessing service: Cannot bind socket to "/var/run/zabbix/zabbix_server_preprocessing.sock": [13] Permission denied.
Это нормально, сейчас настроим SELinux для нормальной работы Zabbix. Для этого устанавливаем пакет policycoreutils-python, скачиваем готовый модуль для SELinux и применяем его.
# yum install policycoreutils-python
# cd ~
# curl https://support.zabbix.com/secure/attachment/53320/zabbix_server_add.te > zabbix_server_add.te
# checkmodule -M -m -o zabbix_server_add.mod zabbix_server_add.te
# semodule_package -m zabbix_server_add.mod -o zabbix_server_add.pp
# semodule -i zabbix_server_add.pp
Теперь нам надо перезапустить zabbix-server.
# systemctl restart zabbix-server
Если у вас это не получится сделать через systemctl, значит служба зависла. Завершаем ее принудительно и запускаем снова.
# kill -9 `pidof zabbix_server`
# systemctl start zabbix-server
Снова проверяйте log файл. Теперь ошибок быть не должно. Как я уже сказал, если у вас отключен SELinux, то делать описанные выше манипуляции с модулем не надо.
С серверной частью закончили. Нам нужно сделать конфиг nginx для работы web интерфейса zabbix на сервере с Centos 7. Если у вас nginx работает на том же сервере, где сам zabbix, и других виртуальных хостов нет и не будет, то правьте сразу дефолтный — /etc/nginx/conf.d/default.conf. Приводим его к следующему виду:
# mcedit /etc/nginx/conf.d/default.conf
server { listen 80; server_name localhost; root /usr/share/zabbix; location / {	index index.php index.html index.htm; } location ~ \.php$ {	fastcgi_pass unix:/var/run/php-fpm/php-fpm.sock;	fastcgi_index index.php;	fastcgi_param SCRIPT_FILENAME $document_root$fastcgi_script_name;	include fastcgi_params;	fastcgi_param PHP_VALUE "	max_execution_time = 300	memory_limit = 128M	post_max_size = 16M	upload_max_filesize = 2M	max_input_time = 300	date.timezone = Europe/Moscow	always_populate_raw_post_data = -1	";	fastcgi_buffers 8 256k;	fastcgi_buffer_size 128k;	fastcgi_intercept_errors on;	fastcgi_busy_buffers_size 256k;	fastcgi_temp_file_write_size 256k; }
}
Для Centos 8 конфиг будет другой, так как из репозитория zabbix прилетает готовый конфиг для php-fpm. Он находится тут — /etc/php-fpm.d/zabbix.conf. Там указан другой сокет — /run/php-fpm/zabbix.sock, который мы будем использовать.Поменяем в этом конфиге пользователя с apache на nginx и укажем свой часовой пояс.
user = nginx
group = nginx
php_value[date.timezone] = Europe/Moscow
После этого php-fpm надо перезапустить.
# systemctl restart php-fpm
Конфиг nginx default.conf для centos 8 будет таким:
server { listen 80; server_name localhost; root /usr/share/zabbix; location / { index index.php index.html index.htm; } location ~ \.php$ { fastcgi_pass unix:/run/php-fpm/zabbix.sock; fastcgi_index index.php; fastcgi_param SCRIPT_FILENAME $document_root$fastcgi_script_name; include fastcgi_params; fastcgi_buffers 8 256k; fastcgi_buffer_size 128k; fastcgi_intercept_errors on; fastcgi_busy_buffers_size 256k; fastcgi_temp_file_write_size 256k; }
}
Проверим конфиг на ошибки и если все в порядке, перезапустим nginx.
# nginx -t
nginx: the configuration file /etc/nginx/nginx.conf syntax is ok
nginx: configuration file /etc/nginx/nginx.conf test is successful
# nginx -s reload
Маленький, но важный нюанс. Нам надо изменить права доступа на некоторые папки. Назначить владельца nginx.
# chown -R nginx:nginx /var/lib/php/session
# chown -R nginx:nginx /etc/zabbix/web
Этот шаг нужно будет проделывать после каждого обновления php или zabbix. Связано с тем, что по-умолчанию zabbix идет в комплекте с apache и рассчитан на работу с ним. Поэтому после установки или обновления, он делает его владельцем директории /etc/zabbix/web.
Даем разрешения SELinux для работы заббикса с web сервером и базой данных.
# setsebool -P httpd_can_connect_zabbix on
# setsebool -P httpd_can_network_connect_db on
Я не знаю, насколько последняя настройка актуальна, если подключение к БД локальное. У разработчиков в инструкции сказано, что в случае с postgresql даже если подключаетесь через 127.0.0.1, разрешение выдавать нужно. Насчет mysql нет комментариев.
С серверной частью закончили. Для продолжения установки zabbix сервера переходим к настройке Zabbix Frontend.
