

In this article, you will learn how to install Chrony NTP Server on Rocky Linux 8 or other RPM based distros.

The
Network Time Protocol (NTP) is a networking protocol for system clock synchronization with remote internet time servers or other sources such as GPS or radio clocks. Accurate timekeeping is crucial in servers for application to work correctly or troubleshooting issues with the help of logs time stamp.
Chrony is an implementation of NTP, and it is a replacement for the old
Ntpd used in previous versions of enterprise Linux operating systems.
Here, we will see how to install
NTP (Chrony) On
CentOS 8 /
CentOS 7 &
RHEL 8 /
RHEL 7.
Chrony works as the default NTP server and client on CentOS 8 / RHEL 8. In CentOS 7/ RHEL 7, you have an option to choose either NTP or Chrony as an NTP daemon.
In this tutorial, we are going to learn how to install and configure NTP server using Chrony on Fedora 29/Fedora 28.
- Installing Chrony
- Configuring Chrony
- Set the time servers
- NTP (Network time protocol)
- Differences between chrony and ntp
- The Directives that are used in chrony. conf
- Configure NTP client
- Run System Update
- Installing Chrony on CentOS 8
- Configure Chrony as an NTP server on CentOS 8
- Set Time Servers
- Open NTP UDP Port 123 on Firewall
- Running Chrony on CentOS 8
- Verify Chrony Time Synchronization
- Setup NTP Client using Chrony on CentOS 8
- Verify Connection to NTP Server UDP Port 123
- Check NTP time synchronization
- Related Tutorials
- What is NTP Server?
- Install Chrony On CentOS 8 / CentOS 7 & RHEL 8 / RHEL 7
- Configure NTP Server Using Chrony
- Configure NTP Client Using Chrony
- Check time synchronization
- What is Chrony?
- Environment Specification
- Checking if chrony is Synchronized
- Checking chrony Tracking
- Checking chrony Sources
- Checking chrony Source Statistics
- Table of Contents
- Update your Linux Operating System
- Configure Chrony as NTP Server
- Installing Chrony Software Package on CentOS 8
- Install Chrony NTP Server
- Configure your NTP Client
- Configure Chrony as NTP Client
- Conclusion
Installing Chrony
The chrony daemon, chronyd, can be controlled by the command line utility chronyc. To install chrony, run the command below;
sudo dnf install chrony -y
After the installation, the chronyd daemon is running by default. You can check the status by running the command below;
systemctl status chronyd
You can also enable it to start on system boot by running the command below;
systemctl enable chronyd
Configuring Chrony
After the installtion of Chrony suite, you need to configure it in order to provide the NTP services in your environment. The default configuration file for chronyd is /etc/chrony.conf.
Set the time servers
To begin configuration, you need to change the line, pool 2.fedora.pool.ntp.org iburst that specifies the time servers used for time synchronization, to servers that are close to your timezone area.
To obtain a list of these servers, navigate to http://www.pool.ntp.org/en/ and choose your continent area where the servers are physically located. Search for your country location and a list of NTP servers should appear. For example, in this guide we are choosing the time servers as shown in the screenshot below;
Therefore, edit the /etc/chrony.conf and comment out the line, pool 2.fedora.pool.ntp.org iburst, replacing it as shown below
Next, you need to specify a host, subnet, or network from which to allow NTP connections to your NTP server. The default is not to allow connections. As an example, to allow hosts on the network subnet 192.168.43.0/24, your configuration would look like;
The Chronyd listens on UDP port 123 and therefore this port needs to be open in the firewall in order to allow the client access:
firewall-cmd —add-port=123/udp —permanent
firewall-cmd —reload
After that, restart chronyd.
systemctl restart chronyd

chrony is an implementation of the Network Time Protocol (NTP). You can use chrony:
- To synchronize the system clock with NTP servers.
- To synchronize the system clock with a reference clock, for example a GPS receiver.
- And to synchronize the system clock with a manual time input.
- As an NTPv4(RFC 5905) server or peer to provide a time service to other computers in the network.
NTP (Network time protocol)
NTP(Network Time Protocol) is a protocol which runs over port 123 UDP. NTP synchronize clients time and date with a master server.
The NTP package is no longer supported in RHEL 8. Chrony is a default NTP client as well as an NTP server on Red Hat Enterprise Linux 8.
Service Name= chronyd
Differences between chrony and ntp
Working environment of this lab:
NTP Server IP: 192.168.73.130
Client IP : 192.168.73.128
OS : CentOS8
Install the chrony package.
# yum install chrony -y
Now start chronyd service, enable it to auto start at system boot and verify the running status:
# systemctl start chronyd
# systemctl status chronyd
# systemctl enable chronyd

To make a chrony (NTP) server, after installation of package you need to make some changes in chrony’s configuration file /etc/chrony.conf.
# vi /etc/chrony.conf
Now search for the “allow” configuration directive and uncomment it and set the network addresses from which the clients are allowed.
# allow 192.168.73.0/24
Now save and exit.
Restart the chronyd service
# systemctl restart chronyd
Now open NTP service in firewalld configuration to allow for incoming NTP requests or allow port 123/udp:
# firewall-cmd —permanent —add-service=ntp
or
# firewall-cmd —permanent —add-port=123/udp
# firewall-cmd —reload
If you want to remove the chrony service by any reason for the firewall. you can use below command.
# firewall-cmd —permanent —remove-service=chrony

The Directives that are used in chrony. conf
For a complete list of the directives that can be used see The chronyd configuration file. Some directives we are discussing here.
Allow
The allow directive is used to specify a host, subnet, or network from which to allow NTP connections to a machine acting as NTP server. The default is not to allow connections.
Cmdallow
This is similar to the allow directive (see section allow), except that it allows control access (rather than NTP client access) to a particular subnet or host.
The syntax is identical. There is also a cmddeny all directive with similar behavior to the cmdallow all directive.
Dumpdir
The dumpdir command should be used to define the directory where the measurement histories are saved.
Dumponexit
If this command is present, it indicates that chronyd should save the measurement history for each of its time sources. It records all instances whenever the program exits. (See the dumpdir command above).
Hwtimestamp
The local keyword is in use to allow chronyd to appear synchronized to real time from the viewpoint of clients polling it, even if it has no current synchronization source.
A large value of 10 indicates that the clock is so many hops away from a reference clock that its time is unreliable. If the computer ever has access to another computer which is ultimately synchronized to a reference clock, it will almost certainly be at a stratum less than 10.
Therefore, the choice of a high value like 10 for the local command prevents the machine’s own time from ever being confused with real time, were it ever to leak out to clients that have visibility of real servers.
Logdir
This directive allows the directory where log files are written to be specified.
An example of the use of this directive is:
Configure NTP client
Installing the chrony package on client side:
Once install you can start enable and verify the chronyd service status:
Configure the system as a direct client of the NTP server. Open the /etc/chrony.conf
Now add the NTP server address:
# Please consider joining the pool
Comment out the default NTP servers set your RHEL 8 NTP server’s address.
Save the changes in the file and close it.
. Restart the chronyd service
# chronyc sources

# chronyc client

You can use below command to track the time sync process.
# chronyc tracking

In this article we have discussed about chrony and NTP. Difference between Chronhy and ntp configuration files, services, deamons etc.
In this guide, we are going to learn how to install and setup NTP Server using Chrony on CentOS 8. Chrony is an implementation of the Network Time Protocol (NTP). Compared to NTP implementation, chrony performs well in a wide range of conditions including:
- intermittent network connections,
- heavily congested networks
- changing temperatures
- systems that do not run continuously
Chrony can be used to synchronise the system clock with NTP servers, reference clocks. It can also operate as an NTPv4 server and peer to provide a time service to other computers in the network.
Run System Update
To synchronize system packages to their latest versions, simply execute the command;
Installing Chrony on CentOS 8
Chrony suite is installed by default on RHEL derivatives, CentOS 8 included. You can however verify this by executing the command below;
rpm -q chrony
If the package is installed, you should get an output like;
Otherwise, you will get an output like;
package chrony is not installed
To see more information about Chrony;
rpm -qi chrony
If for some reasons is not installed by default, you can always install it by running the command below;
Configure Chrony as an NTP server on CentOS 8
Assuming Chrony is installed, you can now proceed to configure it to provide time synchronization.
The default configuration file of Chrony is /etc/chrony.conf. Therefore, we will make most configuration changes in this file.
Set Time Servers
By default, Chrony uses the 2.centos.pool.ntp.org as the default time server. You need to define the time servers close to your region.
To obtain a list of NTP servers close to your region,navigate to Internet Cluster of NTP servers page and select your region. For example, if you are in Europe, below are the available NTP servers;
server 0.europe.pool.ntp.org
server 1.europe.pool.ntp.org
server 2.europe.pool.ntp.org
server 3.europe.pool.ntp.org
# Use public servers from the pool.ntp.org project.
# Please consider joining the pool (http://www.pool.ntp.org/join.html).
# pool 2.centos.pool.ntp.org iburst
server 0.europe.pool.ntp.org
server 1.europe.pool.ntp.org
server 2.europe.pool.ntp.org
server 3.europe.pool.ntp.org
Chrony does not allow any access to NTP server. To restrict or control access to the NTP service running on a system, use the allow directive. This directive simply is to designate particular servers from which NTP clients are allowed to access the computer as an NTP server.
For example, to allow all servers in the network subnet, 192.168.56.0/24 to access your NTP server;
# Allow NTP client access from local network.
#allow 192.168.0.0/16
allow 192.168.56.0/24
Open NTP UDP Port 123 on Firewall
To be able to allow NTP clients access to your NTP server, you need to open port 123/UDP on firewall.
Running Chrony on CentOS 8
Chronyd daemon controls the NTP implementation. As such, you can start and enable it to run on system boot by running the command below;
systemctl enable —now chronyd
Verify Chrony Time Synchronization
chronyc commands is be used to verify Chrony time synchronization with the help of command line options such as sources, tracking, sourcestats.
To display information about the current time sources that chronyd is accessing, run the command;
The M column indicates the mode of the source;
- ^ means a server
- = means a peer
- # indicates a locally connected reference clock
The S column indicates the state of the sources;
- “*” indicates the source to which chronyd is currently synchronized.
- “+” indicates acceptable sources which are combined with the selected source.
- “-” indicates acceptable sources which are excluded by the combining algorithm.
- “?” indicates sources to which connectivity has been lost or whose packets do not pass all tests. This condition is also shown at start-up, until at least 3 samples have been gathered from it.
- “x” indicates a clock which chronyd thinks is a falseticker (its time is inconsistent with a majority of other sources).
- “~” indicates a source whose time appears to have too much variability
To display parameters about the system’s clock performance;
Reference ID : C39AAED1 (leeto.nicolbolas.org)
Stratum : 3
Ref time (UTC) : Sun Mar 01 18:14:38 2020
System time : 0.001563942 seconds fast of NTP time
Last offset : +0.001314329 seconds
RMS offset : 0.002229846 seconds
Frequency : 2.614 ppm fast
Residual freq : +0.147 ppm
Skew : 24.449 ppm
Root delay : 0.150412217 seconds
Root dispersion : 0.008927128 seconds
Update interval : 128.5 seconds
Leap status : Normal
Setup NTP Client using Chrony on CentOS 8
Since our NTP server using Chrony on CentOS 8 is setup and running, it is time to verify that it can serve our NTP clients as expected.
In this demo, we are using another CentOS 8 VM as our NTP client.
Check if Chrony is installed;
Setting NTP client on CentOS 8 is the same as setting the NTP server as described above except that the client doesn’t have access permissions set hence no server can query time information from it.
Open the configuration file and set the NTP server as shown below;
# Use public servers from the pool.ntp.org project.
# Please consider joining the pool (http://www.pool.ntp.org/join.html).
#pool 2.centos.pool.ntp.org iburst
server ntp.kifarunix-demo.com iburst
Ensure that the hostname of the NTP server is resolvable, otherwise use IP address.
Verify Connection to NTP Server UDP Port 123
To verify that there is a connection from the NTP client to NTP server on UDP port 123, simply use netcat command as shown below;
dnf install nc -y
Ncat: Connected to 192.168.56.133:123.
Ncat: UDP packet sent successfully
Ncat: 1 bytes sent, 0 bytes received in 2.14 seconds.
Great. You can now proceed to restart and enable chronyd to run on system boot.
Check NTP time synchronization
To verify that time synchronization is working, you can use the tracking or sources command with chronyc command as shown below;
Reference ID : C0A83885 (ntp.kifarunix-demo.com)
Stratum : 4
Ref time (UTC) : Sun Mar 01 18:56:03 2020
System time : 0.000000034 seconds slow of NTP time
Last offset : +0.000032892 seconds
RMS offset : 0.000032892 seconds
Frequency : 2.246 ppm fast
Residual freq : +14.373 ppm
Skew : 0.564 ppm
Root delay : 0.151499271 seconds
Root dispersion : 0.001610240 seconds
Update interval : 2.0 seconds
Leap status : Normal
Using the sources command;
Check sources statistics
210 Number of sources = 1
Name/IP Address NP NR Span Frequency Freq Skew Offset Std Dev
==============================================================================
ntp.kifarunix-demo.com 5 3 70 +0.408 4.663 +24us 27us
The NTP client is now connected to our NTP server. That brings us to the end of our guide on how to setup NTP Server using Chrony on CentOS 8. We hope this was informative. Enjoy.
Related Tutorials
Setup NTP server Using NTPd on Debian 10 Buster
Configure NTP Server using NTPd on Fedora 30
How to Install and Configure NTP Server Using NTPd on Fedora 29/Fedora 28
What is NTP Server?
NTP stands for Network Time Protocol. It is an Internet protocol used to synchronize the clocks of computer systems to some reference time.
A Time Server is a computer system that provides the time synchronization service to network devices by means of the NTP protocol.
Install Chrony On CentOS 8 / CentOS 7 & RHEL 8 / RHEL 7
There are chances your server already has Chrony installed and configured as a client to use remote clock server(s).
yum install -y chrony
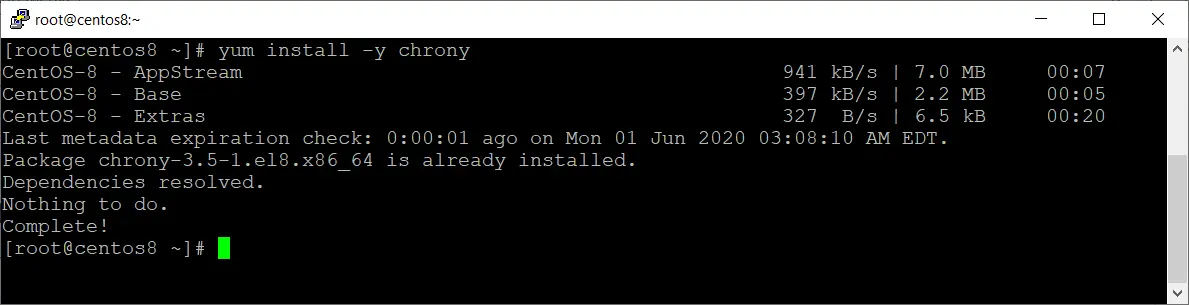
Install Chrony Package
Configure NTP Server Using Chrony
In this section, we will configure the servers as an NTP server, which will act as a remote time server for all clients in your organization.
Change the subnet value of directive as per your requirement to allow the clients from your organization network. In my case, clients who have IP addresses from to are allowed to connect to the NTP server for time synchronization.
Restart the Chrony service to apply the configuration change.
Enable Chrony service on system startup.
Add the firewall rules to allow NTP requests from clients.
firewall-cmd —permanent —add-service=ntp
firewall-cmd —reload
Once you have configured the NTP server, go to the client machine and add this server as an NTP server.
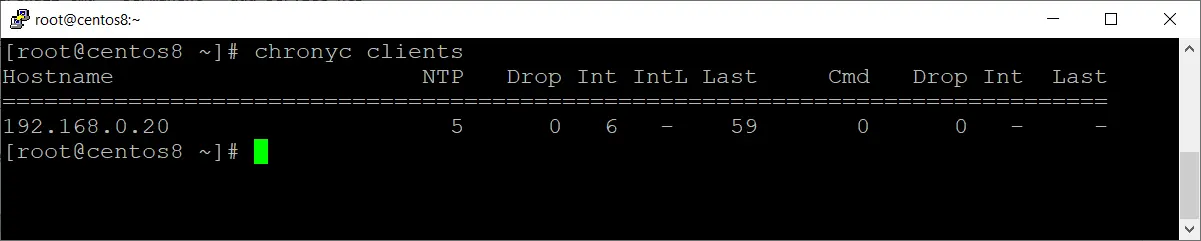
Then, run the below command to check how many clients are accessing the NTP server.
Configure NTP Client Using Chrony
Install the Chrony package if the package is not already installed.
Now, we will configure this machine as an NTP client, which will reach the NTP server we configured earlier for time synchronization.
Comment out the existing server directives and add a new server directive for our NTP server.
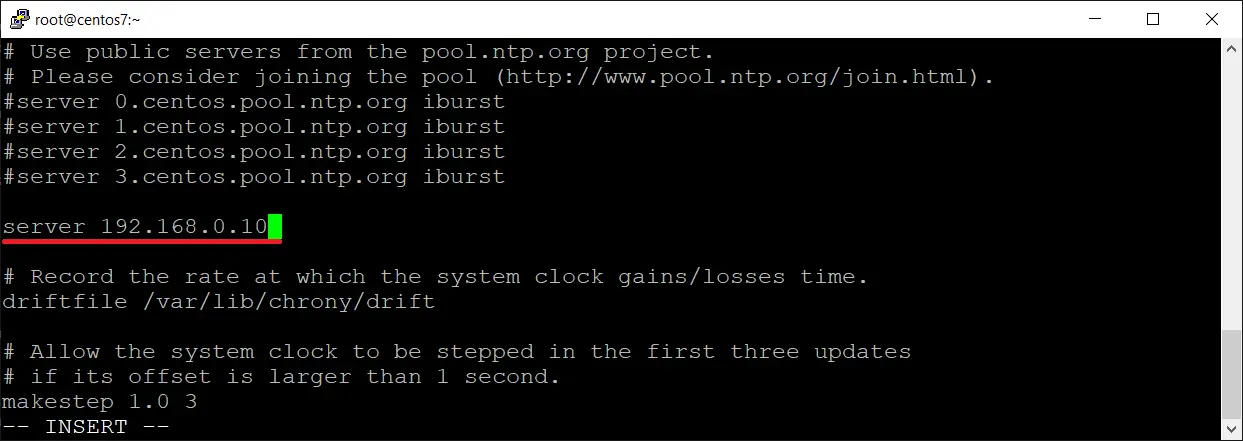
Then, restart the Chrony service.
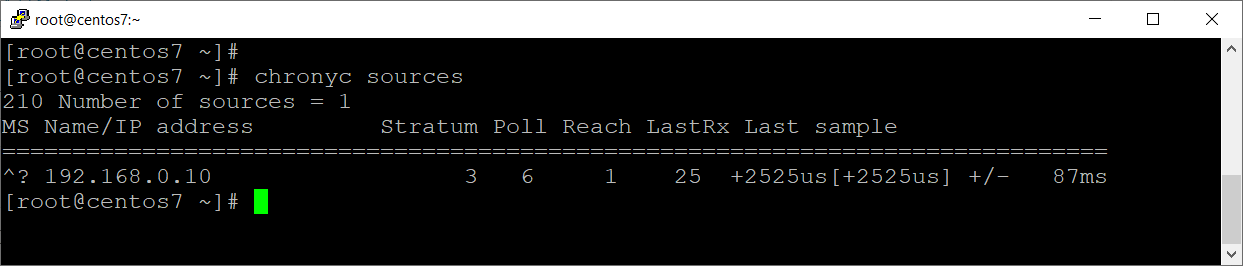
Check the time source to ensure the client is reaching to correct NTP server.
By default, NTP client will perform a time synchronization every 64 seconds. However, you can adjust the clock manually without waiting for the next time sync polling.
Setting NTP client on Fedora is the same as setting the NTP server. The difference is that NTP client time is synchronized with the NTP server, in this case the server you set above and it doesn’t have access permissions set hence no server can query time information from it.
To setup NTP client using the chrony suite, install chrony on the client.
Enable chronyd to start on system boot;
Edit the chronyd configuration file and set the time server address as shown below;
# Use public servers from the pool.ntp.org project.
# Please consider joining the pool (http://www.pool.ntp.org/join.html).
#pool 2.fedora.pool.ntp.org iburst
server 192.168.43.69
where 192.168.43.69 is the IP address of our NTP server.
Check time synchronization
To verify that time synchronization is working, you can use the tracking or sources command with chronyc as shown below;
Reference ID : C0A82B45 (192.168.43.69)
Stratum : 4
Ref time (UTC) : Sun Nov 18 07:04:29 2018
System time : 0.004202977 seconds fast of NTP time
Last offset : +0.007200314 seconds
RMS offset : 0.107927606 seconds
Frequency : 91.718 ppm fast
Residual freq : +3.508 ppm
Skew : 159.694 ppm
Root delay : 0.299425781 seconds
Root dispersion : 0.080330342 seconds
Update interval : 64.2 seconds
Leap status : Normal
From the reference ID, you can see that our client is connected to our NTP server.
You can also use the sources command;
As you can see, our client is now connected to our NTP server.
That is all about installing and setting up Chrony to provide NTP services on Fedora 29. We hope this was informative.
What is Chrony?
Chrony is the new NTP client / server software in CentOS / RHEL 7 or later. It replaces the legacy NTP software.
Chrony is very simple to configure and its client component is worked without any custom configurations on most situations. Whereas, the time server configurations are also simple and straight forward.
Environment Specification
- CPU — 3.4 Ghz (2 cores)
- Memory — 1 GB
- Storage — 20 GB
- Hostname – ntp-server.centlinux.com
- IP Address — 192.168.116.206 /24
Checking if chrony is Synchronized
To check if chrony is synchronized, make use of the tracking, sources, and sourcestats commands.
Checking chrony Tracking
Reference ID : B23E73D4 (cacti.digital-satellites.com)
Stratum : 3
Ref time (UTC) : Sat Nov 17 20:43:46 2018
System time : 0.000046934 seconds slow of NTP time
Last offset : -0.008311978 seconds
RMS offset : 0.072417602 seconds
Frequency : 9.445 ppm fast
Residual freq : -21.688 ppm
Skew : 10.302 ppm
Root delay : 0.254697442 seconds
Root dispersion : 0.020058062 seconds
Update interval : 1.3 seconds
Leap status : Normal
The reference ID specifies the reference ID and hostname or IP address of the server to which the computer is currently synchronized with.
The Stratum indicates the number of hops between your local computer and the reference clock computer.
Checking chrony Sources
The sources command shows the information about the current time sources that chronyd is accessing.
The M column indicates the mode of the source;
The S column indicates the state of the sources;
Checking chrony Source Statistics
The sourcestats command displays information about the drift rate and offset estimation process for each of the sources currently being examined by chronyd
Table of Contents
Chrony uses default NTP service port 123/udp. Therefore, you have to allow it in Linux firewall.
You can allow either 123/udp port or predefined NTP service in Linux firewall.
# firewall-cmd —permanent —add-service=ntp
success
#
success
Your Chrony NTP server is configured successfully.
Update your Linux Operating System
Update cache of enabled yum repositories on your Linux server.
It is a best practice to update your Linux operating system before installing a new software.
Execute dnf command to update your Linux server.
# dnf update -y
You may need to reboot your operating system, if the above command updates your Linux Kernel.
After reboot, check the Linux operating system and Kernel versions.
#
NAME=»Rocky Linux»
VERSION=»8.5 (Green Obsidian)»
ID=»rocky»
ID_LIKE=»rhel centos fedora»
VERSION_ID=»8.5″
PLATFORM_ID=»platform:el8″
PRETTY_NAME=»Rocky Linux 8.5 (Green Obsidian)»
ANSI_COLOR=»0;32″
CPE_NAME=»cpe:/o:rocky:rocky:8:GA»
HOME_URL=»https://rockylinux.org/»
BUG_REPORT_URL=»https://bugs.rockylinux.org/»
ROCKY_SUPPORT_PRODUCT=»Rocky Linux»
ROCKY_SUPPORT_PRODUCT_VERSION=»8″
#
4.18.0-348.12.2.el8_5.x86_64
- CPU — 3.4 Ghz (2 cores)
- Memory — 2 GB
- Storage — 20 GB
- Hostname – ntp-01.centlinux.com
- IP Address — 192.168.116.128 /24
Configure Chrony as NTP Server
To configure your NTP server, you will need to allow your network address in Chrony configuration file.
Restart chronyd NTP service to apply changes.
# systemctl restart chronyd.service
Verify that the chronyd service is listening on the default NTP port.
The Chrony NTP service is running fine. To make it usable by the network clients, you are only required to allow incoming traffic to this port through Linux firewall.
# firewall-cmd —permanent —add-service=ntp
success
#
success
Your Chrony based NTP server has been configured successfully and ready to use.
Installing Chrony Software Package on CentOS 8
By default, Chrony works as a NTP client and synchronize the clock of your Linux server with network time servers or network time peers.
You can enable Chrony NTP service to make it a full fledge network time server / peer.
First of all, you need to install Chrony software package on your Linux operating system.
Execute dnf command to install chrony software package..
# dnf install -y chrony
Enable and start chronyd service.
# systemctl enable —now chronyd.service
Install Chrony NTP Server
Set the required time zone on your Linux Server. You can use timedatectl command for this purpose.
# timedatectl set-timezone America/Chicago
Execute the timedatectl command again without any parameter to check the System Clock status.
#
Local time: Sat 2022-03-05 08:53:46 CST
Universal time: Sat 2022-03-05 14:53:46 UTC
RTC time: Sat 2022-03-05 14:53:46
Time zone: America/Chicago (CST, -0600)
System clock synchronized: no
NTP service: n/a
RTC in local TZ: no
You can see that your System clock is not currently synchronized with any NTP service.
By using dnf command to install Chrony NTP server.
Edit Chrony configuration file by using vim text editor.
Enable and start Chrony NTP service.
Verify the status of Chrony NTP service.
Again check the System clock status.
#
Local time: Sat 2022-03-05 09:05:47 CST
Universal time: Sat 2022-03-05 15:05:47 UTC
RTC time: Sat 2022-03-05 15:05:46
Time zone: America/Chicago (CST, -0600)
System clock synchronized: yes
NTP service: active
RTC in local TZ: no
Now your System clock is synchronized with Global NTP servers.
Execute the chronyc command at Linux Bash prompt to check the Time synchronization status.
Configure your NTP Client
Set the Time zone on our NTP client.
Check the status of System clock.
#
Local time: Sat 2022-03-05 09:40:04 CST
Universal time: Sat 2022-03-05 15:40:04 UTC
RTC time: Sat 2022-03-05 15:40:05
Time zone: America/Chicago (CST, -0600)
System clock synchronized: no
NTP service: n/a
RTC in local TZ: no
Chrony is both NTP server and client software. Therefore, install the same Chrony NTP software on your client machine.
Edit Chrony configuration file with the help of vim text editor.
Find and comment the line that starts with «pool» directive.
server ntp-01.centlinux.com iburst
Again check the status of System clock.
#
Local time: Sat 2022-03-05 09:45:38 CST
Universal time: Sat 2022-03-05 15:45:38 UTC
RTC time: Sat 2022-03-05 15:45:38
Time zone: America/Chicago (CST, -0600)
System clock synchronized: yes
NTP service: active
RTC in local TZ: no
Your system clock is being synchronized now.
# timedatectl set-ntp true
Check the status of time synchronization.
Your NTP client is successfully synchronizing with your Time server.
Configure Chrony as NTP Client
The NTP client is started with default configurations and synchronizing your Linux server clock with available network time servers / peers.
Check the CentOS / Red Hat Linux server time.
#
Sun Oct 11 22:16:26 PKT 2020
Chrony is a versatile implementation of the Network Time Protocol (NTP). It can synchronize the system clock with NTP servers, reference clocks, and manual input using wrist-watch and keyboard. It can also operate as an NTPv4 (RFC 5905) server and peer to provide a time service to other computers in the network.
It is designed to perform well in a wide range of conditions, including intermittent network connections, heavily congested networks, changing temperatures (ordinary computer clocks are sensitive to temperature), and systems that do not run continuously, or run on a virtual machine.
Typical accuracy between two machines synchronized over the Internet is within a few milliseconds; on a LAN, accuracy is typically in tens of microseconds. With hardware time-stamping, or a hardware reference clock, sub-microsecond accuracy may be possible.
Two programs are included in chrony, chronyd is a daemon that can be started at boot time and chronyc is a command-line interface program which can be used to monitor chronyd’s performance and to change various operating parameters whilst it is running. (Source: https://chrony.tuxfamily.org/)
Conclusion
In this article, you have successfully installed Chrony NTP server on Rocky Linux 8 or other RPM based distros. You have also learned how to configure NTP clients to synchronize system clocks with your Time server.
