In any organization, email service is one of the essential and critical services for communication. Proprietary software such as Microsoft Exchange (Outlook 360), IBM dominos and cloud email services like G Suite are ahead of race compared to opensource suits.
But, one such product that is giving a good fight to them is ZCS (Zimbra Collaboration Suite). Zimbra is one of the leading mail server used by many organizations, and it comes in two versions, Open Source, and Enterprise version.
If you want to obtain Exchange ActiveSync ability on your Zimbra Open Source Edition, you can integrate Zimbra and Z-push + Zimbra Backend. With it, you can synchronize email, contacts, and calendars between Zimbra and your mobile device.
This article only for Zimbra that installing Single Server. If you have Zimbra with multi-server installation, I recommend you to install Z-push + Zimbra Backend on a separate server.
This guidance has been tested on Zimbra 8.8.12 – 8.8.15
# Install dependencies
For CentOS 7
yum install epel-release -y
yum install git php-cli php-soap php-process php-mbstring -y
For Ubuntu 16.04 and 18.04
apt update -y
apt install git php-cli php-soap php-cgi php-mbstring php-curl -y
git clone https://github.com/imanudin11/zcs-zpush.git
cd zcs-zpush/
Create folder for log
mkdir /var/lib/z-push /var/log/z-push
chmod 755 /var/lib/z-push /var/log/z-push
chown zimbra:zimbra /var/lib/z-push /var/log/z-push
Save z-push folder on /opt/
cp -rvf z-push /opt/
Note : I use Asia/Jakarta as my Timezone. Please open /opt/z-push/config.php and adjust/change Asia/Jakarta to your Timezone
ln -sf /opt/z-push /opt/zimbra/jetty/webapps/
Save php script on /usr/bin
cp php-cgi-fix.sh /usr/bin/php-cgi-fix.sh
chmod +x /usr/bin/php-cgi-fix.sh
Change publicHostname domain on your Zimbra into localhost
su - zimbra -c 'zmprov md yourzimbradomain.tld zimbraPublicServiceHostname localhost zimbraPublicServiceProtocol https'
Note : If you have more than 1 domain, and that domain want to use Exchange ActiveSync, you should run above command for each domains
# Backup and replace jetty.xml.in
For Zimbra 8.8.6
cp /opt/zimbra/jetty/etc/jetty.xml.in /opt/zimbra/jetty/etc/jetty.xml.in.backup
cp jetty.xml.in-for-zcs-886 /opt/zimbra/jetty/etc/jetty.xml.in
chown zimbra.zimbra /opt/zimbra/jetty/etc/jetty.xml.in
For Zimbra 8.8.7
cp /opt/zimbra/jetty/etc/jetty.xml.in /opt/zimbra/jetty/etc/jetty.xml.in.backup
cp jetty.xml.in-for-zcs-887 /opt/zimbra/jetty/etc/jetty.xml.in
chown zimbra.zimbra /opt/zimbra/jetty/etc/jetty.xml.in
For Zimbra 8.8.8 – Zimbra 8.8.12
cp /opt/zimbra/jetty/etc/jetty.xml.in /opt/zimbra/jetty/etc/jetty.xml.in.backup
cp jetty.xml.in-for-zcs-888-8812 /opt/zimbra/jetty/etc/jetty.xml.in
chown zimbra.zimbra /opt/zimbra/jetty/etc/jetty.xml.in
For Zimbra 8.8.15
cp /opt/zimbra/jetty/etc/jetty.xml.in /opt/zimbra/jetty/etc/jetty.xml.in.backup
cp jetty.xml.in-for-zcs-8815 /opt/zimbra/jetty/etc/jetty.xml.in
chown zimbra.zimbra /opt/zimbra/jetty/etc/jetty.xml.in
For Zimbra 9
cp /opt/zimbra/jetty/etc/jetty.xml.in /opt/zimbra/jetty/etc/jetty.xml.in.backup
cp jetty.xml.in-for-zcs-9 /opt/zimbra/jetty/etc/jetty.xml.in
chown zimbra.zimbra /opt/zimbra/jetty/etc/jetty.xml.in
# Add zpush.ini into php
For CentOS 7
cp zpush.ini /etc/php.d/zpush.ini
For Ubuntu 16.04
cp zpush.ini /etc/php/7.0/cgi/conf.d/10-zpush.ini
For Ubuntu 18.04
cp zpush.ini /etc/php/7.2/cgi/conf.d/10-zpush.ini
Restart Zimbra Mailbox
su - zimbra -c 'zmmailboxdctl restart'
For testing, please access https://ip-of-zimbra/Microsoft-Server-ActiveSync from your browser. Log in with your Zimbra account. If it works, you can see the output as below. Or you can configure your mail apps on mobile devices and ensure choose exchange/activesync

Zimbra 9 has just been released. But the binary only available for Zimbra NE. When I see the release note, Zimbra announces “There are no Open Source repositories specific to Zimbra 9.”.
When I access the Zimbra forum, I found Jorgedlcruz posting about Zimbra 9 FOSS made by beezim.fr. You can find the post here: https://forums.zimbra.org/viewtopic.php?f=15&t=68097. I interest and want to try to install it. When this article was written, Zimbra 9 FOSS available for RHEL7/CentOS7 and Ubuntu 18.04
Here is how I install Zimbra 9 FOSS (unofficial) on CentOS 7
# Install screen and wget
yum install wget screen -y
# Download script automatic configuration
This script will automatically configure /etc/hosts, hostname, create local DNS using BIND and install dependencies that required by Zimbra
screen -S install-zimbra
wget -c https://raw.githubusercontent.com/imanudin11/script/master/persiapan-zimbra-centos7.sh
chmod +x persiapan-zimbra-centos7.sh
./persiapan-zimbra-centos7.sh
Screen commands are used for background processes. When the SSH connection is lost, I can reconnect to the server and check the progress by running the screen -x.
When the script is run, you will be asked about the hostname, domain, and IP address. Below is the information I used
[INFO] : Configuring /etc/hostsHostname. Example mail : mail
Domain name. Example imanudin.net : imanudin.net
IP Address : 192.168.11.12
# Download Zimbra binary
cd /opt/
wget -c https://s3.beezim.fr/beebot/upload/09830127-c2f1-43cb-b3fa-c35fc514e539/zcs-9.0.0_GA_1.RHEL7_64.20200411070311.tgz
# Extract and Install Zimbra
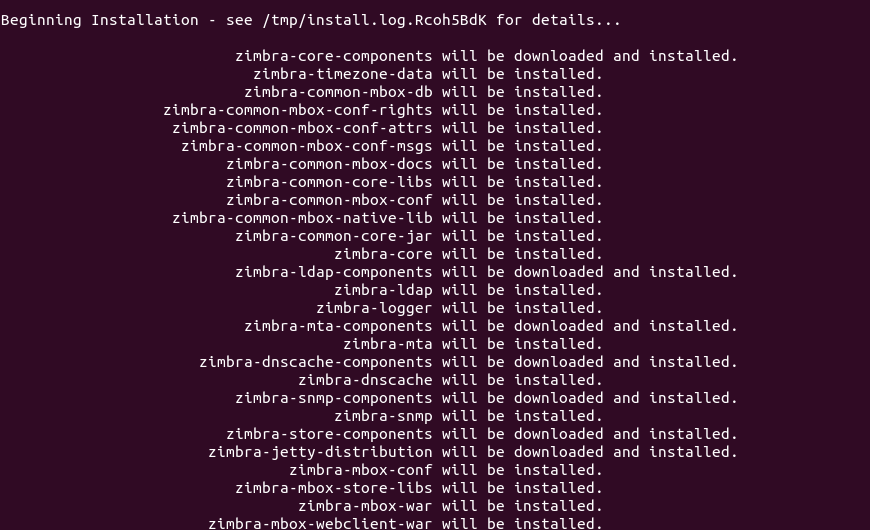
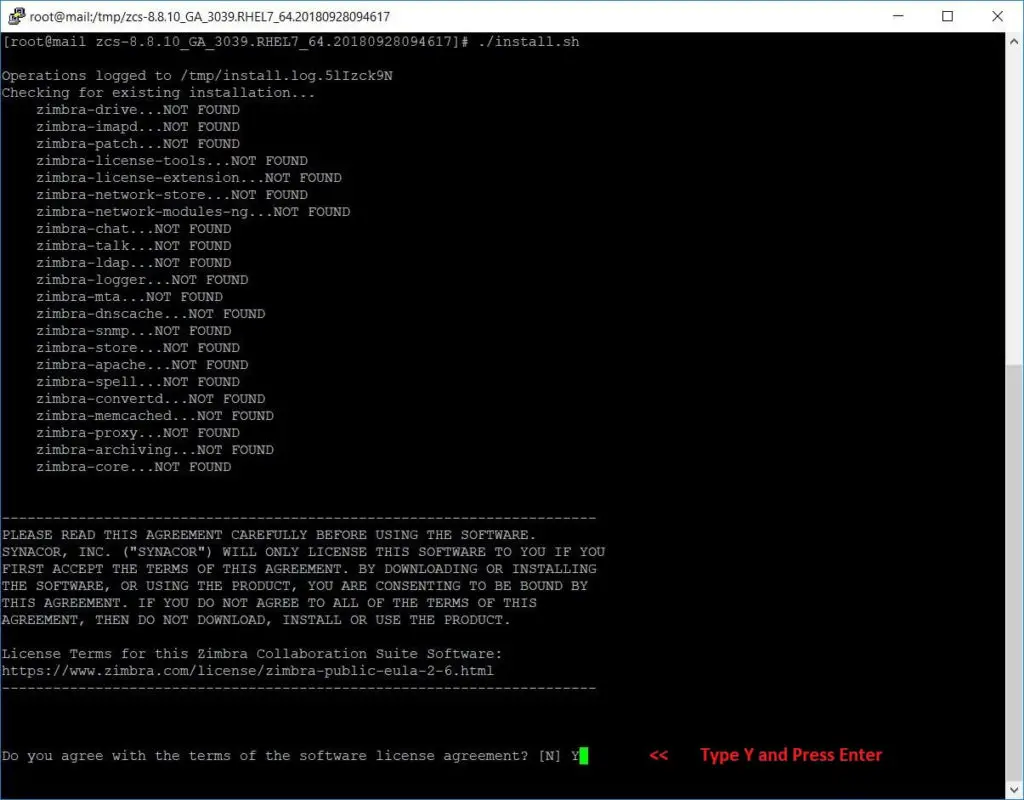
tar -zxvf zcs-9.0.0_GA_1.RHEL7_64.20200411070311.tgz
cd zcs-9.0.0_GA_1.RHEL7_64.20200411070311
./install.sh
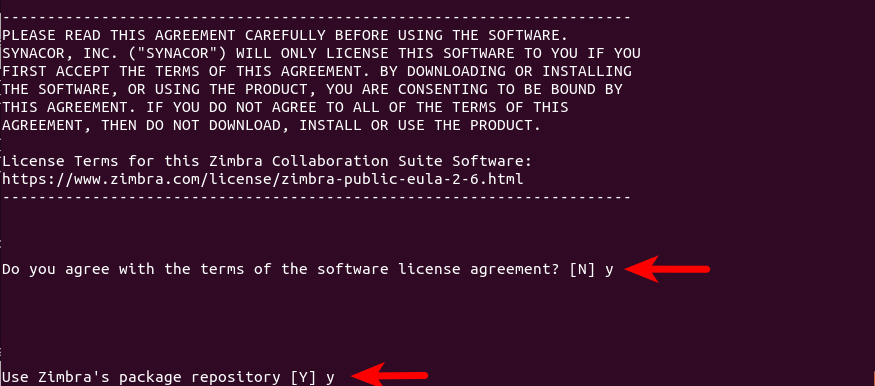
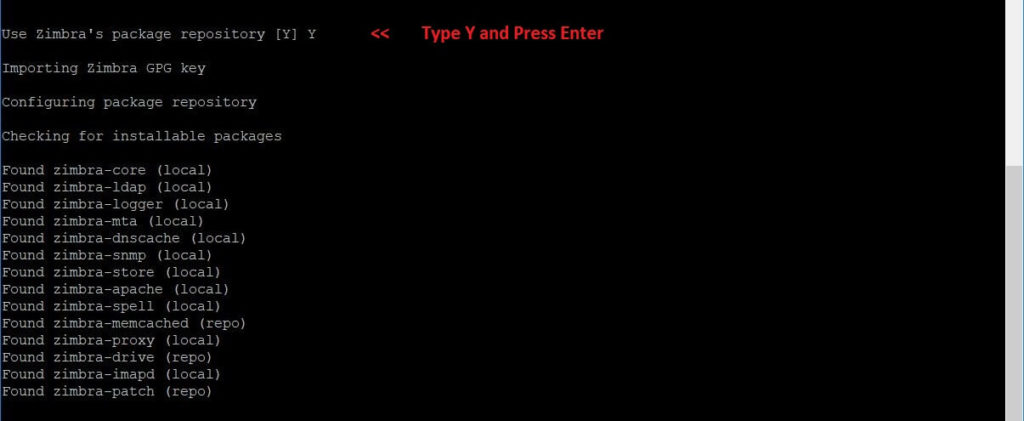
type Y if asked license agreement and repository package
Do you agree with the terms of the software license agreement? [N] Y
Use Zimbra's package repository [Y] Y
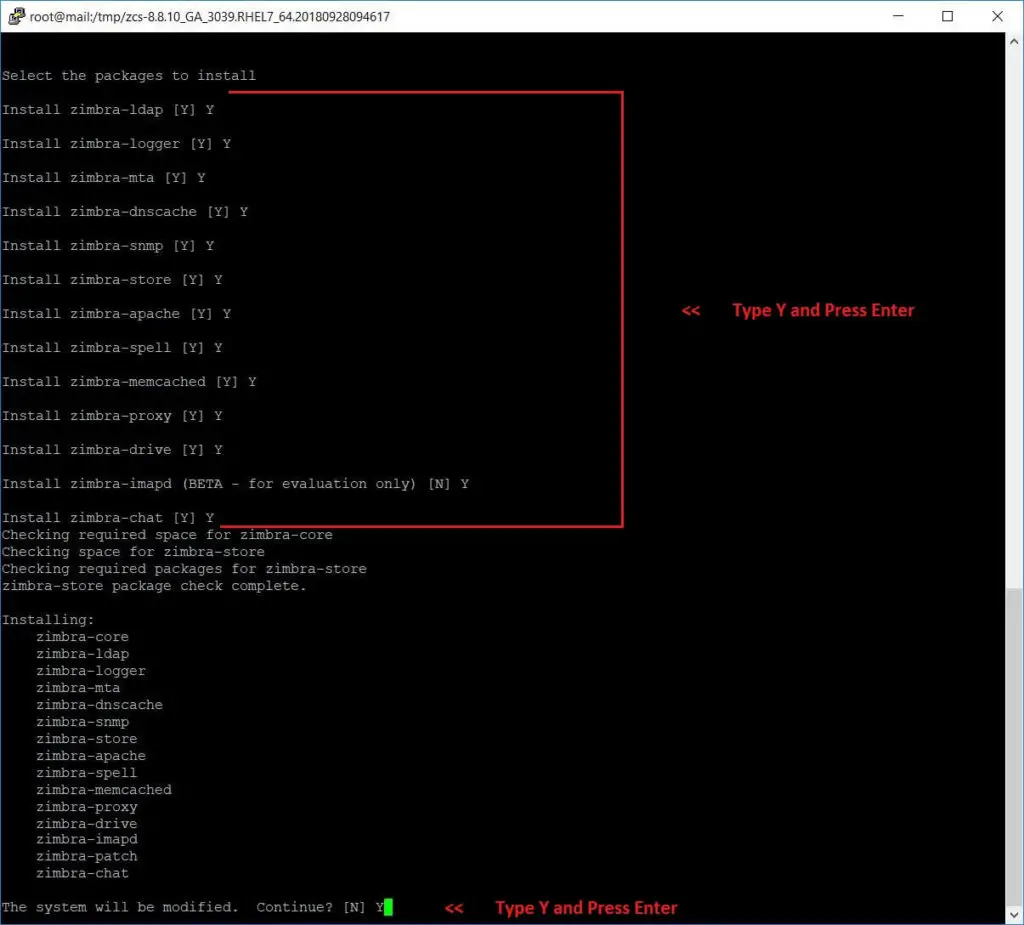
Select the packages to install. I do not install zimbra-imapd and zimbra-dnscache
Install zimbra-ldap [Y] Y
Install zimbra-logger [Y] Y
Install zimbra-mta [Y] YInstall zimbra-dnscache [Y] NInstall zimbra-snmp [Y] Y
Install zimbra-store [Y] Y
Install zimbra-apache [Y] Y
Install zimbra-spell [Y] Y
Install zimbra-memcached [Y] Y
Install zimbra-proxy [Y] Y
Install zimbra-drive [Y] YInstall zimbra-imapd (BETA - for evaluation only) [N] NInstall zimbra-chat [Y] Y
Type Y if asked The system will be modified. Continue?
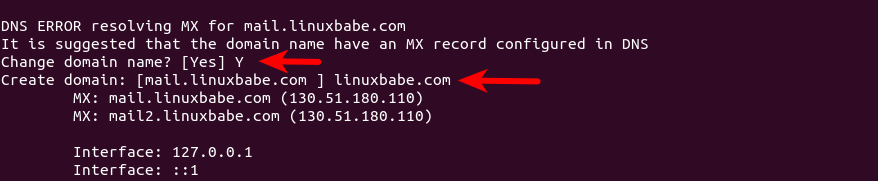
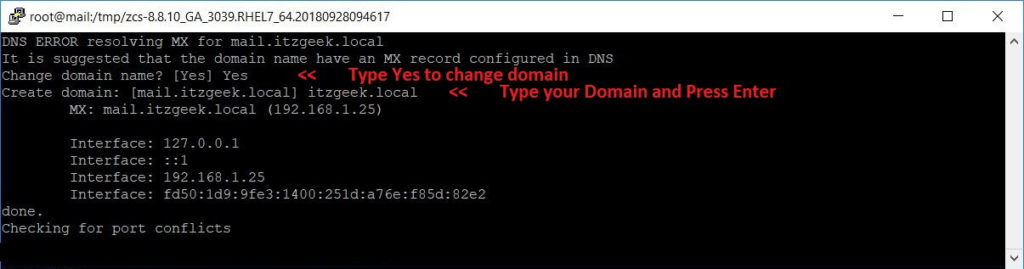
DNS ERROR resolving MX for mail.imanudin.net
It is suggested that the domain name have an MX record configured in DNSChange domain name? [Yes] Yes
Create domain: [mail.imanudin.net] imanudin.net
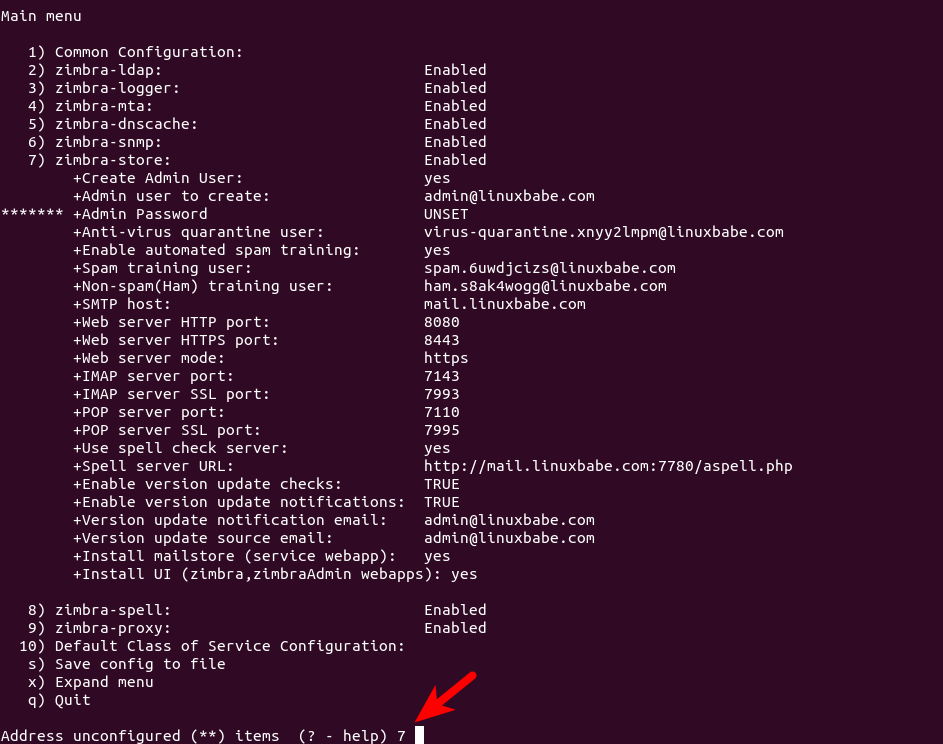
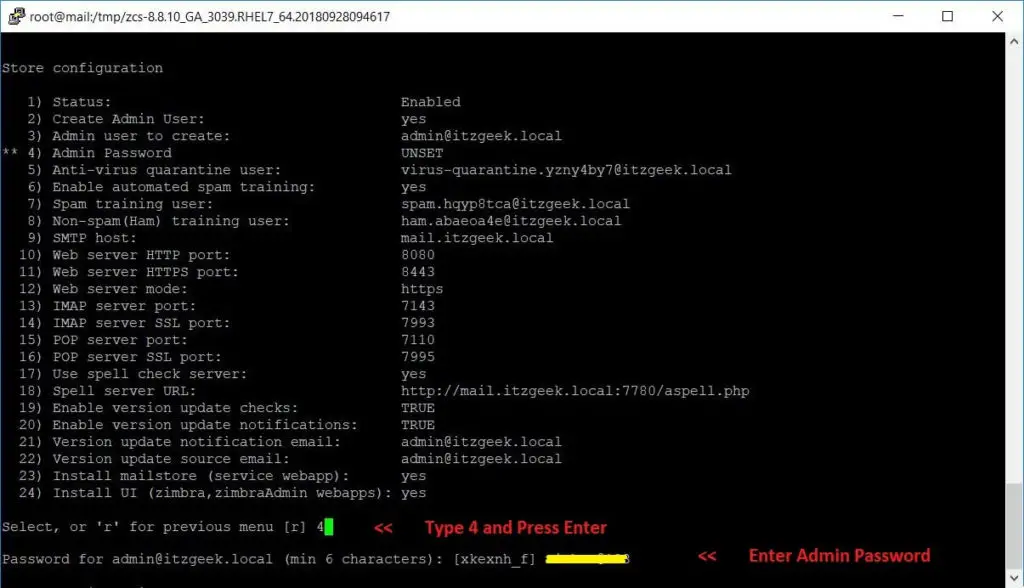
Main menu 1) Common Configuration: 2) zimbra-ldap: Enabled 3) zimbra-logger: Enabled 4) zimbra-mta: Enabled 5) zimbra-snmp: Enabled 6) zimbra-store: Enabled +Create Admin User: yes +Admin user to create: admin@imanudin.net
******* +Admin Password UNSET +Anti-virus quarantine user: virus-quarantine.a5rtucqhim@imanudin.net
.....
.....Address unconfigured (**) items (? - help) 6Store configuration 1) Status: Enabled 2) Create Admin User: yes 3) Admin user to create: admin@imanudin.net
** 4) Admin Password UNSET 5) Anti-virus quarantine user: virus-quarantine.a5rtucqhim@imanudin.net
....
.... Select, or 'r' for previous menu [r] 4Password for admin@imanudin.net (min 6 characters): [_47SUjFEQ] VeryS3cret
After inserting the password, Select, or ‘r’ for previous menu. If all has been configured, apply configuration and wait until Zimbra is finished installing.
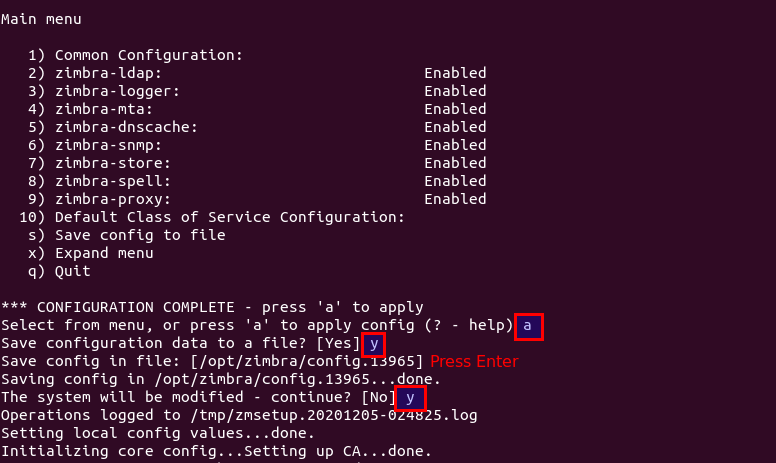
*** CONFIGURATION COMPLETE - press 'a' to apply
Select from menu, or press 'a' to apply config (? - help) a
Save configuration data to a file? [Yes] Yes
Save config in file: [/opt/zimbra/config.5731]
Saving config in /opt/zimbra/config.5731...done.
The system will be modified - continue? [No] Yes
Operations logged to /tmp/zmsetup.20200501-161152.log
Type Yes if asked Notify Zimbra of your installation? then press the enter key when seeing Configuration complete – press return to exit,
Check Zimbra status and version with these commands
su - zimbra -c "zmcontrol status"
su - zimbra -c "zmcontrol -v"
[root@mail zcs-9.0.0_GA_1.RHEL7_64.20200411070311]# su - zimbra -c "zmcontrol -v"
Release 9.0.0_GA_1.RHEL7_64_20200411070311 RHEL7_64 FOSS edition, Patch 9.0.0_P1.
Below are some screenshots of webmail
Zimbra 9 Login Screen
» data-medium-file=»https://i0.wp.com/imanudin.net/wp-content/uploads/2020/05/zimbra9_login_screen.png?fit=300%2C141&ssl=1″ data-large-file=»https://i0.wp.com/imanudin.net/wp-content/uploads/2020/05/zimbra9_login_screen.png?fit=810%2C381&ssl=1″ decoding=»async» src=»https://i0.wp.com/imanudin.net/wp-content/uploads/2020/05/zimbra9_login_screen.png?resize=810%2C381&is-pending-load=1#038;ssl=1″ alt=»» srcset=»https://i0.wp.com/imanudin.net/wp-content/uploads/2020/05/zimbra9_login_screen.png?w=1362&ssl=1 1362w, https://i0.wp.com/imanudin.net/wp-content/uploads/2020/05/zimbra9_login_screen.png?resize=300%2C141&ssl=1 300w, https://i0.wp.com/imanudin.net/wp-content/uploads/2020/05/zimbra9_login_screen.png?resize=1024%2C482&ssl=1 1024w, https://i0.wp.com/imanudin.net/wp-content/uploads/2020/05/zimbra9_login_screen.png?resize=768%2C361&ssl=1 768w» sizes=»(max-width: 810px) 100vw, 810px» data-recalc-dims=»1″ data-lazy-srcset=»https://i0.wp.com/imanudin.net/wp-content/uploads/2020/05/zimbra9_login_screen.png?w=1362&ssl=1 1362w, https://i0.wp.com/imanudin.net/wp-content/uploads/2020/05/zimbra9_login_screen.png?resize=300%2C141&ssl=1 300w, https://i0.wp.com/imanudin.net/wp-content/uploads/2020/05/zimbra9_login_screen.png?resize=1024%2C482&ssl=1 1024w, https://i0.wp.com/imanudin.net/wp-content/uploads/2020/05/zimbra9_login_screen.png?resize=768%2C361&ssl=1 768w» data-old-srcset=»data:image/gif;base64,R0lGODlhAQABAIAAAAAAAP///yH5BAEAAAAALAAAAAABAAEAAAIBRAA7″>
Zimbra 9 FOSS (unofficial) after Login
» data-medium-file=»https://i0.wp.com/imanudin.net/wp-content/uploads/2020/05/zimbra9_webmail_classic.png?fit=300%2C141&ssl=1″ data-large-file=»https://i0.wp.com/imanudin.net/wp-content/uploads/2020/05/zimbra9_webmail_classic.png?fit=810%2C380&ssl=1″ decoding=»async» loading=»lazy» src=»https://i0.wp.com/imanudin.net/wp-content/uploads/2020/05/zimbra9_webmail_classic.png?resize=810%2C381&is-pending-load=1#038;ssl=1″ alt=»» srcset=»https://i0.wp.com/imanudin.net/wp-content/uploads/2020/05/zimbra9_webmail_classic.png?w=1366&ssl=1 1366w, https://i0.wp.com/imanudin.net/wp-content/uploads/2020/05/zimbra9_webmail_classic.png?resize=300%2C141&ssl=1 300w, https://i0.wp.com/imanudin.net/wp-content/uploads/2020/05/zimbra9_webmail_classic.png?resize=1024%2C481&ssl=1 1024w, https://i0.wp.com/imanudin.net/wp-content/uploads/2020/05/zimbra9_webmail_classic.png?resize=768%2C361&ssl=1 768w» sizes=»(max-width: 810px) 100vw, 810px» data-recalc-dims=»1″ data-lazy-srcset=»https://i0.wp.com/imanudin.net/wp-content/uploads/2020/05/zimbra9_webmail_classic.png?w=1366&ssl=1 1366w, https://i0.wp.com/imanudin.net/wp-content/uploads/2020/05/zimbra9_webmail_classic.png?resize=300%2C141&ssl=1 300w, https://i0.wp.com/imanudin.net/wp-content/uploads/2020/05/zimbra9_webmail_classic.png?resize=1024%2C481&ssl=1 1024w, https://i0.wp.com/imanudin.net/wp-content/uploads/2020/05/zimbra9_webmail_classic.png?resize=768%2C361&ssl=1 768w» data-old-srcset=»data:image/gif;base64,R0lGODlhAQABAIAAAAAAAP///yH5BAEAAAAALAAAAAABAAEAAAIBRAA7″>
Why not using a modern web app after login? as mention on Zimbra Wiki “A Zimbra Network Edition license is required to use the Modern Web App.”. So, you should buy Zimbra NE to get more Benefits 🙂
Good luck 🙂
This guidance is the same as guidance on Ubuntu here. However, I use Zimbra 9 unofficial from Beezim. If you are interested in Zimbra 9 unofficial on CentOS, you can find here. Please note, I am using Ubuntu 18.04 here.
# Preparation
Download and run the script
curl -k https://raw.githubusercontent.com/imanudin11/zimbra-auto-install/master/setup-zimbra-ubuntu18.sh > /tmp/setup-zimbra-ubuntu18.sh
chmod +x /tmp/setup-zimbra-ubuntu18.sh
/tmp/setup-zimbra-ubuntu18.sh
[INFO] : Configuring hostname, /etc/hosts and resolv.conf
Please insert your Hostname. Example mail : mailPlease insert your Domain name. Example imanudin.net : imanudin.netPlease insert your IP Address : 192.168.2.16
Now, you can install Zimbra. Download, extract, and run install.sh script
cd /opt/
wget -c https://s3.beezim.fr/beebot/upload/1a4ba286-a177-4c02-9757-3adc42ef9e02/zcs-9.0.0_GA_1.UBUNTU18_64.20200416221446.tgz
tar -zxvf zcs-9.0.0_GA_1.UBUNTU18_64.20200416221446.tgz
cd zcs-9.0.0_GA_1.UBUNTU18_64.20200416221446
./install.sh
Type y/Y if asked :
Type y/Y on all packages except zimbra-dnscache and zimbra-imapd. Zimbra-dnscache not selected because I am using Bind for internal DNS and zimbra-imapd still BETA version
Select the packages to install
Install zimbra-ldap [Y] yInstall zimbra-logger [Y] yInstall zimbra-mta [Y] yInstall zimbra-dnscache [Y] NInstall zimbra-snmp [Y] yInstall zimbra-store [Y] yInstall zimbra-apache [Y] yInstall zimbra-spell [Y] yInstall zimbra-memcached [Y] yInstall zimbra-proxy [Y] yInstall zimbra-drive [Y] yInstall zimbra-imapd (BETA - for evaluation only) [N] NInstall zimbra-chat [Y] yChecking required space for zimbra-core
Checking space for zimbra-store
Checking required packages for zimbra-store
zimbra-store package check complete.
Installing: zimbra-core zimbra-ldap zimbra-logger zimbra-mta zimbra-snmp zimbra-store zimbra-apache zimbra-spell zimbra-memcached zimbra-proxy zimbra-drive zimbra-patch zimbra-mta-patch zimbra-proxy-patch zimbra-chat
The system will be modified. Continue? [N] y
Type Y if asked The system will be modified. Continue?
if you get a message like below, press enter or type Yes and change the domain name
DNS ERROR resolving MX for mail.imanudin.net
It is suggested that the domain name have an MX record configured in DNS
Change domain name? [Yes] YesCreate domain: [mail.imanudin.net] imanudin.net
Main menu 1) Common Configuration: 2) zimbra-ldap: Enabled 3) zimbra-logger: Enabled 4) zimbra-mta: Enabled 5) zimbra-snmp: Enabled 6) zimbra-store: Enabled +Create Admin User: yes +Admin user to create: admin@imanudin.net
******* +Admin Password UNSET +Anti-virus quarantine user: virus-quarantine.7nbg3upe@imanudin.net
... skip ... Address unconfigured (**) items (? - help) 6Store configuration 1) Status: Enabled 2) Create Admin User: yes 3) Admin user to create: admin@imanudin.net
** 4) Admin Password UNSET 5) Anti-virus quarantine user: virus-quarantine.7nbg3upe@imanudin.net
... skip ...Select, or 'r' for previous menu [r] 4Password for admin@imanudin.net (min 6 characters): [9M1CRucQ] v3rysecre7p4ssword
After insert password, Select, or ‘r’ for the previous menu. If all has been configured, apply configuration and wait until Zimbra install finished
*** CONFIGURATION COMPLETE - press 'a' to apply
Select from menu, or press 'a' to apply config (? - help) aSave configuration data to a file? [Yes] YesSave config in file: [/opt/zimbra/config.1450] press key enterSaving config in /opt/zimbra/config.1450...done.
The system will be modified - continue? [No] YesOperations logged to /tmp/zmsetup.20200619-013402.log
Type Yes if asked Notify Zimbra of your installation? and if it has been appeared Configuration complete – press return to exit, your Zimbra installation has been finished. Check Zimbra status with this command su – zimbra -c “zmcontrol status” and make sure all service running well. You can access webmail via browser at URL https://ZimbraServer
You have the option of notifying Zimbra of your installation.
This helps us to track the uptake of the Zimbra Collaboration Server.
The only information that will be transmitted is: The VERSION of zcs installed (9.0.0_GA_1_UBUNTU18_64) The ADMIN EMAIL ADDRESS created (admin@imanudin.net)
Notify Zimbra of your installation? [Yes] Yes
Notification complete
Checking if the NG started running...done.
Setting up zimbra crontab...done.
Moving /tmp/zmsetup.20200619-013402.log to /opt/zimbra/log
Configuration complete - press return to exit

Good luck and hopefully useful 😀
In the previous article, I am using Zimbra Open Source Edition created by Beezim. In this article, I am using Zimbra 9 Open Source Edition unofficial created by ZeXtras. You can find full information about Zimbra 9 OSE created by ZeXtras here: https://www.zextras.com/zimbra-9/.
If you are looking for a Zimbra 9 installation on CentOS 7, please see this one: How to Install Zimbra 9 Open Source Edition (Unofficial) on CentOS 7. If you are looking for a Zimbra 9 installation on Ubuntu, please see this one: How to Install Zimbra 9 Open Source Edition (Unofficial) on Ubuntu.
Here is how I install Zimbra 9 FOSS (unofficial) on CentOS 8 created by ZeXtras
# Install EPEL Repo
yum install epel-release -y
yum update -y
yum upgrade -y
# Install screen and wget
yum install wget screen -y
# Download script automatic configuration
This script will automatically configure /etc/hosts, hostname, create local DNS using BIND and install dependencies that required by Zimbra
screen -S install-zimbra
wget -c https://raw.githubusercontent.com/imanudin11/zimbra-auto-install/master/setup-zimbra-cento8.sh
chmod +x setup-zimbra-cento8.sh
./setup-zimbra-cento8.sh
Screen commands are used for background processes. When the SSH connection is lost, I can reconnect to the server and check the progress by running the screen -x.
When the script is run, you will be asked about the hostname, domain, and IP address. Below is the information I used
[INFO] : Configuring /etc/hostsHostname. Example mail : mail
Domain name. Example imanudin.net : imanudin.net
IP Address : 192.168.11.12
cd /opt/
wget -c https://download.zextras.com/zcs-9.0.0_OSE_RHEL8_latest-zextras.tgz
# Extract and Install Zimbra
tar -zxvf zcs-9.0.0_OSE_RHEL8_latest-zextras.tgz
cd zimbra-installer
./install.sh
type Y if asked license agreement and repository package
Do you agree with the terms of the software license agreement? [N] Y
Use Zimbra's package repository [Y] Y
Select the packages to install. I do not install zimbra-imapd and zimbra-dnscache
Install zimbra-ldap [Y] Y
Install zimbra-logger [Y] Y
Install zimbra-mta [Y] YInstall zimbra-dnscache [Y] NInstall zimbra-snmp [Y] Y
Install zimbra-store [Y] Y
Install zimbra-apache [Y] Y
Install zimbra-spell [Y] Y
Install zimbra-memcached [Y] Y
Install zimbra-proxy [Y] Y
Install zimbra-drive [Y] YInstall zimbra-imapd (BETA - for evaluation only) [N] NInstall zimbra-chat [Y] Y
Type Y if asked The system will be modified. Continue?
DNS ERROR resolving MX for mail.imanudin.net
It is suggested that the domain name have an MX record configured in DNSChange domain name? [Yes] Yes
Create domain: [mail.imanudin.net] imanudin.net
Main menu 1) Common Configuration: 2) zimbra-ldap: Enabled 3) zimbra-logger: Enabled 4) zimbra-mta: Enabled 5) zimbra-snmp: Enabled 6) zimbra-store: Enabled +Create Admin User: yes +Admin user to create: admin@imanudin.net
******* +Admin Password UNSET +Anti-virus quarantine user: virus-quarantine.a5rtucqhim@imanudin.net
.....
.....Address unconfigured (**) items (? - help) 6Store configuration 1) Status: Enabled 2) Create Admin User: yes 3) Admin user to create: admin@imanudin.net
** 4) Admin Password UNSET 5) Anti-virus quarantine user: virus-quarantine.a5rtucqhim@imanudin.net
....
.... Select, or 'r' for previous menu [r] 4Password for admin@imanudin.net (min 6 characters): [_47SUjFEQ] VeryS3cret
After inserting the password, Select, or ‘r’ for previous menu. If all has been configured, apply configuration and wait until Zimbra is finished installing.
*** CONFIGURATION COMPLETE - press 'a' to apply
Select from menu, or press 'a' to apply config (? - help) a
Save configuration data to a file? [Yes] Yes
Save config in file: [/opt/zimbra/config.5731]
Saving config in /opt/zimbra/config.5731...done.
The system will be modified - continue? [No] Yes
Operations logged to /tmp/zmsetup.20200501-161152.log
Type Yes if asked Notify Zimbra of your installation? then press the enter key when you see Configuration complete – press return to exit,
Check Zimbra status and version with these commands
su - zimbra -c "zmcontrol status"
su - zimbra -c "zmcontrol -v"
[root@mailimanudinnet zimbra-installer]# su - zimbra -c "zmcontrol -v"
Release 9.0.0_ZEXTRAS.e41af5bae02dd6e1ee964342d6efb01fdeb09927_202007113.RHEL8_64_20200710151420 RHEL8_64 FOSS edition, Patch 9.0.0_P4.
Below are some screenshots of webmail
Zimbra 9 Login Screen
» data-medium-file=»https://i0.wp.com/imanudin.net/wp-content/uploads/2020/05/zimbra9_login_screen.png?fit=300%2C141&ssl=1″ data-large-file=»https://i0.wp.com/imanudin.net/wp-content/uploads/2020/05/zimbra9_login_screen.png?fit=810%2C381&ssl=1″ decoding=»async» src=»https://i0.wp.com/imanudin.net/wp-content/uploads/2020/05/zimbra9_login_screen.png?resize=810%2C381&is-pending-load=1#038;ssl=1″ alt=»» srcset=»https://i0.wp.com/imanudin.net/wp-content/uploads/2020/05/zimbra9_login_screen.png?w=1362&ssl=1 1362w, https://i0.wp.com/imanudin.net/wp-content/uploads/2020/05/zimbra9_login_screen.png?resize=300%2C141&ssl=1 300w, https://i0.wp.com/imanudin.net/wp-content/uploads/2020/05/zimbra9_login_screen.png?resize=1024%2C482&ssl=1 1024w, https://i0.wp.com/imanudin.net/wp-content/uploads/2020/05/zimbra9_login_screen.png?resize=768%2C361&ssl=1 768w» sizes=»(max-width: 810px) 100vw, 810px» data-recalc-dims=»1″ data-lazy-srcset=»https://i0.wp.com/imanudin.net/wp-content/uploads/2020/05/zimbra9_login_screen.png?w=1362&ssl=1 1362w, https://i0.wp.com/imanudin.net/wp-content/uploads/2020/05/zimbra9_login_screen.png?resize=300%2C141&ssl=1 300w, https://i0.wp.com/imanudin.net/wp-content/uploads/2020/05/zimbra9_login_screen.png?resize=1024%2C482&ssl=1 1024w, https://i0.wp.com/imanudin.net/wp-content/uploads/2020/05/zimbra9_login_screen.png?resize=768%2C361&ssl=1 768w» data-old-srcset=»data:image/gif;base64,R0lGODlhAQABAIAAAAAAAP///yH5BAEAAAAALAAAAAABAAEAAAIBRAA7″>
Zimbra 9 FOSS (unofficial) after Login
» data-medium-file=»https://i0.wp.com/imanudin.net/wp-content/uploads/2020/05/zimbra9_webmail_classic.png?fit=300%2C141&ssl=1″ data-large-file=»https://i0.wp.com/imanudin.net/wp-content/uploads/2020/05/zimbra9_webmail_classic.png?fit=810%2C380&ssl=1″ decoding=»async» loading=»lazy» src=»https://i0.wp.com/imanudin.net/wp-content/uploads/2020/05/zimbra9_webmail_classic.png?resize=810%2C381&is-pending-load=1#038;ssl=1″ alt=»» srcset=»https://i0.wp.com/imanudin.net/wp-content/uploads/2020/05/zimbra9_webmail_classic.png?w=1366&ssl=1 1366w, https://i0.wp.com/imanudin.net/wp-content/uploads/2020/05/zimbra9_webmail_classic.png?resize=300%2C141&ssl=1 300w, https://i0.wp.com/imanudin.net/wp-content/uploads/2020/05/zimbra9_webmail_classic.png?resize=1024%2C481&ssl=1 1024w, https://i0.wp.com/imanudin.net/wp-content/uploads/2020/05/zimbra9_webmail_classic.png?resize=768%2C361&ssl=1 768w» sizes=»(max-width: 810px) 100vw, 810px» data-recalc-dims=»1″ data-lazy-srcset=»https://i0.wp.com/imanudin.net/wp-content/uploads/2020/05/zimbra9_webmail_classic.png?w=1366&ssl=1 1366w, https://i0.wp.com/imanudin.net/wp-content/uploads/2020/05/zimbra9_webmail_classic.png?resize=300%2C141&ssl=1 300w, https://i0.wp.com/imanudin.net/wp-content/uploads/2020/05/zimbra9_webmail_classic.png?resize=1024%2C481&ssl=1 1024w, https://i0.wp.com/imanudin.net/wp-content/uploads/2020/05/zimbra9_webmail_classic.png?resize=768%2C361&ssl=1 768w» data-old-srcset=»data:image/gif;base64,R0lGODlhAQABAIAAAAAAAP///yH5BAEAAAAALAAAAAABAAEAAAIBRAA7″>
Why not using a modern web app after login? as mention on Zimbra Wiki “A Zimbra Network Edition license is required to use the Modern Web App.”. So, you should buy Zimbra NE to get more Benefits 🙂
Good luck 🙂
- Checking If Port 25 (outbound) is blocked
- Configuring Hostname
- Login From Mail Clients
- Prerequisites
- CentOS 7 / RHEL 7
- What if Your Emails Are Still Being Marked as Spam?
- How to Renew TLS Certificate
- Create Cron Job
- Requirements
- Verify Zimbra Services
- Troubleshooting
- HTTP ERROR 502
- Testing Unbound DNS Resolver
- Install Zimbra Mail Server on Ubuntu 18
- Wrapping Up
- Installing Let’s Encrypt TLS Certificate
- Obtaining the Certificate
- Failure to Obtain TLS Certificate
- Installing the Certificate in Zimbra
- Troubleshooting
- Reduce CPU & RAM Usage
- Configure Systemd-Resolved
- Create A and Mx Record
- Local Test Domain
- Verify A and MX Records
- Download Zimbra Collaboration 8. 8 – Open Source Edition
- Server Requirements
- Access Zimbra Admin Portal
- Create Email Account (Optional)
- What if Your Email is Rejected by Microsoft Mailbox?
- What is Zimbra?
- Access Zimbra Web Mail Client
- UnInstall Zimbra Collaboration 8. 8 – Open Source Edition
- Testing Email Score and Placement
- Choose the Right Hosting Provider and Buy a Domain Name
- Improving Email Deliverability
- PTR record
- SPF Record
- DKIM Record
- DMARC Record
- Install Zimbra Collaboration 8. 8 – Open Source Edition
- Mail Server Setup
- Creating DNS MX Record
- Still Can’t Send Email?
- Sending Test Email
Checking If Port 25 (outbound) is blocked
Hint: If you use Kamatera VPS, then the outbound port 25 is open by default.
telnet gmail-smtp-in.l.google.com 25
Trying 74.125.68.26...
Connected to gmail-smtp-in.l.google.com.
Escape character is '^]'.
220 mx.google.com ESMTP y22si1641751pll.208 - gsmtp
Trying 2607:f8b0:400e:c06::1a...
Trying 74.125.195.27...
telnet: Unable to connect to remote host: Connection timed out
Configuring Hostname
sudo apt update
sudo apt upgrade -y
adduser
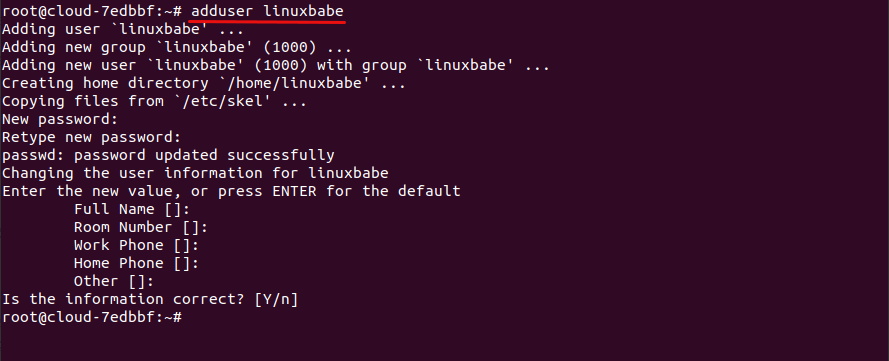
adduser sudo
su -
sudo hostnamectl set-hostname
We also need to update /etc/hosts file with a command-line text editor like Nano.
sudo nano /etc/hosts
Edit it like below. Use arrow keys to move the cursor in the file. You must put your mail server hostname after localhost.
127.0.0.1 localhost.localdomain localhost
Save and close the file. (To save a file in Nano text editor, press Ctrl+O, then press Enter to confirm. To close the file, press Ctrl+X.)
hostname -f
Login From Mail Clients
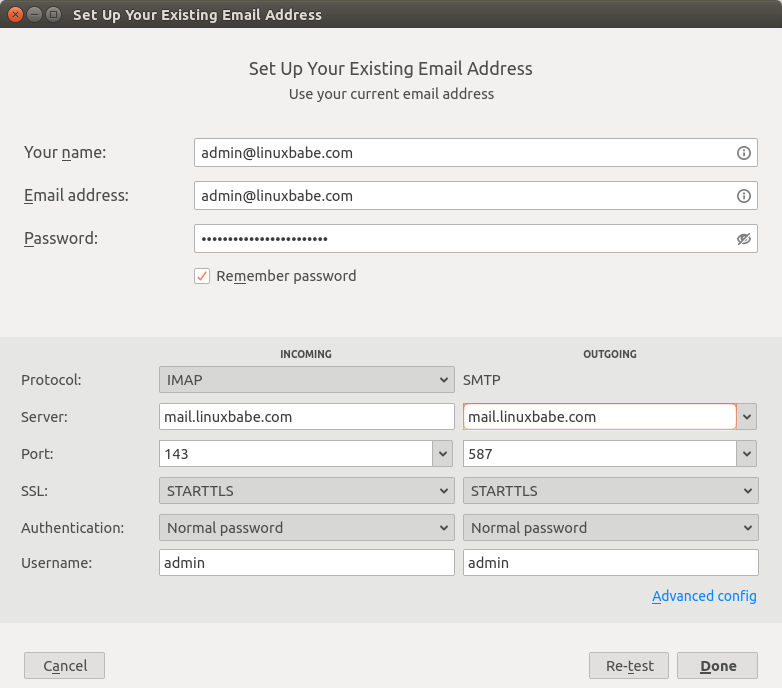
Fire up your desktop email client such as Mozilla Thunderbird and add a mail account.
- In the incoming server section, select IMAP protocol, enter
mail.your-domain.comas the server name, choose port 143 and STARTTLS. Choosenormal passwordas the authentication method. - In the outgoing section, select SMTP protocol, enter
mail.your-domain.comas the server name, choose port 587 and STARTTLS. Choosenormal passwordas the authentication method.
Prerequisites
sudo su -
su -
Install below packages.
### CentOS 7 / RHEL 7 ###yum install -y bind-utils net-tools wget curl perl### Ubuntu 16.04 ###apt-get install -y curl perl wget
Set the hostname of your mail server.
hostnamectl set-hostname mail.itzgeek.local
192.168.1.25 mail.itzgeek.local mail
Zimbra recommends the firewall to be disabled.
### CentOS 7 / RHEL 7 ###systemctl stop firewalld
systemctl disable firewalld### Ubuntu 16.04 ###ufw disable
CentOS 7 / RHEL 7
In CentOS 7, postfix is installed and running by default. So, we need to disable it for Zimbra installation.
systemctl stop postfix
systemctl disable postfix
In Ubuntu 16.04, dnsmasq uses port 53 and acts as local resolver which conflicts with Zimbra DNS. So, we need to disable the use of dnsmasq.
Edit NetworkManager.conf file.
nano /etc/NetworkManager/NetworkManager.conf
Comment out the dns=dnsmasq line by putting a hash # in front of it.
#dns=dnsmasq
Then, restart the service.
service network-manager restart
What if Your Emails Are Still Being Marked as Spam?
I have more tips for you in this article: How to stop your emails being marked as spam. Although it will take some time and effort, your emails will eventually be placed in inbox after applying these tips.
How to Renew TLS Certificate
sudo certbot renew
You can use the --dry-run option to test the renewal process, instead of doing a real renewal.
sudo /snap/bin/certbot renew --dry-run
Create Cron Job
sudo crontab -e
@daily /snap/bin/certbot renew --quiet
Save and close the file.
Requirements
- CentOS 7 / RHEL 7 / Ubuntu 16.04
- 8 GB RAM
- 5 GB Free Space on /opt/Zimbra
- 10 GB free disk space on /opt and /tmp
- Fully Qualified Domain Name (FQDN), in my case it is “mail.itzgeek.local”
- A & MX record for your Server
- The firewall should be disabled
In this post, we will install Open Source Zimbra Collaboration Suite 8.8.10 on CentOS 7 / RHEL 7 & Ubuntu 16.04.
Verify Zimbra Services
[[email protected] ~]# su - zimbra[[email protected] ~]$ zmcontrol status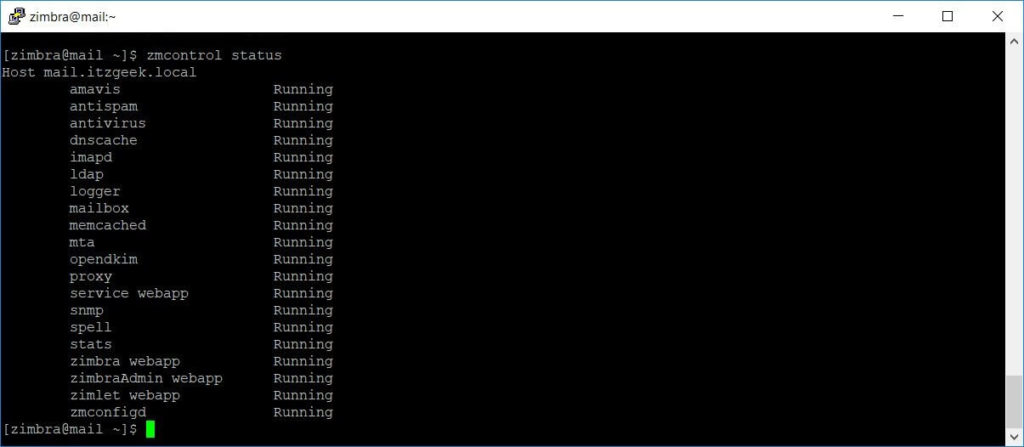
[[email protected] ~]$ zmcontrol restart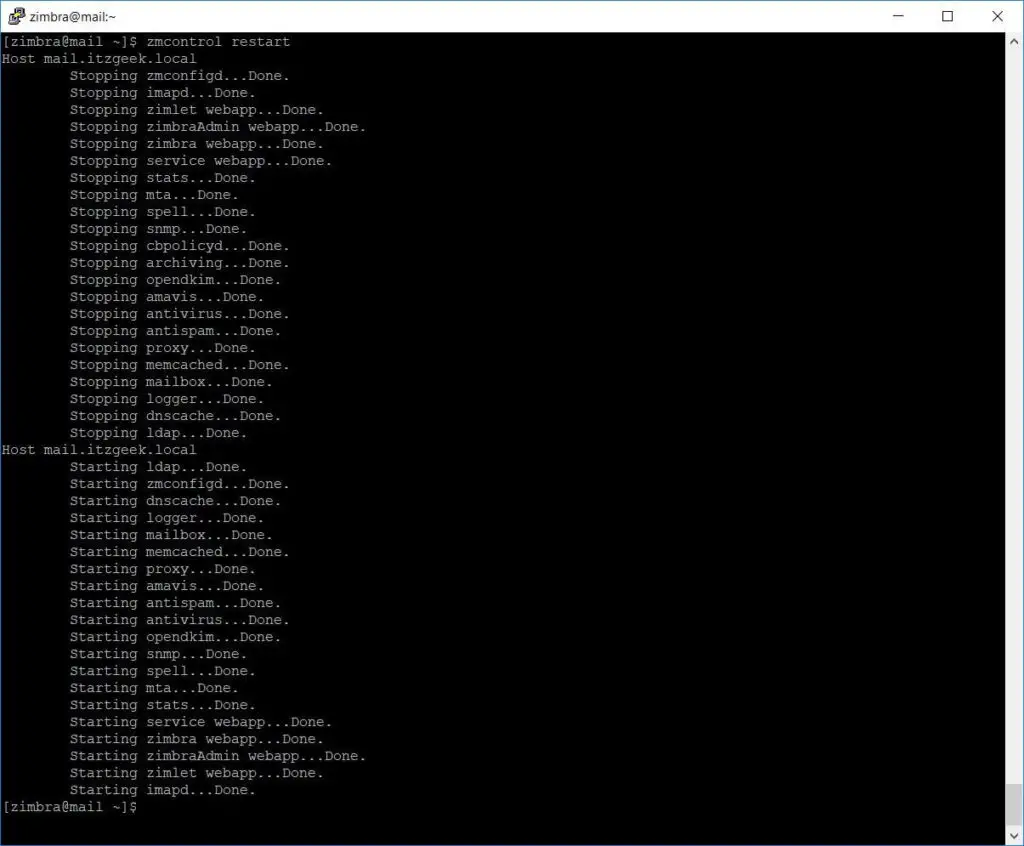
Troubleshooting
As a rule of thumb, you should always check the mail log /var/log/mail.log when there’s email delivery problem.
HTTP ERROR 502
If the Zimbra web interface isn’t accessible, such as a 502 gateway error, it’s likely that your server needs more RAM.
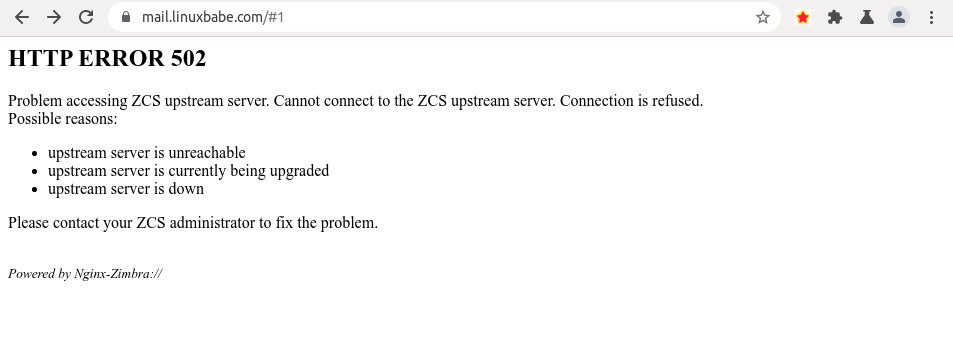
You can also try to restart all Zimbra services to fix this issue.
zmcontrol status
HTTP port: 80
HTTPS port: 443
SMTP port: 25
Submission port: 587
SMTPS port: 465 (For Microsoft Outlook mail client)
IMAP port: 143 and 993
If you would like to use the UFW firewall, check my guide here: Getting started with UFW firewall on Debian and Ubuntu.
Testing Unbound DNS Resolver
The unbound DNS resolver is installed by Zimbra. However, it might not be able to work out of the box. Restart your server.
sudo shutdown -r now
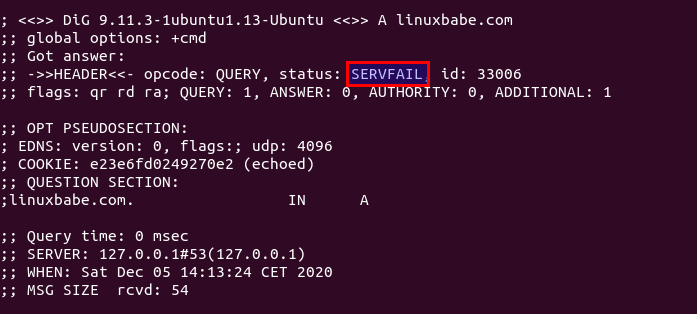
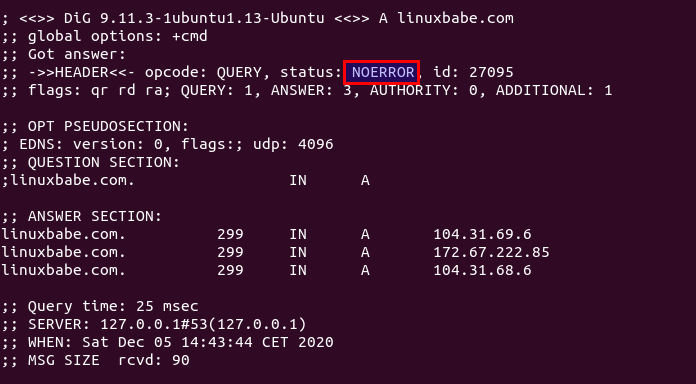
dig A linuxbabe.com
If you see the SERVFAIL error, it means Unbound isn’t running properly.
sudo su - zimbra
And check which upstream DNS resolver Unbound is using.
zmprov getServer `zmhostname` | grep DNSMasterIP
A correct setup should show you that 8.8.8.8 is the upstream DNS resolver.
zimbraDNSMasterIP: 8.8.8.8
If 127.0.0.53 is the upstream resolver, you have a problem. Remove it with:
zmprov ms `zmhostname` -zimbraDNSMasterIP 127.0.0.53
Then add 8.8.8.8 as the upstream resolver.
zmprov ms `zmhostname` +zimbraDNSMasterIP 8.8.8.8
exit
dig A linuxbabe.com
cat /etc/resolv.conf
and it tells you that
/etc/resolv.conf: No such file or directory
Check if the systemd-resolved.service is running.
sudo systemctl status systemd-resolved
sudo systemctl enable --now systemd-resolved
Install Zimbra Mail Server on Ubuntu 18
Zimbra 9 still provides an open-source edition. However, it doesn’t provide the binary. Only the source code is available. Fortunately, there’s a third-party Zimbra solution provider named Zextras that offers Zimbra binary download.
wget download.zextras.com/zcs-9.0.0_OSE_UBUNTU18_latest-zextras.tgz
Extract the archived file.
tar xvf zcs-9.*.tgz
Then change to the newly-created directory.
cd zcs-9*/
Before running the installer script, install the netstat utility.
sudo apt install net-tools
Next, run the Bash script with sudo privilege.
sudo bash install.sh
The mail server setup wizard will appear. First, you need to agree with the terms of the software license agreement.
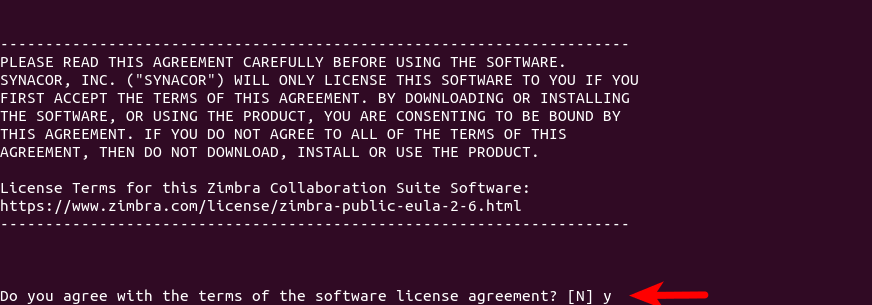
Then type y to confirm that you want to use Zimbra’s package repository.
Next, it will ask you to select the packages you want to install. You can install them by pressing y. ( Y is capitalized, which means it’s the default answer when you press Enter.) Note that the zimbra-imapd package is currently in beta and it’s not recommended to install it. I simply press Enter to use the default answers.

Confirm the packages you selected by pressing y.
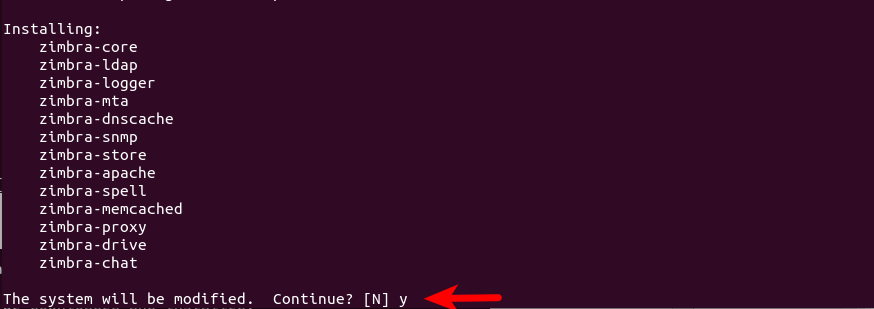
Now installation begins.
It might tell you that you need to change the hostname. Answer y and enter your mail server hostname (mail.your-domain.com).
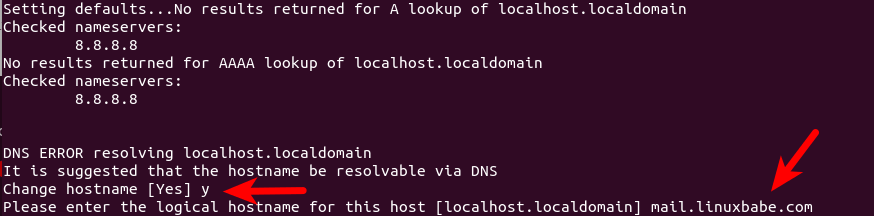
If it tells you that none of the MX records resolve to this host, then you need to create DNS A record for mail.your-domain.com.
sudo systemctl stop systemd-resolved

and continue the installation.

- Press
ato apply the configuration. - Press
yto save the configuration to a file. - Press
Enterto use the default file name. - Press
yto continue.
Wait for the installation process to finish. At the end of the installation, you have the option to notify Zimbra of your installation.

Wrapping Up
That’s it! I hope this tutorial helped you set up a mail server on Ubuntu 18.04 with Zimbra. As always, if you found this post useful, then subscribe to our free newsletter to get more tips and tricks. Take care 🙂
Installing Let’s Encrypt TLS Certificate
Obtaining the Certificate
sudo snap install certbot --classic
sudo /snap/bin/certbot certonly --standalone --agree-tos --staple-ocsp --email -d --preferred-chain 'ISRG Root X1'
certonly: obtain the certificate, but don’t install it automatically.--standalone:uses the standalone plugin to obtain certificate.--preferred-chain 'ISRG Root X1': Use the ISRG Root X1 certificate chain, because the default DST root CA certificate expired on September 31, 2021.
When it asks you if you want to receive communications from EFF, you can choose No.

Failure to Obtain TLS Certificate
If certbot failed to obtain TLS certificate, maybe it’s because your DNS records are not propagated to the Internet. Depending on the domain registrar you use, your DNS record might be propagated instantly, or it might take up to 24 hours to propagate. You can go to https://dnsmap.io, enter your mail server’s hostname (mail.your-domain.com) to check DNS propagation.
Installing the Certificate in Zimbra
sudo apt install acl
sudo setfacl -R -m u:zimbra:rwx /etc/letsencrypt/
sudo su - zimbra
Copy the private key.
cp /etc/letsencrypt/live//privkey.pem /opt/zimbra/ssl/zimbra/commercial/commercial.key
Download Let’s Encrypt Root CA certificate.
wget -O /tmp/isrgrootx1.pem https://letsencrypt.org/certs/isrgrootx1.pem.txt
cat /etc/letsencrypt/live//chain.pem /tmp/isrgrootx1.pem > /opt/zimbra/ssl/zimbra/commercial/commercial_ca.crt
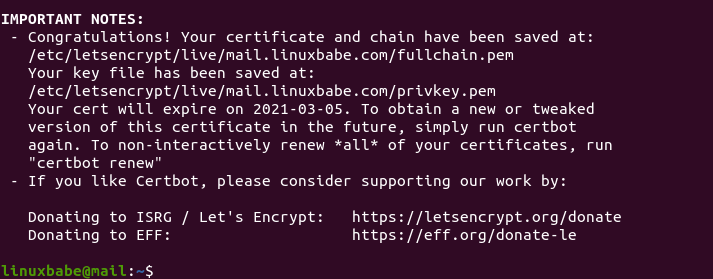
deploy the certificate.
/opt/zimbra/bin/zmcertmgr deploycrt comm /etc/letsencrypt/live//cert.pem /opt/zimbra/ssl/zimbra/commercial/commercial_ca.crt
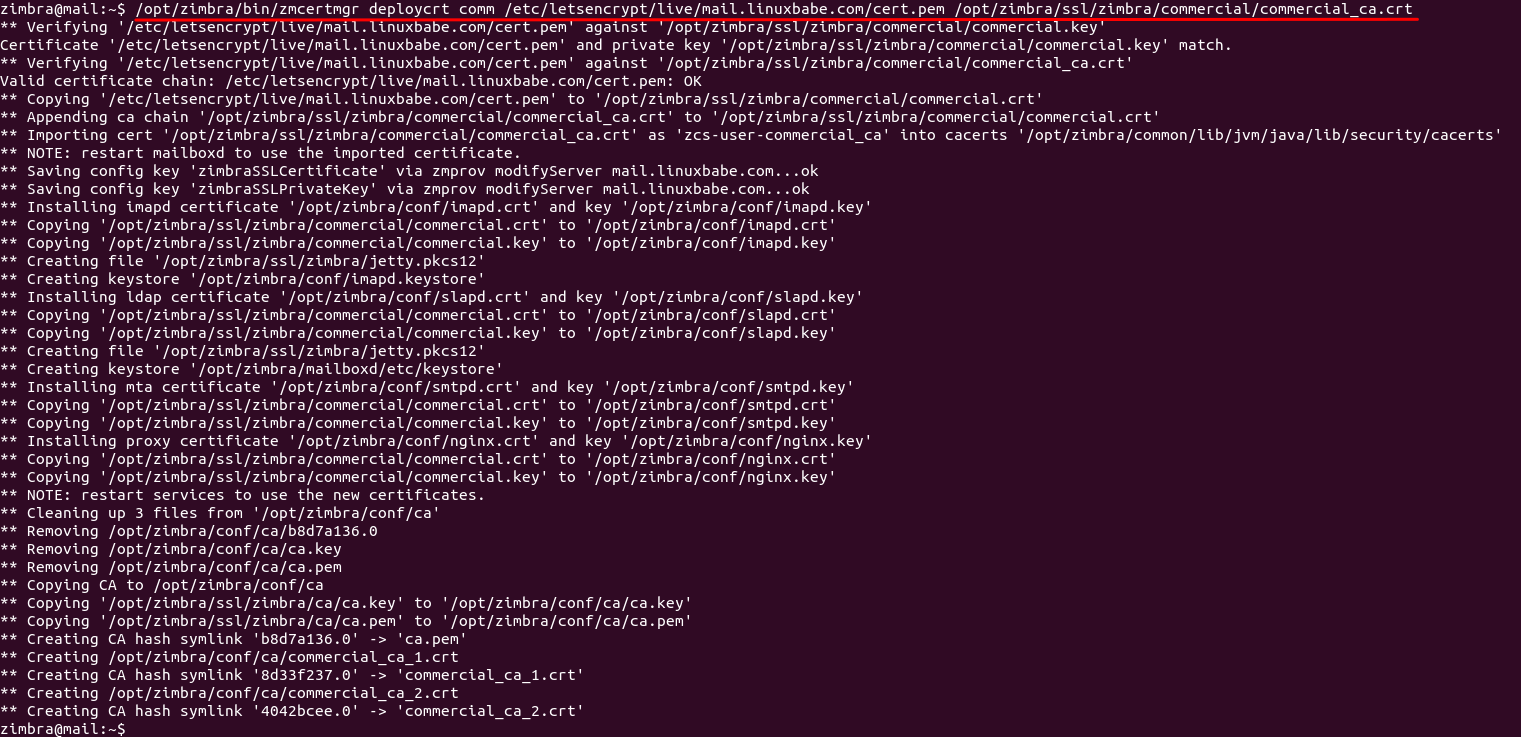
View the deployed cert.
/opt/zimbra/bin/zmcertmgr viewdeployedcrt

zmcontrol restart
zmcontrol status
If all is working, it should display

Troubleshooting
If the zmcontrol status command shows the localhost.localdomain hostname, then you need to change the hostname to mail.your-domain.com.
/opt/zimbra/libexec/zmsetservername -n mail.your-domain.com
Then delete localhost.localdomain.
zmloggerhostmap -d localhost.localdomain localhost.localdomain
If OpenLDAP fails to restart, and it says that
Unable to start TLS: SSL connect attempt failed error:1416F086:SSL routines:tls_process_server_certificate:certificate verify failed when connecting to ldap master.
zmlocalconfig -e ldap_starttls_required=false
zmlocalconfig -e ldap_starttls_supported=0
Then restart Zimbra services.
zmcontrol restart
Hint: If you have successfully deploy Let’s Encrypt TLS certificate in Zimbra as instructed earlier, then your OpenLDAP server should have no problem in starting TLS.
If Amavis is not running, then restart it with:
zmamavisdctl restart
Ignoring stale PID file /opt/zimbra/log/amavisd.pid, older than system uptime 0 0:01:00
Pid_file already exists for running process (3340)
So I need to delete the stale PID file.
rm /opt/zimbra/log/amavisd.pid
Then restart Amavis.
zmamavisdctl restart
Reduce CPU & RAM Usage
zmopendkimctl: OpenDKIM.zmamavisdctl: Amaviszmantispamctl: Anti-Spamzmdnscachectl: Unbound DNS resolver.zmantivirusctl: Anti-Viruszmmtactl: Postfix SMTP serverzmspellctl: Spell checkingzmzimletctl: Zimlet webappzmmailboxdctl: mailboxdzmstatctl: statszmconfigdctl: zmconfigdzmmemcachedctl: memcachedzmloggerctl: logger
zmprov ms `zmhostname` zimbraAmavisMaxServers 1
zmprov ms `zmhostname` zimbraClamAVMaxThreads 1
This will make Amavis and ClamAV use only one thread to process emails. (Default is 10) If you have a 4 cores CPU and 16 GB RAM, you can increase the number of threads to make email processing faster.
Configure Systemd-Resolved
Systemd-resolved is the default DNS resolver manager on Ubuntu. We need to change its configuration to make it work with Zimbra. It should start after the Zimbra service at system boot time.
The service configuration file for systemd-resolved is /lib/systemd/system/systemd-resolved.service. To override the default systemd service configuration, we create a separate directory.
sudo mkdir -p /etc/systemd/system/systemd-resolved.service.d/
Then create a file under this directory.
sudo nano /etc/systemd/system/systemd-resolved.service.d/custom.conf
[Unit]
After=zimbra.service
Before=
[Service]
ExecStartPre=/bin/sleep 60
Save and close the file. Then reload systemd for the changes to take effect.
sudo systemctl daemon-reload
Create A and Mx Record
You would need to create A and MX record for your domain to receive emails.
1. For Local Test Domain
2. For Live Domain
Local Test Domain
The local test domain set up is done by creating A and MX record on the local DNS server.
READ: How To Configure DNS Server on CentOS 7 / RHEL 7
READ: How To Configure DNS Server On Ubuntu 16.04
Verify A and MX Records
Verify that the A is configured for your domain using dig command.
dig -t A mail.itzgeek.local
; <<>> DiG 9.9.4-RedHat-9.9.4-72.el7 <<>> mail.itzgeek.local
;; global options: +cmd
;; Got answer:
;; ->>HEADER<<- opcode: QUERY, status: NOERROR, id: 49222
;; flags: qr aa rd ra; QUERY: 1, ANSWER: 1, AUTHORITY: 0, ADDITIONAL: 1
;; OPT PSEUDOSECTION:
; EDNS: version: 0, flags:; udp: 4000
;; QUESTION SECTION:
;mail.itzgeek.local. IN A
;; ANSWER SECTION:mail.itzgeek.local. 3600 IN A 192.168.1.25;; Query time: 0 msec
;; SERVER: 192.168.1.230#53(192.168.1.230)
;; WHEN: Thu Dec 06 09:53:22 IST 2018
;; MSG SIZE rcvd: 63
Verify MX records.
dig -t MX itzgeek.local
; <<>> DiG 9.9.4-RedHat-9.9.4-72.el7 <<>> -t MX itzgeek.local
;; global options: +cmd
;; Got answer:
;; ->>HEADER<<- opcode: QUERY, status: NOERROR, id: 621
;; flags: qr aa rd ra; QUERY: 1, ANSWER: 1, AUTHORITY: 0, ADDITIONAL: 2
;; OPT PSEUDOSECTION:
; EDNS: version: 0, flags:; udp: 4000
;; QUESTION SECTION:
;itzgeek.local. IN MX
;; ANSWER SECTION:itzgeek.local. 3600 IN MX 10 mail.itzgeek.local.;; ADDITIONAL SECTION:
mail.itzgeek.local. 3600 IN A 192.168.1.25
;; Query time: 0 msec
;; SERVER: 192.168.1.230#53(192.168.1.230)
;; WHEN: Thu Dec 06 09:54:02 IST 2018
;; MSG SIZE rcvd: 79
A record is to point your system’s FQDN (hostname) to your mail server IPv4 address.
NAME TTL TYPE DATA
mail.itzgeek.com. 3600 A 35.193.38.113
MX record is to specify which mail server is responsible for accepting email messages on behalf of your domain.
NAME TYPE PRIORITY DATA
itzgeek.com. MX 10 mail.itzgeek.com.
SPF record is used to verify which mail servers are permitted to send email on behalf of your domain. In the example below, emails sent from all servers defined in MX record of itzgeek.com are permitted.
itzgeek.com. 3600 IN TXT "v=spf1 mx mx:itzgeek.com ~all"
PTR (Pointer) is an IP address to domain name mapping, and it’s the exact opposite of A record which maps domain names to IP addresses.
You would most likely need to reach to your hosting provider / ISP and make a request to create a reverse PTR record for your mail server IP address
If you are struggling to create DNS records, you can always reach your domain registrar for assistance.
Download Zimbra Collaboration 8. 8 – Open Source Edition
Create a directory called zimbra to place the installer.
mkdir /zimbra
cd /zimbra
Download the Zimbra Collaboration Suite 8.8 – Open Source Edition from the official site or download using the wget command
### CentOS 7 / RHEL 7 ###wget https://files.zimbra.com/downloads/8.8.10_GA/zcs-8.8.10_GA_3039.RHEL7_64.20180928094617.tgz### Ubuntu 16.04 ###
wget https://files.zimbra.com/downloads/8.8.10_GA/zcs-8.8.10_GA_3039.UBUNTU16_64.20180928094617.tgz
Server Requirements
- A clean fresh Ubuntu 18.04 OS.
- At least 2 CPU cores and 3GB RAM. If you use a single-core CPU, Zimbra will be running very slowly. And you need a server with at least 3GB of RAM, because after the installation, your server will use more than 2GB of RAM.
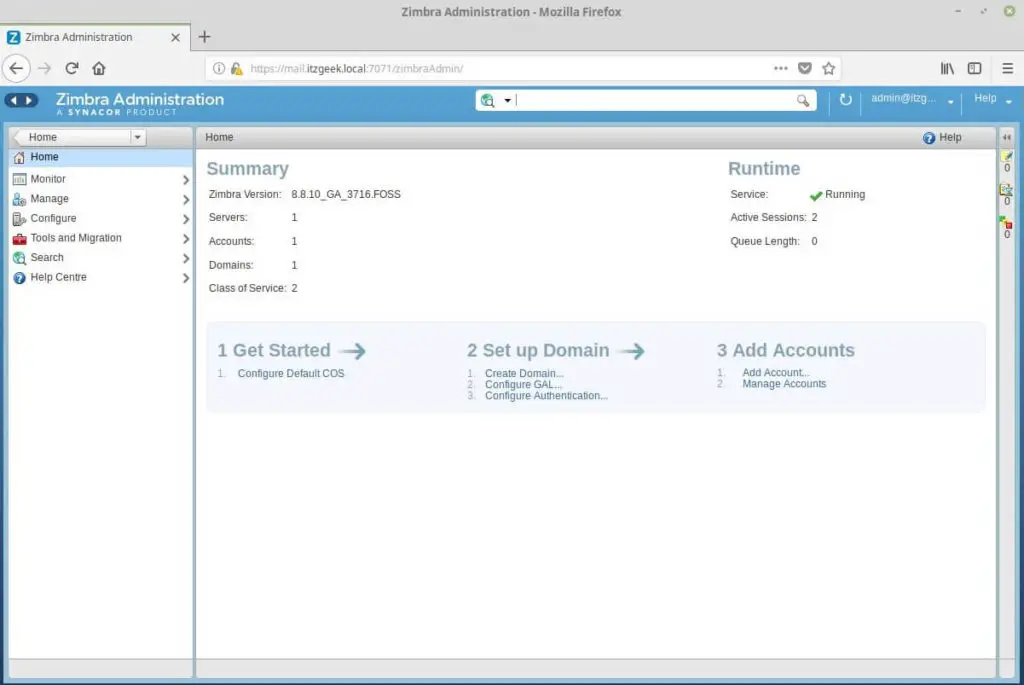
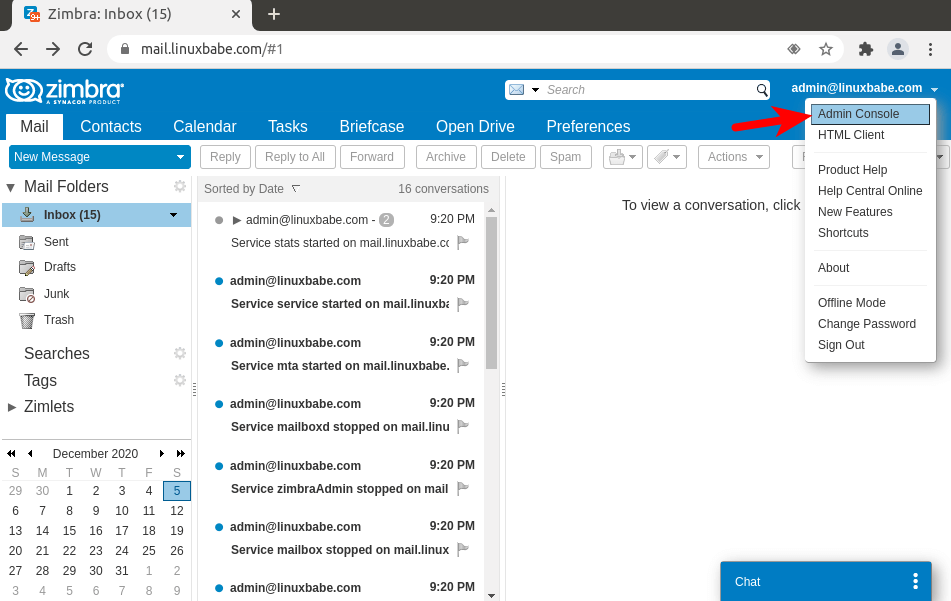
Access Zimbra Admin Portal
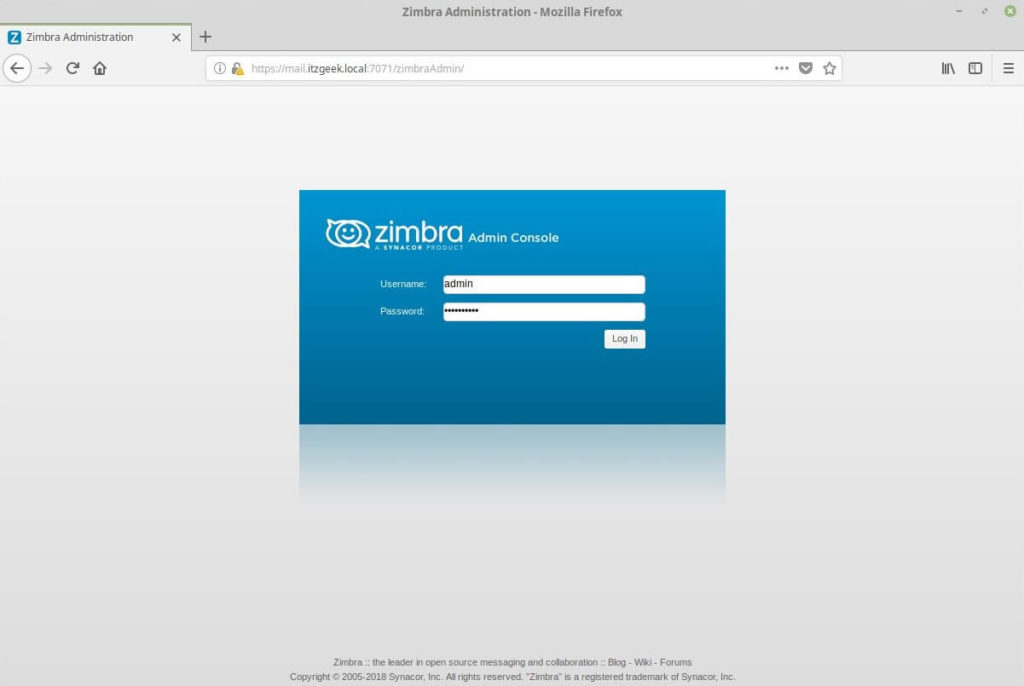
Upon login, you will get the dashboard where you can view the summary.
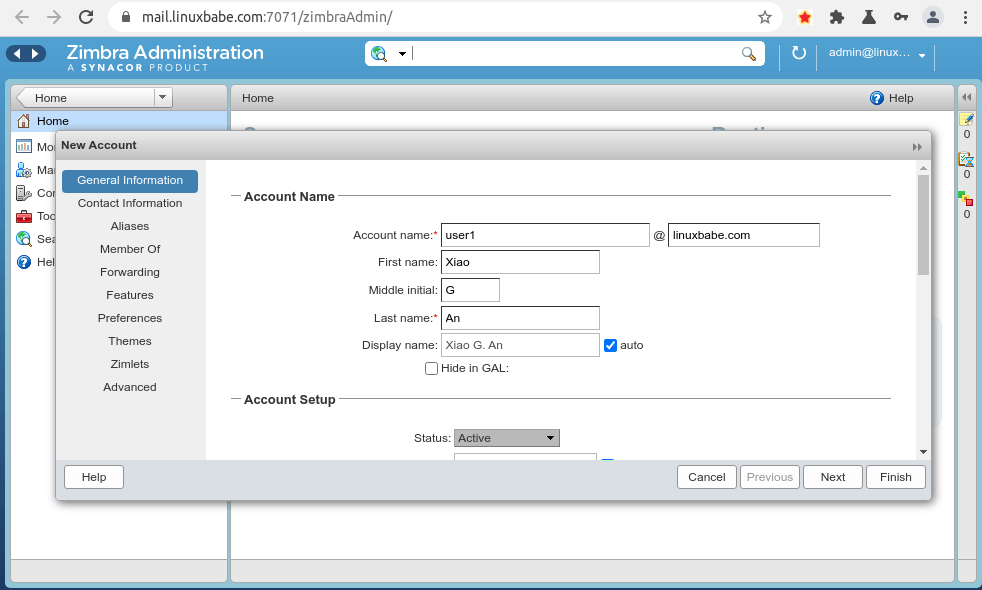
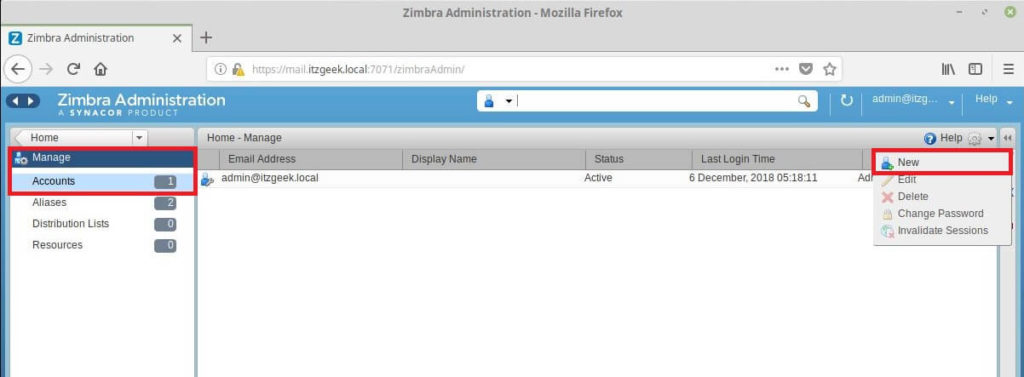
Create Email Account (Optional)
To test the functionality of Zimbra, I would be creating an email account for receiving an email from second test domain blog.local. To create an email account, go to Manage >> Accounts >> New.
Enter the account details.
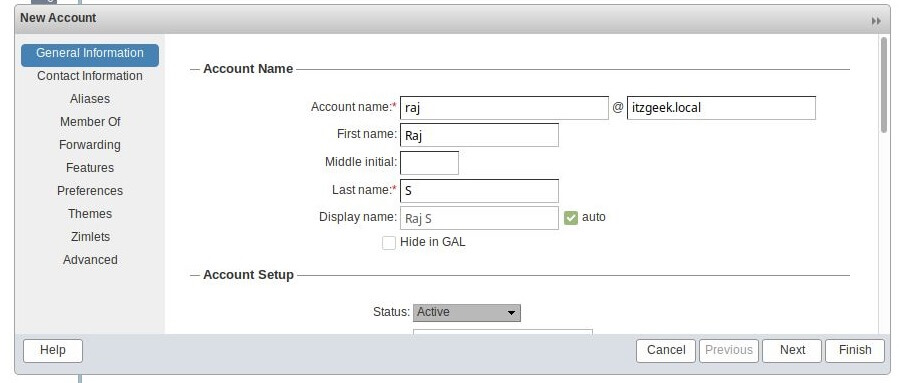
Scroll the window down to set the password for the new email account. Then, click finish.

What if Your Email is Rejected by Microsoft Mailbox?
Microsoft seems to be using an internal blacklist that blocks many legitimate IP addresses. If your emails are rejected by Outlook or Hotmail, you need to submit the sender information form. After that, your email will be accepted by Outlook/Hotmail.
What is Zimbra?
- Postfix SMTP server
- Nginx web server to serve the admin console and webmail. It will also be used as an IMAP/POP3 proxy.
- Jetty: web application server that runs Zimbra software.
- OpenLDAP stores Zimbra system configuration, the Zimbra Global Address List, and provides user authentication.
- MariaDB database
- OpenDKIM: for DKIM signing and verification
- Amavised-new: an interface between MTA and content scanner.
- SpamAssassin for anti-spam
- ClamAV: anti-virus scanner
- Lucene: open-source full-featured text and search engine
- Apache JSieve: email message filter
- LibreOffice: High fidelity document preview
- Aspell: an open-source spell checker used on the Zimbra Web Client
- memcached: open-source object caching system.
- unbound: lightweight and fast DNS resolver.
Zimbra also ships with some of its own developed software:
- zimbra-drive: cloud storage.
- zimbra-chat: text chat.
- zimbra-talk: group messaging and video conferencing with screen sharing and file sharing funcationality.
- mailboxd: Its own developed IMAP/POP3 server.
There are two editions of Zimbra:
- Free open-source edition.
- Commercially supported Network Edition with 60-days free trial.
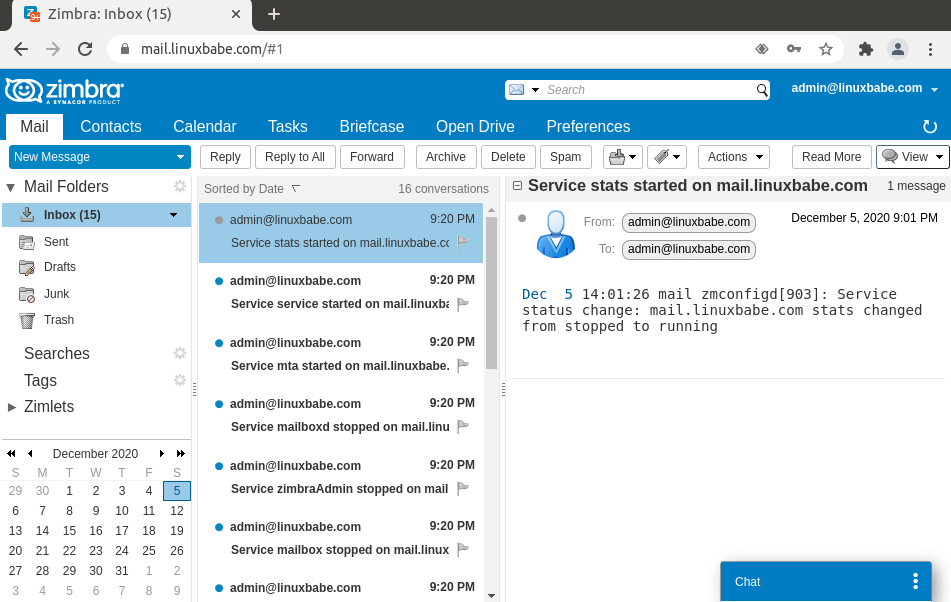
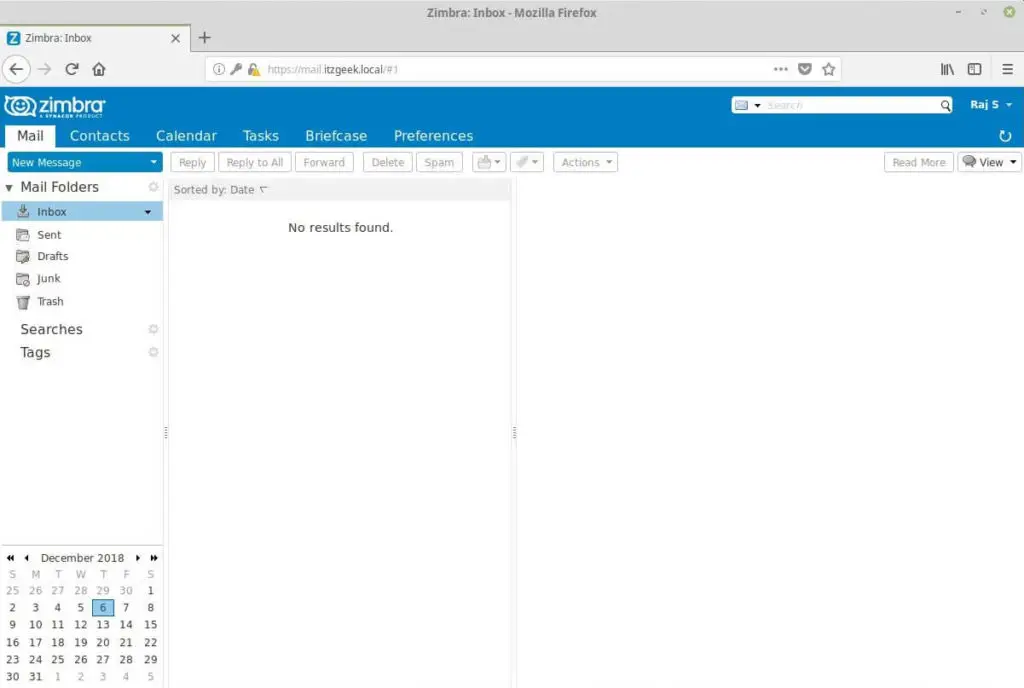
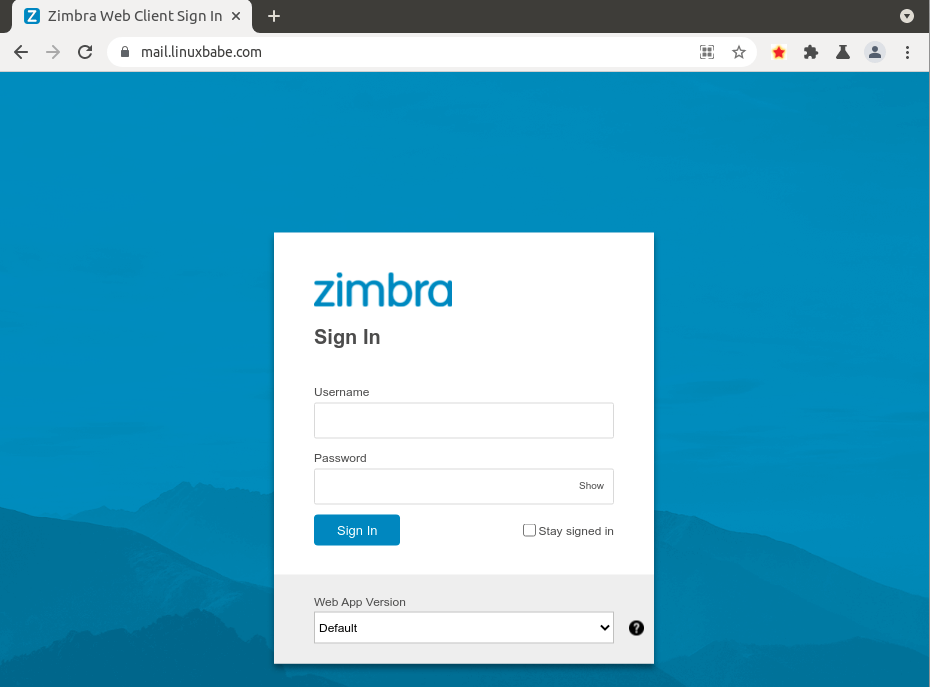
Access Zimbra Web Mail Client
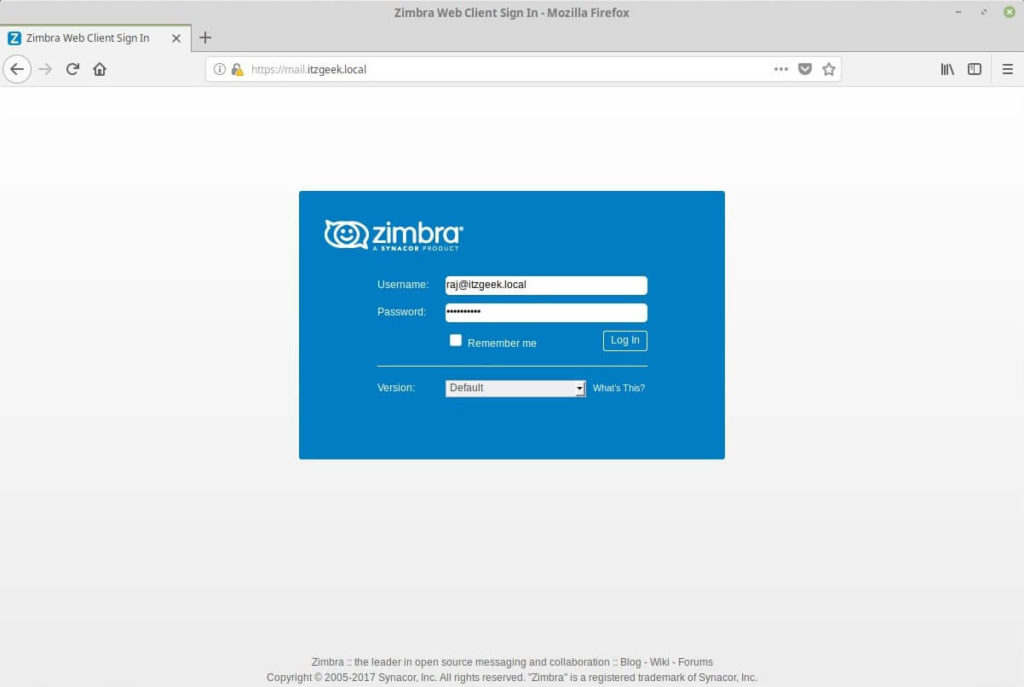
The Zimbra webmail will look like below.
UnInstall Zimbra Collaboration 8. 8 – Open Source Edition
In any time, you want to uninstall Zimbra mail server from the system. Go to the installer directory.
cd /zimbra/zcs-8.8.10_GA_3039.RHEL7_64.20180928094617
./install.sh -u
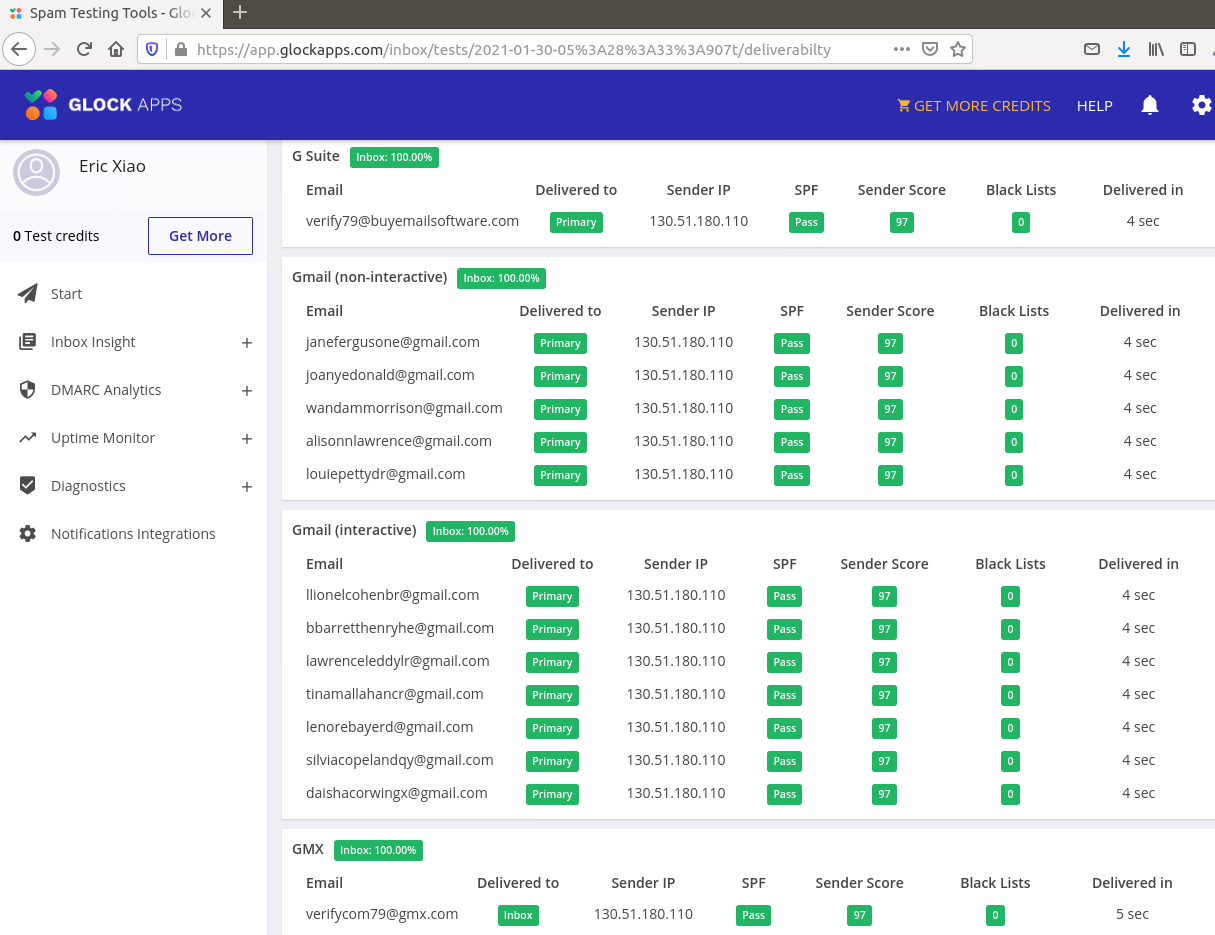
Testing Email Score and Placement
After creating PTR, SPF, DKIM record, go to https://www.mail-tester.com. You will see a unique email address. Send an email from your domain to this address and then check your score. As you can see, I got a perfect score. In the test result, you should check if your PTR record, SPF and DKIM record is valid.
Choose the Right Hosting Provider and Buy a Domain Name
Zimbra must be installed on a clean fresh server.
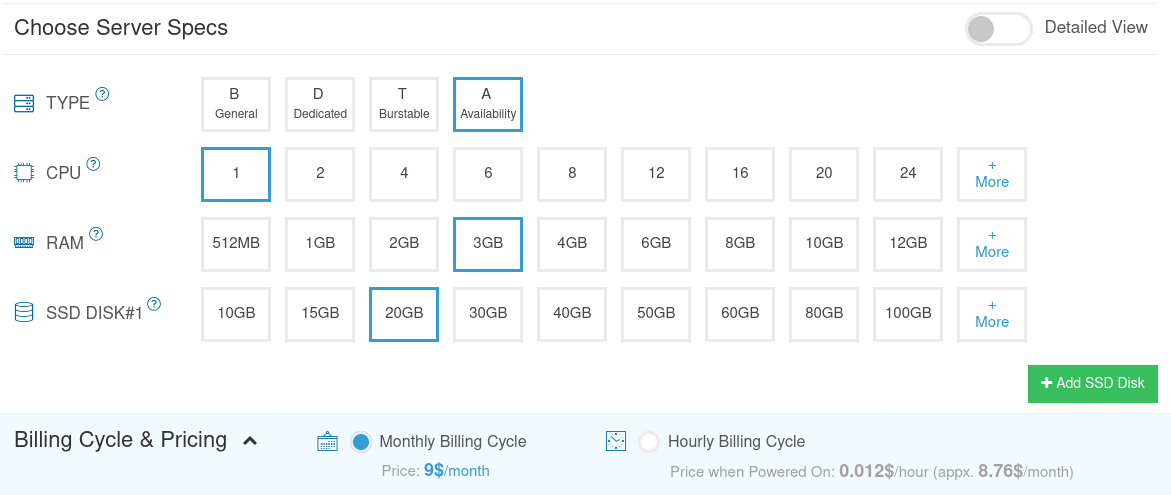
This tutorial is done on a $9/month Kamatera VPS (virtual private server) with 1 CPU and 3GB RAM. They offer a 30-day free trial.
Kamatera is a very good option to run a mail server because
- They don’t block port 25, so you can send unlimited emails (transactional email and newsletters) without spending money on SMTP relay service. Kamatera doesn’t have any SMTP limits. You can send a million emails per day.
- The IP address isn’t on any email blacklist. (At least this is true in my case. I chose the Dallas data center.) You definitely don’t want to be listed on the dreaded Microsoft Outlook IP blacklist or the spamrats blacklist. Some blacklists block an entire IP range and you have no way to delist your IP address from this kind of blacklist.
- You can edit PTR record to improve email deliverability.
- They allow you to send newsletters to your email subscribers with no hourly limits or daily limits, whatsoever.
- You can order multiple IP addresses for a single server. This is very useful for folks who need to send a large volume of emails. You can spread email traffic on multiple IP addresses to achieve better email deliverability.
Go to Kamatera website to create an account, then create your server in your account dashboard.
ssh [email protected]You will be asked to enter the password.
It’s highly recommended that you use Ubuntu LTS like Ubuntu 18.04. Installing a piece of complex server software like Zimbra on a non-LTS Ubuntu is discouraged as you will probably encounter problems when upgrading your OS every 9 months. It is far better for your mail server to stay stable for 2 or 5 years.
You also need a domain name. I registered my domain name from NameCheap because the price is low and they give whois privacy protection free for life.
Improving Email Deliverability
PTR record
To check the PTR record for an IP address, run this command:
dig -x +short
host
PTR record isn’t managed by your domain registrar. It’s managed by the organization that gives you an IP address. Because you get IP address from your hosting provider or ISP, not from your domain registrar, so you must set PTR record for your IP in the control panel of your hosting provider, or ask your ISP. Its value should be your mail server’s hostname: mail.your-domain.com. If your server uses IPv6 address, be sure to add a PTR record for your IPv6 address as well.
SPF Record
SPF (Sender Policy Framework) record specifies which hosts or IP address are allowed to send emails on behalf of a domain. You should allow only your own email server or your ISP’s server to send emails for your domain. In your DNS management interface, create a new TXT record like below.
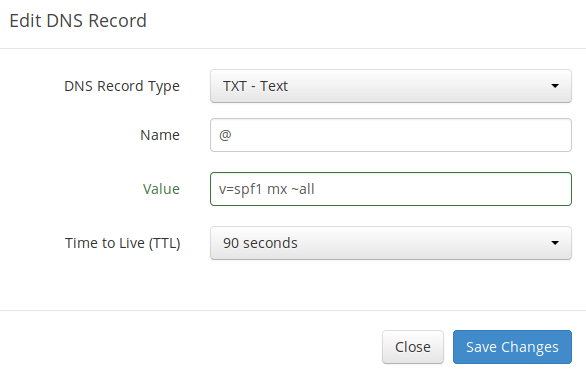
- TXT indicates this is a TXT record.
- Enter @ in the name field to represent the main domain name.
- v=spf1 indicates this is a SPF record and the version is SPF1.
- mx means all hosts listed in the MX records are allowed to send emails for your domain and all other hosts are disallowed.
- ~all indicates that emails from your domain should only come from hosts specified in the SPF record. Emails that are from other hosts will be flagged as forged.
To check if your SPF record is propagated to the public Internet, you can use the dig utility on your Linux mail server like below:
dig txt
The txt option tells dig that we only want to query TXT records.
DKIM Record
/opt/zimbra/libexec/zmdkimkeyutil -a -d
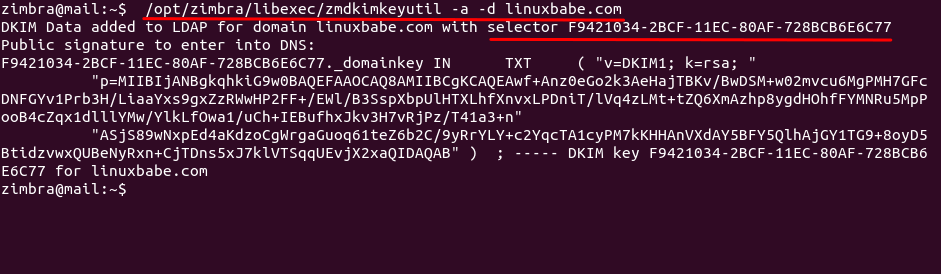
The DKIM public key is in the parentheses. My DKIM selector is F9421034-2BCF-11EC-80AF-728BCB6E6C77. The DKIM sub-domain is F9421034-2BCF-11EC-80AF-728BCB6E6C77._domainkey.linuxbabe.com. Yours might be different.
Then in your DNS manager, create a TXT record, enter F9421034-2BCF-11EC-80AF-728BCB6E6C77._domainkey in the name field. (Your DKIM sub-domain might be different.) Copy everything in the parentheses and paste it into the value field. Delete all double quotes and line breaks.
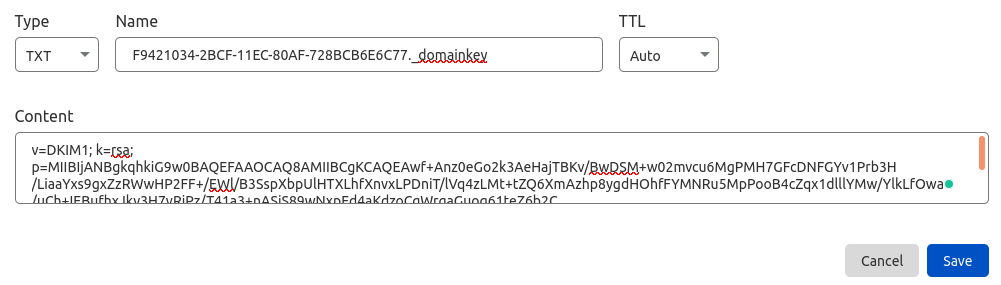
Note that your DKIM record may need some time to propagate to the Internet. Depending on the domain registrar you use, your DNS record might be propagated instantly, or it might take up to 24 hours to propagate. You can go to https://www.dmarcanalyzer.com/dkim/dkim-check/ to check if your DKIM record is valid.
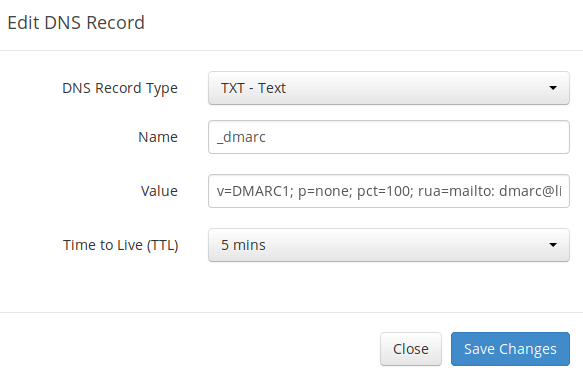
DMARC Record
DMARC stands for Domain-based Message Authentication, Reporting and Conformance. DMARC can help receiving email servers to identify legitimate emails and prevent your domain name from being used by email spoofing.
v=DMARC1; p=none; pct=100; rua=mailto:
Install Zimbra Collaboration 8. 8 – Open Source Edition
Extract the downloaded Zimbra archive file using the tar command
### CentOS 7 / RHEL 7 ###tar -zxvf zcs-8.8.10_GA_3039.RHEL7_64.20180928094617.tgz### Ubuntu 16.04 ###tar -zxvf zcs-8.8.10_GA_3039.UBUNTU16_64.20180928094617.tgz
Go to the extracted folder.
### CentOS 7 / RHEL 7 ###cd zcs-8.8.10_GA_3039.RHEL7_64.20180928094617### Ubuntu 16.04 ###cd zcs-8.8.10_GA_3039.UBUNTU16_64.20180928094617/
Execute the install script.
./install.sh
Once you execute the install script, you will get text-based installation wizard. Press Y to accept the Zimbra license agreement.
Now Configure the Zimbra package repository.
Press Y to all Zimbra Components to install.
Also, press Y to continue to download the Zimbra related packages. This task can take time depending upon on your internet speed.
Once all the Zimbra packages are download and installed, we will get the below window.
Enter the domain name for Zimbra installation.
In my case, it is itzgeek.local.
If your installation is for the live domain, enter like domain.com or domain.org.

Now press r to go to the previous menu and then press a to apply the changes.

Save the installation log and continue.

Upon successful completion of configuration and starting the services, you will get the output something like below.

Mail Server Setup
For this demo, I will configure Zimbra to receive emails for domain itzgeek.local.
itzgeek.local is not a live internet domain, and it can’t receive or send emails to internet domains such as gmail.com or yahoo.com. So, I have created one more email server (blog.local) in my environment to test the functionality.
Installation for the live domain is similar to local domain setup, and it will work only if the A, MX and SPF records are created properly as shown in the next step.
Creating DNS MX Record
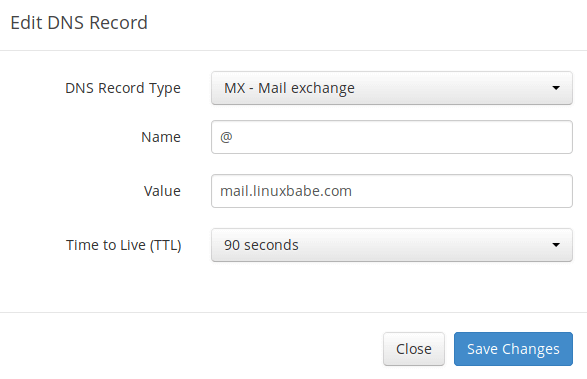
Note: The hostname for MX record can not be an alias to another name. Also, It’s highly recommended that you use hostnames, rather than bare IP addresses for MX record.
Your DNS manager may require you to enter a preference value (aka priority value). It can be any number between 0 and 65,356. A small number has higher priority than a big number. It’s recommended that you set the value to 0, so this mail server will have the highest priority for receiving emails. After creating MX record, you also need to create an A record for mail.your-domain.com , so that it can be resolved to an IP address. If your server uses IPv6 address, be sure to add AAAA record.
Still Can’t Send Email?
sudo tail -n 30 /var/log/mail.log
For example, some folks might see the error message.
host gmail-smtp-in.l.google.com[2404:6800:4003:c03::1b] said: 550-5.7.1 [2a0d:7c40:3000:b8b::2] Our system has detected that 550-5.7.1 this message does not meet IPv6 sending guidelines regarding PTR 550-5.7.1 records and authentication. Please review 550-5.7.1 https://support.google.com/mail/?p=IPv6AuthError for more information
This means your mail server is using IPv6 to send the email, but you didn’t set up IPv6 records. You should go to your DNS manager, set AAAA record for mail.your-domain.com, then you should set PTR record for your IPv6 address, which is discussed in step 9.
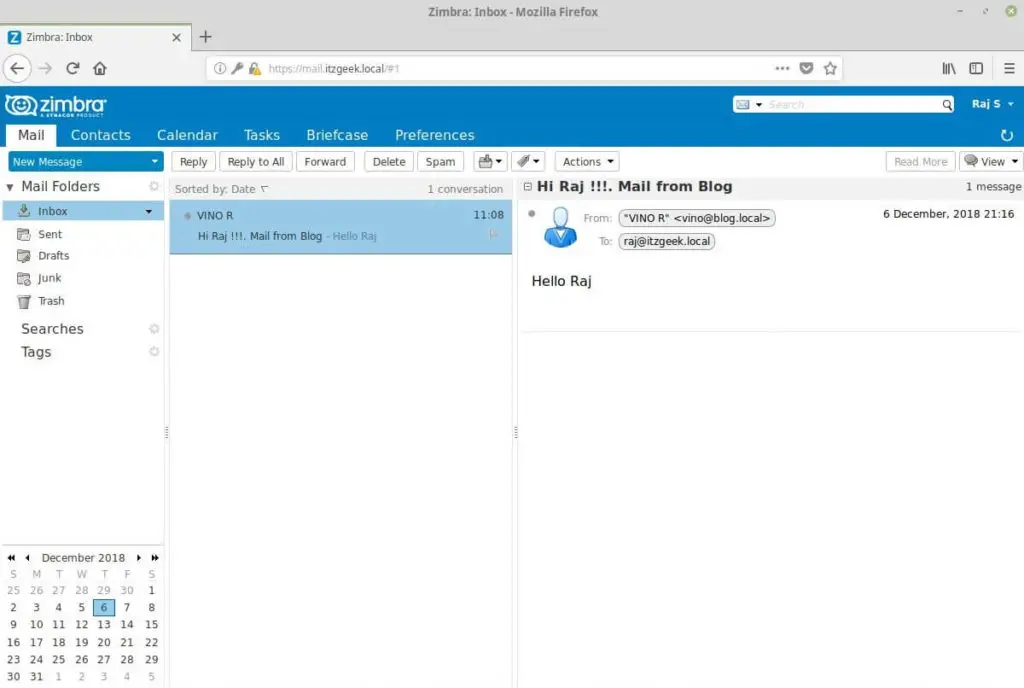
Sending Test Email
Now you can visit the Zimbra web client again. Your web browser won’t warn you anymore because Nginx is now using a valid TLS certificate.

Zimbra has a built-in calendar.
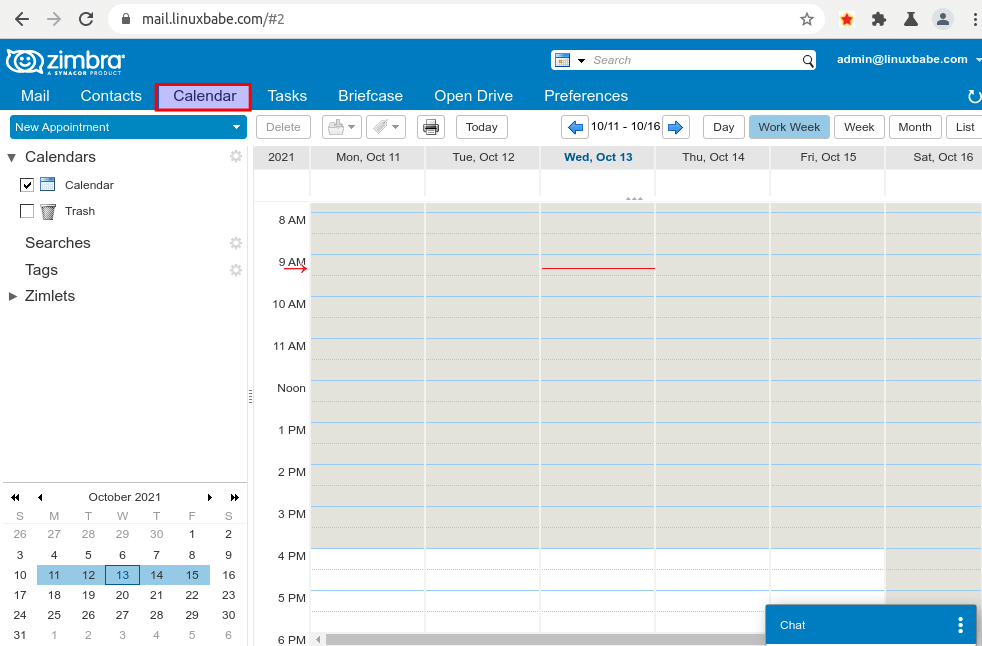
Click the Add Account link to add new email addresses.