Все операционные системы предоставляют команды и интерфейс для настройки сети из командной строки. В дистрибутивах Linux нам даже это не нужно, потому что мы можем сами редактировать конфигурационные файлы и вносить необходимые изменения. В некоторых случаях настройка через конфигурационные файлы будет проще, чем с помощью графических утилит, потому что вы можете полностью все контролировать.
В этой статье будет рассмотрена настройка сети Debian 9. Мы разберем как настроить имя хоста, сетевые интерфейсы и получить IP адреса для них. Эта инструкция подойдет как для обычных компьютеров, так и для серверов.
Если вы являетесь обычным пользователем Linux или системным администратором, вам может потребоваться настройка сети в вашей системе. В отличие от настольных систем, где вы можете использовать динамические конфигурации, на серверах вам придется выполнять специфические настройки в зависимости от вашего сетевого окружения. Динамические конфигурации меняются при перезагрузке сервера, поэтому в некоторых случаях возникает необходимость в статических конфигурациях, например, когда сервер нуждается в удаленном администрировании, или когда на сервере работает приложение или служба, требующая постоянного доступа. Итак, в этой статье мы объясним, как можно настроить базовую сеть в ОС Linux на базе Debian. Базовая настройка включает в себя установку статического IP, шлюза, DNS и имени хоста.
Прежде всего настраиваем сеть.
- Настраиваем NAT.
- Устанавливаем DHCP-сервер под Debian:
- Настраиваем DHCP-сервер.
- Why Network Configuration is important
- How to configure network settings in Debian 11
- Conclusion
- Работа с сетевыми устройств
- Работа с соединениями
- Настройка DNS для существующего соединения
- Настройка статического IP для существующего соединения
- The list of available network interfaces:
- The basic network configuration on a Debian GNU/Linux 9.5:
- Debian Network Configuration in detail
- Automatic enabling of an interface on startup
- Activate an interface if the network cable is plugged in
- Static interface configuration
- Dynamic interface configuration via DHCP
- Other options
- Showing the interface configuration
- Interface configuration usingifconfig:
- Interface configuration using ip:
- Enabling and disabling an interface
- Interface activation using ifup:
- Adding further options
- Conclusion
- Links and References
- About the author
- Network-Manager graphical description
- Network settings:
- Network connections:
- Using nmcli, the command line interface for Network-Manager
- Getting information on network devices with nmcli Network Manager interface:
- Managing your wifi with nmcli Network Manager interface:
- Starting, stopping and disconnecting network interfaces with nmcli Network Manager interface:
- About the author
- Изменение конфигурации сети
- Использование команды ifconfig и route
- Назначение IP-адреса интерфейсу
- Настройка шлюза по умолчанию
- Настройка DNS-сервера
- Удаление IP-адреса из сетевого интерфейса
- Изменение сетевых настроек с помощью файла интерфейсов
- Определение серверов имен (DNS)
- Настройка сетевого интерфейса
- Настройка динамического IP
- Настройка статического IP адреса
- Настройка виртуальных интерфейсов
- Настройка мостов
- Имя компьютера
- Просмотр текущей конфигурации сети
- Поиск IP-адреса через командную строку
- Способ № 1: Использование команды IP-адрес
- Способ № 2 Использование команды ifconfig
- Способ № 3 Использование команды IP route
- Способ № 4 Использование команды hostname
- 5. Использование команды nmcli
- Настройка имени хоста
- Перезагрузка сети
- Поиск внутреннего IP через графический интерфейс
- Выводы
- Заключение
- Заключение
- Список сетевых интерфейсов
Настраиваем NAT.
Затем включаем (раскомментируем) в файле /etc/sysctl.conf параметр
net.ipv4.ip_forward=1
Теперь, чтобы изменения вступили в силу выполним команду
sysctl -p
Осталось включить NAT. Делается это всего одной командой:
iptables -A POSTROUTING -t nat -j MASQUERADE
Однако сделать так, чтобы данное правило применялось после перезапуска системы несколько сложнее, но не сильно.
Создаем в директории /etc/network/if-pre-up.d/ файл с любым именем, к примеру, nat и вносим в него следующие строки:
#!/bin/sh
/sbin/iptables -A POSTROUTING -t nat -j MASQUERADE
Сохраняем файл, после чего выставляем ему права на запуск командой:
chmod +x /etc/network/if-pre-up.d/nat
Устанавливаем DHCP-сервер под Debian:
aptitude install isc-dhcp-server
Настраиваем DHCP-сервер.
Прежде всего открываем файл /etc/default/isc-dhcp-server и в строке INTERFACES=»» вписываем имя интерфейса, который будет обслуживать DHCP сервер, к примеру:
INTERFACES="eth1"
Теперь нужно настроить основной конфигурационный файл nano /etc/dhcp/dhcpd.conf. Параметры, которые нам интересны:
default-lease-time 36000; — устанавливает через сколько происходит повторный запрос адреса,
max-lease-time 72000; — сколько будет действовать адрес после того, как не удалось повторно получить адрес от сервера,
authoritative; — раскомментируем строку, если это основной DHCP-сервер в сети
Далее идет описание подсети:
subnet 192.168.0.0 netmask 255.255.255.0 { range 192.168.0.10 192.168.0.100; option domain-name-servers 8.8.8.8; option routers 192.168.0.2;
}
Где в первой строке указаны подсеть и маска подсети, во второй: с какого и по какой выдавать адреса, в третьей: список DNS-серверов, в четвертой: роутер по умолчанию.
После внесения данных настроек можно запускать DHCP-сервер:
/etc/init.d/isc-dhcp-server start
На этом пока закончим настройку NAT и DHCP-сервера под Debian.
Опубликовано 6 August 2013
Debian is a Linux-based distribution known for its power, stability and security. Network configuration is a broad process to set up controls of a network, manage the network flow and operation to support the network communication for a specific organization or network owner. Multiple configuration settings are included while configuring the network: Router Configuration, Host Configuration, Software Configuration.
In this descriptive post, network configuration of Debian 11 is explained using command line and GUI as well.
Why Network Configuration is important
How to configure network settings in Debian 11
This section will present the process of network configuration of Debian 11: primarily there are three fundamental requirements for network settings:
- Configuring IP address
- Changing Hostname
After that select your ethernet connection and hit enter on “Edit” option:
Note: Use the “tab” key to navigate to several options and hit “enter” to select/edit that option.
Navigate to IPv4 CONFIGURATION option and to open its settings, press enter on “<Show>” option:
Set the IPv4 Configuration method to “manual”:
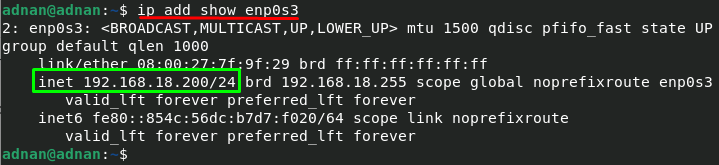
Change the IP address in the “Addresses” option: 192.168.18.200
Set the gateway in “Gateway” option: 192.168.18.1
Lastly, input the DNS server address: 8.8.8.8
Scroll down and hit enter on “OK”:
After that, navigate to “Back” option:
Choose the option “Activate a connection”:
Lastly, choose “Deactivate” to deactivate the connection:
After that, choose “Activate a connection” to start the connection again and navigate to “OK”:
Changing IP address using GUI : Firstly, click on “Activities” and type “settings” in search bar; you will see the settings icon in search results; click on it to open settings:

Once “Settings” is opened; click on “Network” placed on left side and navigate setting gear icon:
You will see a new window that contains the current IP address, gateway, DNS server, Netmask, as shown in the image below:
Step 1: Firstly, change the IPv4 method from Automatic to Manual:
Step 2: Move to “Addresses” section, and write the IP address, Netmask and Gateway:
Step 3: After that, turn off the automatic DNS toggle button and put the DNS value:
IP address: 192.168.18.150
After inserting values, apply the changes by clicking on “Apply” button:
Turn OFF/Turn ON the button to allow computer to use new data:
Once you have done this; click on the gear icon and look for details; it is observed that the values are changed now:
The interface shows three options; choose “Set system hostname” and navigate to “OK” to proceed:
Your current hostname will be displayed and can be edited:
Type new hostname by replacing the old one: For instance, our old hostname was “adnan” and we have changed it to “linuxhint”: Hit enter on “OK” to complete this step:
After changes, you have to confirm the change by putting the password and then clicking on Authenticate:
After successful authentication, it will display a message, set the hostname to ‘linuxhint’, navigate to “OK” to finish the process:
The hostname must be changed after completion of the process:
You can verify the changes by using the command mentioned below:

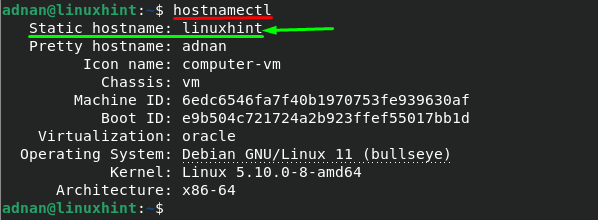
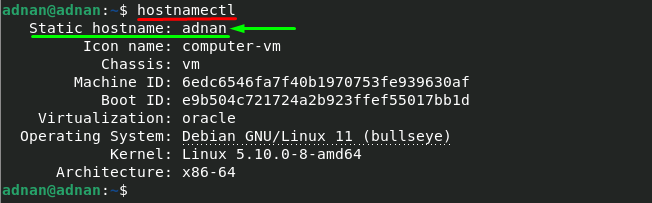
It is observed that the current hostname in “linuxhint”; for instance, the command mentioned below will change the hostname to “adnan”:
hostnamectl set-hostname adnan

Conclusion
Здравия всем! В этой статье я расскажу как настраивать сеть из консоли с помощью утилиты Network Manager.
После установки Home Assistant на свеже установленный Debian 11 столкнулся с проблемами с сетью на хостовой машине. Начал разбираться и понял, что Network Manager, который нужен для Home Assistant, не всегда точно настраивается. Решил написать для себя памятку как его настраивать из командной строки Linux.
После установки командой
apt install network-managerВ системе появляется служба NetworkManager
# service NetworkManager status
● NetworkManager.service - Network Manager Loaded: loaded (/lib/systemd/system/NetworkManager.service; enabled; vendor preset: enabled) Active: active (running) since Fri 2022-08-19 13:10:14 MSK; 15min ago Docs: man:NetworkManager(8) Main PID: 8676 (NetworkManager) Tasks: 3 (limit: 2340) Memory: 4.4M CPU: 583ms CGroup: /system.slice/NetworkManager.service └─8676 /usr/sbin/NetworkManager --no-daemon
авг 19 13:17:26 debian NetworkManager[8676]: <info> [1660904246.1858] device (ens18): state cha>
авг 19 13:17:26 debian NetworkManager[8676]: <info> [1660904246.1890] device (ens18): state cha>
авг 19 13:17:26 debian NetworkManager[8676]: <info> [1660904246.1924] device (ens18): state cha>
авг 19 13:17:26 debian NetworkManager[8676]: <info> [1660904246.1941] dhcp4 (ens18): activation>
авг 19 13:17:26 debian NetworkManager[8676]: <info> [1660904246.4858] dhcp4 (ens18): state chan>
авг 19 13:17:26 debian NetworkManager[8676]: <info> [1660904246.4885] device (ens18): state cha>
авг 19 13:17:26 debian NetworkManager[8676]: <info> [1660904246.4915] device (ens18): state cha>
авг 19 13:17:26 debian NetworkManager[8676]: <info> [1660904246.4926] device (ens18): state cha>
авг 19 13:17:26 debian NetworkManager[8676]: <info> [1660904246.4978] policy: set 'Supervisor e>
авг 19 13:17:26 debian NetworkManager[8676]: <info> [1660904246.5216] device (ens18): Activatio>
Работа с сетевыми устройств
Для того, чтобы посмотреть список всех устройств выполним команду
# nmcli device
DEVICE TYPE STATE CONNECTION
ens18 ethernet подключено Supervisor ens18
docker0 bridge без управления --
hassio bridge без управления --
veth09a87b9 ethernet без управления --
veth6e7e60d ethernet без управления --
veth7c2ed85 ethernet без управления --
veth82dbf2f ethernet без управления --
veth82f0817 ethernet без управления --
veth9e73789 ethernet без управления --
lo loopback без управления --
Посмотреть информацию по конкретному устройству команда:
nmcli device show DEVICEК примеру, у меня это:
# nmcli device show ens18
GENERAL.DEVICE: ens18
GENERAL.TYPE: ethernet
GENERAL.HWADDR: DA:38:AB:49:51:E6
GENERAL.MTU: 1500
GENERAL.STATE: 100 (подключено)
GENERAL.CONNECTION: Supervisor ens18
GENERAL.CON-PATH: /org/freedesktop/NetworkManager/ActiveConnection/3
WIRED-PROPERTIES.CARRIER: вкл.
IP4.ADDRESS[1]: 192.168.1.37/24
IP4.GATEWAY: 192.168.1.1
IP4.ROUTE[1]: dst = 0.0.0.0/0, nh = 192.168.1.1, mt = 100
IP4.ROUTE[2]: dst = 192.168.1.0/24, nh = 0.0.0.0, mt = 100
IP4.DNS[1]: 192.168.1.1
Работа с соединениями
Для получения списка всех соединений команда:
# nmcli connection
NAME UUID TYPE DEVICE
Supervisor ens18 3beb0614-186b-4323-8dcd-80b0b4a70ebb ethernet ens18
Проводное соединение 1 187a4f3b-6e09-3b76-946b-5c1dbc8fc016 ethernet --
Для получения информации по конкретному соединению команда:
nmcli connection show NAMEК примеру, у меня это:
nmcli connection show "Supervisor ens18"
connection.id: Supervisor ens18
connection.uuid: 3beb0614-186b-4323-8dcd-80b0b4a70ebb
connection.stable-id: --
connection.type: 802-3-ethernet
connection.interface-name: ens18
connection.autoconnect: да
...
Настройка DNS для существующего соединения
Часто бывает, что Network Manager не переносит текущий DNS сервер, и следовательно, теряется связь с интернетом, компьютер не может получить информацию об IP адресе доменов.
Для того чтобы поменять DNS воспользуемся командой
nmcli connection modify "Supervisor ens18" ipv4.DNS 192.168.1.1Если нужно прописать более одного DNS сервера, перечислим их через запятую
nmcli connection modify "Supervisor ens18" ipv4.DNS 192.168.1.1,192.168.1.10Для применения изменений нужно перезапустить сервис
service NetworkManager restartНастройка статического IP для существующего соединения
Проверим текущий статус соединения. Нас интересует строчка ipv4.method, и ipv4.addresses
# nmcli connection show "Supervisor ens18"
connection.id: Supervisor ens18
connection.uuid: 3beb0614-186b-4323-8dcd-80b0b4a70ebb
...
ipv4.method: auto
ipv4.dns: 192.168.1.3,192.168.1.33
ipv4.dns-search: --
ipv4.dns-options: --
ipv4.dns-priority: 100
ipv4.addresses: --
ipv4.gateway: --
ipv4.routes: --
...
Как видно, нам вначале нужно установить ipv4.addresses
nmcli connection modify "Supervisor ens18" ipv4.address 192.168.1.49/24и только потом менять метод на ручной:
nmcli connection modify "Supervisor ens18" ipv4.method manualПри выполнение этой команды, пропадет соединение. По этому не применяйте её при удаленном соединении!
Также нам нужно еще установить шлюз по умолчанию
nmcli connection modify "Supervisor ens18" ipv4.gateway 192.168.1.1Чтобы изменения вступили в силу, нужно деактивировать и затем активировать соединение вновь:
nmcli connection down "Supervisor ens18"
nmcli connection up "Supervisor ens18"
При выполнение этих команд, пропадет соединение. По этому не применяйте их при удаленном соединении!
Network Manager это очень мощная утилита, которая имеет внешнее управление через API. Поэтому оно используется в Home Assistant Supervisor. И теперь у меня есть под рукой мануал, как быстро настроить сеть и не лезть за этим в поисковик.
The entire configuration for the network interfaces is stored in plain text files in a single directory named /etc/network. This directory contains a number of files and subdirectories to cover both the setup for IPv4 and IPv6.
- interfaces and interfaces.d: general configuration per interface
- if-down.d: scripts that are run in case the interface goes down
- if-post-down.d: scripts that are run after the interface goes down
- if-up.d: scripts that are run if the interface goes up
- if-pre-up.d: scripts that are run before the interface goes up
The specific configuration is done per network interface. You can store all of it in the single file named interfaces, or as separate files in the directory interfaces.d. A typical IPv4 configuration from a portable device is shown below. It consists of one loopback interface , an ethernet interface , and a wireless interface . Line 1 refers to include all the scripts that are stored in the directory . The lines 3 to 5 configure , lines 7 to 9 /dev/eth0, and line 11 the interface /dev/wlan0. A detailed explanation for the single commands is given below.
etcnetworkinterfaces.d
# The loopback network interface
auto lo
iface lo inet loopback
# The primary network interface
allow-hotplug eth0
iface eth0 inet dhcp
iface wlan0 inet dhcp
The list of available network interfaces:
The basic network configuration on a Debian GNU/Linux 9.5:

As the next step we will have a look at the single statements to configure a desired interface.
Debian Network Configuration in detail
Automatic enabling of an interface on startup
Activate an interface if the network cable is plugged in
The keyword “allow-hotplug” leads to a event based on a physical connection. The named network interface is activated as soon as the network cable is plugged in, and deactivated as soon as the the network cable is unplugged. The next line demonstrates this for the Ethernet interface /dev/eth0 (similar to line 8 of listing 1).
Static interface configuration
iface eth0 inet static
address 192.168.1.5
netmask 255.255.255.0
gateway 192.168.1.1
iface enp0s3 inet6 static
address fd4e:a32c::9e59:0004::
netmask
gateway fd4e:a32c::9e59:0004::
Dynamic interface configuration via DHCP
iface wlan0 inet dhcp
#For IPv6 use this line, instead:
iface wlan0 inet6 dhcp
Similar to the static configuration from above a number of options are possible to be set. These options depend on your DHCP setup. Among others the list includes the hostname to be requested (hostname), the metric for added routes (metric), the preferred lease time in hours or seconds (leasehours, leasetime), the client identifier (client), or the hardware address (hwaddress).
Other options
Showing the interface configuration
Up to the release 8 of Debian GNU/Linux use the command “/sbin/ifconfig” to display the interface configuration. See the configuration for the first ethernet interface below.
Interface configuration using ifconfig:

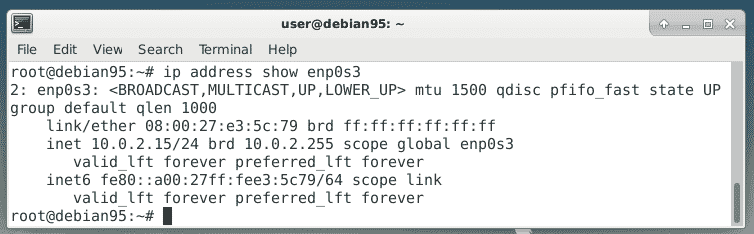
From the release 9 onwards, the command “ifconfig” is no longer preinstalled, and replaced by its predecessor “ip”. Use the command “ip addr show”, instead.
Interface configuration using ip:
Enabling and disabling an interface
As already described above the option “auto” enables an interface on startup, automatically. There are two commands to enable and disable an interface, manually. Up to Debian 8, use “ifconfig eth0 up” or “ifup eth0” to enable the interface. From Debian 9, use “ifup eth0”, only. The counterparts are “ifconfig eth0 down” and “ifdown eth0”. The image below shows the default output when enabling an interface.
Interface activation using ifup:

Adding further options
It is possible to add further action in case an interface is activated or deactivated. These scripts are called if-pre-up and if-post-down scripts and come into play before enabling and after disabling an interface.
The next example demonstrates this in combination with a firewall that is active in case the interface is active, too. In line 3 the script /usr/local/sbin/firewall-enable.sh is called before the interface is activated (hence the tag “pre-up”, and in line 4 the script “/usr/local/sbin/firewall-disable.sh” is called after the interface is deactivated.
allow-hotplug eth0
iface eth0 inet dhcp
pre-up usrlocalsbinfirewall-enable.sh
post-down usrlocalsbinfirewall-disable.sh
Conclusion
Links and References
Thanks
The author would like to thank Axel Beckert for his help and critical comments while preparing this article.
About the author

Frank Hofmann is an IT developer, trainer, and author and prefers to work from Berlin, Geneva and Cape Town. Co-author of the Debian Package Management Book available from dpmb.org.
NetworkManager seeks to keep connectivity through Ethernet, WIFI, PPPoE and allows VPN (Virtual Private Network). It has several graphical interfaces for GNOME, KDE, Cinnamon and more, it simplifies the network configuration including network devices, gateways configuration, IP address assignation, VPN, bridges, DNS and additional options.
Learning where settings are on Network Manager can help for example when you want to know how to reveal the current or a former wifi connection password.
This tutorial focuses on network-manager itself and nmcli which is the command line interface to manage Network-Manager with a brief description of the graphical interface for GNOME which is really intuitive. Instructions are for Debian based Linux distributions which includes Network-Manager by default, therefore there are no installation instructions, but if you used WICD to manage your connections probably your network-manager won’t launch automatically, if that’s your case you need to remove the network manager and reinstall it.
Network-Manager graphical description
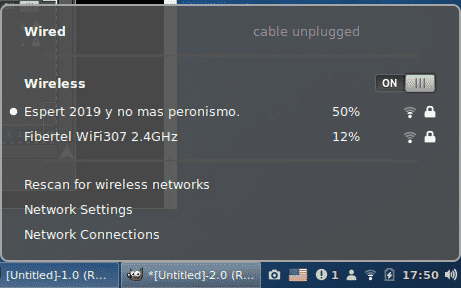
The network-manager is a daemon starting when the system boots, it can be graphically found in the Gnome applets, next to the clock or sound icons, if you are connected through wifi you’ll find a waves icon like in my example below, through Ethernet you’ll find connected wired devices.
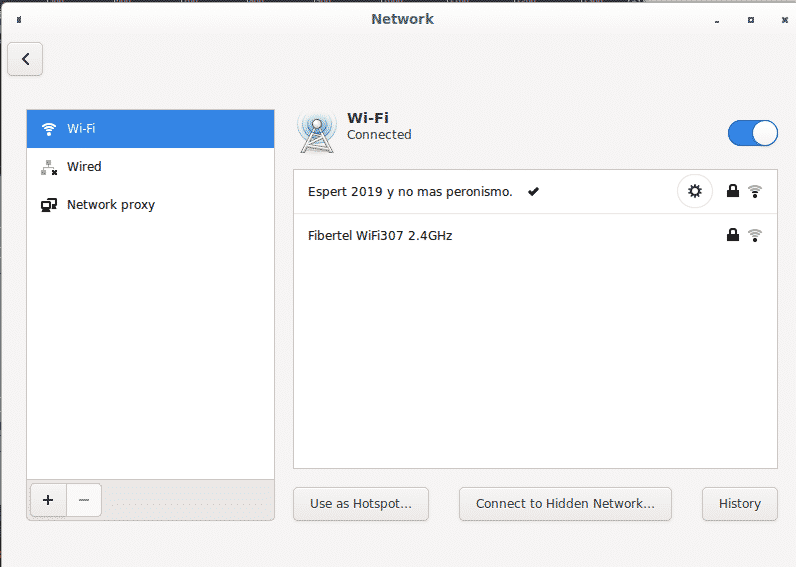
At the top you’ll find the wired connections, then the wireless connections with the option to disable your wireless card, the option to rescan for available networks, Network Settings and Network Connections.

Network settings:
On the network settings section you have options like disabling your wifi card or connect to networks,including hidden networks, setup proxies and more:
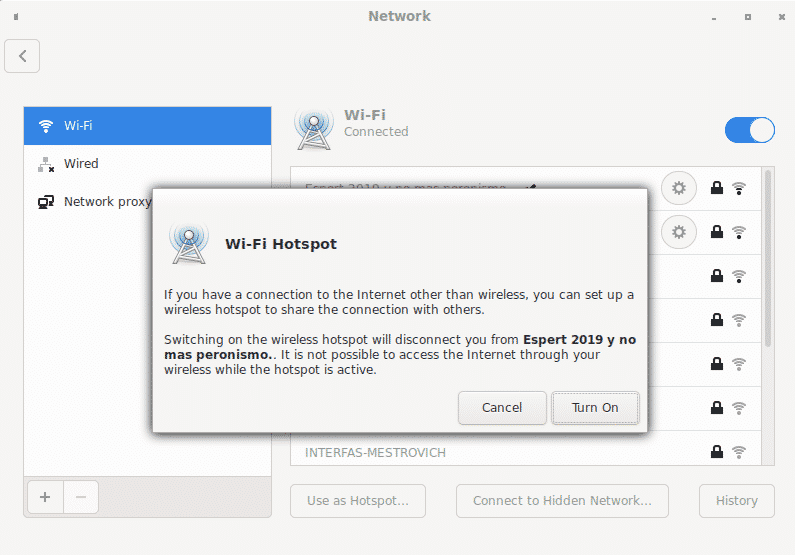
On the window bottom you can find symbols + and – to edit additional options to add and remove VPN connections importing files.
On the network settings main screen next to each connection there are a gear icon to access additional configuration options, a padlock showing if the connection is protected and the signal power:

By clicking on the gear of the established connection you can get and edit settings, the first section “details” will summarize the connection configuration:

The second section “security” displays the encryption type and allows to show the current wireless connection password:
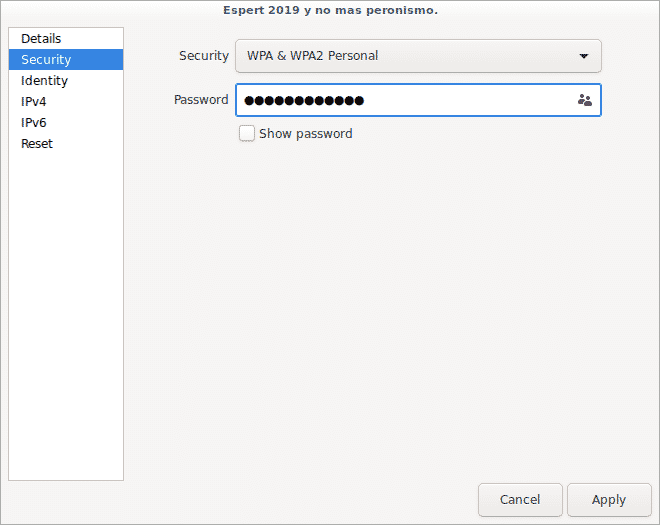
To show the password just mark the “show password” option.
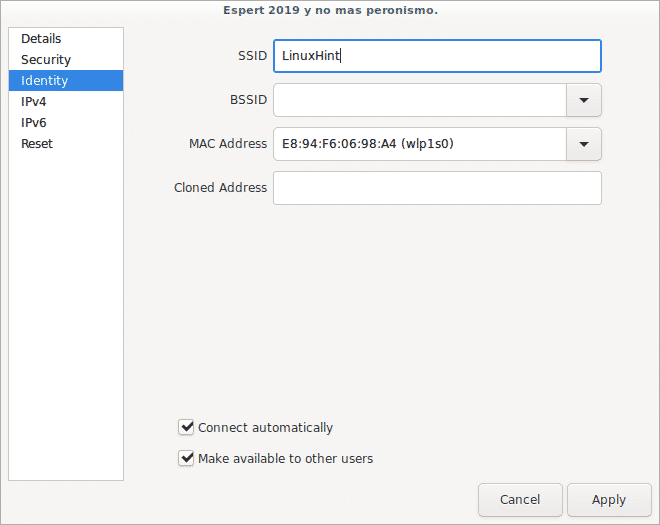
The third section “identity” shows the wifi connection name, the router and local mac addresses:
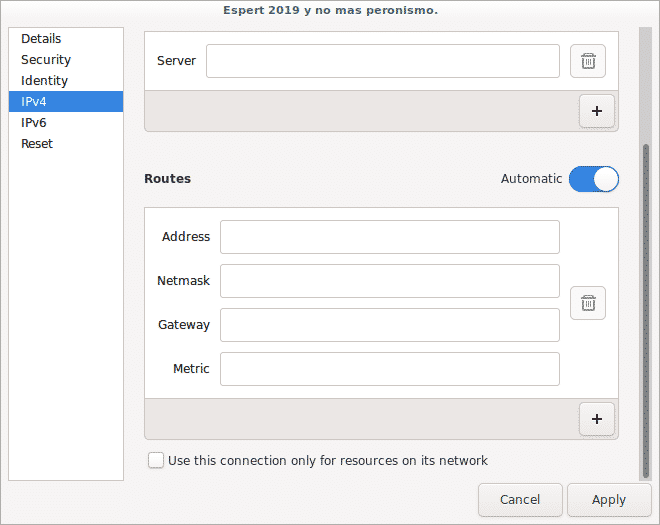
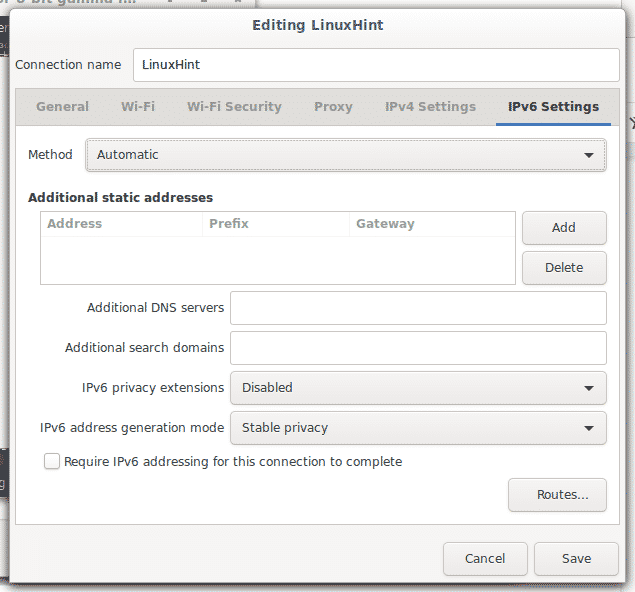
The fourth section “IPv4” allows to enable or disable this protocol, the DHCP service, the DNS and routing options for the IPv4 protocol only.

The fifth section “IPv6” is the same than above but for IPv6 protocol:

Finally on the last section you can reset all connection settings with option to keep the connection as preferred or not to prevent it from connecting automatically again.

Network connections:
Going back to the menu on the applets bar now click on Network Connections:
On the main menu you’ll see all available connections classified by type, at the bottom you’ll see symbols + and – to add and remove connections.


The next tab Wi-Fi shows the connection name, the connection mode (client, hotspot or ad hoc), frequency, channel, mac addresses (bssid) and MTU (Max. transmission unit).

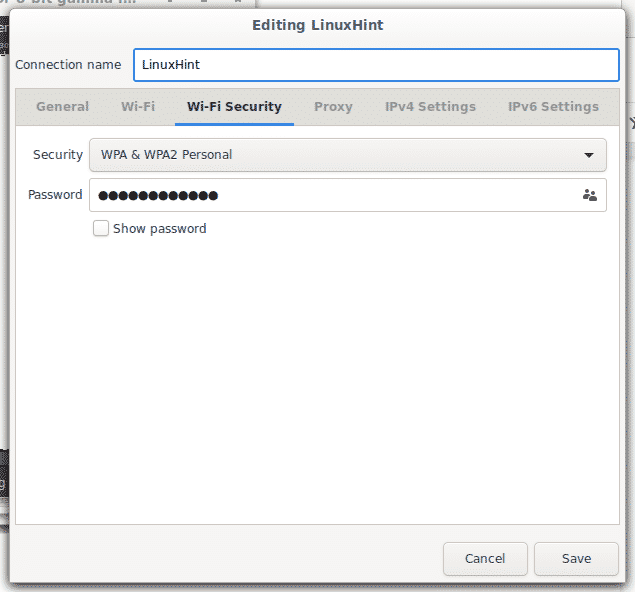
Next tab Wifi-Security shows the encryption type and allows to reveal the currentor former password (depending if you are checking a current connection or an outdated one).
Next tab allows to configure a proxy for the whole connection or to browse, you can specify it:

Tab IPv4 allows to change configuration for this protocol such as gateways, DNS and DHCP.


Finally you have the IPv6 tab similar to IPv4 but for the IPv6 protocol:
These are all available options on the Network Manager.
Now let’s see a little about nmcli to see some settings from the command line.
Using nmcli, the command line interface for Network-Manager
The option -h will display all available options for this command.
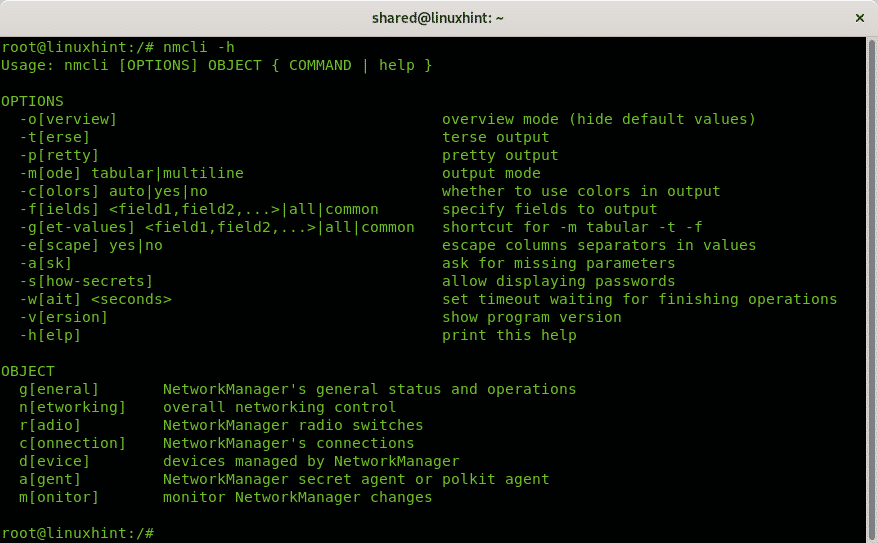
As you can see there are two categories, OPTIONS and OBJECT, where OPTIONS you can instruct how information should be printed and OBJECT what information should be printed.
Among the available options for nmcli you’ll find:
- -o: When using options to display information, the -o (overview) option is useful to summarize the output omitting empty properties and default settings
- -t: The options -t (terse) is used for scripting, by applying this options you can display only values.
- -p: Contrary to the -t option, the -p (pretty) option is to optimize the output for humans, by using this option the output will be listed in columns.
- -m: By default nmcli shows the output in tabular mode. The options -m (mode) allows to change the output to multiline mode.
- -c: This option is to color the output.
- -f: The option -f (field) is useful to specify what fields should include in the output.
- -g: Same than -m
- -e: The option -e (escape) is useful to escape separators (“:”, “\”).
- -a: The option -a (ask) instructs network-manager to ask additional information if needed, like passwords.
- -s: The option -s (show secret) shows passwords.
- -w: The option -w (wait) allows to limit the time for the requested operation.
- -v: The option -v (version) shows the nmcli version.
In the OBJECT section there are 7 options:
- general: This allows to display the Network-Manager status, permissions, hostname and logging level for domains.
- networking: This object is also useful to display the status, to enable and disable networking.
- radio: This object allows to check the wireless state and to turn off and turn on the wireless card.
- connection: This object allows to display connections, add, modify, clone, export, import connections and more.
- device: This object allows to display the status, to connect, disconnect network devices, to list, connect and rescan wifi networks.
- monitor: This object allows to monitor NetworkManager connectivity.
Getting information on network devices with nmcli Network Manager interface:


You can get a summarized view on all devices status by running:

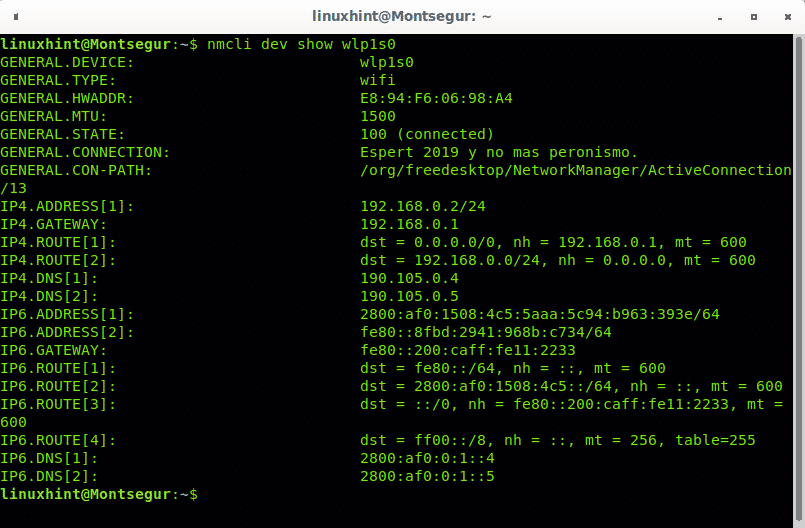
You can also display information on a specific device:
nmcli dev show device-name
In my case:
Managing your wifi with nmcli Network Manager interface:
If you want to check your wireless status use the object radio:

You can disable the wifi adapter by specifying it adding the option off:
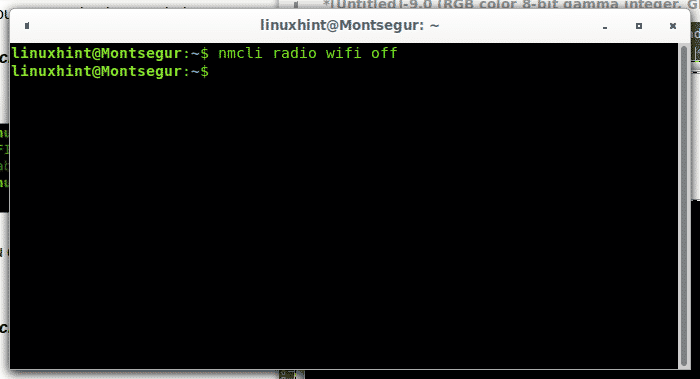
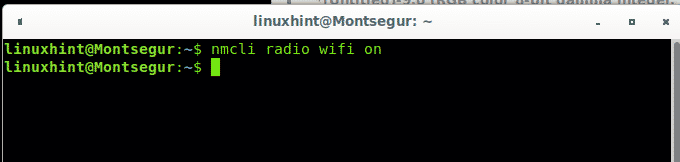
By using the option on you can enable your wifi:
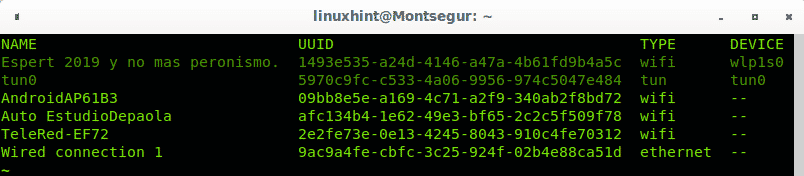
When we establish a connection, a profile containing the necessary information to establish it again in the future is created,to print the profiles run:
Starting, stopping and disconnecting network interfaces with nmcli Network Manager interface:
To disable a connection run:
nmcli con down ‘connection-name’
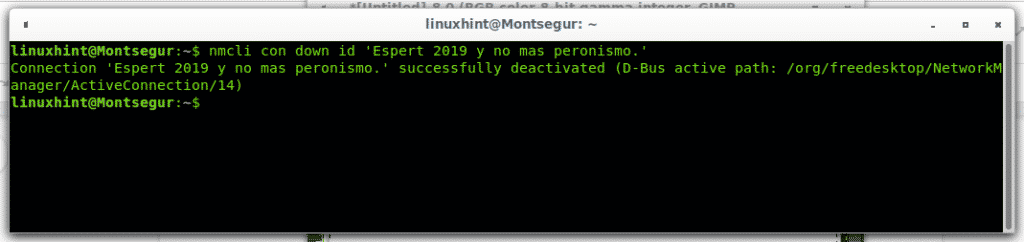
Note: while single quote are not mandatory they are useful for connections including spaces, usually on wireless connections.
You can also disconnect and connect devices instead of connections, when you disable a connection invoking the device instead of the connection name it will prevent the connection from reestablishing automatically:
nmcli dev disconnect wlp1s0

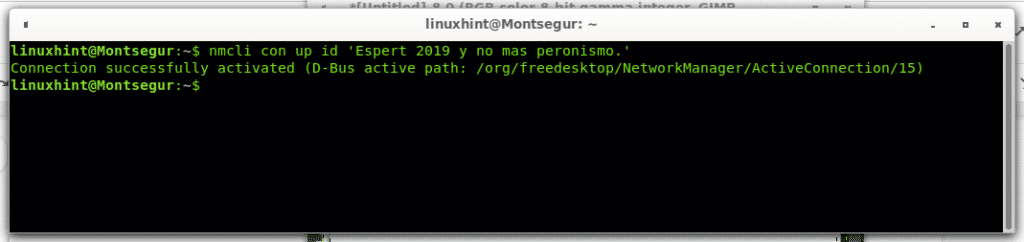
To connect just replace “disconnect” for “connect”:
About the author
Изменение конфигурации сети
Использование команды ifconfig и route
В этом методе мы рассмотрим, как настроить параметры сети. Однако помните, что эти настройки не будут постоянными. Как только вы перезагрузите систему, настройки будут удалены.
Назначение IP-адреса интерфейсу
sudo ifconfig <интерфейс> <IP_адрес> netmask <маска подсети> upsudo ifconfig eth0 192.168.72.16 netmask 255.255.255.0 upНастройка шлюза по умолчанию
Шлюз по умолчанию — это адрес, используемый для связи с внешней сетью. Чтобы настроить шлюз по умолчанию, используйте следующий синтаксис команды:
sudo route add default gw <IP_адрес> <интерфейс>В следующем примере я использую 192.68.72.1 в качестве адреса шлюза по умолчанию.
sudo route add default gw 192.168.72.1 eth0Настройка DNS-сервера
echo "nameserver <IP_адрес>" > /etc/resolv.confecho "nameserver 1.1.1.1" > /etc/resolv.confУдаление IP-адреса из сетевого интерфейса
ip address del <IP_адрес> dev <интерфейс>Изменение сетевых настроек с помощью файла интерфейсов
В этом методе мы настроим постоянные сетевые параметры, которые ваша система будет помнить даже после перезагрузки. Для этого нам нужно отредактировать файл /etc/network/interfaces с помощью любого текстового редактора. Для этого выполните следующую команду в терминале:
sudo nano /etc/network/interfacesЗатем добавьте в него следующие строки:
auto eth0
iface eth0 inet static
address 192.168.72.16
netmask 255.255.255.0
gateway 192.168.72.1
Теперь нажмите Ctrl+O, а затем Ctrl+X, чтобы сохранить и выйти из файла.
Обратите внимание, что строки адреса, маски сети и шлюза должны начинаться с пробелов! В случае, если вы хотите динамически назначить адрес, используйте следующие строки:
auto eth0
iface eth0 inet dhcp
Определение серверов имен (DNS)
Чтобы добавить информацию о DNS-сервере, нам нужно отредактировать файл /etc/resolv.conf. Для этого выполните следующую команду:
nameserver 1.1.1.1
nameserver 192.168.72.1
Теперь нажмите Ctrl+O, а затем Ctrl+X, чтобы сохранить и выйти из файла.
Настройка сетевого интерфейса
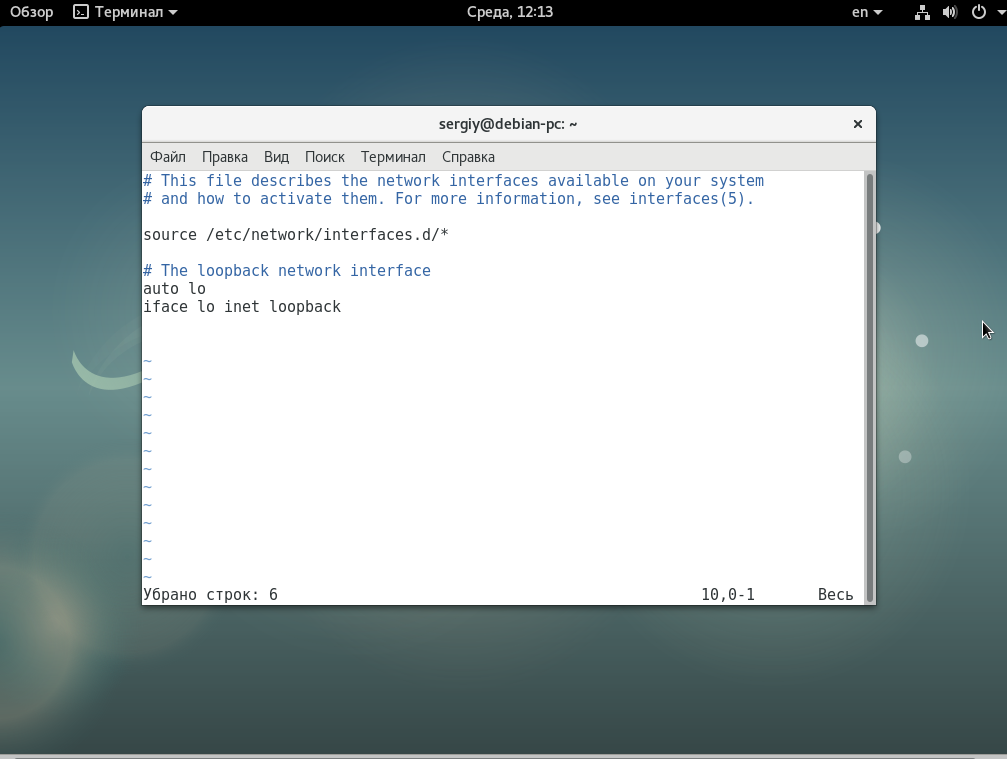
Для настройки сетевых интерфейсов в операционных системах, основанных на Debian, используется файл /etc/network/interfaces. Здесь должно находится описание для каждого интерфейса, способ получения IP а другие параметры. В одном файле может быть настроено несколько интерфейсов. Описание каждого интерфейса начинается со слова auto после которого идет имя интерфейса.
Это означает, что указанный интерфейс должен быть запущен при выполнении ifup с опцией -a, именно она используется при инициализации системы. После строки auto идут другие строки настроек, которые касаются именно этого интерфейса. Вот так, например, выглядит строка для включения локального интерфейса:
Перед тем как рассматривать все более подробно, поговорим про опции, которые можно использовать:
- pre-up — выполнить команду перед запуском интерфейса;
- post-up — выполнить команду после запуска интерфейса;
- up — выполнить команду при запуске интерфейса;
- pre-down — команда перед отключением;
- post-down — команда после отключения;
- iface — указывает имя интерфейса;
- inet — указывает
- description — создать имя синоним для устройства;
- address — устанавливает ip адрес для статического соединения;
- netmask — установка маски сети;
- broadcast — широковещательный адрес;
- metric — приоритет для шлюза по умолчанию;
- gateway — шлюз по умолчанию;
- hwaddress — установить MAC адрес;
- mtu — размер одного пакета.
Это далеко не все опции, которые можно использовать, но основные из них и уже с помощью этого можно настроить большинство из того, что нужно. Дальше рассмотрим различные варианты настройки интерфейсов, самый часто используемый на домашних компьютерах — это получение ip адреса по DHCP, в таком случае, ip адрес может меняться при каждом запуске. Рассмотрим его первым.
Настройка динамического IP
Мы будем получать IP адрес через DHCP сервер, оттуда же будут получены шлюзы и DNS сервер, поэтому для работы достаточно добавить две строчки. Например, настроем получение IP по DHCP для интерфейса eth0:
auto eth0
 iface eth0 inet dhcp
Но если необходимо, то вы можете установить вручную ip адрес DNS сервера:
Для локального интерфейса настройка будет выполняться таким образом:
auto lo
 iface lo inet loopback
Здесь мы не получаем адрес по DHCP, но присваиваем локальный адрес 127.0.0.1.
Настройка статического IP адреса
Если вы хотите установить именно статический IP, то здесь все будет немного сложнее. Нам нужно знать не только этот свободный IP адрес, но и шлюз, маску сети и DNS сервер. Для настройки используется такой набор строк:
iface eth0 inet static
 address 192.168.1.15
 netmask 255.255.255.0
 gateway 192.168.1.1
 broadcast 192.168.0.255
 dns-nameservers 8.8.8.8
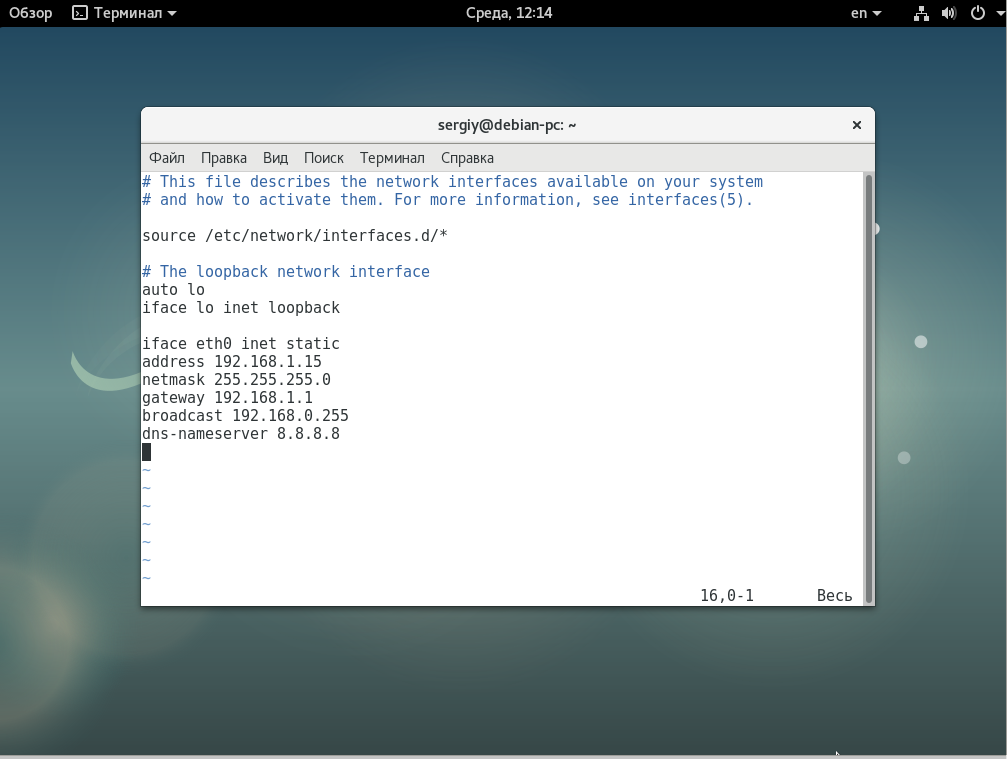
Здесь указывается, что мы будем использовать метод получения ip адреса static, а затем расписаны все параметры. Но это еще далеко не все, что можно сделать с помощью файла /etc/network/interfaces. Также вы можете создавать виртуальные интерфейсы.
Настройка виртуальных интерфейсов
В некоторых случаях нам может понадобиться создать виртуальный интерфейс. Это позволяет добавить еще один IP адрес к интерфейсу. Чтобы создать такой интерфейс достаточно дописать его номер после двоеточия:
auto eth0:0
 iface eth0:0 inet static
 address 192.168.1.101
 netmask 255.255.255.0
 gateway 192.168.1.1
 dns-nameservers 8.8.8.8
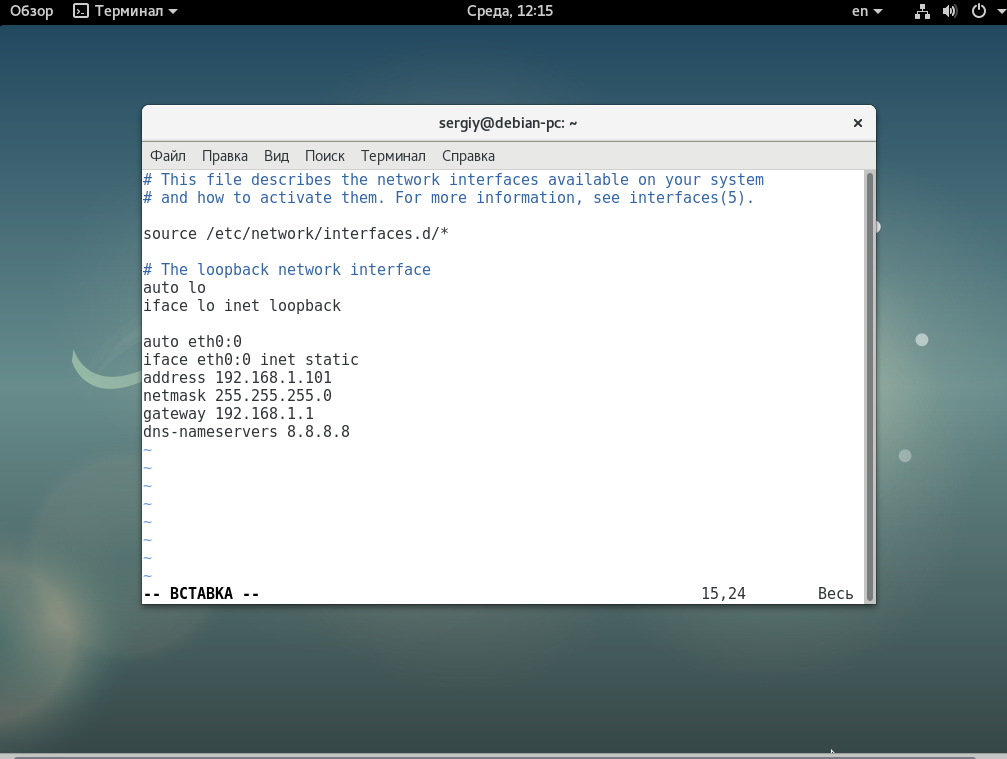
Имя интерфейса, для которого создается виртуальный интерфейс должно совпадать с реальным.
Настройка мостов
Сетевые мосты между виртуальными интерфейсами в системе позволяют настроить полноценный доступ к интернету из виртуальных машин. Они могут применяться для KVM,qemu,XEN и других конфигураций. Для настройки моста используйте:
auto br0
 iface br0 inet static
 address 192.168.1.20
 network 192.168.1.0
 netmask 255.255.255.0
 broadcast 192.168.1.255
 gateway 192.168.1.1
 bridge_ports eth0
 bridge_stp off
 bridge_fd 0
 bridge_maxwait 0

Здесь мы указываем имя интерфейса br0, дальше выполняем стандартную настройку получения статического IP адреса, затем связываем этот мост с интерфейсом eth0.
Имя компьютера
Чтобы посмотреть текущее имя хоста вы можете использовать команду hostname:
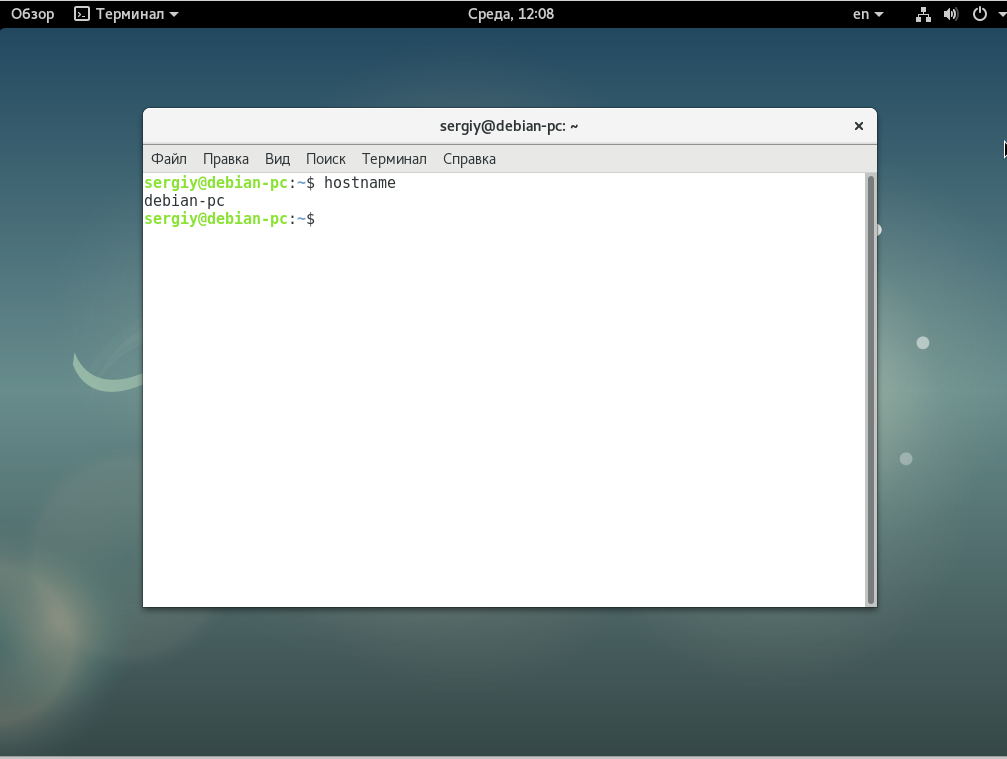
Установить новое имя хоста очень просто, для этого достаточно передать его команде hostname в качестве параметра:
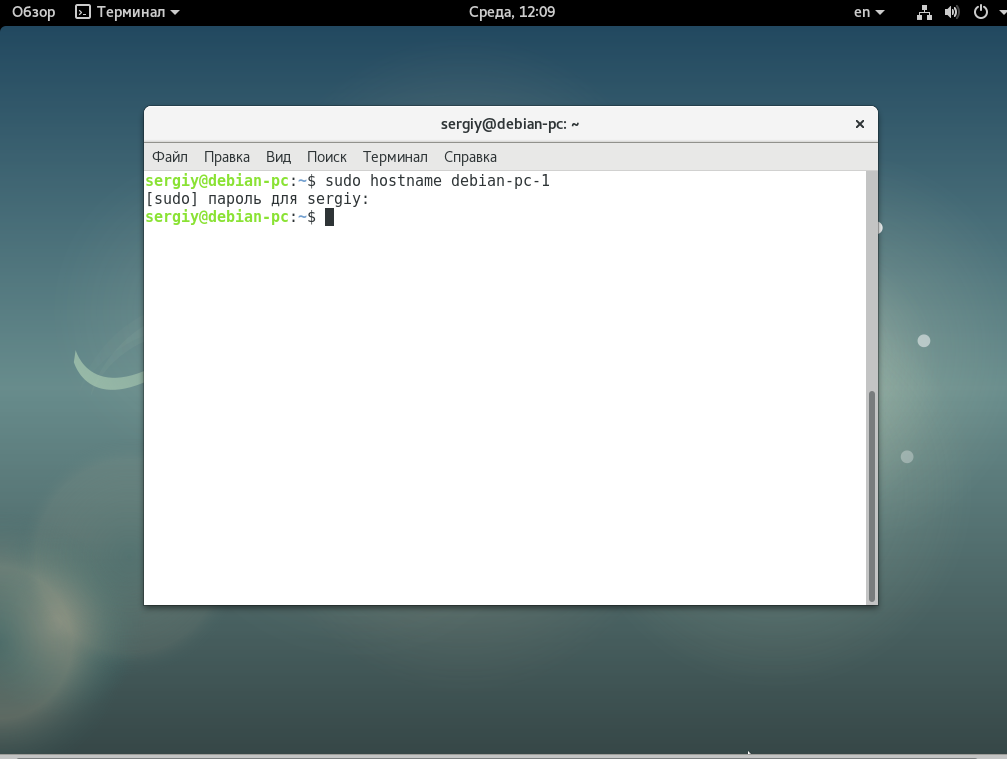
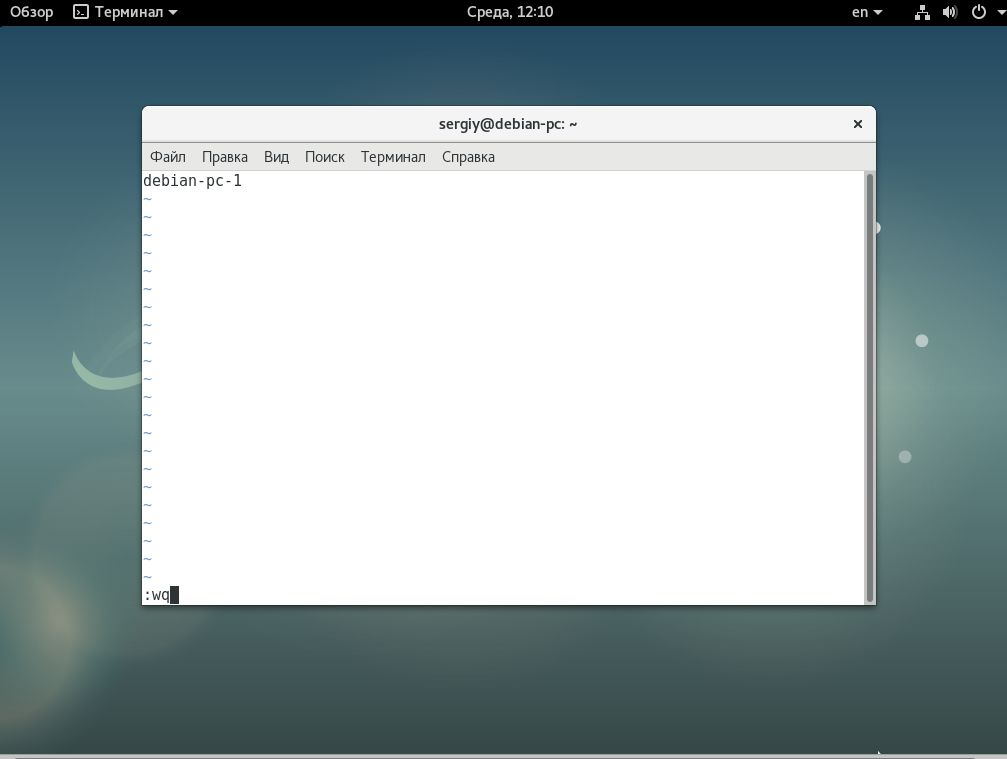
После перезагрузки имя хоста не сохранится, поэтому вам нужно отредактировать файл /etc/hostname и добавить туда новое имя хоста, уже это имя останется даже после перезагрузки:
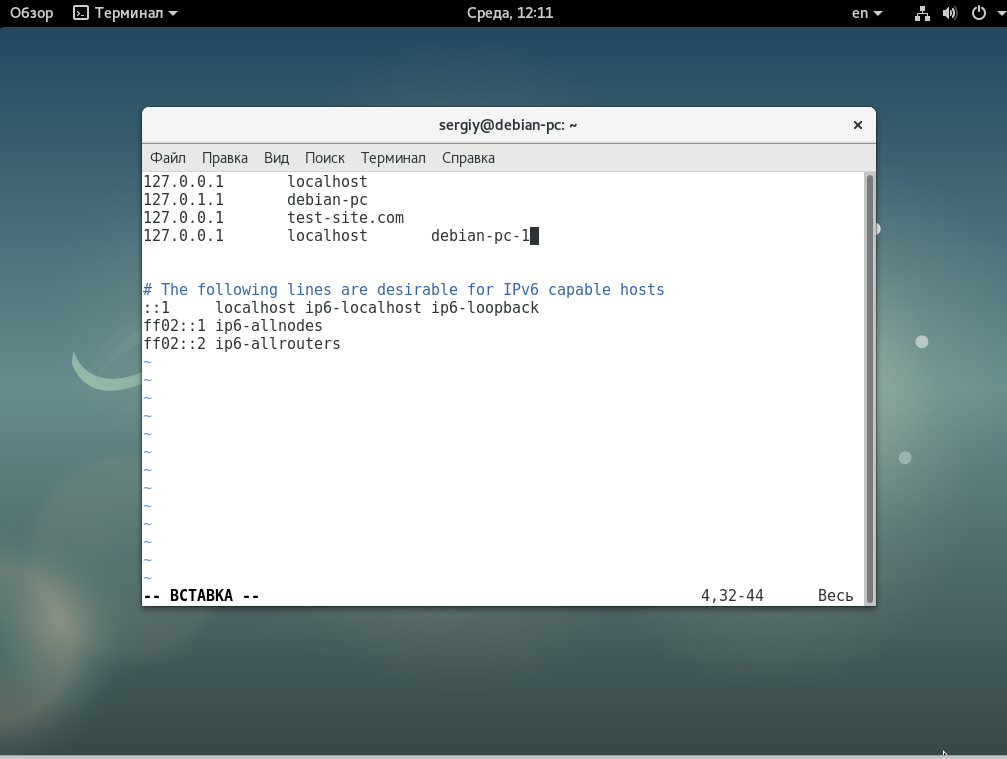
Осталось только связать новое имя хоста с локальным IP адресом, чтобы иметь возможность обращаться по нему к компьютеру. Для этого добавьте такую строку в файл /etc/hosts:
127.0.0.1 localhost debian-pc
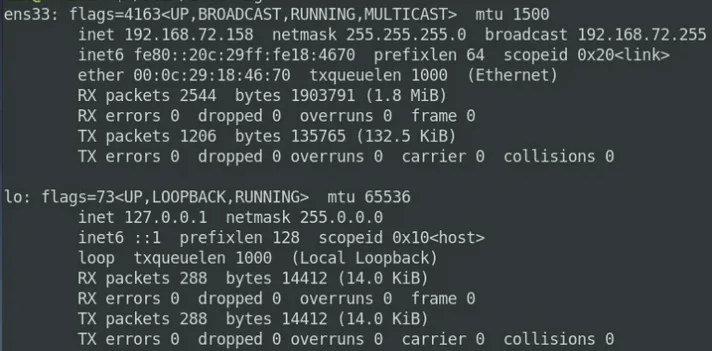
Просмотр текущей конфигурации сети
Чтобы просмотреть текущую конфигурацию сети, выполните следующую команду в Терминале. Она покажет вывод для каждого интерфейса в отдельном разделе.
Поиск IP-адреса через командную строку
Найти внутренний IP через командную строку гораздо проще, чем графическим методом, поскольку вам не нужно перемещаться по различным окнам. Мы рассмотрим различные команды, которые вы можете использовать для поиска внутреннего IP.
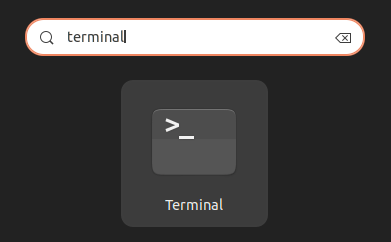
Сначала нам нужно запустить приложение терминала. Для этого перейдите на вкладку «Деятельность» в левом верхнем углу рабочего стола. Затем введите терминал в строке поиска. Когда появится значок терминала, нажмите на него, чтобы запустить его.
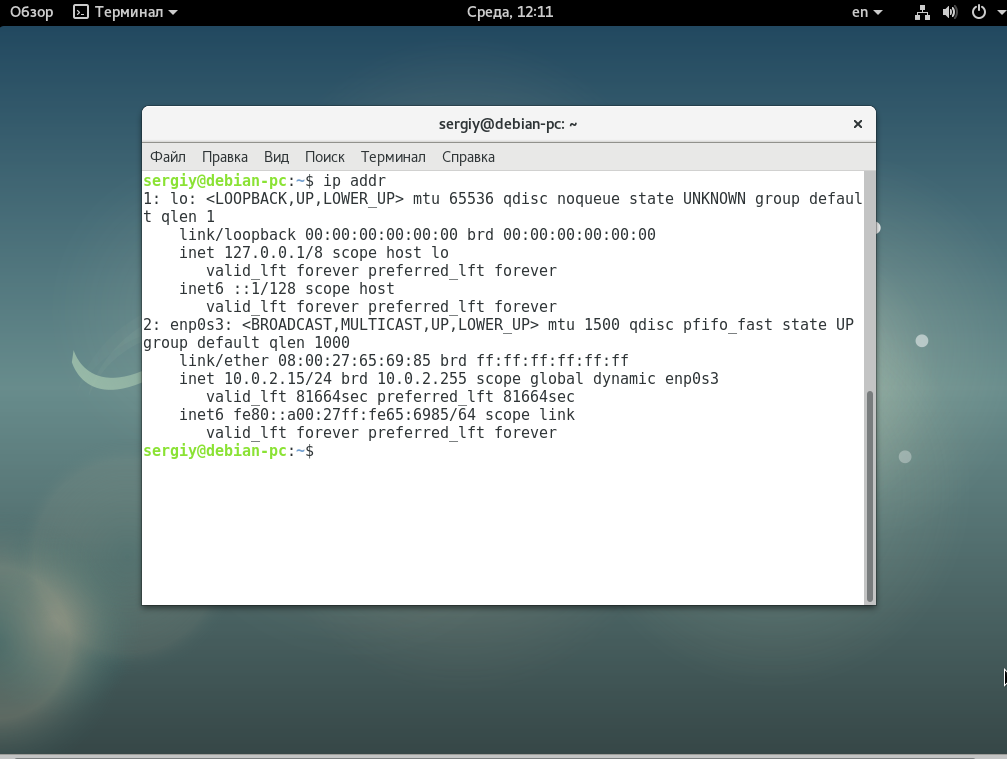
Способ № 1: Использование команды IP-адрес
Вывод будет выглядеть примерно так, как показано ниже:

Способ № 2 Использование команды ifconfig
ifconfig — это наиболее используемая команда в различных дистрибутивах Linux, но сейчас она устарела и поэтому отсутствует в последней версии Debian OS. Тем не менее, мы всё ещё можем использовать её. Для этого нам нужно установить её с помощью команды apt-get. Для этого откройте Терминал и выполните следующую команду:
/sbin/ifconfig [имя_интерфейса]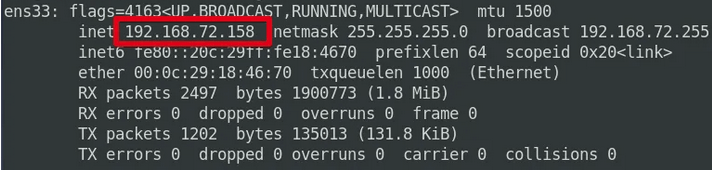
Способ № 3 Использование команды IP route

Способ № 4 Использование команды hostname

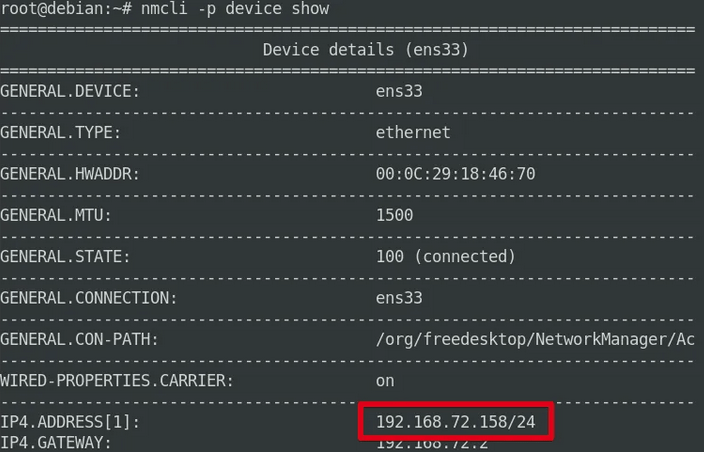
5. Использование команды nmcli
Из приведенного ниже вывода вы можете увидеть IP сетевого интерфейса и другие подробности.
Настройка имени хоста
Чтобы изменить имя хоста системы, вы можете выполнить следующую команду. Но как только вы перезагрузите систему, ваше первоначальное имя хоста будет восстановлено.
Чтобы навсегда изменить имя хоста, вам нужно отредактировать файл hostname, расположенный по адресу /etc/hostname. Для этого введите следующую команду:
Этот файл содержит только имя хоста, измените старое имя на желаемое, а затем нажмите Ctrl+O и Ctrl+X для сохранения и выхода.
Перезагрузка сети
После внесения всех изменений необходимо перезапустить сеть, чтобы сетевые настройки debian вступили в силу, для этого наберите:
sudo systemctl restart networking
Поиск внутреннего IP через графический интерфейс
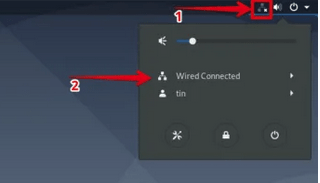
Затем нажмите на опцию Настройки сети.
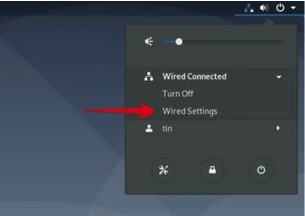
Откроется окно сетевых настроек. Чтобы просмотреть настройки проводного или беспроводного соединения, нажмите на значок шестерёнки перед подключённым интерфейсом.


Выводы
В этой статье мы рассмотрели как выполняется настройка сети Debian 9. Конечно, это еще далеко не все, что возможно настроить, но с помощью этих команд можно в большинстве случаев заставить работать сеть. настройка сети из консоли debian дело сложное, в графическом интерфейсе все делается намного проще, с помощью NetworkManager все настраивается автоматически. Надеюсь, эта информация была полезной для вас.
Обнаружили ошибку в тексте? Сообщите мне об этом. Выделите текст с ошибкой и нажмите Ctrl+Enter.
Заключение
Теперь мы узнали, как найти внутренний IP-адрес в операционной системе на базе Debian. Вы можете использовать либо графический интерфейс пользователя, либо различные методы командной строки, описанные выше. Эти методы также могут быть применены к другим дистрибутивам Linux.
Заключение
Существует несколько типов подключения к интернету, и в Debian есть все необходимые инструменты для их настройки. Как можно отметить из всего вышесказанного, существует даже несколько способов для настройки каждого вида подключения. Вам же остается решить для себя, каким из них воспользоваться.
Список сетевых интерфейсов
Перед тем как мы сможем настроить сеть нужно посмотреть какие сетевые интерфейсы подключены к вашей системе и какие имена им присвоены. Для этого наберите:
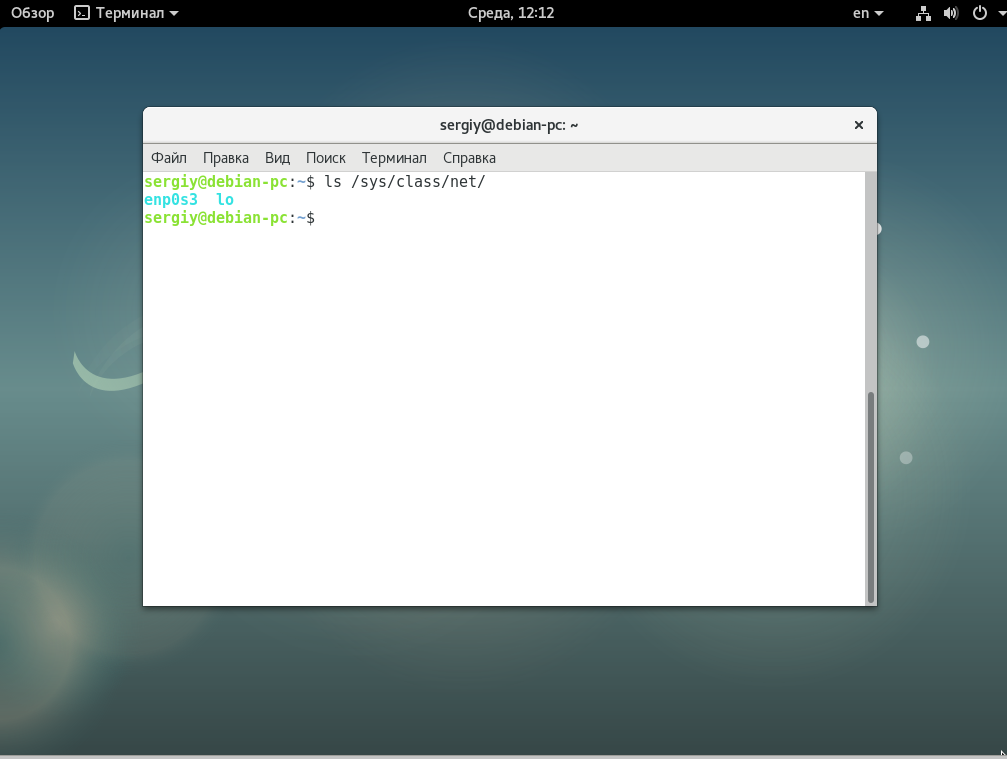
 Также можно посмотреть только имена интерфейсов, в папке /sys/class/net: