

Today we will talk about the basics of interaction with one of the most popular git systems.
- # Getting Started
- What is GitLab
- Difference between GitLab and GitHub
- # Project backup
- # Web interface
- # Console
- # Access settings
- # Install Gitlab
- # Gino App Packages
- # Creating and deleting a project
- How to use GitLab
- How to create a project
- How to create a repository
- How to upload website/app files to GitLab
- First — use the GitLab web interface
- Second — use the command line
- Third — use a third-party git client
- How to add an SSH key to connect to the repository
- How to work with branches
- How to create branches
- Merging branches
- How to add users to the project
- How to create bug reports
- How to delete a project
- # Gitlab basic setup
- # Setting up Gitlab CE and first launch
- # Login to Gitlab CE
- Instead of conclusion
# Getting Started
The first login to Gitlab is done as the root user. You can set the root user’s password when you first log into Gitlab on the page you set as your home page in the /etc/gitlab/gitlab.rb configuration file.
If Gitlab doesn’t prompt you to set a root password the first time you visit the page, you can set it manually via the console. To do this, you need to use gitlab-rake — the Gitlab task manager:
The launched task will ask you to specify a username — we specify root — and set a new password for it. After that, you can access Gitlab through a browser.
The Gitlab code repository management system is widely used in web development and is the main work tool for many companies. Gitlab is convenient, functional and allows you to track the entire life cycle of the application being developed.
In this tutorial, we will talk about two ways to install Gitlab CE and its initial setup — setting passwords, restricting access, setting up authentication when connecting.
We will need a server running Ubuntu 20.04 ready to go.
For Gitlab CE to work, the server must meet the minimum system requirements (opens new window) declared by the developers:
What is GitLab
Almost no one writes code alone these days. The engineering and development teams are growing by leaps and bounds. Working in teams, programmers use source code management systems based on git, a special tool that allows you to store the data of the project being developed on the network and jointly edit it, taking into account certain rules and methods of interaction. The most famous such service is GitHub. And GitLab is its brother, performing the same functions, but arranged a little differently.
GitLab allows you to manage code repositories, track bugs in developed programs, publish code and test it. This is an indispensable tool for everyone who does not program alone.
Community is now in Telegram
Subscribe and stay up to date with the latest IT news
Gitlab is one of the standard services for working with the git version control system. It supports all the functions necessary for development: managing private and public repositories, analyzing code for errors, managing user rights and access to repositories. Gitlab can also be installed on a local server where development is being carried out — this can be useful for organizing private access to the repository or for more flexible configuration of access rights for different users to the project.
In this tutorial, we’ll show you how to set up a freshly installed Gitlab and walk you through some basic features: managing project permissions, creating and deleting new projects, backing up and restoring a project from a backup, and importing and exporting projects. from public repositories.
We will need a ready-to-use server on Ubuntu or CentOS with pre-installed Gitlab.
Difference between GitLab and GitHub
Both services are git-based repository management systems. There are no fundamental differences between them. GitHub came before and became almost synonymous with git, so it is more popular and for many is the only system for managing repositories.
But GitLab has a lot to offer in terms of functionality, which is why we see more and more users moving from GitHub to GitLab. In particular, this applies to novice developers who have not yet “grown” to GitHub.
Due to the growing popularity of GitLab, I decided to introduce you to this service better.
# Project backup
There are two ways to back up a project: through the SSH connection console or through the web interface.
# Web interface
A project backup can be downloaded at any time using the Gitlab web interface in one of the proposed formats: zip, tar.gz, tar.bz2, tar. To do this, go to the project and click on the button on the main page of the project:

The resulting version can be saved on the local machine:
# Console
To back up your projects in the console, first install git:
After that, you can start the Gitlab-rake command manager:
Upon completion, the command will issue a warning:
The specified gitlab.rb and gitlab-secrets.json files must be saved manually.
The address where backups will be located is specified in the configuration file:
Find the block in the opened file:
As you can see, by default, backups are stored in /var/opt/gitlab/backups. If you need more space to store them, allocate a separate disk space for this and rewrite the path to them in the configuration file.
Important: After changing the configuration file, don’t forget to update the Gitlab configuration:
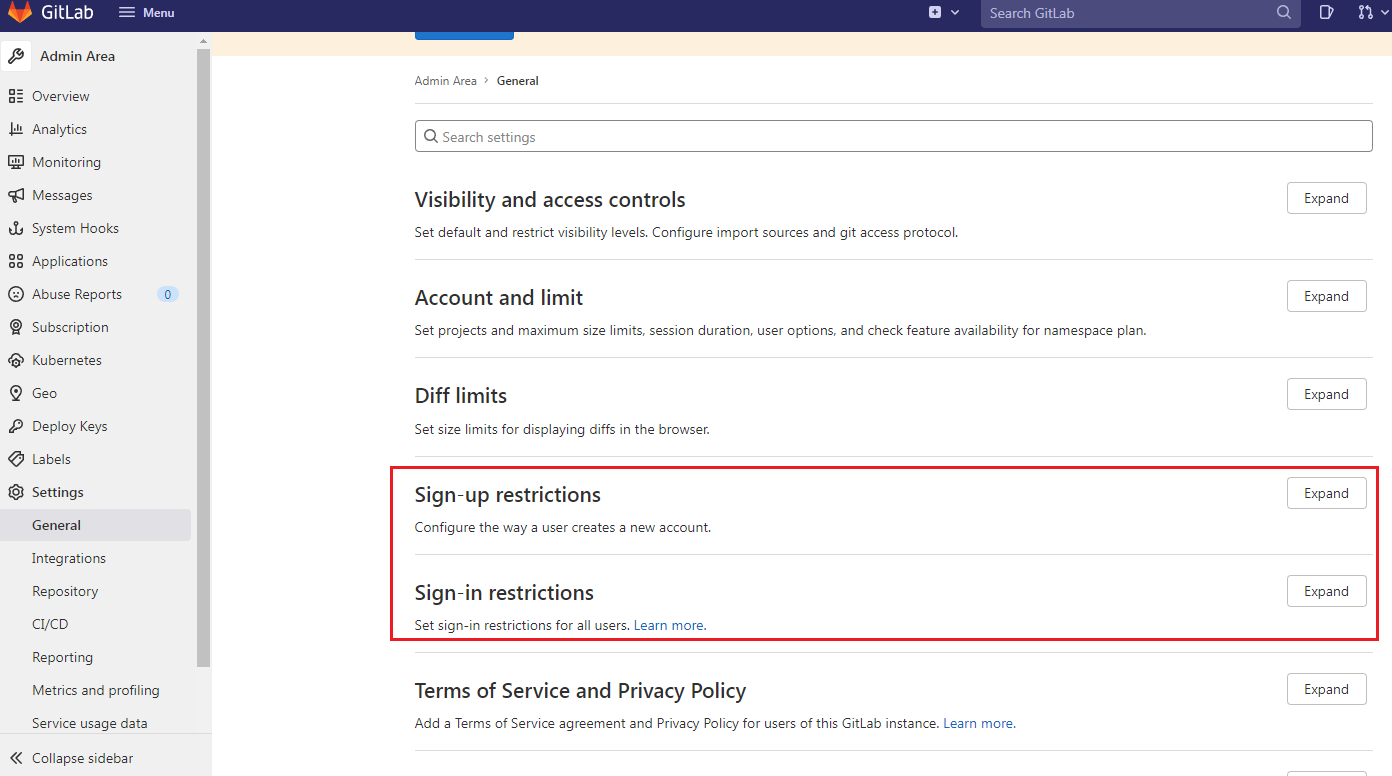
# Access settings
Administrative rights in Gitlab allow you to flexibly configure the access policy for each user and project.
To configure access restrictions, go to the administrative area and in the Settings section switch to the General tab:
Here, in the Sign-up restrictions and Sign-in restrictions, you can set up user restrictions both for creating new accounts and for accessing certain projects:
You can add a new user to an existing project from the project management window.
In the menu section, select the Members item, then from the already created users, select those to whom you want to give access to the project.
# Install Gitlab
Before we start, let’s update the list of apt packages available for installation:
Install a few packages that Gitlab will need for installation and runtime:
During the installation of postfix, a question will appear in which you need to select the Internet site option and specify the name of the domain associated with the server in order to configure mail sending.
After installing all the necessary services, you can proceed to install Gitlab. Let’s go to the /tmp/ directory and download the installation script:
Before running the script, let’s check its contents. Enter the command:
She will open the script in a text editor. If its contents are not suspicious, then run it:
The script will update the list of apt repositories and the list of packages available for installation. After the script is finished, we proceed to install Gitlab:
The Gitlab installer will not only install the program on the server, but also add the necessary rules for ufw.
# Gino App Packages
As an alternative installation option, if your VPS is located on Gino, you can use the installation from «Application Packages». To do this, in the section select Gitlab CE. The installer will install Gitlab CE and all required components for it.
# Creating and deleting a project
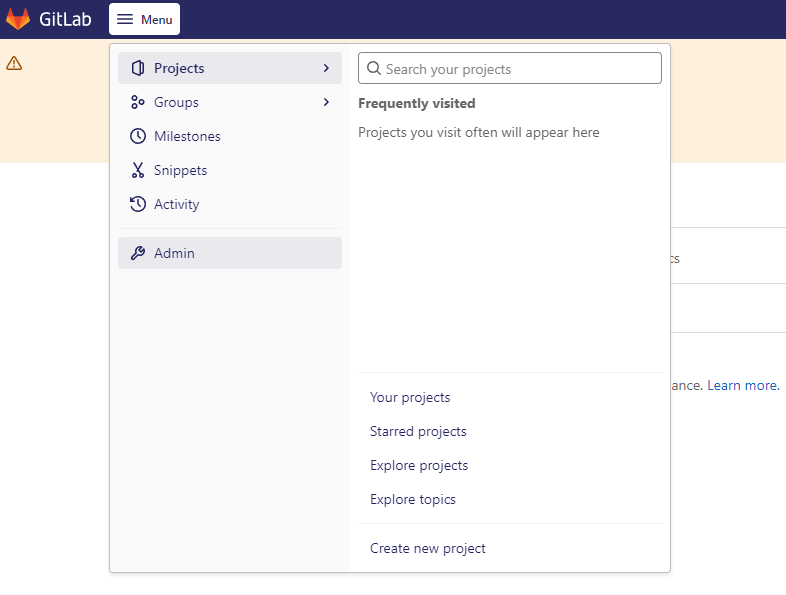
You can create a project on the main Gitlab page by clicking the button or the plus sign next to the search bar:

Here you can create a new project, select a template for the project, or download an existing one from the repository. Create an empty project:
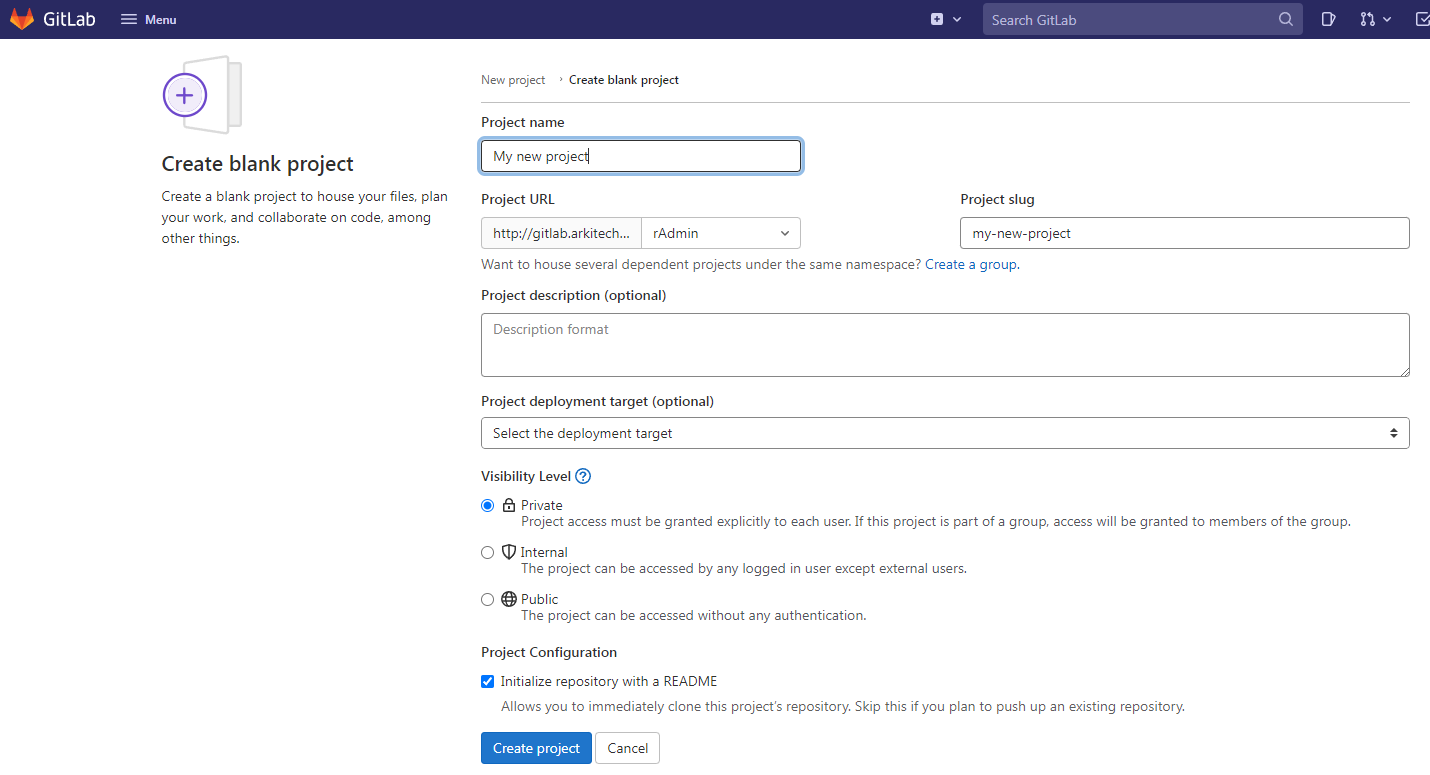
When creating a project, in addition to the standard options like setting a name, project description and creating a project slug, it is possible to choose the level of access to the project:
Also, when creating a project, check the box Initialize repository with a README — this will allow us to create a new repository linked to our project. The first file in the repository will be README.txt, which usually contains a complete description of the project.
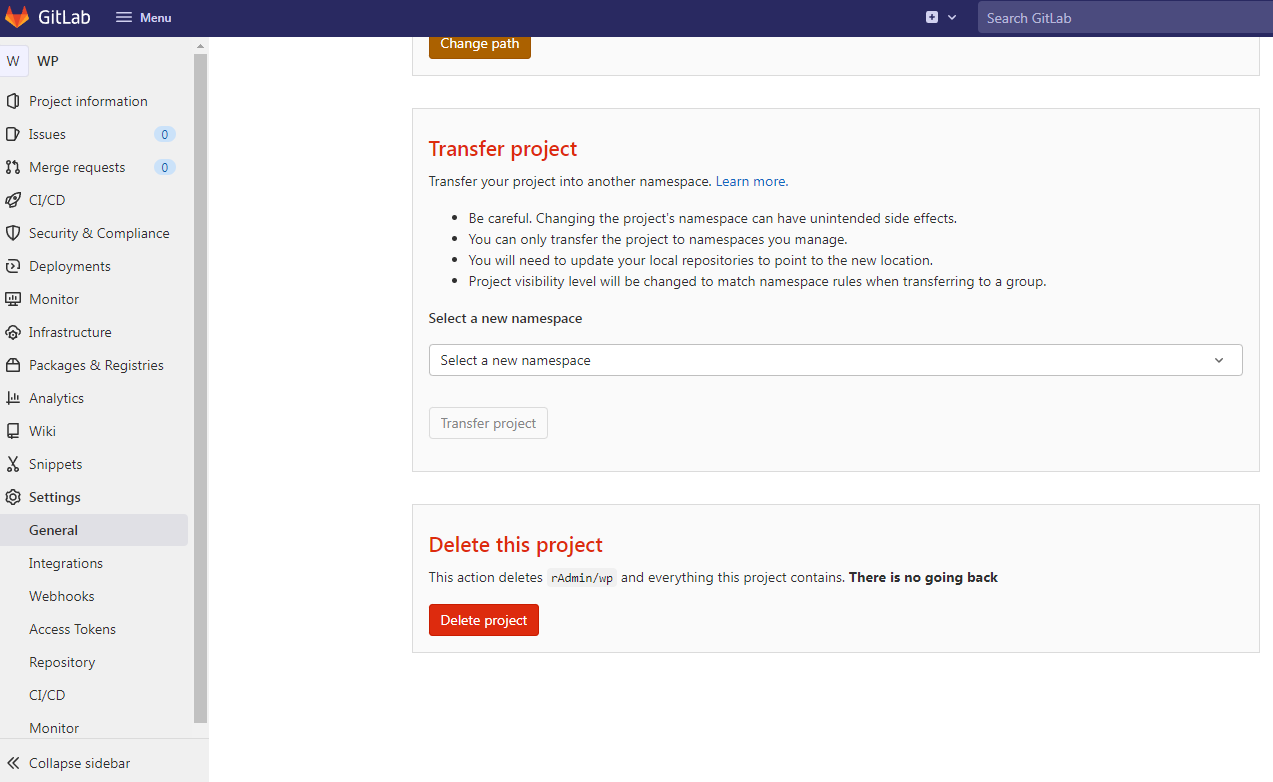
You can delete a project in the menu section. At the bottom of the section there will be an Advanced item, when you click on the button, a window with an extended set of settings will open, in which there will be a Delete this project item:
How to use GitLab
Before you start working with the service, you need to create an account. This procedure is very trivial:
Account is ready. Now you can go directly to getting to know GitLab.
How to create a project
A project in GitLab is a global workspace that will host a repository with files for your websites and applications. And also in it you can interact with colleagues and use other features of the service.
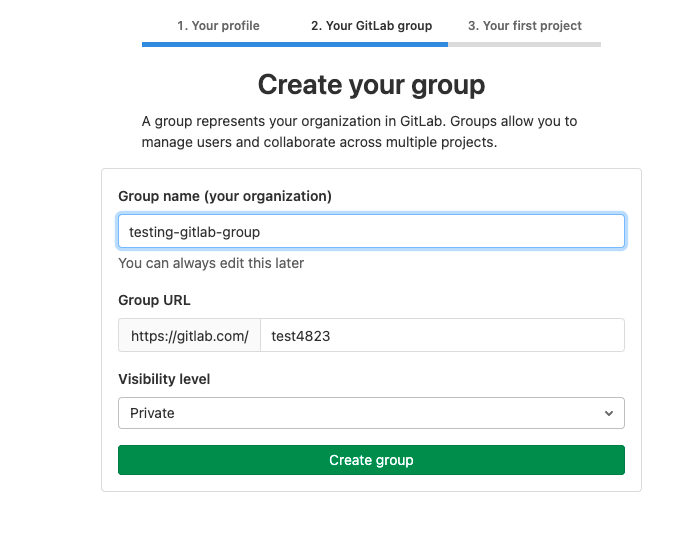
Therefore, the first time you log in with your account, GitLab will ask you to specify the type of activity, the presence or absence of a team, the name of the working group and the name of the project.
After creating a project, you can proceed directly to creating repositories, uploading programs to GitLab, etc.
How to create a repository
To use the repository, you need to create a new project:
Together with the project, a new git repository will be formed. Now you can interact with it, that is, upload files, make commits, create various branches for product development and merge them if necessary.
How to upload website/app files to GitLab
There are 3 ways.
First — use the GitLab web interface
You can also use the WebIDE built into GitLab to write code and create files for your application/website directly in the browser.
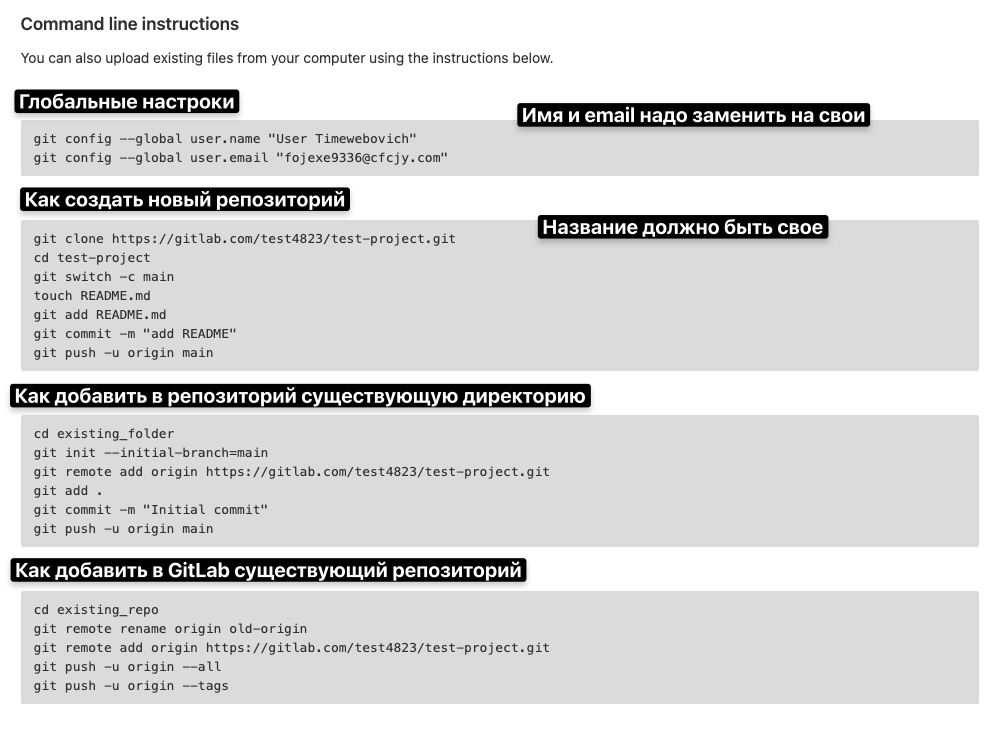
Second — use the command line
Everything is more complicated here, but GitLab itself has published a short and intelligible instruction for connecting to the service via the command line using the classic git client.
Third — use a third-party git client
There are applications like Tower and Sublime Merge that allow you to manage repositories, make commits and push changes to projects using a convenient graphical interface. You can connect to GitLab using one of these programs.
How to add an SSH key to connect to the repository
SSH keys can be used for authorization in GitLab and for managing repositories using the Secure Shell protocol. To do this:
How to work with branches
Branches are a tool for creating additional variations of an application/site that allow you to develop new features without affecting the main application available to users.
By default, only one branch is available in GitLab — master. But it is more often used not for development, but for publishing ready-made builds of the project, which are not scary to turn into a release for the masses.
Therefore, it is customary to create new branches to develop additional features, and only then merge them with the main one.
How to create branches
Branches are not a feature unique to GitLab. It’s part of git, so as with repositories, there are three ways to go:
Either method will allow you to create a new branch, to which you can then send commits and push pushes.
Merging branches
Merging (or merging) branches is a mechanism for merging two sets of features of one program, allowing you to transfer features from additional branches to the main development branch where the application resides. The result will also be seen by users, not just developers.
A branch merge request will appear on the GitLab site every time you make changes to the code of one or more branches.
It looks like this:
How to add users to the project
You can always involve outsiders in the development of your application/website:
If the selected person agrees to join, then your team will expand.
How to create bug reports
Git systems have tools to help notify developers about errors and discuss them with both users and colleagues.
We are talking about the Issues section. If there is a problem, please report it here. For this:
How to delete a project
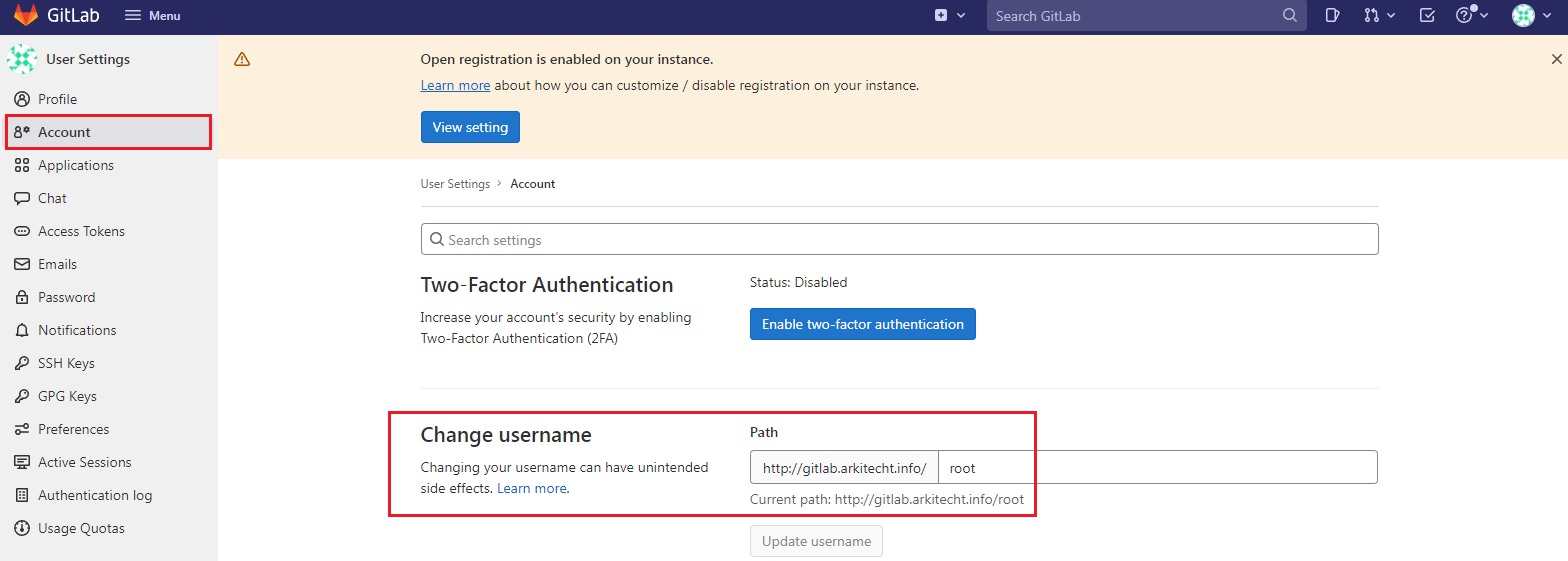
The default username root rarely changes, so it becomes one of the potential security vulnerabilities in our Gitlab. Let’s change the name of the root user!
# Gitlab basic setup
The best way to get started with Gitlab is with a few basic setup steps to make using Gitlab as comfortable and secure as possible.
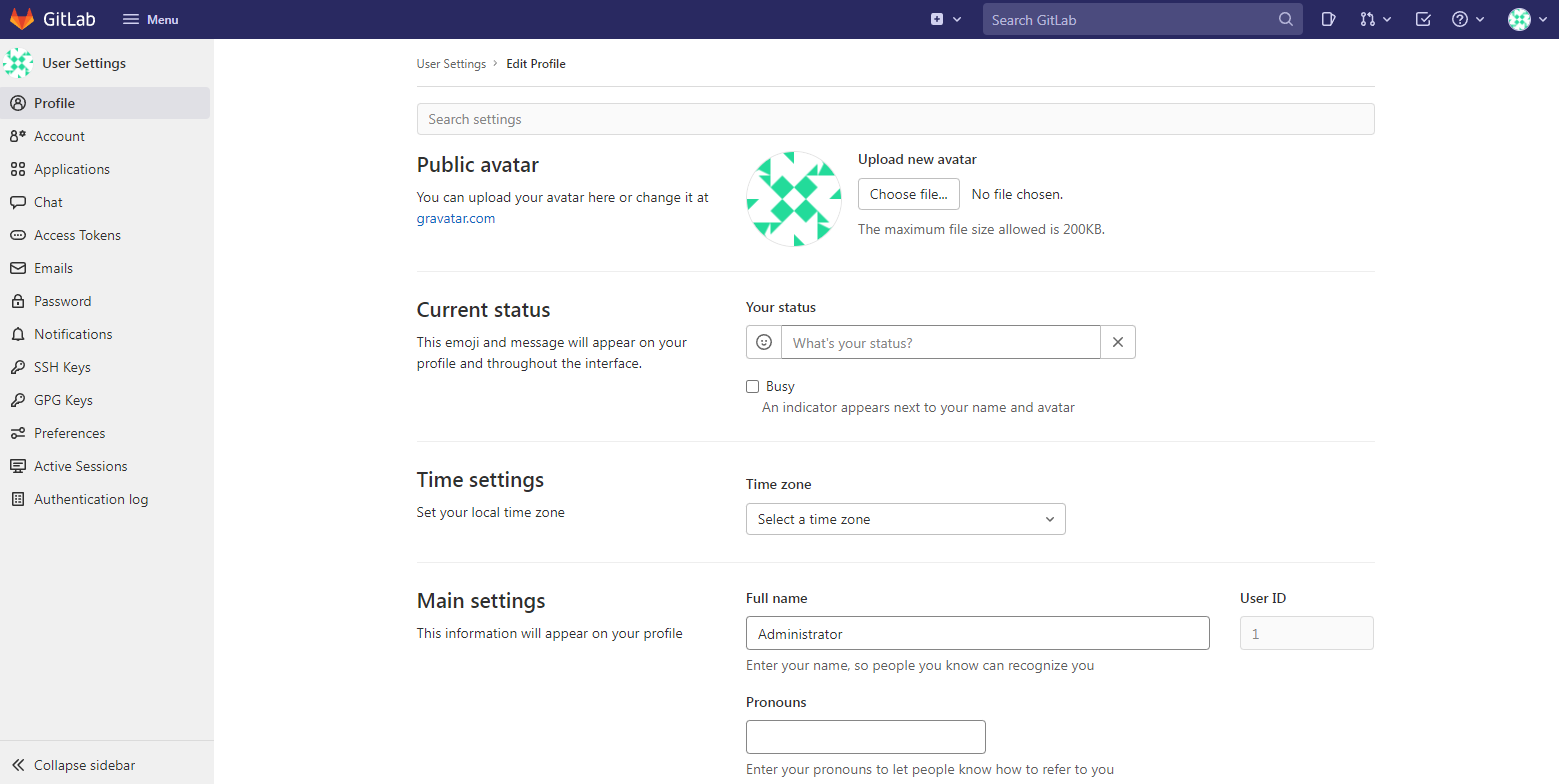
First, let’s update our account information. To do this, go to the «Edit Profile» profile settings section:
Here you can enter the current administrator name and email address for feedback:
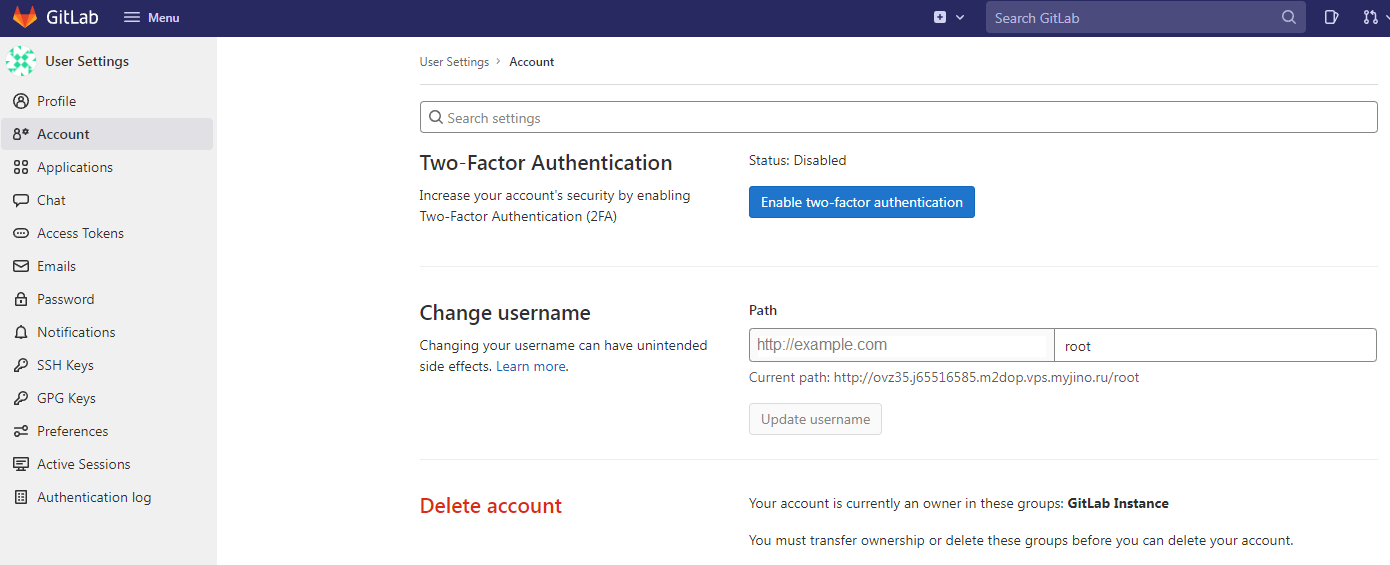
After that, we will change the name of the root user: the name root is used by default and therefore often becomes the object of hacker attacks. Go to the «Account» section and change the username, while maintaining root rights:
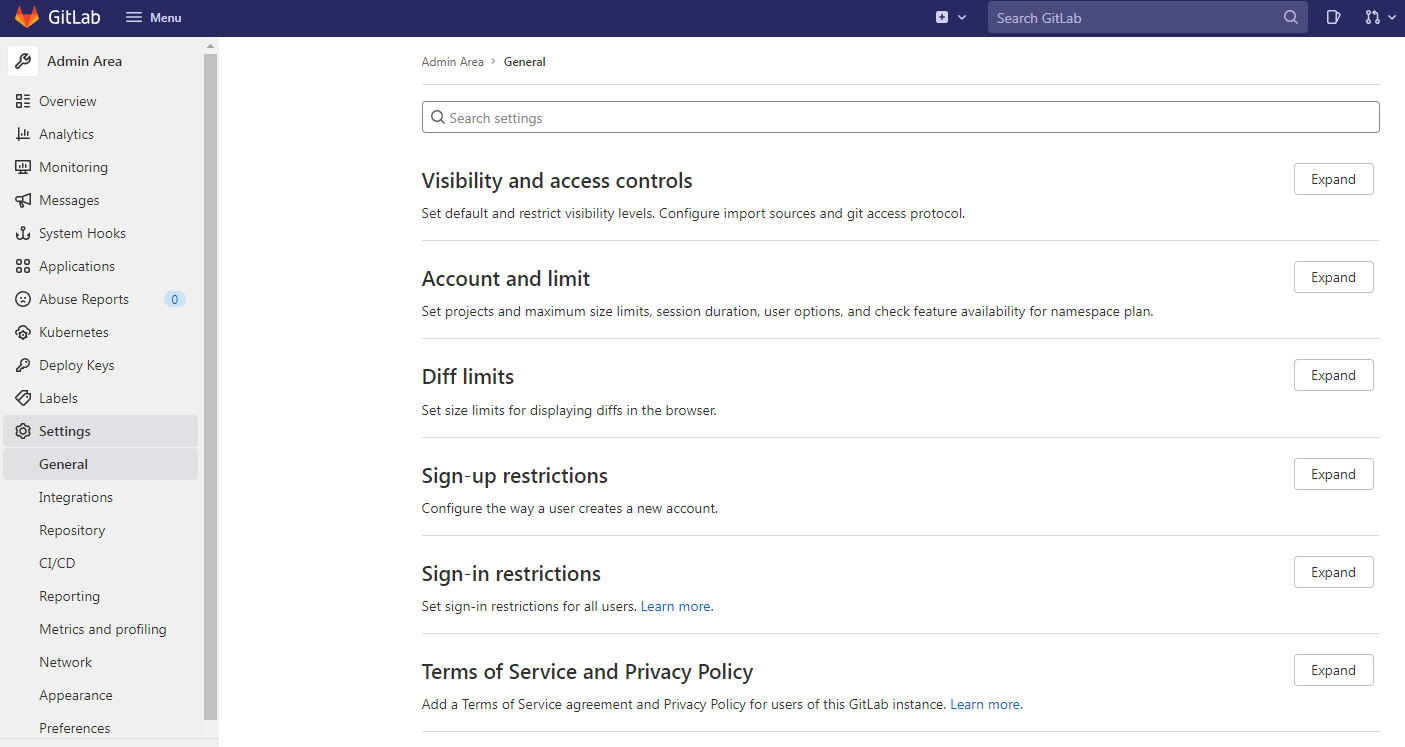
Gitlab provides a wide range of options for setting up access to the repository. They are presented in the admin area:
Here you can configure user access both to individual projects and to the repository as a whole, set restrictions or completely prohibit the registration of new users, configure access restrictions to the repository for a specific IP or domain:
Gitlab CE is now ready to start a new project.
# Setting up Gitlab CE and first launch
Regardless of the method you used to install Gitlab, further setup and work with it is the same.
First you need to set up access to Gitlab. To do this, open the configuration file:
Go to line:
In it, we indicate the domain name associated with our server. For VPS located on Gino, you can specify the technical address of the server. This is the only change that needs to be made in the config file. Close it and run Gitlab config update:
When the config is updated, you can check if Gitlab works. To do this, open the browser and go to the URL specified in the configuration file. If everything works correctly, we will see the Gitlab CE start page.
# Login to Gitlab CE
The first login to Gitlab must be done as an administrator (root user). If during installation the installer did not ask you to set a password for it, we will do it manually:
This command will launch gitlab-rake, a tool for running tasks in Gitlab. The job specified here allows you to set a user password. We will specify root as the username and set a new password for it.
Instead of conclusion
That’s all. I’ve covered the basics of GitLab and intentionally left out the analytics tools, Kubernetes integration, and advanced features, trying to focus on the most important GitLab and git concepts. This is what you need to get started, whether you have used other repository management systems before or not.
