
By the end of this article, you will have learned how to install and Use FirewallD on Debian 11. FirewallD is one of the Linux firewalls but it has a special feature called zones. Zones are used to control traffic entering your system. Firewalld uses firewall-cmd component to manage all the firewall rules, i.e. adding and removing the rules.
Assuming you have Debian 11 up and running with root privileges, continue with the article to install and Use FirewallD on Debian 11.
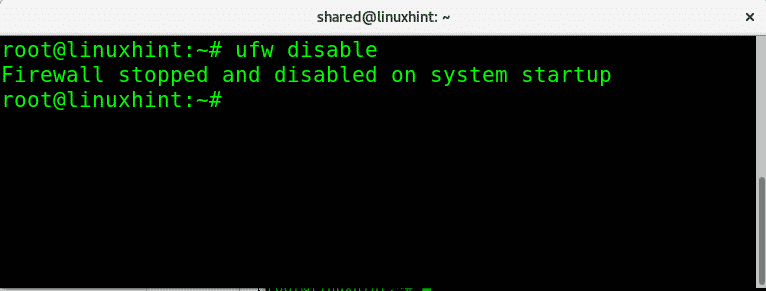
If you already have UFW installed, disable it.
sudo ufw disableNext, update system packages:
sudo apt updateNow install firewalld from the apt repository
sudo apt -y install firewalldConfirm if firewalld has been installed by checking the version
sudo firewall-cmd --versionCheck the firewall status
$ systemctl status firewalld
● firewalld.service - firewalld - dynamic firewall daemon Loaded: loaded (/lib/systemd/system/firewalld.service; enabled; vendor pre> Active: active (running) since Fri 2022-07-15 17:50:18 EAT; 1min 44s ago Docs: man:firewalld(1) Main PID: 3531 (firewalld) Tasks: 2 (limit: 3498) Memory: 25.6M CPU: 2.270s CGroup: /system.slice/firewalld.service └─3531 /usr/bin/python3 /usr/sbin/firewalld --nofork --nopid
Jul 15 17:50:01 itnixpro systemd[1]: Starting firewalld - dynamic firewall daem>
Jul 15 17:50:18 itnixpro systemd[1]: Started firewalld - dynamic firewall daemo>
- Enable firewalld service
- How To Setup a Firewall with UFW on Debian 11
- How to Enable UFW on Debian 11
- How to Configure All UFW Incoming and Outgoing Connections on Debian 11
- How to Disable the Firewall on Debian 11
- Bottom Line
- About the author
- Installing ufw:
- Brief introduction to Firewalls policies:
- Applying restrictive and permissive policies with ufw:
- Related articles
- About the author
- Introduction
- Prerequisites
- Update Operating System
- How to Enable, Install or Remove UFW
- How to Check UFW Status
- How to set UFW Default Policies
- How to view UFW Application Profiles
- How to Enable IPv6 on UFW
- How to Allow UFW SSH Connections
- How to Enable UFW Ports
- Allow HTTP Port 80
- Allow HTTPS Port 443
- UFW Allow Port Ranges
- How to Allow Remote Connections on UFW
- UFW Allow Specific IP Address
- UFW Allow Specific IP Address on Specific Port
- Allow Subnet Connections to a Specified Port
- Allow Specific Network Interface
- How to Deny Remote Connections on UFW
- How to Delete UFW Rules
- How to Access and View UFW Logs
- How to Test UFW Rules
- How to Reset UFW Rules
- How to find All Open Ports (Security Check)
- Conclusion
- What Firewalls can be Installed on Debian?
- How to Enable NGFW Capabilities on Debian Firewall?
- What are the Requirements to Install a Firewall on Debian 10/11 with UFW?
- What are the Steps to Install a Firewall with UFW on Debian 10/11?
- 1. UFW Installation
- 2. UFW Uninstallation
- 3. Enable UFW
- 4. Checking the Status and Rules of the UFW
- 5. Configuring UFW Default Policies
- 6. Managing UFW Application Profiles
- 7. Enabling IPv6
- 8. Allow SSH Connections
- Limiting SSH connections
- 9. Allowing Additional Connections
- Open FTP Service Port (20:21/TCP)
- Open MySQL Service Port (3306/TCP)
- Open HTTPS Service Port (443)
- Open HTTP Service Port (80)
- Open DNS Service Port (53)
- Open WireGuard Service Port(51820/UDP)
- Open OpenVPN Service Port (1194/UDP)
- Open Email Service Ports
- 10. Allowing Port Ranges
- 11. Allow Connections From an Only Trusted IP Address
- 12. Allow Connections From a Trusted IP Address on Specific port
- 13. Allow Connections From Trusted Subnets
- 14. Allow Connections From a Specific Interface
- 15. Denying Connections
- 16. Denying ICMP/Ping Request
- 17. Deleting Rules
- 1. Rule Number
- 2. Specifying the Actual Rule
- 18. UFW Disabling or Resetting
- 19. UFW Logging
- 20. Testing UFW Rules
- Using Firewalld on Debian 11
- List all zones
- Opening a port
- Display all open ports
- List rules configured
- List services that can be enabled/disabled
- Enable service
- Create a new zone
- Enable service/port on a specific zone
- Add an interface to a zone
- Allow access to a port from specific subnet/IP
- List rich rules
- Configure Port forwarding
- Removing a port or service
- Does Debian Need Firewall?
- Is Debian Secure by Default?
- Conclusion
Enable firewalld service
If you want firewalld to run at system boot, enable this using the command:
sudo systemctl enable firewalldDebian, commonly known as Debian GNU/Linux, is one of the oldest Linux-based operating systems. It is developed by the community-supported Debian Project, which was founded by Ian Murdock in 1993. Many other distributions, including Ubuntu, are based on Debian. Debian releases a new stable branch every two years. It will be supported for around three years, including updates for major security and usability issues. A total of 5 years of security support is available for each Debian release.
To defend Debian servers from cyber threats, it is common to configure ‘ufw’ as a host-based firewall. The Debian server can also be configured as a firewalling and routing platform for networks, especially small business (SMB) and home networks, with the help of ‘ufw’.
In this article, we’ll explain how to install The Uncomplicated Firewall (ufw) on a Debian 10/11 server and use the ‘Zenarmor’ to enable next-generation firewall features like content and application filtering.
In this guide, we will install and set up the Firewall with UFW on Debian 11.
The UFW has been available by default in Debian since 10. In Debian 11 you can install it through a simple command:

How To Setup a Firewall with UFW on Debian 11
etcdefaultufw
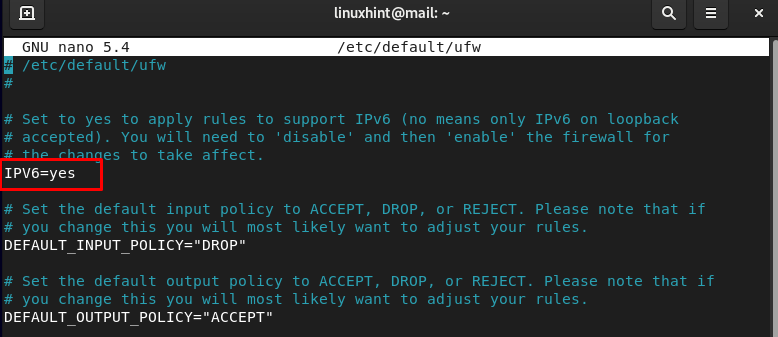
In the file locate the IPV6 and ensure the value is yes. Save the file and UFW is enabled for both IPV6 and IPV4.
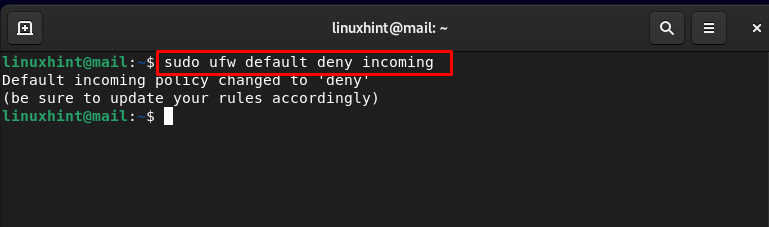
By default, the UFW is set to deny all the incoming connections and allow all the outgoing connections. To enable the incoming connection first you need to create rules that allow the incoming SSH or HTTP connections.
How to Enable UFW on Debian 11
The firewall is now active on your system, run the verbose command to check all the rules you have set for your system:

How to Configure All UFW Incoming and Outgoing Connections on Debian 11
ufw default deny incoming
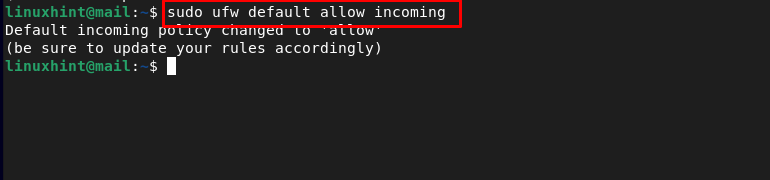
To allow all the incoming connections use the allow options:
ufw default allow incoming
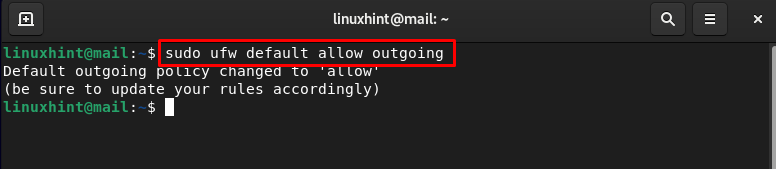
ufw default allow outgoing
ufw default deny outgoing

The firewall is now configured on Debian 11, allowing only those connections that your server needs and limiting unnecessary connections.
How to Disable the Firewall on Debian 11

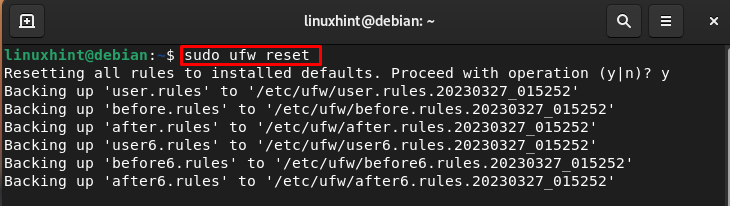
You can use the reset command to start over again in the ufw:
Bottom Line
UFW is a powerful firewall tool also known as an uncomplicated firewall to improve the security of Linux systems. The main purpose of the UFW is to keep a check on the network connections. It keeps track of all the incoming and outgoing connections and only those connections can access the network that is allowed by the firewall. In this detailed guide, we have provided the steps to install and set up the firewall with UFW on Debian 11.
About the author
Note: for this tutorial the network interface enp2s0 and IP address 192.168.0.2/7 were used as example, replace them for the correct ones.
Installing ufw:
To install ufw on Debian run:
To enable UFW run:
To disable UFW run:
If you want to carry out a fast check on your firewall status run:
Status: informs if the firewall is active.
To: shows the port or service
Action: shows the policy
From: shows the possible traffic sources.
We can also check the firewall status with verbosity by running:
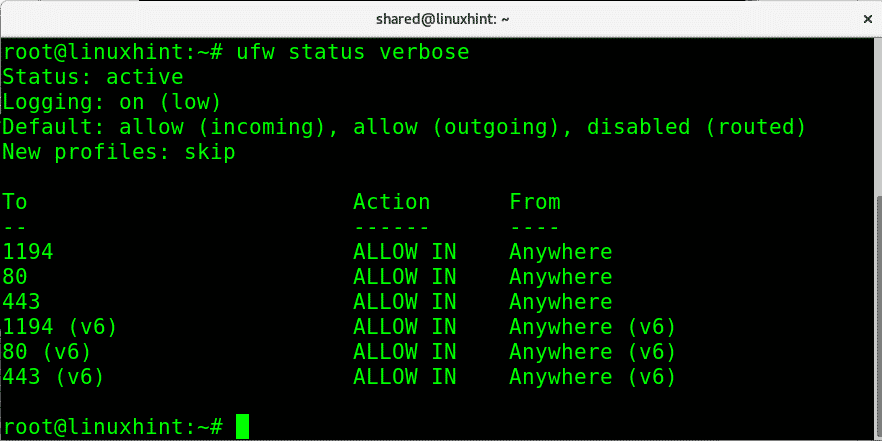
This second command to see the firewall status will also display the default policies and traffic direction.
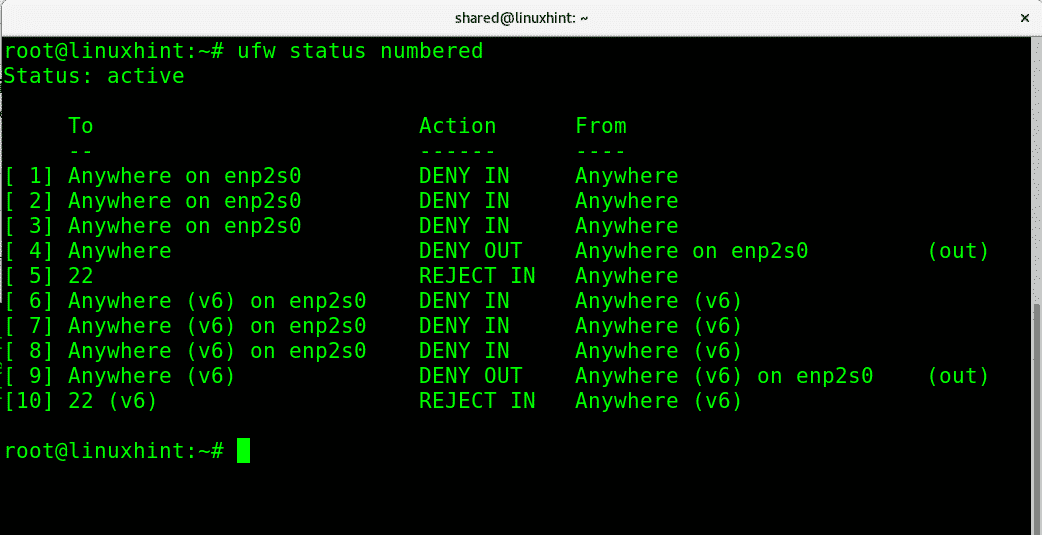
Additionally to informative screens with “ufw status” or “ufw status verbose” we can print all rules numbered if it helps to manage them as you’ll see later. To get a numbered list of your firewall rules run:
At any stage we can reset UFW settings to the default configuration by running:

When resetting ufw rules it will request confirmation. Press Y to confirm.
Brief introduction to Firewalls policies:
Applying restrictive and permissive policies with ufw:
In order to restrict all incoming traffic by default using ufw run:
ufw default deny incoming
To do the opposite allowing all incoming traffic run:
ufw default allow incoming
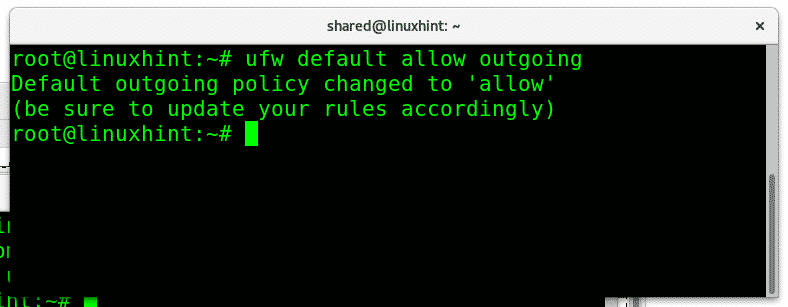
To allow all outgoing traffic we just replace “deny” for “allow”, to allow outgoing traffic unconditionally run:
ufw= calls the program
deny= defines the policy
in= incoming traffic
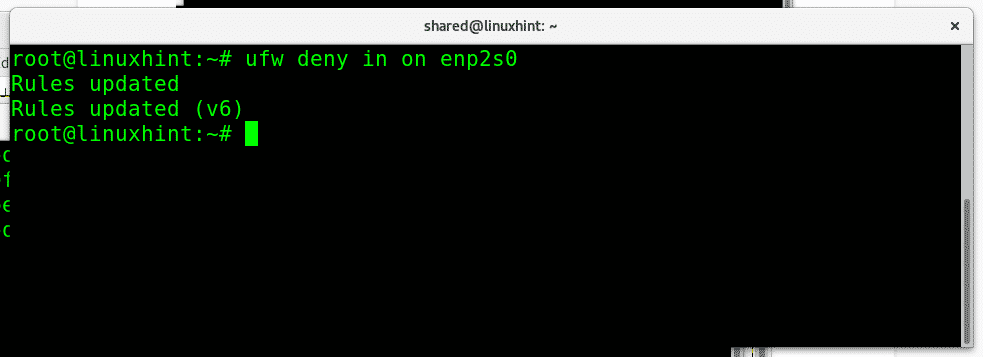
enp2s0= my ethernet interface
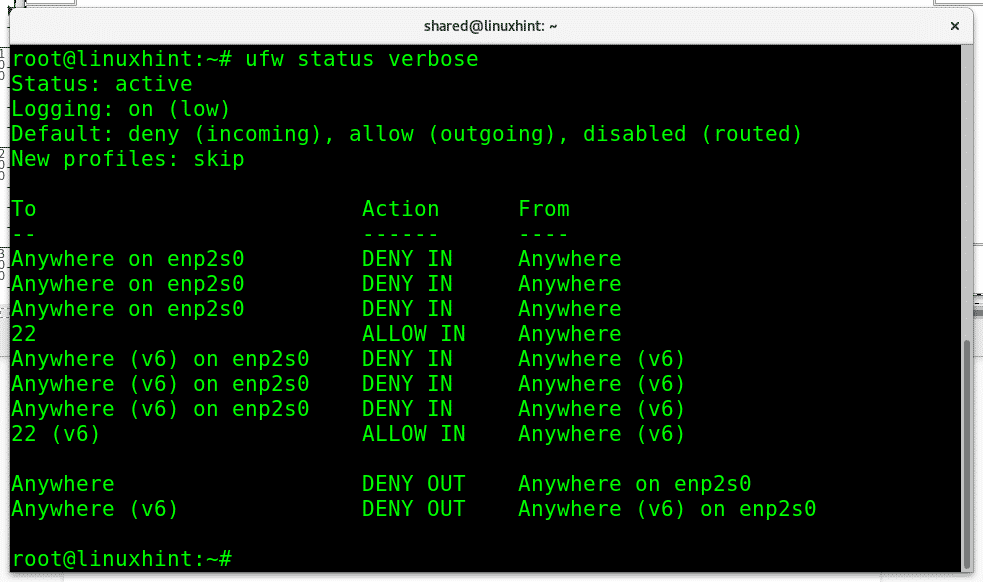
Now, I will apply a default restrictive policy for incoming traffic and then allow only ports 80 and 22:
ufw default deny incoming
ufw allow
ufw allow http
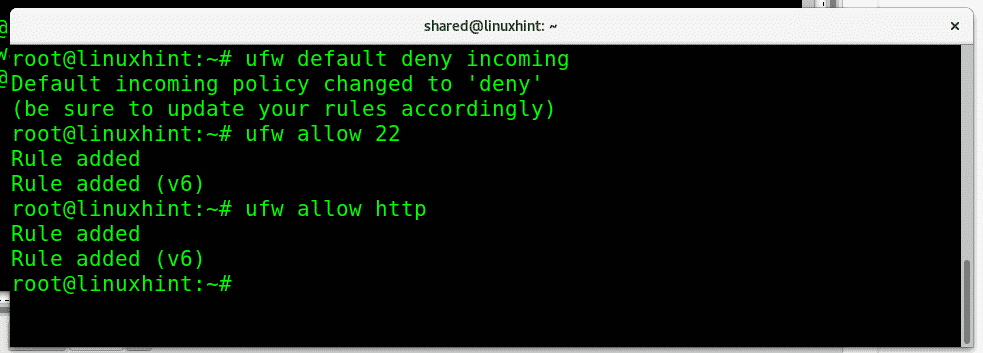
The command “ufw status verbose” will show the result:
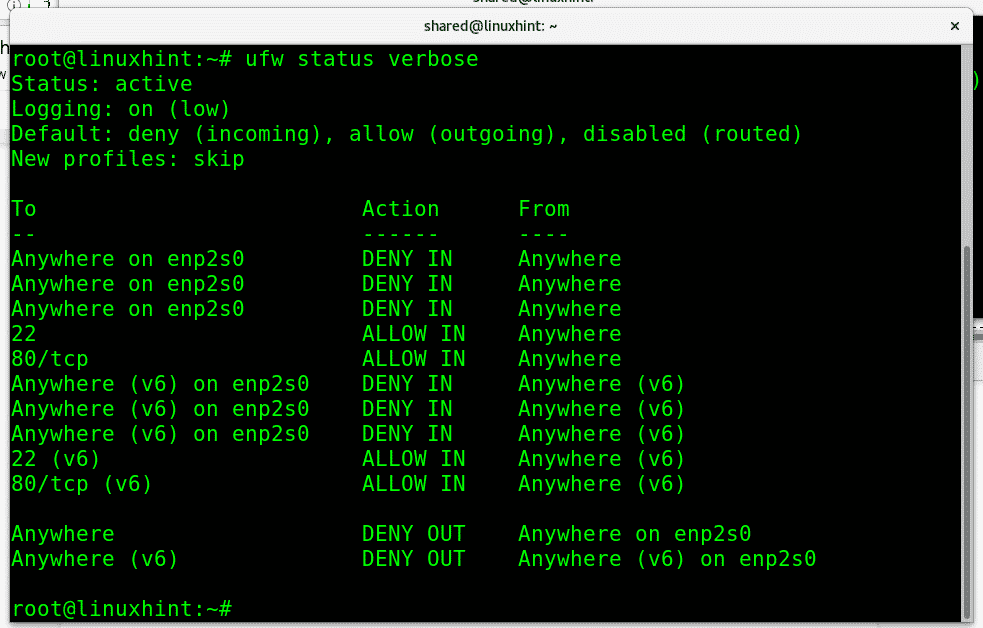
All incoming traffic is denied while the two services (22 and http) we allowed are available.
If we want to remove a specific rule, we can do it with the parameter “delete”. To remove our last rule allowing incoming traffic to port http run:
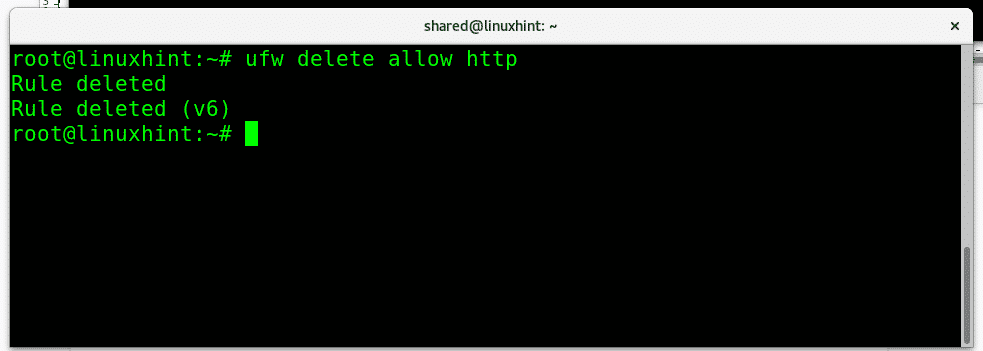
The port 80 doesn’t appear anymore as an exception, being the port 22 the only one.
You can also delete a rule by just invoking it’s numerical ID provided by the command “ufw status numbered” mentioned before, in this case I will remove the DENY policy on incoming traffic to the ethernet card enp2s0:
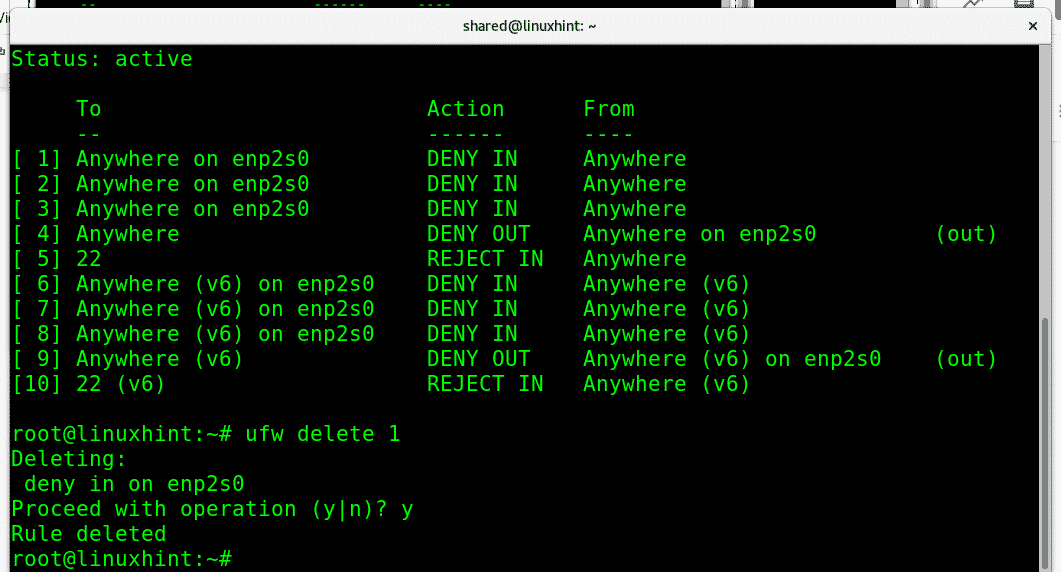
It will ask for confirmation and will proceed if confirmed.
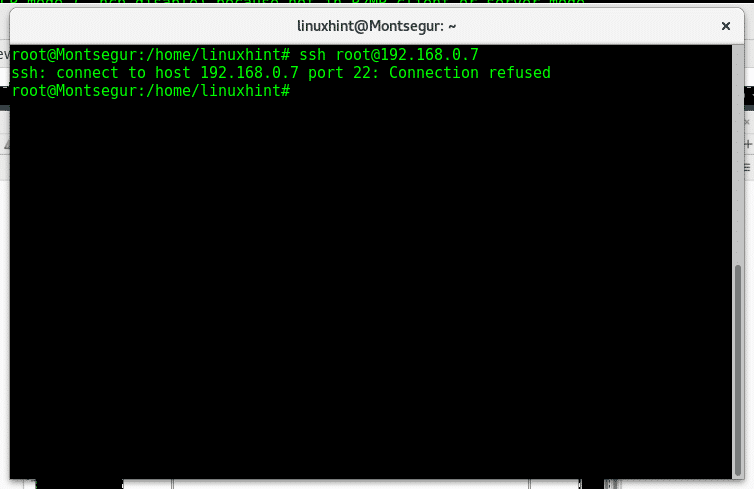
Additionally to DENY we can use the parameter REJECT which will inform the other side the connection was refused, to REJECT connections to ssh we can run:
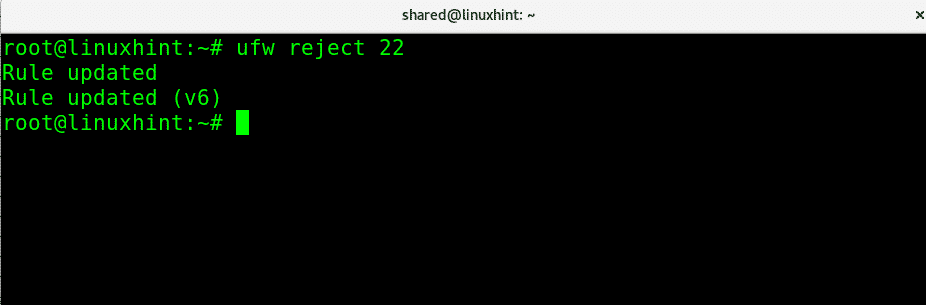
Then, if someone tries to access our port 22 he will be notified the connection was refused as in the image below.
At any stage we can check the added rules over the default configuration by running:
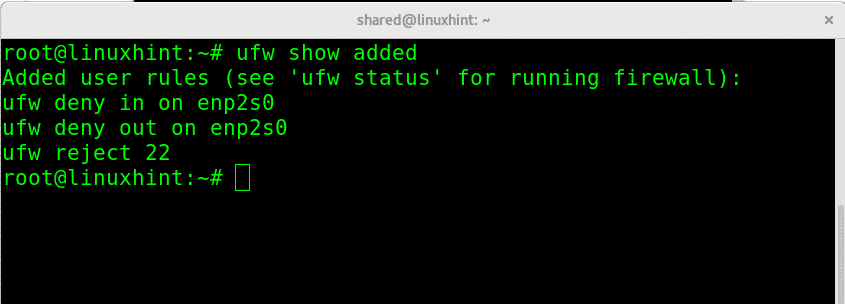
ufw deny
ufw allow from 192.168.0.2
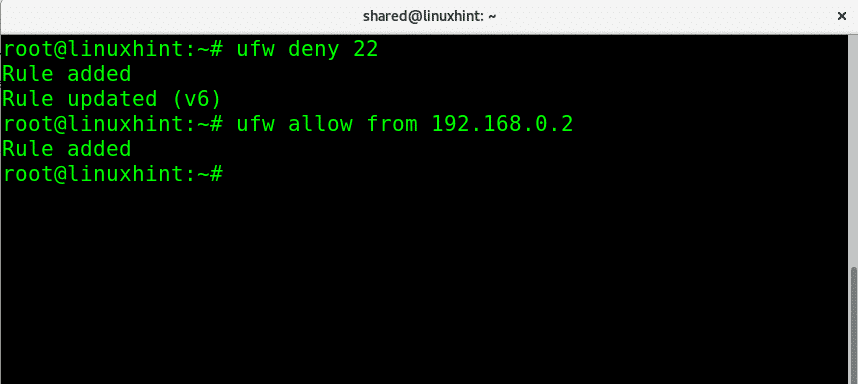
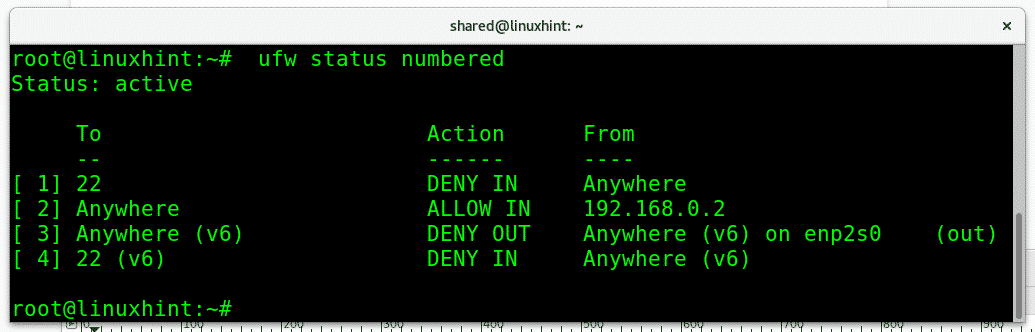
Now if we check ufw status you’ll see all incoming traffic to port 22 is denied (rule 1) while allowed for the specified IP (rule 2)
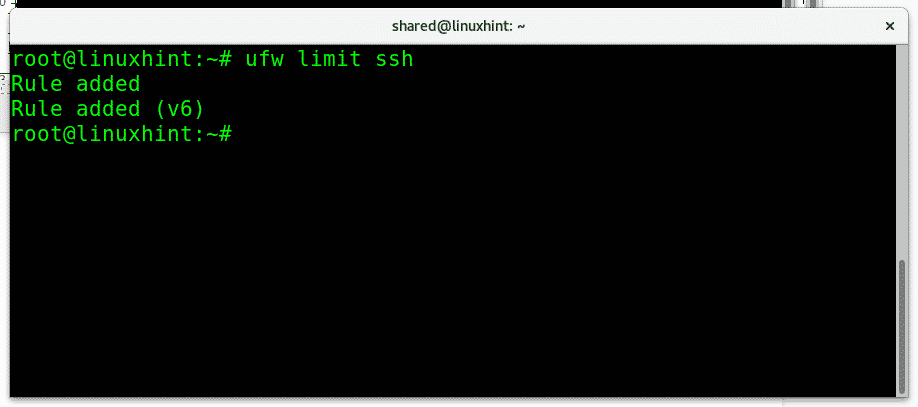
We can limit the login attempts to prevent brute force attacks by setting a limit running:
ufw limit ssh
To end this tutorial and learn to appreciate ufw’s generosity, let’s remember the way in which we could deny all traffic except for a single IP using iptables:
iptables INPUT 192.168.0.2 ACCEPT
iptables OUTPUT 192.168.0.2 ACCEPT
iptables INPUT DROP
iptables OUTPUT DROP
The same can be done with just 3 shorter and simplest lines using ufw:
ufw default deny incoming
ufw default deny outgoing
ufw allow from 192.168.0.2
Related articles
Iptables for beginners
Configure Snort IDS and Create Rules
About the author
Introduction
Before we begin talking about how to install UFW Firewall on Debian 11 Bullseye, let’s briefly understand — What is UFW Firewall?
Prerequisites
- Debian 11 Bullseye is the recommended operating system.
- A user account with root access or sudo privileges.
The installation process in the tutorial uses the terminal, which can be found under Activities > Show Applications > Terminal.

Update Operating System
Update your Debian system to ensure that all existing packages are up-to-date:
sudo apt update && sudo apt upgrade -yAssuming you have sudo status, the tutorial will use the sudo command.
To check your account’s sudo status:
sudo whoamiExample output displaying sudo status:
[[email protected]~]$ sudo whoami
root
How to Enable, Install or Remove UFW
UFW is not installed by default on Debian distributions, but it is available through its repository. The command below should be used to install UFW.
sudo apt install ufw -yAfter installation, activate the service to get started.
sudo systemctl enable ufw --nowNext, ensure UFW is active and error-free by checking its status.
sudo systemctl status ufwThe next step in configuring a UFW firewall is to enable the firewall itself.
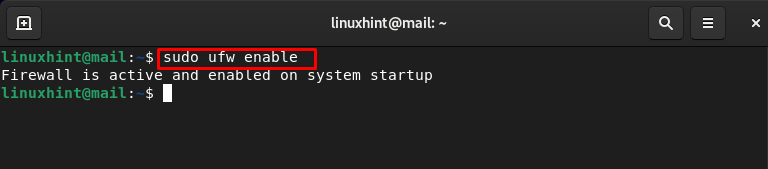
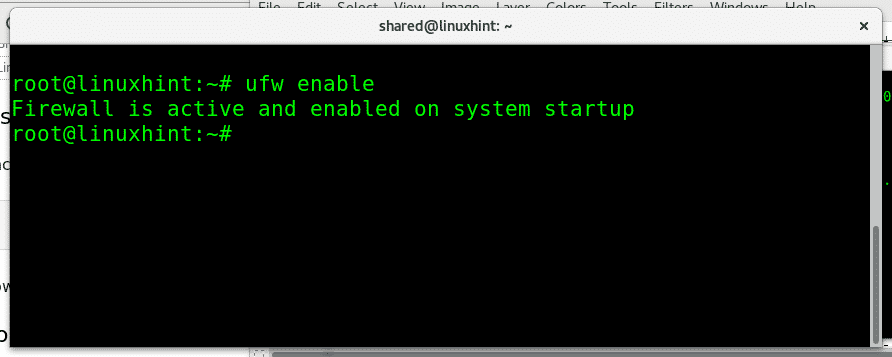
sudo ufw enableOutput
Firewall is active and enabled on system startupsudo ufw disablesudo apt remove ufw --purgeRemove UFW only if you have a reliable alternative or are familiar with IPTables, especially if you are managing a server environment that is accessible to the public. This will end badly.
How to Check UFW Status
sudo ufw status verboseThe verbose flag was used in the example above, but listing the rules in numerical order is also a viable option. This makes it much easier to delete rules afterwards.
sudo ufw status numberedHow to set UFW Default Policies
The directory /etc/default/ufw contains the default UFW firewall policies.
To deny all incoming connections:
sudo ufw default deny incomingTo allow all outgoing connections:
sudo ufw default allow outgoingWhen activated, these are already set as the default rules, but you can adjust them according to your needs using the same principle.
sudo ufw default deny outgoingHow to view UFW Application Profiles
sudo ufw app listLearning more about the service listed in the UFW application list is a useful aspect of the application profiles.
sudo ufw app info qBittorrentThe application’s general description and the port it uses are printed out, as mentioned previously. This is a useful function to have when you are investigating open ports and are not sure what kinds of applications they relate to or what the applications do.
How to Enable IPv6 on UFW
Open the UFW default firewall file.
sudo nano /etc/default/ufwIf not set, change the next line to yes
IPV6=yesPress CTRL+O to save the updated modifications to the file, and CTRL+X to close it.
To make the modifications effective, restart the UFW firewall service.
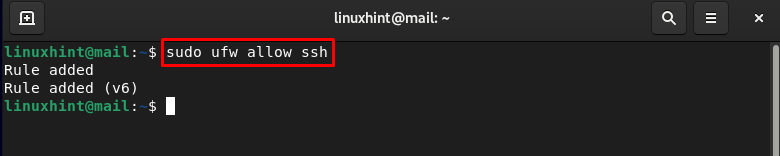
sudo systemctl restart ufwHow to Allow UFW SSH Connections
SSH connections are prohibited by UFW by default. You would have realized you were locked out if you had already enabled the firewall remotely.
Enable the SSH application profile first.
sudo ufw allow sshsudo ufw allow 3541/tcpsudo ufw deny ssh/tcpOpen a new port and close the old one if you need to change the custom SSH port; this tutorial uses port 3541 as an example.
sudo ufw deny 3541/tcp How to Enable UFW Ports
With UFW, you can configure the firewall to allow connections to specified ports that are allocated for a particular application. You can customize the application with your own rules. Setting up a web server that listens on port 80 (HTTP) and 443 (HTTPS) by default is an excellent demonstration of this rule.
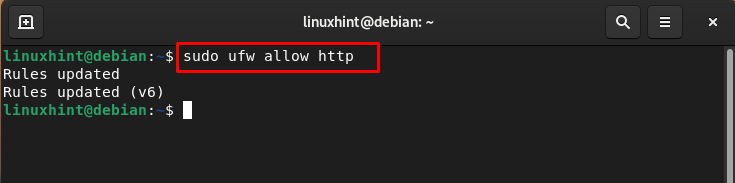
Allow HTTP Port 80
Allow by application profile:
sudo ufw allow 'Nginx HTTP'Allow by service name:
sudo ufw allow httpAllow by port number:
sudo ufw allow 80/tcpAllow HTTPS Port 443
Allow by application profile:
sudo ufw allow 'Nginx HTTPS'Allow by service name:
sudo ufw allow httpsAllow by port number:
sudo ufw allow 443/tcpsudo ufw allow 'Nginx Full'UFW Allow Port Ranges
UFW can grant access to port ranges. You must specify the port protocol before opening a port range.
Allow port range with TCP & UDP:
sudo ufw allow 6500:6800/tcp
sudo ufw allow 6500:6800/udp
Conversely, you can allow several ports in a single hit, however, allow ranging might be better to use as described above.
sudo ufw allow 6500:6509/tcp
sudo ufw allow 6500:6509/udp
How to Allow Remote Connections on UFW
UFW Allow Specific IP Address
For instance, to permit particular IP addresses, you are on an internal network and need the systems to connect together, use the below syntax.
sudo ufw allow from 192.168.55.131UFW Allow Specific IP Address on Specific Port
sudo ufw allow from 192.168.55.131 to any port 3900Allow Subnet Connections to a Specified Port
sudo ufw allow from 192.168.1.0/24 to any port 3900All IP addresses between 192.168.1.1 and 192.168.1.254 will be able to connect to port 3900 as a result.
Allow Specific Network Interface
sudo ufw allow in on eth2 to any port 3900How to Deny Remote Connections on UFW
When UFW is installed, all incoming connections are set to “deny” in accordance with its default configuration policy. Unless you add a rule to enable the connections to come through, this rejects all incoming traffic.
sudo ufw deny from 203.13.56.121sudo ufw deny from 203.13.56.121/24sudo ufw deny from 203.13.56.121/24 to any port 80
sudo ufw deny from 203.13.56.121/24 to any port 443How to Delete UFW Rules
You need to remove the rules you have made and denied access to, since you no longer require them. There are two ways to accomplish this.
sudo ufw status numberedsudo ufw delete 3How to Access and View UFW Logs
Most desktop systems are acceptable with UFW logging being set to low, which is the default setting. However, servers might need more extensive logging.
If you want to set UFW logging to low (Default):
sudo ufw logging lowIf you want to set UFW logging to the medium:
sudo ufw logging mediumIf you want to set UFW logging to high:
sudo ufw logging highThe final option is to disable logging entirely, be sure you are comfortable with this and will not require log checking.
sudo ufw logging offYou can view UFW logs in their default location of /var/log/ufw.log.
The tail command is a simple and quick way to view live logs.
tail -f /var/log/ufw.logAlternatively, you can use the -n <number flags> to print out numerous recent lines.
tail /var/log/ufw.log -n 30The last 30 lines of the log will be printed out as a result. You can fine-tune the results even further with GREP and other sorting commands.
How to Test UFW Rules
When experimenting with the firewall settings, highly critical systems can add the -dry-run flag. This enables viewing an example of the potential modifications without actually processing them.
sudo ufw --dry-run enablesudo ufw --dry-run disableHow to Reset UFW Rules
sudo ufw resetsudo ufw statusStatus: inactive You must now re-enable the firewall and begin the process of adding rules after the UFW firewall was reset. If feasible, use the reset command sparingly.
How to find All Open Ports (Security Check)
Most systems are unaware of the possibility of having ports open. It is essential to keep an eye on what is going on behind the scenes in the age where every IP address on the Internet is inspected every day.
Installing Nmap and then utilizing this well-known application to identify the open ports is the best course of action.
sudo apt install nmap -yNext, identify the system’s internal IP address.
hostname -I192.168.50.45Now run the Nmap command with the server’s IP address.
sudo nmap 192.168.50.45From this point, you can close or restrict the open ports using the custom UFW rules you have learned to create throughout the lesson.
Conclusion
You now know how to set up and configure UFW for desktop or server on Debian 11 Bullseye.
What Firewalls can be Installed on Debian?
Uncomplicated Firewall(UFW): Uncomplicated Firewall (UFW) is a simple-to-use application for managing a netfilter firewall. It has a command-line interface with a few simple commands and utilizes iptables for configuration.
FirewalID: Firewalld is a dynamically managed firewall that supports security zones, which define the level of trust for network interfaces. It supports IPv4/v6 firewall settings, as well as IP sets and ethernet bridges. It also provides an interface through which services can directly add firewall rules.
How to Enable NGFW Capabilities on Debian Firewall?
According to Gartner, an NGF, is:
Thankfully, you can simply implement next-generation firewall capabilities, such as web content and application filtering, by installing and configuring Zenarmor on your Debian server. Zenarmor provides cutting-edge, next-generation firewall features that are not currently available in open-source firewalls. Zenarmor is based on a very lightweight and powerful application layer/L7 packet inspection technology. It provides free access to a wide range of enterprise-grade network security functions.
The primary capabilities of the Zenarmor are listed below:
Time scheduled policies is an extremely useful feature, particularly for managing internet bandwidth.
Cloud Threat Intelligence
Rich reporting and analytics which provides network visibility.
What are the Requirements to Install a Firewall on Debian 10/11 with UFW?
- A
Debian 10 BusterorDebian 11 BullseyeServer and - Privileged access to your Debian system as root or via the
sudocommand. The best practice is to run administrative commands as asudouser.
What are the Steps to Install a Firewall with UFW on Debian 10/11?
You can easily set up a host-based firewall by configuring the UFW on your Debian server. UFW installation and configuration steps are given below:
1. UFW Installation
Update your local package index by running the next command:
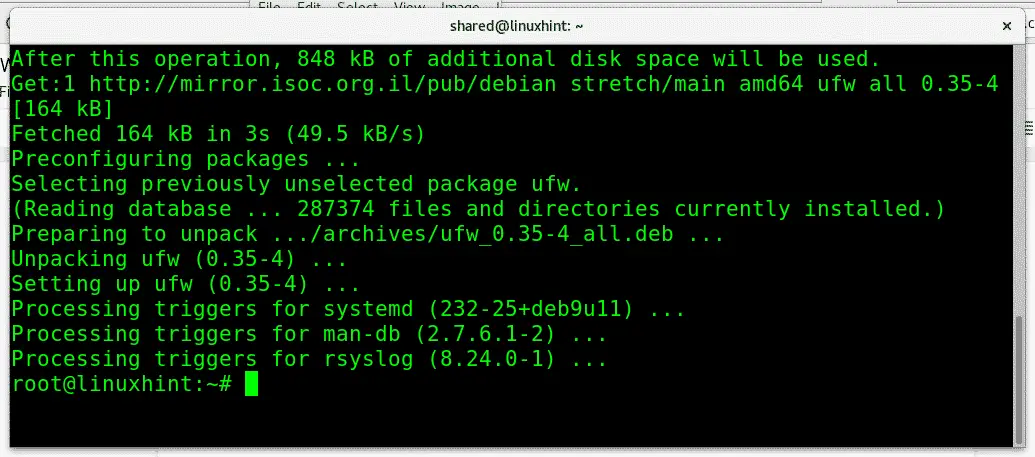
sudo apt update && sudo apt upgrade -ysudo apt-get install ufw -yThe output should look something like this:
   to remove and

   additional disk space will be used
2. UFW Uninstallation
sudo apt autoremove ufw --purge -y
The output should look something like this:
Building dependency tree

0 upgraded, 0 newly installed, 1 to remove and 0 not upgraded.
After this operation, 852 kB disk space will be freed.
Skip stopping firewall: ufw (not enabled)
It is not recommended to remove the UFW from a server that is accessible from the Internet if you don’t know how to use iptables or have a reasonable alternative.
3. Enable UFW
By default, ufw is disabled on Debian 10/11 server.
sudo ufw allow proto tcp from any to any port 22
The output should look something like this:
Rule added (v6)
The ssh port will be open after the firewall is enabled.
Firewall is active and enabled on system startup
Please beware that to be able to log in to your server you must explicitly allow incoming SSH connections before enabling the UFW firewall.
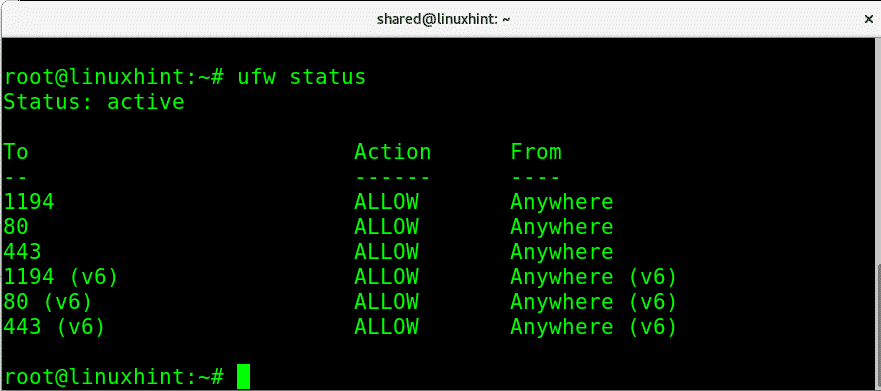
You may verify the status of UFW to make sure it is active without any error by running the next command:
This will display the output similar to given below:
To Action From
-- ------ ----
22/tcp ALLOW Anywhere
22/tcp (v6) ALLOW Anywhere (v6)
4. Checking the Status and Rules of the UFW
To view the ufw rules with their sequence numbers, you may run the next command:
The output should look something like this::
To Action From
-- ------ ----
5. Configuring UFW Default Policies
the /etc/default/ufw file is used to store the UFW default policies. You may change the default policies by running the next command:
sudo ufw default deny outgoing
In such cases, you need to maintain all permitted outgoing connections by defining the related allow rules.
6. Managing UFW Application Profiles
The application profile, which includes the service description and UFW settings, is created in the /etc/ufw/applications.d directory during the installation of an application package using the ‘apt’ command.
The syntax for application profiles is simple, using the .INI file format:
Depending on the applications installed on your system, the output will look something like this:
sudo ufw app info '<name>'
where <name> is one of the apps listed by the app list command.
sudo ufw app info 'WWW Full'
And, the output may be similar to this:
Profile: WWW Full
Title: Web Server (HTTP,HTTPS)
Description: Web Server (HTTP,HTTPS)
This is a useful feature when you’re looking into open ports on your server and aren’t sure what applications they belong to or what the application does.
sudo ufw app update '<name>'
If you enter ‘all’ for the name, all profiles will be updated.
7. Enabling IPv6
- Edit the
/etc/default/ufwfile with your favorite program such as vi or nano. - Find and set the related line to
IPv6=yes. - Save and close the file.
- To enable IPv6 by activating the changes on the
/etc/default/ufwfile run the following command:
8. Allow SSH Connections
sudo ufw allow <port-number>
Now, your firewall is configured to allow incoming SSH connections, you can enable it by running:
You will be warned that enabling the firewall may disrupt existing ssh connections, just type y and press Enter
Firewall is active and enabled on system startup
Limiting SSH connections
9. Allowing Additional Connections
UFW can be configured to open specific ports, allowing specific services on your server to be accessed from the outside. UFW Rules can be specified using either
- a simple syntax or
- a full syntax.
sudo ufw allow <port-number>
The full syntax that is more complete specifies the source and destination addresses as well as ports. The general full syntax for an allow rule is given below:
sudo ufw allow <port-number>/<protocol>
You can also add comments to your firewall rules using the ‘comment’ parameter to help explain your entry.
Open FTP Service Port (20:21/TCP)
sudo ufw allow 21/tcp
sudo ufw allow 20/tcp
Open MySQL Service Port (3306/TCP)
Open HTTPS Service Port (443)
sudo ufw allow 'WWW Secure'
Open HTTP Service Port (80)
sudo ufw allow 'WWW Full'
Open DNS Service Port (53)
sudo ufw allow 53 comment 'DNS server'
sudo ufw allow dns comment 'DNS server'
These commands will allow TCP and UDP port 53 to any address on the server.
Open WireGuard Service Port(51820/UDP)
sudo ufw allow 51820/udp comment 'WireGuard VPN server'
Open OpenVPN Service Port (1194/UDP)
sudo ufw allow 1194/udp comment 'OpenVPN server'
Open Email Service Ports
The ports used for mail delivery by each of the TCP/IP protocols are listed in the table below.
sudo ufw allow 25 comment 'allow smtp connections'
sudo ufw allow 587 comment 'allow smtp tls connections'
sudo ufw allow 465 comment 'allow smtp ssl connections'
sudo ufw allow 995 comment 'allow pops connections'
sudo ufw allow 110 comment 'allow pop3 connections'
sudo ufw allow 143 comment 'allow imap connections'
sudo ufw allow 993 comment 'allow imap3 connections'
10. Allowing Port Ranges
You can allow incoming connections for a range of ports using : between the port numbers. However, you must specify the protocol, either tcp or udp. For example,
sudo ufw allow 55100:55200/tcp
Also, you may allow multiple ports by using a comma , between the port numbers. For example,
sudo ufw allow 22,80,443/tcp
11. Allow Connections From an Only Trusted IP Address
sudo ufw allow from 10.10.10.100
12. Allow Connections From a Trusted IP Address on Specific port
sudo ufw allow from 10.10.10.10 to any port 3306
13. Allow Connections From Trusted Subnets
sudo ufw allow from 10.10.0.0/24 to any port 20:21 proto tcp
14. Allow Connections From a Specific Interface
ufw applies rules to all available interfaces by default. You can limit this, by specifying the DIRECTION on a specific interface. The DIRECTION can be either:
infor incoming connections oroutfor outgoing connections.
To allow all new incoming HTTP connections on ens18, for example, use:
sudo ufw allow in on ens18 to any port 80 proto tcp
15. Denying Connections
sudo ufw deny <port>/<protocol>
sudo ufw deny from 122.133.144.155
sudo ufw deny from 122.133.144.155 to any port 80,443 proto tcp
16. Denying ICMP/Ping Request
- Edit the
/etc/ufw/before.ruleswith your favorite editor, such as nano. The rules in this file are evaluated before any rules are added via the ufw command. - Remove or comment the lines given below
-A ufw-before-input -p icmp --icmp-type destination-unreachable -j ACCEPT
-A ufw-before-input -p icmp --icmp-type time-exceeded -j ACCEPT
-A ufw-before-input -p icmp --icmp-type parameter-problem -j ACCEPT - Save and close the file.
- To activate the changes, you can reload the ufw by running the next command
17. Deleting Rules
You may delete the UFW rules from your Debian server in two different ways:
1. Rule Number
- After viewing the numbered rule list, to delete the rule, such as with number 24, run the following command:The output should look something like this:
Before it is deleted, you will be asked for confirmation. Type «y» and then «Enter» if you’re sure. Type «n» to cancel the procedure if you make a mistake.
2. Specifying the Actual Rule
You can also delete a rule by specifying the actual rule, for example, if you added a rule to open port 8080 you can delete it with the next command:
sudo ufw delete allow 8080
18. UFW Disabling or Resetting
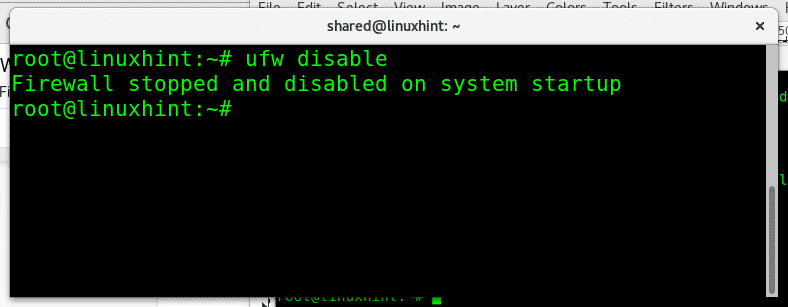
The output should look something like this:
Firewall stopped and disabled on system startup
When you reset UFW, all active rules are deleted and the firewall is reset to its default settings. This is a good option if you want to undo all of your changes and start over.
19. UFW Logging
By default, all UFW entries are logged with the ‘low’ log level into the /var/log/ufw.log file. A higher level of logging may be required. There are numerous logging levels to choose from, and you can select your preferred option based on which firewall logs you want to save.
- off: ufw logging is turned off.
- Low: logs blocked packets that don’t match the rules you’ve specified and packets that match the rules you’ve logged.
- Medium: Logs low-level, authorized packets that don’t meet the rules, invalid packets, and all new connections to your server.
- High: Logs medium without attempts/rate-limiting, and all packets with attempt limiting
- Full: All firewall packets are fully logged, with no rate/access attempts limitations.
To set your UFW logging level, use the command below.
To enable logging for a specific firewall rule, such as SSH, use the command.
sudo ufw allow log 22/tcp
Above medium log levels, a large amount of logging output is generated, quickly filling up your disk. The log level medium may generate a large amount of logging output on a busy system.
20. Testing UFW Rules
sudo ufw --dry-run enable
Using Firewalld on Debian 11
With firewalld installed, let’s look at the usage using various examples.
List all zones
Check all the available zones by using command:
sudo firewall-cmd --list-all-zonesOpening a port
To permanently open a port in all the zones, use the command syntax sudo firewall-cmd --add-port=port/protocol--permanent
For instance, open TCP port 26267
sudo firewall-cmd --zone=public --add-port=26267/tcp --permanentIn case you want to open multiple ports, separate the ports with commas. Let’s say you want to open ports 8080, 8081 and 8082, use the command
sudo firewall-cmd --zone=public --add-port={8080,8081,8082}/tcp --permanentReload firewalld to effect the changes
sudo firewall-cmd --reloadTo use UDP port, replace TCP with UDP.
Display all open ports
Use firewall-cmd --list-ports command to output open ports
sudo firewall-cmd --list-ports8080/tcp 8081/tcp 8082/tcp 26267/tcpList rules configured
Display all list rules configured in the firewall.
$ sudo firewall-cmd --list-all
public (active) target: default icmp-block-inversion: no interfaces: enp0s3 sources: services: dhcpv6-client ssh ports: 26267/tcp 8080/tcp 8081/tcp 8082/tcp protocols: forward: yes masquerade: no forward-ports: source-ports: icmp-blocks: rich rules:
List services that can be enabled/disabled
Show full list of services that can be enabled or disabled:
sudo firewall-cmd --get-servicesEnable service
Use the command syntax below to allow a service on the firewall
sudo firewall-cmd --add-service="servicename" --permanentFor example, enable https service
sudo firewall-cmd --add-service="https" --permanentThen reload the firewalld
sudo firewall-cmd --reloadIn case you want to add multiple services, separate the services with commas i.e.
sudo firewall-cmd --add-service={http,https,smtp,imap} --permanent --zone=publicCreate a new zone
Create a new firewall zone using the command:
sudo firewall-cmd --new-zone=zonename --permanentCreate a zone called itnixpro then reload the firewall.
sudo firewall-cmd --new-zone=itnixpro --permanent
sudo firewall-cmd --reload
Enable service/port on a specific zone
Replace the zone, service, protocol and port in the commands below.
sudo firewall-cmd --zone=<zone> --add-port=<port>/protocol--permanent
sudo firewall-cmd --zone=<zone> --add-service=<service> --permanent
Do the same if you want to enable multiple services:
sudo firewall-cmd --zone=<zone> --add-service={service1,service2,service3} --permanentAdd an interface to a zone
If your system has more than one interface, add an interface to a zone e.g. Backend web servers to use private zone, and fronted applications to use public zone.
sudo firewall-cmd --get-zone-of-interface=eth3 --permanent
sudo firewall-cmd --zone=<zone> --add-interface=eth3 --permanent
Allow access to a port from specific subnet/IP
You can deny or allow access from specific IP address or subnet with the use of rich rules. For example:
sudo firewall-cmd --add-rich-rule 'rule family="ipv4" service name="ssh" \
source address="192.168.8.10/24" accept' --permanent
List rich rules
Show rules with the command:
sudo firewall-cmd --list-rich-rulesConfigure Port forwarding
sudo firewall-cmd --add-masquerade --permanentForward a port to a different port within same server ( 22 > 2022):
sudo firewall-cmd --add-forward-port=port=22:proto=tcp:toport=2022 --permanentForward a port to same port but on a different server (local:22 > 192.168.8.10:22):
sudo firewall-cmd --add-forward-port=port=22:proto=tcp:toaddr=192.168.8.10:22 --permanentForward a port to different port on a different server (local:7071 > 192.168.8.50:22:9071):
sudo firewall-cmd --add-forward-port=port=7071:proto=tcp:toport=9071:toaddr=192.168.8.50 --permanentRemoving a port or service
Replace --add with –-remove in each command used above to remove a specific port/service.
Does Debian Need Firewall?
Yes. In fact, not only a Debian server but also all components of an IT system which are publicly accessible via the Internet, such as routers, switches, servers, PCs, mobile devices and IoT devices, need a firewall protection against cyber threats. With cyber attacks on the IT world on the rising trend and costing millions of dollars each year, there has never been a better time to implement an effective firewall in your network.The main reasons for implementing a firewall to protect your Debian system are outlined below:
- A strong firewall can provide secure remote access to your system via a VPN service, such as OpenVPN or WireGuard.
- A firewall can limit internet bandwidth usage for efficiency. It can allow network administrators to restrict network bandwidth for non-business traffic by reserving bandwidth for higher-important business traffic.
- An effective firewall can safeguard your network from malicious traffic, such as malware and phishing attacks.
- A firewall is the first line of defense against hackers and other unauthorized access attempts. Without having a firewall placed in the network perimeter, your data and valuable assets are at huge risk.
- A firewall can prevent your users to access the illegal and harmful websites, such as phishing sites,
Is Debian Secure by Default?
Yes. The Debian project manages security by making information available to the public. Also, the Debian security team supports the stable branch.
Conclusion
Congrats! That is the end of the article. You have managed to install and Use FirewallD on Debian 11.
Install DokuWiki on Debian 11
Install Skype on Debian 11
Install Anydesk on Debian 11
