
 / Хабр")
- Choose a buildpack
- Configure django
- Create a virtual environment
- Enable multi-factor authentication (optional)
- Make an app release
- Run a local development server
- Specify untracked files
- Step 1: scaffold a django project for hosting
- Create a virtual environment
- Install project dependencies
- Step 2: create a local git repository
- Initialize an empty git repository
- Specify untracked files
- Make the first commit
- Step 3: create a free heroku account
- Sign up
- Enable multi-factor authentication (optional)
- Step 4: install the heroku cli
- Step 6: create a heroku app
- Step 7: deploy your django project to heroku
- Choose a buildpack
- Choose the python version (optional)
- Update remote database schema
- Как развернуть проект на базе django / python на сервере vds
- Топ-10 хостингов с поддержкой python
- Install project dependencies
Choose a buildpack
Heroku automates a lot of the deployment steps, but it needs to know your project setup and the technology stack. The recipe to build and deploy a project is known as a buildpack. There are already a few official buildpacks available for many backend technologies, including Node.
You can set one manually when you create a new app or you can let Heroku detect it based on the files in your repository. One way for Heroku to recognize a Python project is by looking for the requirements.txt file in your project root directory.
Some other files that will help Heroku recognize a Python project are Pipfile and setup.py. Heroku will also recognize the Django web framework and provide special support for it. So if your project includes requirements.txt, Pipfile, or setup.py, then there’s usually no action required to set a buildpack unless you’re dealing with some edge case.
Configure django
You built a bare-bones Django project earlier, and now it’s time to configure it so that it’s ready to run on your Heroku instance. Configuring a Django project lets you fine-tune various settings ranging from database credentials to the template engine.
To access your Django project through a non-local network address, you need to specify ALLOWED_HOSTS in your project settings. Other than that, the Django buildpack for Python runs the collectstatic command for you, which requires the STATIC_ROOT option to be defined.
Instead of configuring Django by hand, you can take a shortcut and install a convenient django-heroku package that will take care of all that and more.
Note: The package django-heroku is no longer maintained, and the corresponding GitHub repository was archived. It might not be an issue if you only want to get your feet wet with deploying a Django project to Heroku. However, for a production-grade application, you can try a fork called django-on-heroku, which Adam suggested in the comments section below. Alternatively, you can use an experimental buildpack described by Eric Matthes on his blog.
Make sure you’re in the right virtual environment before proceeding, and remember to refresh your requirements file when done:
This will replace your requirements file’s content with the most recent dependencies of the project. Next, append these two lines of Python code to your portfolio/settings.py file, and don’t forget to return to the project root folder afterward:
Alternatively, use cd portfolio/ and cd .. instead of the pushd and popd commands if they don’t work in your shell.
Create a virtual environment
It’s a good habit to start every project by creating an isolated virtual environment that won’t be shared with other projects. This can keep your dependencies organized and help avoid package version conflicts. Some dependency managers and packaging tools like Pipenv or poetry automatically create and manage virtual environments for you to follow best practices. Many IDEs like PyCharm do this by default, too, when you’re starting a new project.
However, the most reliable and portable way of creating a Python virtual environment is to do it manually from the command line. You can use an external tool such as virtualenvwrapper or call the built-in venv module directly.
You’ll be using the standard venv module in this tutorial. It’s customary to place the virtual environment in the project root folder, so let’s make one first and change the working directory to it:
You’re now in the portfolio-project folder, which will be the home for your project. To create a virtual environment here, just run the venv module and provide a path for your new environment. By default, the folder name will become the environment’s name. If you want to, you can instead give it a custom name with the optional —prompt argument:
A path starting with a leading dot (.) indicates that it’s relative to the current working directory. While not mandatory, this dot clearly shows your intent. Either way, this command should create a venv subdirectory in your portfolio-project root directory:
portfolio-project/
│
└── venv/
This new subdirectory contains a copy of the Python interpreter along with a few management scripts. You’re now ready to install project dependencies into it.
Enable multi-factor authentication (optional)
This step is purely optional, but Heroku might nag you to enroll in multi-factor authentication (MFA) to increase the protection of your account and keep it secure. This feature is also known as two-factor authentication (2FA) because it typically consists of only two stages to verify your identity.
Fun Fact: My personal Netflix account got hacked at one point, and someone was able to use my credit card, even long after I canceled my subscription. Since then, I enable two-factor authentication in all of my online services.
When logged in to your Heroku dashboard, click your ninja avatar in the top-right corner, choose Account Settings, and then scroll down until you can see the Multi-Factor Authentication section. Click the button labeled Setup Multi-Factor Authentication and choose your verification methods:
- Salesforce Authenticator
- One-Time Password Generator
- Security Key
- Built-In Authenticator
- Recovery Codes
Which of these verification methods should you choose?
Salesforce is the parent company that acquired Heroku in 2022, which is why they promote their proprietary mobile app as your first choice. If you’re already using another authenticator app elsewhere, however, then choose the One-Time Password Generator option and scan the QR code with your app.
The Security Key requires an external hardware USB token, while the Built-In Authenticator method can take advantage of your device’s fingerprint reader, for example, if it comes with one.
Finally, the Recovery Codes can work as an additional password. Even if you’re only planning to use an authenticator app on your phone, you should download the recovery codes as a backup. Without an alternative way to verify your identity, you won’t be able to log in to your Heroku account ever again if you lose, damage, or upgrade your phone. Trust me, I’ve been there!
Heroku used to offer another verification method through SMS sent to your phone, but they discontinued it due to security concerns around it.
Make an app release
You might have noticed that configuring the environment variable with the heroku config:set command produced a peculiar «v3» string in the output, which resembles a version number. That’s not a coincidence. Every time you modify your app by deploying new code or changing the configuration, you’re creating a new release, which increments that v-number you saw earlier.
To list a chronological history of your app releases, use the Heroku CLI again:
The items on the list are sorted from newest to oldest. The release number always increments. Even when you roll back your app to a previous version, it will create a new release to preserve the complete history.
Making new app releases with Heroku boils down to committing the code to your local Git repository and then pushing your branch to a remote Heroku server. However, before you do, always double-check the git status for any uncommitted changes, and add them to the local repository as necessary, for example:
While you can push any local branch, it must be pushed to a specific remote branch for the deployment to work. Heroku only deploys from either the remote main or master branches. If you’ve followed along and created your repository with the git init command, then your default branch should be named master. Alternatively, if you created it on GitHub, then it will be named main.
Run a local development server
Before increasing the complexity by throwing Heroku on top of your project, it makes sense to test everything out on a local computer. This may spare you a lot of unnecessary debugging. Fortunately, Django comes with a lightweight web server for development purposes, which requires little to no configuration.
Note: Technically, you can take advantage of the same development server built into Django on Heroku. However, it wasn’t designed to handle real-life traffic, nor is it secure. You’re better off using a WSGI server like Gunicorn.
To run the development server, type the following command in your terminal window where you activated the virtual environment before:
It will start the server on localhost port 8000 by default. You can adjust the port number if another application is already using 8000. The server will keep watching for changes in the project source files and automatically reload them when necessary. While the server is still running, navigate to the URL in your web browser:
The host 127.0.0.1 represents one of the IP addresses on the virtual local network interface. If everything went fine and you haven’t changed the default project settings, then you should land on the Django welcome page:
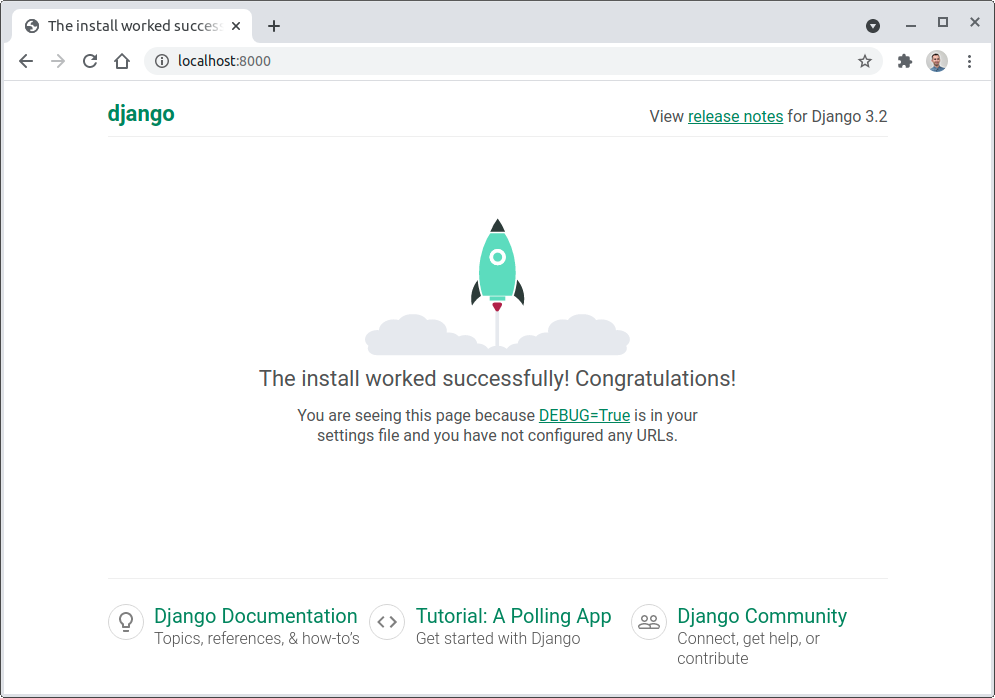
Hooray! The rocket has taken off, and your Django project is ready for deployment in the cloud.
Specify untracked files
It’s useful to tell Git which files to ignore so that it doesn’t track them anymore. Some files shouldn’t be part of the repository. You should usually ignore IDE and code editor settings, configuration files with sensitive data such as passwords, binary files like the Python virtual environment, cache files, and data like the SQLite database.
When you check the current status of your new Git repository, it will list all files present in the working directory and suggest adding them to the repository:
Instead of adding all of those files and folders, you’ll want to make Git ignore some of them, for example:
.idea/__pycache__/db.sqlite3venv/
The .idea/ folder is specific to PyCharm. If you’re using Visual Studio Code or another editor, then you’ll need to add their corresponding files and folders to this list. Including more filename patterns upfront will let other contributors safely use the editors and IDEs of their choice without having to update the list too often.
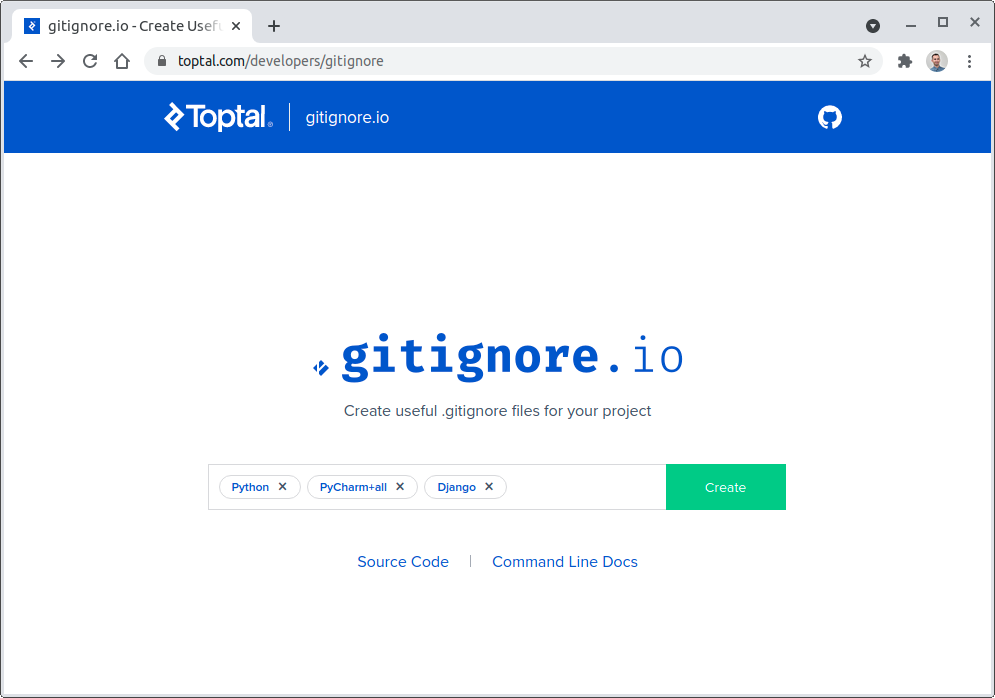
Git looks for a special file called .gitignore, which is usually placed in your repository’s root folder. Each line contains a concrete filename or a generic filename pattern to exclude. You can edit this file by hand, but it’s much quicker to create one from a predefined set of components using the gitignore.io website:
You’ll notice that typing gitignore.io into the address bar will redirect the browser to a more verbose domain owned by Toptal.
Here, you can choose the programming language, libraries, and tools you’re using. When you’re happy with your selection, click the Create button. Then, either copy and paste the result to a text editor and save it as .gitignore in your project root folder or note the URL and use cURL in the command line to download the file:
If you find yourself typing this URL repeatedly, then you may consider defining an alias command in your shell, which should be easiest to remember:
There are often multiple ways to achieve the same goal, and learning about the different options can teach you a lot. Either way, after creating the .gitignore file, your repository status should look like this:
The remaining steps of creating a local Git repository are staging your changes and saving them in your first commit.
Step 1: scaffold a django project for hosting
To host a Django web application in the cloud, you need a working Django project. For the purposes of this tutorial, it doesn’t have to be elaborate. Feel free to use one of your hobby projects or to build a sample portfolio app if you’re short on time, and then skip ahead to creating your local Git repository. Otherwise, stick around to make a brand new project from scratch.
Create a virtual environment
It’s a good habit to start every project by creating an isolated virtual environment that won’t be shared with other projects. This can keep your dependencies organized and help avoid package version conflicts. Some dependency managers and packaging tools like Pipenv or poetry automatically create and manage virtual environments for you to follow best practices. Many IDEs like PyCharm do this by default, too, when you’re starting a new project.
However, the most reliable and portable way of creating a Python virtual environment is to do it manually from the command line. You can use an external tool such as virtualenvwrapper or call the built-in venv module directly. While virtualenvwrapper keeps all environments in a predefined parent folder, venv expects you to specify a folder for every environment separately.
You’ll be using the standard venv module in this tutorial. It’s customary to place the virtual environment in the project root folder, so let’s make one first and change the working directory to it:
You’re now in the portfolio-project folder, which will be the home for your project. To create a virtual environment here, just run the venv module and provide a path for your new environment. By default, the folder name will become the environment’s name. If you want to, you can instead give it a custom name with the optional --prompt argument:
A path starting with a leading dot (.) indicates that it’s relative to the current working directory. While not mandatory, this dot clearly shows your intent. Either way, this command should create a venv subdirectory in your portfolio-project root directory:
portfolio-project/
│
└── venv/
This new subdirectory contains a copy of the Python interpreter along with a few management scripts. You’re now ready to install project dependencies into it.
Install project dependencies
Most real-life projects depend on external libraries. Django is a third-party web framework and doesn’t ship with Python out-of-the-box. You must install it along with its own dependencies in your project’s virtual environment.
Don’t forget to activate your virtual environment if you haven’t already. To do so, you’ll need to execute the commands in one of the shell scripts available in the virtual environment’s bin/ subfolder. For example, if you’re using Bash, then source the activate script:
The shell prompt should now display a prefix with your virtual environment’s name to indicate it’s activated. You can double-check which executables the specific commands are pointing to:
The above output confirms that running python will execute the corresponding file located in your virtual environment. Now, let’s install the dependencies for your Django project.
You’ll need a fairly recent version of Django. Depending on when you’re reading this, there might be a newer version available. To avoid potential compatibility problems, you may want to specify the same version as the one used at the time of writing this tutorial:
This will install the 3.2.5 release of Django. Package names are case insensitive, so it doesn’t matter whether you type django or Django, for example.
Installing Django brings a few additional transitive dependencies, which you can reveal by listing them:
Since you want others to be able to download and run your code without problems, you need to ensure repeatable builds. That’s what freezing is for. It outputs roughly the same set of dependencies with their sub-dependencies in a special format:
These are essentially the arguments to the pip install command. However, they’re usually encapsulated within one or more requirements files that pip can consume in one go. To create such a file, you can redirect the output of the freeze command:
This file should be committed to your Git repository so that others can install its contents using pip in the following way:
At the moment, your only dependency is Django and its sub-dependencies. However, you must remember to regenerate and commit the requirements file every time you add or remove any dependencies. This is where the package managers mentioned earlier might come in handy.
With that out of the way, let’s start a new Django project!
Step 2: create a local git repository
Now that you have a working Django project in place, it’s time to take the next step towards hosting it in the cloud. In this section, you’ll explore the available options for building and deploying applications on the Heroku platform. You’ll also create a local Git repository for your project if you haven’t already. At the end of this step, you’ll be ready to deep dive into the Heroku toolchain.
Heroku offers at least five different ways to deploy your project:
- Git: Push commits to a remote Git repository on Heroku
- GitHub: Automatically trigger deployment when a pull request is merged
- Docker: Push Docker images to the Heroku container registry
- API: Automate your deployment programmatically
- Web: Deploy manually from the Heroku dashboard
The most straightforward and developer-centric method is the first one. Many software developers already use Git on a daily basis, so the entry barrier to Heroku can be pretty low. The git command lets you accomplish a lot in Heroku, which is why you’re going to use Git in this tutorial.
Initialize an empty git repository
Stop your development server with the key combination Ctrl C or Cmd C or open another terminal window, then initialize a local Git repository in your project root folder:
It doesn’t matter whether your virtual environment is active or not for this to work. It should create a new .git subfolder, which will contain the history of the files tracked by Git. Folders whose names start with a dot are hidden on macOS and Linux. If you want to check that you created it successfully, then use the ls -a command to see this folder.
Specify untracked files
It’s useful to tell Git which files to ignore so that it doesn’t track them anymore. Some files shouldn’t be part of the repository. You should usually ignore IDE and code editor settings, configuration files with sensitive data such as passwords, binary files like the Python virtual environment, cache files, and data like the SQLite database.
When you check the current status of your new Git repository, it will list all files present in the working directory and suggest adding them to the repository:
Instead of adding all of those files and folders, you’ll want to make Git ignore some of them, for example:
.idea/__pycache__/db.sqlite3venv/
The .idea/ folder is specific to PyCharm. If you’re using Visual Studio Code or another editor, then you’ll need to add their corresponding files and folders to this list. Including more filename patterns upfront will let other contributors safely use the editors and IDEs of their choice without having to update the list too often.
Git looks for a special file called .gitignore, which is usually placed in your repository’s root folder. Each line contains a concrete filename or a generic filename pattern to exclude. You can edit this file by hand, but it’s much quicker to create one from a predefined set of components using the gitignore.io website:
You’ll notice that typing gitignore.io into the address bar will redirect the browser to a more verbose domain owned by Toptal.
Here, you can choose the programming language, libraries, and tools you’re using. When you’re happy with your selection, click the Create button. Then, either copy and paste the result to a text editor and save it as .gitignore in your project root folder or note the URL and use cURL in the command line to download the file:
If you find yourself typing this URL repeatedly, then you may consider defining an alias command in your shell, which should be easiest to remember:
There are often multiple ways to achieve the same goal, and learning about the different options can teach you a lot. Either way, after creating the .gitignore file, your repository status should look like this:
The remaining steps of creating a local Git repository are staging your changes and saving them in your first commit.
Make the first commit
Remember that to work with Heroku through Git, you have to push your code to a remote Git repository. You need to have at least one commit in your local repository to do so. First, add your new files to the staging area, which is a buffer between your working tree and the local repository. Then, recheck the status to verify you haven’t missed anything:
These files are ready to be committed, so let’s take their snapshot and save them in a local repository:
It’s always a good idea to provide a descriptive commit message to help you navigate the change history. As a rule of thumb, your message should explain why you made the change. After all, anyone can review the Git log to find out exactly what has changed.
Okay, so what have you learned so far? You know that deploying new releases to the Heroku platform usually involves pushing your local commits to a Git remote. You’ve created a local Git repository and made your first commit. Next, you need to create your free Heroku account.
Step 3: create a free heroku account
At this point, you’re ready to sign up for a free Heroku account and configure it to your liking.
Django advertises itself as the web framework for perfectionists with deadlines. Heroku takes a similar opinionated approach to hosting web applications in the cloud and aims to reduce development time. It’s a high-level and secure Platform as a Service (PaaS) that takes the burden of infrastructure management off your shoulders, letting you focus on what matters to you the most—writing code.
Fun Fact: Heroku is based on Amazon Web Services (AWS), another popular cloud platform operating mainly in an Infrastructure as a Service (IaaS) model. It’s much more flexible than Heroku and can be more affordable but requires a certain level of expertise.
Many startups and smaller companies don’t have a team of skilled DevOps engineers during their early stages of development. Heroku might be a convenient solution in terms of return on investment for those companies.
Sign up
To start with Heroku, visit the Heroku sign-up page, fill in the registration form, and wait for an email with a link to confirm your account. It will take you to the password setup page. Once configured, you’ll be able to proceed to your new Heroku dashboard. The first thing you’ll be asked to do is to read and accept the terms of service.
Enable multi-factor authentication (optional)
This step is purely optional, but Heroku might nag you to enroll in multi-factor authentication (MFA) to increase the protection of your account and keep it secure. This feature is also known as two-factor authentication (2FA) because it typically consists of only two stages to verify your identity.
Fun Fact: My personal Netflix account got hacked at one point, and someone was able to use my credit card, even long after I canceled my subscription. Since then, I enable two-factor authentication in all of my online services.
When logged in to your Heroku dashboard, click your ninja avatar in the top-right corner, choose Account Settings, and then scroll down until you can see the Multi-Factor Authentication section. Click the button labeled Setup Multi-Factor Authentication and choose your verification methods:
- Salesforce Authenticator
- One-Time Password Generator
- Security Key
- Built-In Authenticator
- Recovery Codes
Which of these verification methods should you choose?
Salesforce is the parent company that acquired Heroku in 2022, which is why they promote their proprietary mobile app as your first choice. If you’re already using another authenticator app elsewhere, however, then choose the One-Time Password Generator option and scan the QR code with your app.
The Security Key requires an external hardware USB token, while the Built-In Authenticator method can take advantage of your device’s fingerprint reader, for example, if it comes with one.
Finally, the Recovery Codes can work as an additional password. Even if you’re only planning to use an authenticator app on your phone, you should download the recovery codes as a backup. Without an alternative way to verify your identity, you won’t be able to log in to your Heroku account ever again if you lose, damage, or upgrade your phone. Trust me, I’ve been there!
Heroku used to offer another verification method through SMS sent to your phone, but they discontinued it due to security concerns around it.
Step 4: install the heroku cli
Working in the terminal is an essential skill for any developer. Typing commands might seem intimidating at first, but it becomes second nature after seeing its power. For a seamless developer experience, you’ll want to install the Heroku Command-Line Interface (CLI).
The Heroku CLI will let you create and manage your web applications right from the terminal. In this step, you’ll learn a few essential commands and how to display their documentation. First, follow the installation instructions for your operating system. When done, confirm that the installation was successful with the following command:
If the heroku command was found and you’re on the latest version of the Heroku CLI, then you can enable autocomplete in your shell. It will automatically complete commands and their arguments when you press the Tab key, which saves time and prevents typos.
Note: The tool requires a Node.js server, which most of the installation methods bundle. It’s also an open source project, which means you can take a look at its source code on GitHub.
The Heroku CLI has a modular plugin architecture, which means that its features are self-contained and follow the same pattern. To get a list of all available commands, type heroku help or simply heroku in your terminal:
Sometimes, the name of a command may not give away what it does. If you want to find out more details about a particular command and see quick examples of usage, when available, then use the —help flag:
Here, you’re asking for more information about the auth command by using the —help flag. You can see that auth should be followed by a colon (:) and another command. By typing heroku auth:2fa, you’re asking the Heroku CLI to check the status of your two-factor authentication setup:
The Heroku CLI commands are hierarchical. They will often have one or more subcommands that you can specify after a colon, like in the example above. Additionally, some of those subcommands may have an alias available at the top level of the command hierarchy.
All three commands give the same result, which lets you choose the one that’s easier to remember.
In this short section, you installed the Heroku CLI on your computer and got acquainted with its syntax. You’ve seen some handy commands. Now, to get the most out of this command-line tool, you’ll need to log in to your Heroku account.
Step 6: create a heroku app
In this step, you’ll create your first Heroku app and learn how it integrates with Git. By the end, you’ll have a publicly available domain address for your project.
In a Django project, apps are independent units of code that encapsulate reusable pieces of functionality. On the other hand, Heroku apps work like scalable virtual computers capable of hosting your entire Django project. Every app consists of the source code, a list of dependencies that must be installed, and the commands to run your project.
At the very minimum, you’ll have one Heroku app per project, but it’s not uncommon to have more. For example, you may want to run the development, staging, and production versions of your project all at the same time. Each can be hooked up to different data sources and have a different set of features.
Note:Heroku pipelines let you create, promote, and destroy apps on demand to facilitate a continuous delivery workflow. You can even hook up GitHub so that every feature branch will receive a temporary app for testing.
To create your first app using the Heroku CLI, make sure that you’re already logged in to Heroku, and run either the heroku apps:create command or its alias:
By default, it chooses a random app name that’s guaranteed to be unique, such as polar-island-08305. You can choose your own, too, but it has to be universally unique across the entire Heroku platform because it’s a part of the domain name that you get for free. You’ll quickly find out if it’s already taken:
If you think about how many people use Heroku, it’s not a big surprise that someone has already created an app with the name portfolio-project. When you run the heroku create command inside a Git repository, Heroku automatically adds a new remote server to your .git/config file:
The last three rows in your Git configuration file define a remote server named heroku, which points to your unique Heroku app.
Typically, you’ll have one remote server—for example, on GitHub or Bitbucket—in your Git configuration after cloning a repository. However, there can be multiple Git remotes in a local repository. You’ll use that feature later to make new app releases and deployments to Heroku.
Step 7: deploy your django project to heroku
At this point, you have everything you need to start hosting your Django project on Heroku. However, if you tried deploying your project to Heroku now, it’d fail because Heroku doesn’t know how to build, package, and run your project. It also doesn’t know how to install the specific Python dependencies listed in your requirements file. You’ll fix that now.
Choose a buildpack
Heroku automates a lot of the deployment steps, but it needs to know your project setup and the technology stack. The recipe to build and deploy a project is known as a buildpack. There are already a few official buildpacks available for many backend technologies, including Node.js, Ruby, Java, PHP, Python, Go, Scala, and Clojure. Apart from that, you can find third-party buildpacks for less popular languages such as C.
You can set one manually when you create a new app or you can let Heroku detect it based on the files in your repository. One way for Heroku to recognize a Python project is by looking for the requirements.txt file in your project root directory. Make sure that you’ve created one, which you may have done with pip freeze when setting up your virtual environment, and that you’ve committed it to the local repository.
Some other files that will help Heroku recognize a Python project are Pipfile and setup.py. Heroku will also recognize the Django web framework and provide special support for it. So if your project includes requirements.txt, Pipfile, or setup.py, then there’s usually no action required to set a buildpack unless you’re dealing with some edge case.
Choose the python version (optional)
By default, Heroku will pick a recent Python version to use to run your project. However, you can specify a different version of the Python interpreter by placing a runtime.txt file in your project root directory, remembering to commit it:
Note that your Python version must include all major.minor.patch components of the semantic versioning. While there are only a few supported runtimes for Python, you can usually tweak the patch version. There’s also beta support for PyPy.
Update remote database schema
When you define new models in your Django apps, you typically make new migration files and apply them against a database. To update your remote PostgreSQL instance’s schema, you need to run the same migration commands as before, only on the Heroku environment. You’ll see the recommended way of doing this later, but for now, you can run the appropriate command manually:
The run plugin starts a temporary container called a one-off dyno, which is similar to a Docker container that has access to your app’s source code and its configuration. Since dynos are running Linux containers, you can execute any command in one of them, including an interactive terminal session:
Running the Bash shell inside a temporary dyno is a common practice to inspect or manipulate the state of your Heroku app. You can think of it as logging in to a remote server. The only difference is that you’re starting a throwaway virtual machine, which contains a copy of your project files and receives the same environment variables as your live web dyno.
However, this way of running your database migrations isn’t the most reliable because you might forget about it or make a mistake down the road. You’re better off automating this step in the Procfile by adding the highlighted line:
Now, every time you make a new release, Heroku will take care of applying any pending migrations:
Как развернуть проект на базе django / python на сервере vds
И так, чтобы развернуть проект на базе Django / Python на сервере я использую Dokku. Dokku – это мини-Heroku и самая компактная реализация PaaS (Platform as a Service – платформа как сервис). Если вы еще не знаете, что такое Heroku, то спросите у Google.
Преимущество Heroku и его альтернативы в виде Dokku заключается в простоте процесса выгрузки и запуска проекта в продакшн, т.к. работа происходит через Git. Если вы еще не знает, что такое Git, то подробнее можно посмотреть снова в Гугл, а если коротко, то это система управления версиями.
Проще говоря, каждый раз когда вы хотите внести изменения в код вашего проекта, вы создаете некую запись в структуре Git и в ней будут отображены изменения в коде по отношению к предыдущим версиям. Это удобно, т.к. вы всегда можете отследить изменения в коде, выявить причины изменений, вернутся к более ранним версиям и т.п.
При выгрузке проекта в продакшн Git используется как источник кода для передачи на сервер и его запуска. В свою очередь Dokku, при условии, что вы настроили проект верно, определяет необходимые компоненты для установки на стороне сервера, создает среду, обеспечивает работу кода и связь между компонентами проекта (такими как БД или файловое хранилище).
И так, думаю, что пока я наговорил слишком много моментов, которые могут показаться отпугивающими для новичков. Поэтому, на данном этапе предлагаю сделать перерыв и усвоить изложенное.
Пока все. Удачи!
Топ-10 хостингов с поддержкой python
Python является универсальным языком программирования и часто используется в создании веб-приложений разного уровня: простые блоги, сложные системы с нестандартной логикой и другие. Обычно сайты на Python создаются с помощью фреймворков Django или Flask. Поэтому размещать такие проекты лучше всего на хостинга с нативной поддержкой этого языка.
Для готовых к запуску проектов можно воспользоваться обычным виртуальным хостингом, а для нагруженных ресурсов с перспективами доработки – VPS/VDS. Сегодня мы рассмотрим 10 отличных хостингов с поддержкой Python.
Российский провайдер, работающий с 2006 года. Является одним из наиболее популярных провайдеров в стране – в настоящий момент им обслуживается свыше 3,3 миллионов доменов. Среди более чем 2,2 миллионов клиентов – Альфа Банк, Совкомбанк, ВДудь, Mail.ru и пр. В число услуг провайдера входит хостинг сайтов, VPS, аренда выделенных серверов, колокация, администрирование, регистрация доменов и многое другое.

Провайдер предлагает 3 группы тарифов, каждая из которых включает 3-4 тарифных плана. Поддержки Python нет только на наиболее дешевом тарифе Host-Lite из группы «Эконом» – этот тариф актуален для статичных страниц. Все оставшиеся тарифы поддерживают Python, РНР, MySQL, Perl и популярные движки сайтов.
Преимущества:
Российский провайдер, работающий с 2006 года. В число пользователей входят крупные компании – Хоум Кредит Банк, МТС, Эрих Краузе и пр. Провайдер предлагает услуги виртуального хостинга, хостинга для CMS, VPS/VDS, аренды выделенных серверов, регистрации доменов и так далее.

На всех тарифных планах можете размещать проекты на Python (а также Perl, Yii, Django, Flask, Laravel, Ruby on Rails). Такая возможность есть даже на самом дешевом тарифе, предназначенном для размещения посадочных страниц и визиток.
Преимущества:
Европейский провайдер, работающий с 2007 года. Услугами пользуются многие крупные проекты – например, Пикабу, Admitad, Вибум и пр. Провайдер предлагает хостинг сайтов, VPS, аренду выделенных серверов, администрирование, защиту от DDoS-атак и многое другое.

В панелях управления cPanel и ISPManager можете работать с языком Python. Например, в ISPManager доступен отдельный раздел «Расширения», в котором сможете просматривать имеющиеся и устанавливать дополнительные расширения.
Преимущества:
Российский провайдер, работающий с 2009 года. В числе услуг – хостинг сайтов, VPS, аренда серверов, регистрация доменов и многое другое.

Провайдер предлагает 2 группы тарифов хостинга – виртуальный хостинг и VIP-хостинг (больше размер диска, число сайтов, потенциальная нагрузка и пр.). Поддержка Python (а также PHP 4/5/7, Perl 5, Zend и phpMyAdmin) доступна на всех тарифах провайдера, включая самый дешевый. Также Python поддерживается на бесплатном хостинге от Beget.
Преимущества:
- Собственная панель управления, отличающаяся интуитивным интерфейсом, высокой скоростью работы и возможностью установки CMS и других приложений в 1 клик.
- Резервное копирование данных на скорости до 1 Гб/с на 2 сервера (локальный и удаленный). Дисковое пространство для хранения бэкапов не ограничено.
- Нет ограничений в трафике, числе доменов/поддоменов, FTP, БД.
- Бесплатные SSL-сертификаты, переносы сайтов и различные подарки при оплате услуг.
- Возможность расширения дискового пространства на текущих тарифах.
- Тестовый период 30 дней.
Российский провайдер, работающий с 2005 года. Среди клиентов – крупные компании (Федерация Керлинга России, Международный аэропорт Симферополь, Ford и пр. Провайдер предлагает услуги виртуального хостинга, аренды выделенных серверов и регистрации доменов.

На всех тарифных планах провайдера Python поддерживается через uWSGI. Также в число поддерживаемых технологий входят Node.js, Memcache, ZendOpcache, Sphinxx, Debug и прочие.
Преимущества:
- Нет ограничений в количестве БД, FTP, трафике и числе доменов на аккаунте.
- Бесплатные SSL-сертификаты, переносы сайтов.
- Автоматическая установка движков, галерей и других приложений в 1 клик.
- Автоматическое резервное копирование данных за последние дни.
- Тестовый период – 30 дней.
Российский провайдер, работающий с 2003 года. Компания обслуживает более 50 тысяч клиентов, среди которых – НТВ Плюс, Subaru, РосЭнерго, Международный яхт-клуб «Спартак» и пр. В настоящий момент на обслуживании провайдера находится свыше 100 тысяч доменов. Оказываемые услуги – виртуальный хостинг и хостинг для CMS, VDS, аренда серверов, регистрация доменов и прочие.

Провайдер предлагает 2 группы тарифов виртуального хостинга – «Скоростные» и «Мощные». На любом из них поддерживается Python (как mod_wsgi). Благодаря этому модулю сможете работать с веб-приложениями, написанными на необходимом языке программирования.
Преимущества:
- Бесплатные SSL-сертификаты, переносы сайтов, домен в подарок в 10 зонах, бесплатный антивирус для обнаружения вирусов, вредоносных и хакерских скриптов на аккаунте.
- Неограниченные базы данных, почтовые ящики, FTP.
- Стабильная работа серверов – провайдер использует качественное сетевое оборудование от Supermicro, Dell, Juniper и пр., благодаря чему аптайм составляет 99,98%.
- Автоматическая установка более 200 приложений в 1 клик.
- Тестовый период – 30 дней.
Российский провайдер, работающий с 2003 года. За время работы клиентами компании стали более 300 тысяч пользователей. В число услуг провайдера входят хостинг сайтов, VPS, регистрация доменов, предоставление облачного хранилища для файлов и пр.

Хостинг сайтов от «Джино» поддерживает сайты и приложения, написанные на Python и Perl, а также другие популярные библиотеки и фреймворки — Django (для Python), Catalyst (для Perl) и многие другие.
Преимущества:
- Собственная панель управления хостингом с интуитивно понятным и функциональным интерфейсом.
- Кастомизация тарифа – сами выбираете поддерживаемое количество доменов на аккаунте, объем дискового пространства, поддерживаемые технологии (Python в связке с Django можно выбрать отдельно от других технологий), размер и количество баз данных, почтовых сервисов и другие услуги. Используемый тариф можно настраивать в реальном времени.
- Уникальная посуточная тарификация, при которой платите только за выбранные ресурсы.
- Высокая скорость работы благодаря использованию SSD-дисков.
Install project dependencies
Most real-life projects depend on external libraries. Django is a third-party web framework and doesn’t ship with Python out-of-the-box. You must install it along with its own dependencies in your project’s virtual environment.
Don’t forget to activate your virtual environment if you haven’t already. To do so, you’ll need to execute the commands in one of the shell scripts available in the virtual environment’s bin/ subfolder. For example, if you’re using Bash, then source the activate script:
The shell prompt should now display a prefix with your virtual environment’s name to indicate it’s activated. You can double-check which executables the specific commands are pointing to:
The above output confirms that running python will execute the corresponding file located in your virtual environment. Now, let’s install the dependencies for your Django project.
You’ll need a fairly recent version of Django. Depending on when you’re reading this, there might be a newer version available. To avoid potential compatibility problems, you may want to specify the same version as the one used at the time of writing this tutorial:
This will install the 3.2.5 release of Django. Package names are case insensitive, so it doesn’t matter whether you type django or Django, for example.
Installing Django brings a few additional transitive dependencies, which you can reveal by listing them:
Since you want others to be able to download and run your code without problems, you need to ensure repeatable builds. That’s what freezing is for. It outputs roughly the same set of dependencies with their sub-dependencies in a special format:
These are essentially the arguments to the pip install command. However, they’re usually encapsulated within one or more requirements files that pip can consume in one go. To create such a file, you can redirect the output of the freeze command:
This file should be committed to your Git repository so that others can install its contents using pip in the following way:
At the moment, your only dependency is Django and its sub-dependencies. However, you must remember to regenerate and commit the requirements file every time you add or remove any dependencies. This is where the package managers mentioned earlier might come in handy.
With that out of the way, let’s start a new Django project!
